Did a lot of little things that needed to be done before lighting...........Trying to delay because I'm still up in the air to do either LED strips or FO for interior lighting?
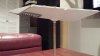
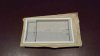
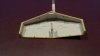
Built and light blocked the trench hanger. It is not glued in yet. It needs to be painted and I want to see how I'm going to light the interior of it.
View attachment 775117 View attachment 775118 View attachment 775119 View attachment 775120
View attachment 775125 View attachment 775126 View attachment 775127
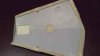
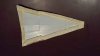
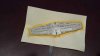
Fixed the angle of the command tower and now lines are parallel to ship....still need to add some small strips to fill the small gaps. It's not glued on yet.
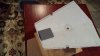
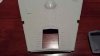
I will be making the top section removable from the ship to get to the electronics. I have glued a small skirt around edge so now it press fits into place and stops 95% of light leak. Some very thin foam will fix the rest. I may also use MicroScale liquid tape to make a stronger but removable connection that can be reattached. The stuff remains sticky and gives a fairly strong temporary bond.
View attachment 775132 View attachment 775133 View attachment 775134 View attachment 775135
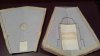
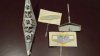
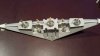
Here are some pictures of the drilled window holes......from inside and some from outside.
View attachment 775136 View attachment 775137 View attachment 775138 View attachment 775139
View attachment 775140
After the above pictures were taken I drilled more holes so I'm probably 99% done with the drill holes. I have also drilled the locations for the laser turrets in 3 location on each side. I will use .75 mm FO for this connected to 2 green LEDs that will alternate firing 4 double bursts over a 1.5 to 2.5 second span.
Everyone have a Happy Thanksgiving!!
I hope to get some more done over the long weekend and post some more pictures.
")