Bb8 build

Markas1976

Well-Known Member
Gona build a bb8 now the dust is barely settled on my Speeder bike build i finished early October but I have itchy feet so I'm gona go again but this build should b quicker I have a few ideas how to go about it based on things I've seen around the Web and ideas of my own too.
 
DSC_6127.JPG

A few of the things I shall use during this build minus a bunch of things that hadn't arrived yet
 
DSC_6128.JPG

Gona need plenty glue for paper mache stage of bb8's body and other pieces plus buying for future builds that's a handy 5 litre bottle of glue right there lol

- - - Updated - - -

DSC_6124.JPG
Foam cutters was a handy addition for this build and future projects pretty cheap too
 
DSC_6123.JPG

Styrofoam ball arrived I'm opting for a 300mm ball for the head of bb8 which is pretty accurate. I then cut thru the ball with a well chosen saw with good teeth on it i placed the styrofoam ball into a bin to use as a marker line for the cut and marked it with a felt pen all the way round. And cut through it slowly with the saw that should be your bb8 head size ready bar a fine diagonal cut inwards on his dome which is slight and that's where the shown pictured foam cutters served there purpose ☺
Was then waiting on the likes of bb8's body ball, the white spray paint, plastic ties for inside the body later on, putty, magnets,glass ball for the main eye etc
 
DSC_6156.JPG

I added some fibreglass to the head of bb8 a day or so after the last posts I used more west systems resin, hardener and fibreglass cloth and left it again to dry
 
DSC_6167.JPG

I sat the eye on for reference and planning. I Used a half of a plastic see through tree bobble and sawed off the tiny bit that would attach it to the tree sanded that area down gently and sprayed the inside of the bobble with black spray paint on the inside of it while the outside was covered in tape to keep it clean.
Once removing the tape ur left with a black eye but with a shine ☺
Eye size is around 6cm diameter.
 
Last edited:
DSC_6189.JPG

Last night I sat for a while and measured a did some drawing to get this head going I've had a slow start so wanted to get going with the designing I still have some detailing to do along the base of the head and of course spray painting after that
 
DSC_6205.JPG

Then removed some of the bagging off the top of head where grey is to go and covered the newly painted orange once it was Dry as well
 
DSC_6216.JPG

Got the proper size beachball for bb8's body after 4 attempts I was ordering he right size but these sellers are selling 20" beachballs and they are like 12 or 16 inch ones inside half the time I guess they ain't counting on people paying much attention if using them for likes of the beach etc but I got there in the end as mentioned earlier in this message it's a diameter of 20" the beachball u would need.
 
DSC_6212.JPG

Once all the tape and bagging was removed I had to top up tiny bits of the white paint some traces of orange more so than the grey got onto white areas very minimal though this of course was before I touched up the white paint of the head I liked the weather style look it had so I kept some of it
But it looks alright eh
 
Last edited:
View attachment 777789

This is view from front of the head the main black eye would end up where that rounded bit of design is I also used a bronzy-goldy shade of colour permanent marker pen for the outlines on the head as on the small sphero toy version the outlines over the head look that kind of shade
 
View attachment 777790

Still hadn't touched up the white bits of paint yet I would soon though but
I did attach the main black eye which is a clear bobble for a Xmas tree cut in half sprayed black inside it and then glued to the head now the head is smooth by this point with paint on it so I cut thinly around the eye creating a thin circle this allowed the eye to push into that circle hole I'd made I put some glue in the circle groove on the head and on the edges of the eye then pushed it gently into the grooves of the circle I'd cut onto the head and held it for a short while not only does this give the eye something to sit into a little it also allows the glue to dry to something better than a smooth paint surface ☺
It's actually like bb8 now
 
DSC_6227.JPG

I added 2 antennas just like the movie and toy bb8 I used a WiFi rooter antenna for the shorter one and cut of a piece of a fishing rod that isn't used for the longer one ��.
Then I painted the short one white and the longer one white with a black top and bottom.
Then I used a drill to make small suitable holes in the head being very gentle to make the holes the right size so the antennas would fit well then again like with the eye I glued inside the holes and the end of the antennas job done ☺
Also by This point I'd now touched up the heads white paint just almost like a dry paint tho to keep the weathered look
 
DSC_6231.JPG

I found more time to add the small black piece just to the side of the main eye I chose to use the front part of my headtorch it's also similar to a camera piece it works well it's not to wide or long and has a good shape to it with a smooth lens style end on it which I also sprayed black from the inside of it just like the main eye and also I again cut the same style circle into the head using a small knife and again I glued the edges of the piece and inside the circular outline hole I'd made and attached it easily and it could look a hell of a lot worse.
 
IMG_20171128_004745_604.jpg

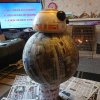
I then used my 20" diameter beachball which took a few bought online to get the right size dodgy sellers .
I did paper mache 3 coats onto the ball 1 coat per day and left over night to dry
 
This thread is more than 6 years old.

Your message may be considered spam for the following reasons:

  1. This thread hasn't been active in some time. A new post in this thread might not contribute constructively to this discussion after so long.
If you wish to reply despite these issues, check the box below before replying.
Be aware that malicious compliance may result in more severe penalties.
Back
Top