Slothman86's Samus Aran from Super Metroid

slothman86

New Member
Hey RPF,

I've been a big Fan of Metroid since the late 80's and I've always wanted my own Chozo suit. I decided last Halloween 2016 that I wanted to finally make one for Halloween 2017 and eventually be able to wear to ECCC 2018.

Here is my attempt at recording my progress.

I wanted to finalize my design, So I thought that a custom samus design would be best especially because the proportions for samus are really unnatural and extreme.

20151108_133013.jpg
First Design- I thought this one was really cool, but I couldn't get it to translate into 3d very well...
untitled.90.jpg
Doesn't look very good here.

I opted to go for the Metroid - Other M design (Although, I do not like the game
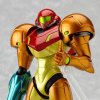
HTB1OS9VHFXXXXcxXVXXq6xXFXXXK.jpg

I scaled the images some what to my body
SCALE.jpg
It's obvious that I won't be matching the exact silhouette. But I decided it was close enough. I also decided to go with Super Metroid Pauldrons, because the looks better and are more iconic. Eventually I would switch the entire design to be super metroid, (with exception of the helmet)

I downloaded every 3d model I could from the internet, including the models from other M and metroid Prime.

My plan was to use Rhino 3d to modify these models to fit my body and then use pepakura to create the patterns for the EVA foam. I got some great tips for how to do this here - https://www.youtube.com/watch?v=FlseLeNRYag&t=298s

Here is an example of how my arm cannon was created using that method
rhino 3d model
2017-10-09.png

exports as OBJ to pepakura
2017-10-09 (1).png

printed cut-out and pasted to folders for the template
3543369647264243467-account_id=1.jpg

traced onto foam then cut out and glued together
5959998374407968996-account_id=1.jpg7187940342276289752-account_id=1.jpg

*Helpful tip - glue layers onto curved surface , try not to glue multiple layers together then bend or try to curve it... you may not get the bend you want... I had to make the arm cannon twice.
8546456480512346031-account_id=1.jpg3787834272836218692-account_id=1.jpg

HELMET & CHEST

The first thing I worked on building was the helmet and the chest
2017-07-14.png6504383058269682231-account_id=1.jpg8844661270842369319-account_id=1.jpg1635812979725037393-account_id=1.jpg2172393992153045932-account_id=1.jpg2978674145967191577-account_id=1.jpg3448944129945389634-account_id=1.jpg5844858003001636322-account_id=1.jpg6505165835152870628-account_id=1.jpg8906971021200293962-account_id=1.jpg

I created the templates in pepakura printed them out and made Card board templates. I thought this would give me what I needed for fitment.

After careful contemplation ont he size of the helmet and the chest, I decided to make some changes.

For the chest, I created a more super metroid like chest. which not only gave me better mobilty, but looked better too!
9178750019132283274-account_id=1.jpg4789731009900187774-account_id=1.jpg2846439716644149080-account_id=1.jpg5959998374407968996-account_id=1.jpg
 
Last edited:
I also scaled down the helmet by 10% so the pauldrons and the chest armor would appear larger.
View attachment 769809View attachment 769808View attachment 769807View attachment 769814View attachment 769815View attachment 769813
Original size
View attachment 769812View attachment 769811View attachment 769810
scaled down size

I repeated the print, template, trace, mock-up, cut, glue process for each armor part. I still did really now how I was going to attach these to my body. I kninda thought I'd use velcro, but I wasn't sure
View attachment 769822View attachment 769821View attachment 769820

I adjusted templates and mockups mulitple times to get the best fitment and look.
 
Different scales of forearm armor
View attachment 769831View attachment 769832View attachment 769833

I got to the point where I was cutting and gluing all the parts together.

Back section traced and cardboard mockup
View attachment 769834

SHOE
I wrapped a shoe in cellophane then in duct tape drew the pattern drirectly onto the duct tap, cut it out, adjusted the tempalte, cut it out of foam, and then glued it onto the shoe.

View attachment 769830View attachment 769828View attachment 769829

I did this for most of the pieces. I still have n't even thought about the abdomen area...
View attachment 769840View attachment 769839View attachment 769837View attachment 769836View attachment 769835View attachment 769841
 
Now that I had everything glued together, i connected everything together with velcro and elastic. I had to get a little creative to get this to work. It's a combination of attaching armor pieces to other armor pieces with elastic and velcro and using vecro patches to keep the armor stuck to the body suit.

Next was the prepping sealing and painting process.

The Eva foam sheets I used were the floor mat variety so they have various pits and pores. I did use Quick seal by DAP to fill in a majority of those. Heat sealing the pieces before also helped. I should have used more Dap to close up and finish seams. It's really like a reverse bondo.

I did realize that at this point I still have no abdominal armor or crotch armor so I had to figure that out quick and in a hurry. I also didnt have much time for a mock up.
So i just came up with a concept, cut the foam out, sealed and painted it, and it fit just right. Really lucked out on that.

So i masked and painted everything, this took a good 24 hours over 3 days. I didnt get much sleep at all.

When plasti dipping each part, I laid on 2 thick wet coats. This gave a really smooth finish and a nice painting surface. Each piece should be finished, sanded, heat sealed and quick sealed before this process. I found that putting the plastidip in hotter water helps it come out nice and fine and without clumps. I recommend doing so for about 10 mins before use.

I used silver aluminum 2x rustoleum for a primer of sorts, especially becuase I was ising metallic paints and they do not cover well at all. Maybe i should have used regular primer too? It seems like I have good adhesion so I'm not so sure.

I used 2x colonial red, 2x sage green, orange sierra universal metallics, and pure gold universal metallics for the rest of the colors (also all rustoleum). I covered everthing with rustoleum crystal clear over coat, which gives a great finish

I learned how to do this from evilted, kamui cosplay, heroes workshop, xrobots and punished props. They all have amazing techniques on how to build foam armor. I suggest checking out their youtube channels.

I still have to add led lights to my costume and a few other things. But It should be pretty straight forward on that front.

I'll post more pictures and insight as it becomes available. Thanks.
dcb6da5b43d925f67f0197d8b97f3132.jpg
8f895d72ec0fe05e11aff5d8a4c7efc9.jpg
880e83c3659aec1f1deb5c48cc5aaa20.jpg
1122da170fc1fcbc96653724e0bc1ea7.jpg
33c9ae99014ca365d26f70ff17eaa9b7.jpg
15d96dfe2a601bf4c4ed05c26f7f2928.jpg
b2cd0d99833c1152d6d4de74779dc5fd.jpg
6e6fd0e2fcdb9d3aae5b8263d8ff2a15.jpg
3b315af15fa66575af9b1b704a9981ef.jpg
4173f70f87fb2eeb0ecb0a198f81b15c.jpg
1f103eeb5ed645397a8f273d9de28afd.jpg
30ddebe407f4de141c61f5305922f393.jpg
27a60f6b8933c11bf2ac47d5cace4c1a.jpg
f2d69781616c488a6e345c27844a119e.jpg
547483e99fc21397e20ebdaf8b8d366d.jpg
178e22007dfeead94e027a3e672c4662.jpg
9bd56550f93c4357d6c71ba64a17fa67.jpg


Sent from my SM-N900T using Tapatalk
 
Last edited:
UPDATE: arm cannon lights

I added some lights to my arm cannon. I think it worked out pretty well.

I made a small light box made from bent clear petg plastic. I used eva foam for a base. Hot glued a strip of led lights on the interior. Used packaging foam/insulation to disperse the lights.

For the coloration i simply drew a gradient on beinfang marker paper with alchohol markers and inserted it in between the package foam and the petg plastic.

Power for the side lights comes from a single 9v box battery.

The barrel light is a sliced ipubrofen bottle with a cheapo flashlight embedded inside. I used a oatmeal box top, translucent kind to help diffuse the light and keep it contained. I used the same method for coloration as the side lights.

Time for the visor and the chest lights and I'm almost there.

Still got a few other minor details to work out before comiccon. Hope you found this useful.
e2e105957c128871260e59e2ed835407.jpg
f54ff93620223894911a939a30423926.jpg
a915ebaf84ca1e3a7021855eccf9e9bf.jpg
70a27c82e16cc5d9303e302c89f1f854.jpg
6cd5903c325d5af0743cfcdfb00ce7d4.jpg
2950c5fa3b4e37a8a43d5c6020aefdab.jpg
1cf6ebf30f4eb5a6fae5b44f0325e663.jpg
 
These build diaries don't seem to get many comments, partly because they are so in depth, there's nothing really to add!

It really is fascinating to see how different people tackle big builds. Thanks for sharing, the finish on the armour looks great.
 
This thread is more than 5 years old.

Your message may be considered spam for the following reasons:

  1. This thread hasn't been active in some time. A new post in this thread might not contribute constructively to this discussion after so long.
If you wish to reply despite these issues, check the box below before replying.
Be aware that malicious compliance may result in more severe penalties.
Back
Top