StarCraft BattleCruiser (Scratchbuilt) FINISHED - Now with a ton of pics.

Nice tone of silver paint. Silver has a depth and makes different shades depends on a lighting.

By the way, I still can't understand that the reason why blakeh1 was banned.
I've read his rather long comment on the recent Bandai release schedule but I don't think there are any problem with that.
Blakeh1 is a kind guy and I like him, Michael-san, can you tell me why?

katsu
Thanks.
As for Blake, we're believing he was talking to political in another thread on here, but it unfortunately got him banned as the rules say we can't talk about that stuff.
 
For the last few weeks I've just not felt like working on this....mostly because I was playing random levels from Starcraft 1 and 2.
Now that I'm moving in 4 weeks, I want to get as much done as I can.

Started with painting the kitbashed part under the blue squares a whiteish but very light gray color.
BC282.jpg

I wasn't so happy with the color I had on the side bottom part that connects to the chrome thrusters, so I got a bit darker gray and resprayed it.
BC283.jpg

I taped off part of the bottom, as I'll paint that different types of grays.
BC284.jpg

Heres more I painted, mainly the really dark gray.
BC285.jpg

Closer shot.
BC286.jpg

Still gots more to do.
 
After looking at the neck part and seeing those random squares painted on it, I felt the sides were to wobbly. Mainly because the paint seeped through the blue tape. So I thought about it and decided that adding lines around each one should look pretty cool. However, I decided on using a sharpie marker....big mistake. Using a small piece of stryene as my ruler, I tried drawing them in, but they just weren't working out so well. The sharpie bleed out a little in places and the stryene piece would move in places even when taped down. Plus the sharpie would act like it was drying up, even when brand new.
Heres how that came out.

BC287.jpg

So after thinking more on it a few days, decided to use a uniball pen free hand. Going over the lines, adding more random lines and squares in places, mostly to cover up any mess ups, I think it actually turned out better.

BC288.jpg

And the other side, with the pen. Still not as perfect as I'd like it, but best I'm going to get it without redoing the whole section.
BC289.jpg
 
I will redo that part because that part is very obvious place you look upon the model. You should not leave it as it is.
Come on, it's only a few hours work.
I will spray black at the first place and mask there with some thin masking tape and paint multi tones of silver.
 
I will redo that part because that part is very obvious place you look upon the model. You should not leave it as it is.
Come on, it's only a few hours work.
I will spray black at the first place and mask there with some thin masking tape and paint multi tones of silver.
While I do like how the lines ended up turning out, still not as good as I would have liked. If you could elaborate a bit more on the masking tape silver thing a bit.
 
This is just an option but,


Spray black paint on that area at first.
Then put the usual masking tape on the glass plate or something.
Cut that masking tape with a sharp knife to make a thin strip of tapes like 2 mm width.
Put that thin strip of tapes on that area you sprayed black to make a grid.
Then apply silver ( gray ?) spray on that area.
Then put some square cut masking tape on some grid to cover up.
Spray another different tone of silver (gray) over that area.
That's it.


Mickael-san, your model is comming up a very excellent one.
If you have some part you rather feel not as good as you expected, never leave that as it is. Your beloved model should not be that way.

I'm sorry that I've just stepped out of line a bit way to far but I think you understand.

Katsu
I defiantly cherish any feedback you would give. My biggest concern with the tape, is that it always seems to bleed through the sides no matter how much I press it down.
 
While looking at my reference pics, I saw this one, which actually helps with the area I'm working on now. In game, theres nothing there, you can see the ground through the area. I didn't like that, but this pic is actually from the HD port of the game that came out last year. It has those areas in black with light blue color lines through it. Might do something like that.
Although I don't like how the neck part is so much higher than the head in the pic. Glad I made it more even.
Just sprayed it black now.

bc.jpg
 
This is just an option but,


Katsu

First off, I've been seeing all this crazy stuff happening in Japan and just was hoping you and the family are all right.
As for the model, I'm in the process of painting the areas black and then will doing something over that. However, I'm now moving in 2 weeks, so by next week, I got to get this all packed up. A bunch of my other models were very carefully packed away. Need to get more boxes. Once I leave, I'll be on the road for about 5 days. Kinda scared to reopen the boxes and hope everything survives all right.
 
Thanks for your kind care for me. Earthquake and typhoon coming by and by but we are alright. You're gonna have a very busy week, Michael-san. Take good care and take a good enough time to prepaire start up a new life in a new place. I look forward to see your next post.


All the best,
Katsu
 
Thanks for your kind care for me. Earthquake and typhoon coming by and by but we are alright. You're gonna have a very busy week, Michael-san. Take good care and take a good enough time to prepaire start up a new life in a new place. I look forward to see your next post.


All the best,
Katsu

Good luck with the move, I hope it goes well. Will be waiting for more updates on this great build!
Thanks.

So I went and redid the neck, and it turned out much better. After looking at the pictures, since a camera always shows more detail, I will need to go in and clean it up a bit more. But does look much better than the sharpie lines.

Heres both sides. Used blue tape to start the outline, but still had a lot of paint leak out, so then went and free hand painted black around the edges. The problem with the squares I had before, was the background was a dark gray that I had mixed myself and didn't have anymore, so I couldn't fix the sides. My mistake.
BC290.jpg

BC291.jpg

The the trusses that outline the black will need to be repainted a lighter color now to stand out.
 
Well, this is it. Time to move from Florida to Idaho. Been packing these last few days.

So this is pretty much my whole life piled up into a bunch of boxes, which then will have to be stuff into 2 different small cars on Thursday.

Boxes.jpg

And the last 2 things, my battle cruiser and way to short star destroyer. I sure hope they don't get damaged, I stuffed old shirts inside the custom made boxes for them both.
It will take 5 days to get there, which I might be able to check out the group, but not sure yet, as I still don't have a smart phone. Once I get there, I won't have internet at all, and not sure when I'll get it. But hopefully I can get to a computer every now and then. Hoping that once I get settled it, I can then do more work on this and then finally get some pics posted, but who knows how long that will be.

BCSD.jpg
 

Attachments

  • P1013129.JPG
    P1013129.JPG
    3.5 MB · Views: 191
  • P1013128.JPG
    P1013128.JPG
    3.8 MB · Views: 173
I think its time to start working on this again. This thread was 16 pages back and 5 months later. After moving here to Idaho and living a few months with my Grandpa, which was quite tricky, him being 90 and all and not quite seeing eye to eye on things. I've now moved again, this time only 20 mins away. My brother owns a house, but he had lost his job last year due to the company outsourcing. So after months and months, he finally found a new job......in Albany, New York. So I'm now here living in his house with the roommate he had and where both watching over it and his cats.
Might have worked on this sooner, but Kingdom Hearts 3 came out and was playing that. But now here I am with new updates and what I got done just today. Decided to work on the base for now. And instead of just it being a base for a model, thought it would be cooler if made into a docking bay type landing place for the ship.


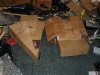
So I had bought these weird train tracks at Hobby Lobby in the sale section sometime last year. So I cut them up as seen in the top of the pic....
BC292.jpg


Glued 3 on each side and added part of a gun turrent on the top. I'll be adding much more detail.

BC293.jpg

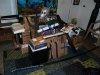
I have all these random parts I got at an electronics store for detailing.

BC294.jpg

I realized that the long round dowel I have fit through the whiteish plastic part. So I cut it to size and glued it to the yellow part. But kept the glue off the 2 parts so it can move.

BC295.jpg

So for now, until I add more detail of course, these parts look like this, kinda like big clamps to lock onto the ship as its landing.

BC296.jpg

But they can also flip out like this as well for a nice little effect.

BC297.jpg


So thats it for now. Hope I can get more done soon.
 
Great to see you back! I'm glad you've settled down enough to model again.

The platform outline looks great. I'm impressed with your intuitive scratchbuilding, those repurposed Ikea tracks looks as if they were made for the job, and the cradle looks awesome. Keep going!
 
Great to see you back! I'm glad you've settled down enough to model again.

The platform outline looks great. I'm impressed with your intuitive scratchbuilding, those repurposed Ikea tracks looks as if they were made for the job, and the cradle looks awesome. Keep going!
Thanks. Its fun to make something out of such random stuff. The only problem is running out of space to put it. Ha
 
I've toyed with the idea of building "stuff" the BC included from StarCraft... I play it quite a bit. But I never took the plunge. This looks fantastic and I may just go ahead and start one of my own... maybe not quite as large as yours :D. It might be a good excuse to learn some 3D modeling techniques I've also been toying with learning. model and print the basic chapes then greeblie and paint it all up... I think I'm talking myself into it....

Your build is inspiring.

Jedi Dade
 
These 4 pics now means I've uploaded 301 pics for this project. Crazy.

Heres the back of the base. Just kinda went crazy and did whatever, since you wn't really see that part too much anyways. Used a lot of the printer parts I had.
BC298.jpg


More of the side.
BC299.jpg


And the front. The big open flat part will have decals about the ship and the logo. The sloped part, haven't decided yet what to do.
\
BC300.jpg

Close up. Still need to add more.
BC301.jpg
 
This thread is more than 3 years old.

Your message may be considered spam for the following reasons:

  1. This thread hasn't been active in some time. A new post in this thread might not contribute constructively to this discussion after so long.
If you wish to reply despite these issues, check the box below before replying.
Be aware that malicious compliance may result in more severe penalties.
Back
Top