In need of some greeblie help please!!

Slayer6769

New Member
I am scratch building a 181st tie pilot chestbox and need some help. I have never scratch built anything like this before, so please excuse any dumb questions I might have.
I have the box itself figured out, but I'm going to need some greeblies. I could just buy some, but I want to make everything on my own.
I was going to sculpt the buttons and switches from clay and make a mold to cast the final resin parts.
Do I use a clay that's non hardening or air dry hardening?
Which brand do you recommend?
I'm assuming I need to make the mold from silicone.
Any brand preferences?
I am also going to be making some molds to cast rubber shoulder straps for my current tie pilot chest armor. Do I make this mold from silicone as well? Also I need recommendations for a good strong rubber to make the castings from. Thank you ahead of time for any help or suggestions you can offer.
I will post pics of my progress as I make my first props on my own. I'm absolutely stoked about doing this!
 
Yeah, I would forget the clay and molds. The buttons simple enough shapes that you could more easily cut them out of pieces of pine. And as for the buttons, they're just squares of colored acrylic.
 
Yes I could just make them out of wood, but I am wanting to try my hand at casting. I figured with simple shapes, this might be a good way for me to learn before tackling something more complex. I also realize I will have more money in my greeblies vs just buying some. But I wouldn't get the benefit of learning how to do this casting process and also the satisfaction of doing it all from scratch.
I do have some future casting plans and need to start somewhere and I figured this would be the best way to start.
 
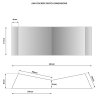
BTW. Here are the dimensions for some rocker switches that were used in the movies. They were measured from some real buttons many years ago by someone here on the RPF - I forget by who.
v_switch_05.jpg
 
Last edited:
Ok I think I finally made a model that I'm happy with. I ended up getting some basswood that was easier to work with than what I was using. I don't have a bandsaw or scroll saw, so I had to rough cut my model with a coping saw. I then sanded it to the desired shape and dimensions. I assume this model needed to be as perfect as I could possibly make it. So that was my goal. I ended up finishing it with 800 grit sandpaper. It feel like it is made of glass.
I know this rocker is just something very simple, but I've never tried anything like this before and I'm excited about learning molding and casting.

- - - Updated - - -

IMG_20171106_042312431_LL.jpgIMG_20171106_042312431_LL.jpg

- - - Updated - - -

I'm on my way now to hobby lobby to pick up a casting kit that propmaniac suggested. They have the alumilite all in one kit and I got a 40% off coupon, so this is working out nicely.
 
Ok I think I finally made a model that I'm happy with. I ended up getting some basswood that was easier to work with than what I was using. I don't have a bandsaw or scroll saw, so I had to rough cut my model with a coping saw. I then sanded it to the desired shape and dimensions. I assume this model needed to be as perfect as I could possibly make it. So that was my goal. I ended up finishing it with 800 grit sandpaper. It feel like it is made of glass.
I know this rocker is just something very simple, but I've never tried anything like this before and I'm excited about learning molding and casting.

- - - Updated - - -

View attachment 771870View attachment 771870

- - - Updated - - -

I'm on my way now to hobby lobby to pick up a casting kit that propmaniac suggested. They have the alumilite all in one kit and I got a 40% off coupon, so this is working out nicely.

Nicely done. Thats the way to make a thing !!
 
Before you cast the rocker switch you may want to hit it with a coat of primer. It's looking good. Nice simple pieces are the best way to learn molding and casting.
 
I screwed up my first attempt of casting the mold, but that's ok. I anticipated things going wrong and I learned a few things, so it wasn't a total bust. I started this with the idea of having failures before I had success. So I'm ok with failed results if I'm able to learn from my mistakes.
So I will give it another go later today.
It's probably a overkill, but I'm letting my silicone cure for at least 24 hours just to be certain it's completely cured before I mess with it.
 
After my first mold failure, the second and third came out great after learning from previous mistakes.
I mixed and poured some resin. I did not anticipate how quickly this resin would set up. I will use up what I have, but I will have to get something with more work time. I'm looking at Alumilite slow set 7?
I don't like being rushed like this. But anyway, my first casts came out good even with a couple hiccups.
I'm planning to continue to make casts until I use up this resin and hopefully learn a few more things.
 
I've had some nice success with this. I've learned a few things and I'm very pleased with my results.
I think I am going to make some chestbox gears next. I've not been very happy with most of the ones I've gotten in the past. I think I will try to make some that I will be happy with. IMG_20171115_203940415.jpg
 
This thread is more than 6 years old.

Your message may be considered spam for the following reasons:

  1. This thread hasn't been active in some time. A new post in this thread might not contribute constructively to this discussion after so long.
If you wish to reply despite these issues, check the box below before replying.
Be aware that malicious compliance may result in more severe penalties.
Back
Top