The Knights Who Say Ni

TheArchdude

New Member
Hi everyone, for Halloween this year I thought it would be fun to build the chief of the Knights Who Say Ni costume with a full steel antlered helm. Since this is my first original build design I thought I'd share it with you all.


I SHALL SAY NI TO YOU IF YOU DO NOT FOLLOW THIS THREAD!
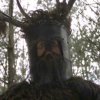

8495743.jpg

From the pictures, it looked to me like the helm was constructed from an upper and lower piece on the front and back, connected in a cylinder with a flat top and a band around the top edge. I started out with some poster board mock-ups for sizing.

20170921_220234.jpg20170921_215855.jpg20170921_220301.jpg

I ended up shortening the top pieces by an inch to be only 4" tall. I also made the flanged bits on the top piece a full inch long instead of the half inch on the mock-up.

20170921_220234.jpg


8495743.jpg


20170921_215855.jpg


20170921_220301.jpg
 
Last edited by a moderator:
20170921_211236.jpg I taped the mock-up pieces together and gave it a test fit. I decided this was a bit too tall at the brow so it was shortened.


20170921_220750.jpg20170921_230306.jpg
I used metal shears to cut the steel using the poster board as a pattern. I used 22"x14" 22 gauge steel sheets so that the helm would be both sturdy and relatively light. I wouldn't count on it to protect me from the word "it" though, much less any serious physical impacts.


20170922_142631.jpg I bent down all the flanged bits on the top and drilled 3/16" holes in the center of each with a heavy duty step down drill bit. These are what will attach the top to the sides.

20170923_165303.jpg For some of the cutting I used my dremel cutting wheel. This made the metal really hot because I don't think I was using a proper cutting wheel for steel and I probably still have steel shavings embedded in my skin.


20170923_173123.jpg20170923_173943.jpg I drilled holes at the corners of the face plate and use the dremel to cut out the face.


20170922_151724.jpg 20170923_143540.jpg I used bolts and wing nuts to fit the pieces together before marking all of the remaining rivet holes.

20170923_160018.jpg20170923_190048.jpg More of the same. Fitting and drilling, fitting and drilling.

20170923_202638.jpg All of the pieces cut out with rivet holes. I added more holes to the lower front and back pieces later when I realized there were more on the movie helm.

20170923_204036.jpg20170926_183518.jpg I used 3/16" short pop rivets for final assembly. The ones on the movie helm looked a little bigger and rounder but pop rivets are just so flippin' convenient. In the end, I think it still looks pretty close.
 
I don't know why some pictures work fine and others either don't show up or are completely sideways. Any of you experts got tips on how to attach image files more consistently?
 
I don't know why some pictures work fine and others either don't show up or are completely sideways. Any of you experts got tips on how to attach image files more consistently?

Are you taking these with a cell phone? I ask because Androids have a habit of doing funky stuff to pictures. You may even find the quality rise and fall with whatever lighting the room has at the time of the picture, thus changing the file size to something above what you are allowed to upload. The only thing I would suggest is some post editing in a software like gimp or the like in which you can rotate all of your images and set a standard on file size/quality and export in .jpeg format.

Nice work by the way! I fear I'm at the end of the generation that understands Monty Python humor... At least in America...

I did take the pictures on my Android phone so that could be a factor. The odd thing is that the pictures that show up sideways are correctly oriented on my hard drive and the ones that refuse to thumbnail are actually smaller than the others. Oh well.
 
I figured... I had the same issues a while back on another forum, and found it to be a situation of accept it, or edit almost everything I uploaded... I decided to just roll with it. Lol.
 
20170926_200121.png I had to give it a test fit to make sure I could say the sacred words adequately.

20170926_201940.jpg 20170926_232737.jpg I fit the top band around the crown of the helm and marked the holes from the inside.

20170929_194419.jpg The helm itself fully assembled. Additional rivets were added to the side seams.


Next up were the antlers. I'm 90% sure from looking at stills from the movie that the original helm just used tree branches for the antlers so that's the approach I took. Finding real or even fake antlers the appropriate size and shape would have been really difficult anyway.

monty-python-and-the-holy-grail-knights-who-ni.jpg

20171007_102720.jpg After hunting around the more unkempt shrubberies of the local park, I managed to find two dead branches that looked nice and weren't too expensive. I cleaned the bark off them with my dremel sanding drum and shaved the ends of the smaller branches to look more like antler points.

20171007_102846.jpg Test fitting the look of the "antlers" on the floor. I think it looks good on my favorite smuggler decoration.

20171007_120840.jpg20171007_124656.jpg To figure out a mounting system, I had to go to the hardware store and search for inspiration. I ended up taking two 3/4" PVC elbows and two T-joints, and connecting them with two 2" pieces of pipe and a 4" piece across the middle. Then I used PVC brackets to bolt them to the helm. This should distribute the torque from the antlers evenly across the top and avoid straining or warping the steel.

20171007_133031.jpg I trimmed the bottom ends of the antlers to fit into 2" long PVC pieces and filled the gaps with hot glue. This makes them easily detachable for transport when not riding a coconut horse. I also left the PVC T-joints un-glued from the rest of the mounting system so that I can adjust the angle of the antlers.


20171007_174144.jpg I picked up some nice shaggy light brown fur from Hobby Lobby for the top of the helm and glued some bits in the antlers. The fur is attached to the helm with velcro and covers up the PVC nicely.

20171016_175919.jpg Since the helm was a little too shiny and light-colored, I darkened it up with a couple layers of hammered finish black paint.

20171019_203024.jpg That's it for the helm! Now I just need a longer beard. :darnkids
 
Most of the rest of the costume is pretty straightforward. A long dark brown robe, a brown fur cloak that goes halfway down the back, and some kind of inner shirt with ragged dark grey sleeves.


The-Knights-Who-Say-Ni-monty-python-and-the-holy-grail-591173_1008_566.jpg From what I could see of the sleeves, it looks like they were some kind of ragged grey patchwork material. Since I didn't want to make an entire shirt just for the sleeves, I decided to just buy a black long-sleeved crafts shirt from Hobby Lobby and wrap it with grey flannel.

20171009_192233.jpg I took a yard of cheap flannel, cut it into strips, and wrinkled the hell out of it. Then I ran it through the washer and dryer to really get it nice and frayed. In hindsight, it would have been better to tear the strips instead of cutting but it still worked out.

20171011_190221.jpg While wearing the shirt, I hot glued the ratty flannel strips to my arm. This got a bit....warm.... but ones does not become one of the Keepers of the Sacred Words without sacrifice.

20171020_175116.jpg The cloak was super easy. I just took a couple yards of dark brown faux fur, cut a slit for my head and rounded the corners. It would have been nice to get something a bit shaggier and more like bear fur but this was the best I could find. Future enhancement #1.

The robe was also easy and not very interesting. With some help from my expert sewing consultant (I call her mom), I just took two halves of a 6 yard piece of brown cotton/polyester, cinched them at the top with some shoestring, and sewed the shoulders and sides together. Then I had the bottom cut off while standing on a chair to get the desired length The robe material is a lighter brown than I'd like but it was also the best I could find in the amount I needed. Future enhancement #2.

For gloves I just used the same black jersey gloves that I used for working with the sheet metal.


I debuted the costume this weekend and got some fun pics of the final product. For height I just stood on a metal folding chair though someday I may be brave enough to use stilts.

Knight1.jpgKnight2.jpg22688572_10156870580714517_2773145182095144058_n.jpg

22730299_10156870580119517_5065391963240246190_n.jpg This shrubbery was no good. The owners were made to cut down the mightiest tree in the yard with a herring.

22549571_10156870580219517_7179579411983314014_n.jpg This was a good shrubbery despite having no laurels.

22688725_10156870580654517_6854405312549680025_n.jpg These shrubberies even had a two-level effect with a little path going down the middle.


This was a fun project idea that I wasn't sure I'd be able to finish in time so I'm glad it came out as well as it did. With some tweaks I might take to some future Comic Cons or other public events where proper Monty Python silliness is appreciated. Thanks for checking out my build!
 
This thread is more than 6 years old.

Your message may be considered spam for the following reasons:

  1. This thread hasn't been active in some time. A new post in this thread might not contribute constructively to this discussion after so long.
If you wish to reply despite these issues, check the box below before replying.
Be aware that malicious compliance may result in more severe penalties.
Back
Top