Gahhh - this is brilliant! I love everything so far, but the little guy is, hands down, one of my favorite things EVER!
You are using an out of date browser. It may not display this or other websites correctly.
You should upgrade or use an alternative browser.
You should upgrade or use an alternative browser.
40K Ork Warboss,,,,
- Thread starter McCarthy83
- Start date
McCarthy83
Active Member
Gahhh - this is brilliant! I love everything so far, but the little guy is, hands down, one of my favorite things EVER!
Cheers, there is a lot more to do on him yet!!!
I've been thinking about the head I will have to make for the the Warboss; whether to have the mouth open or closed.... so to images pulled off google of two miniatures as examples. Be interested to know what people thoughts were?...
Closed mouth:

Open mouth:

I second the open mouth. ")
McCarthy83
Active Member
Cheers guys, I have to say that I agree with you guys; the open mouth will look good I reckon so that may well be the plan....
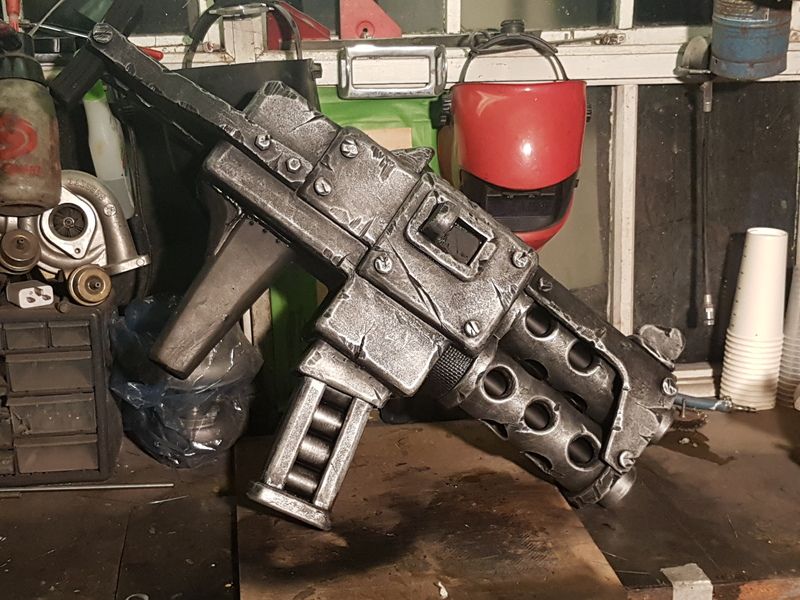
I was going to get on with making the templates for the trousers over the last few days because I thought I had the material.... I actually don't so i couldn't.... So instead I started on the Shooter instead. I had debated on what gun to build to work with the suite. As you already know Ork weapons are all pretty big which equals heavy. The options where limited by those two factors. I opted for the double barrel bolter type option.... now it isn't that heavy and its pretty big so it works quite well for my needs.... I do have a few bits of detail to add before paint and also figure out a way to make it less front heavy and it pulls on the fingers quite a lot which I think in the long term will cause issues.... but for now so pics...
So i started by looking at one of my miniatures to get a rough idea of the basic body size and could just build from there....
The main body, and one of it just resting on the hand:
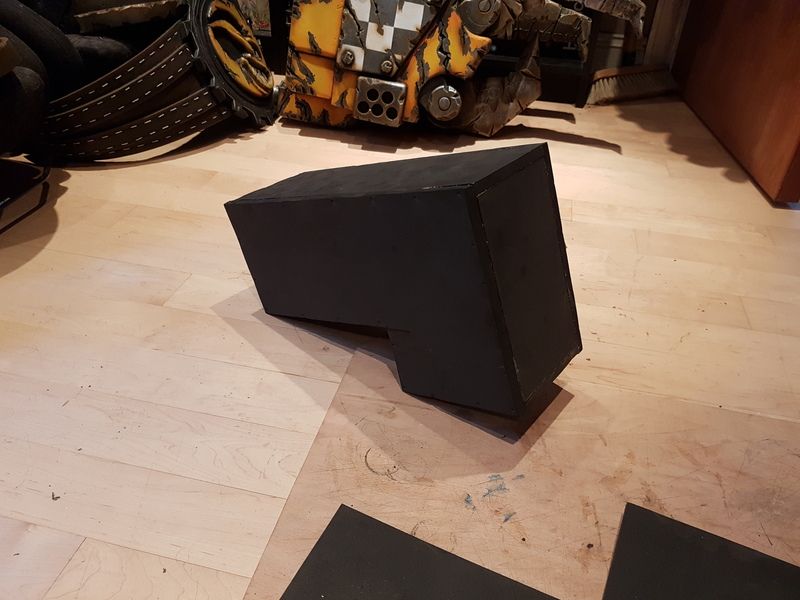
From there I just started layering additional foam down to make the desired shapes just pinning them in place to start with...
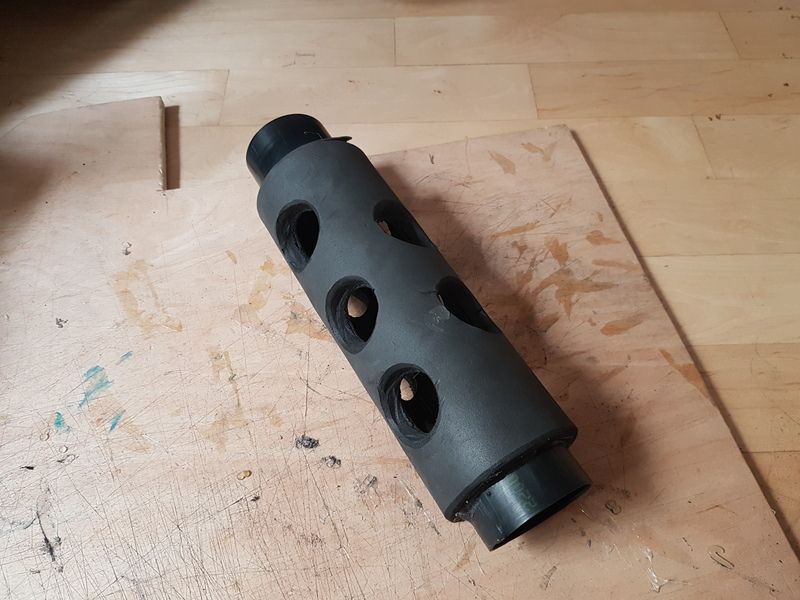
Then onto the barrel sizes. I initially did these the same way as i did the exhaust on the power klaw but that left them looking a little thin and un-Ork like so i wrapped them in foam to bulk them out:
(needed a clean up at this stage)
I was going to get on with making the templates for the trousers over the last few days because I thought I had the material.... I actually don't so i couldn't.... So instead I started on the Shooter instead. I had debated on what gun to build to work with the suite. As you already know Ork weapons are all pretty big which equals heavy. The options where limited by those two factors. I opted for the double barrel bolter type option.... now it isn't that heavy and its pretty big so it works quite well for my needs.... I do have a few bits of detail to add before paint and also figure out a way to make it less front heavy and it pulls on the fingers quite a lot which I think in the long term will cause issues.... but for now so pics...
So i started by looking at one of my miniatures to get a rough idea of the basic body size and could just build from there....
The main body, and one of it just resting on the hand:


From there I just started layering additional foam down to make the desired shapes just pinning them in place to start with...

Then onto the barrel sizes. I initially did these the same way as i did the exhaust on the power klaw but that left them looking a little thin and un-Ork like so i wrapped them in foam to bulk them out:

(needed a clean up at this stage)


McCarthy83
Active Member
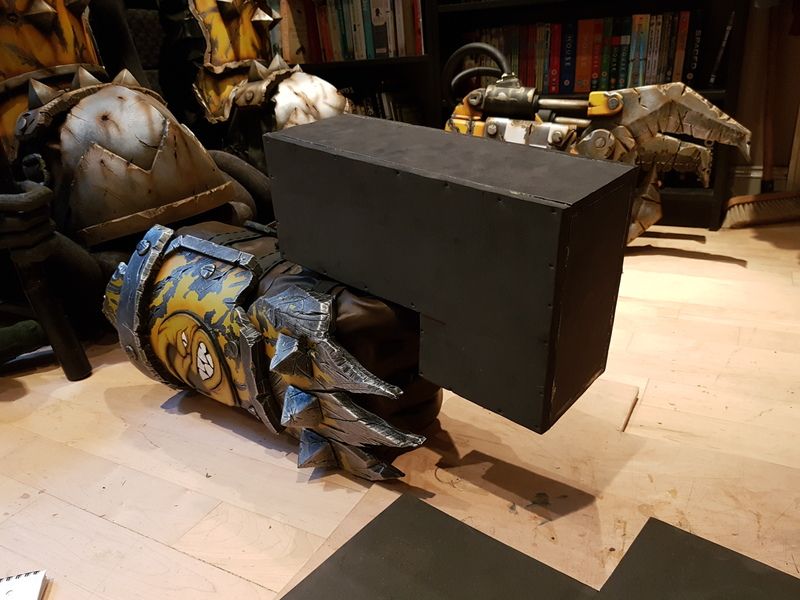
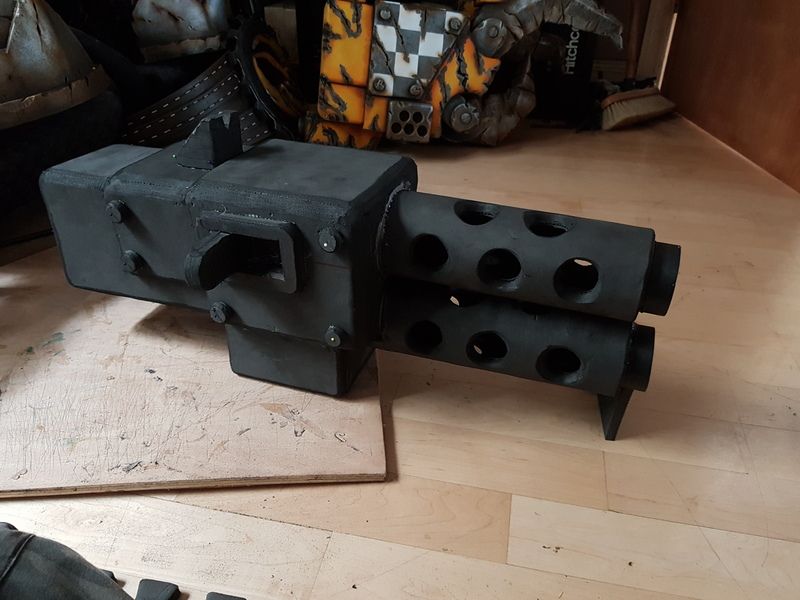
From there it was just a case of sanding, skimming, dremeling and so on! so it ended up looking a bit like this:

The magazine for the gun:

I was very limited by the shape of the hand with what i could do with the grip so alas its a touch boring. I will likely shape it a little more and wrap it so it looks like a bodged leather grip but for now it serves a purpose.... but other than a few extra details its pretty much ready to be scuffed up and primed....


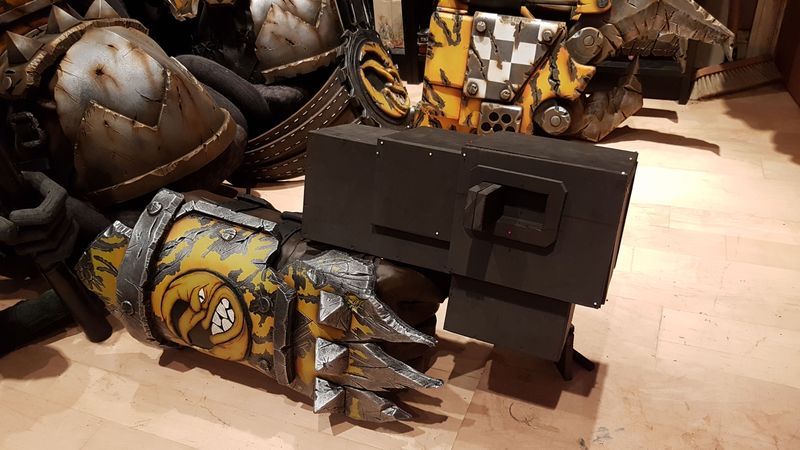
and with the hand:

- - - Updated - - -
oh and its quite large when its held by a puny human....
i had no idea what my feet are doing in this photo its like they are on different dimensional plans!!!

The magazine for the gun:
I was very limited by the shape of the hand with what i could do with the grip so alas its a touch boring. I will likely shape it a little more and wrap it so it looks like a bodged leather grip but for now it serves a purpose.... but other than a few extra details its pretty much ready to be scuffed up and primed....
and with the hand:
- - - Updated - - -
oh and its quite large when its held by a puny human....
i had no idea what my feet are doing in this photo its like they are on different dimensional plans!!!
McCarthy83
Active Member
There is defiantly a lot to do.... trying to do bits between other things!!!
Well while I'm waiting for material to turn up for the lower half of the body I decided to make so Stikkbomez that i can use in one of two ways.... or i could make more of them and use them both ways at once So the first way will be to hang from the back of the belt once they are all complete. The second is to make a back pack for the Grot and he can carry them for me.
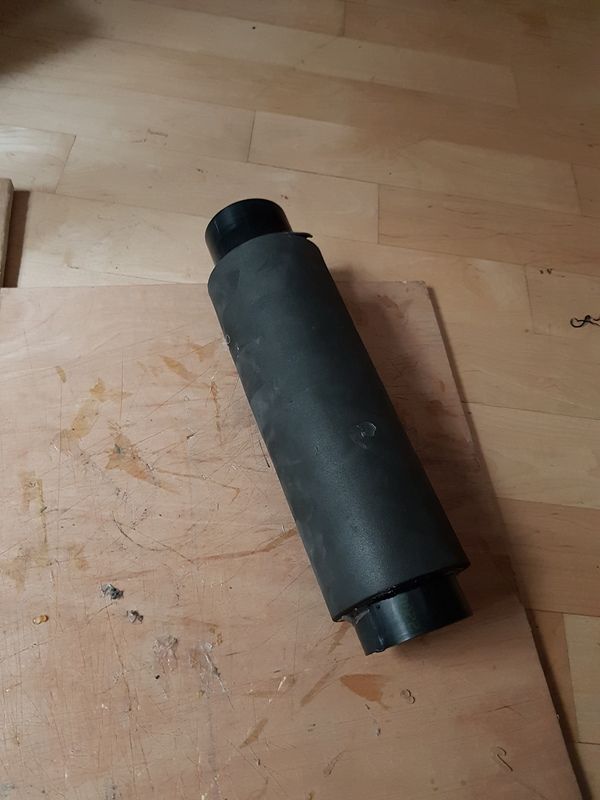
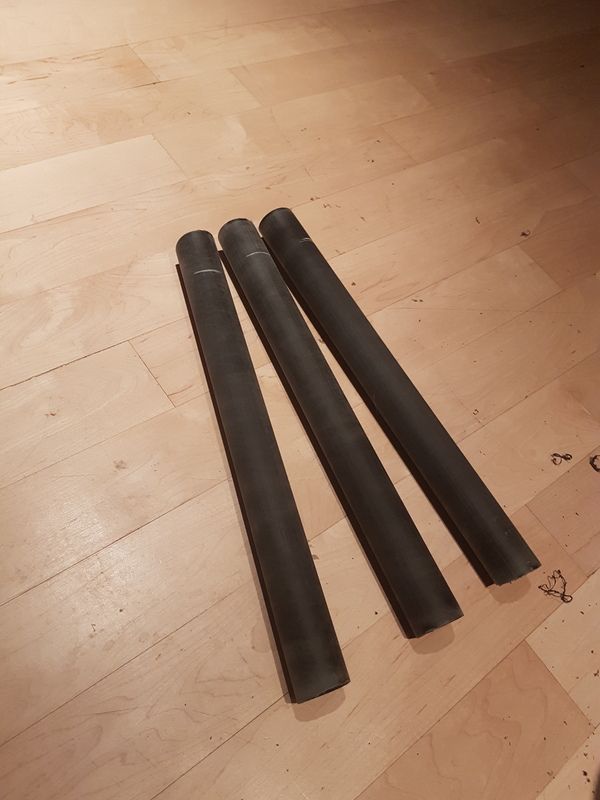
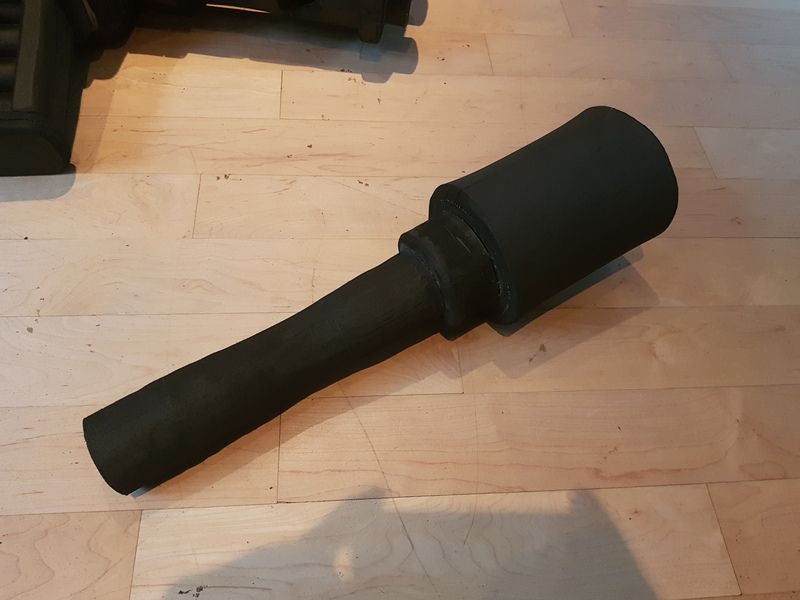
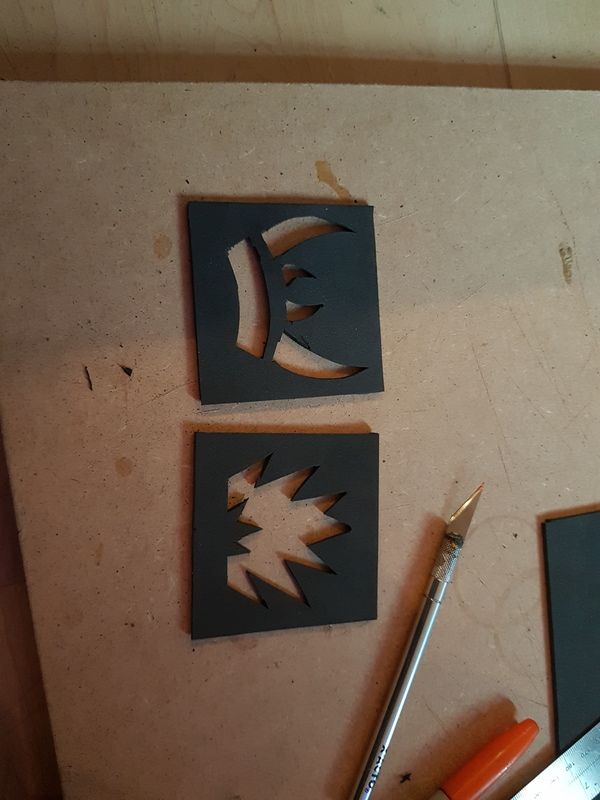
I wasn't sure of the best way to make these an in hind sight a thick foam or insulation board may have been better for the handles but anyway they are done now. So i started with some 1.5" PVC pipe and wrapped that in 10mm EVA foam before shaping the handle for a bit more definition. The explosive end is just EVA rolled into cylinders and finally some 3mm foam just to add some Ork glytphs to add some extra detail and make them a little more interesting...
The most exciting pic ever: some pipe!!!
The main body of the Stikkbomb after being attacked with a knife! and after being dremeled!... starting to take shape...
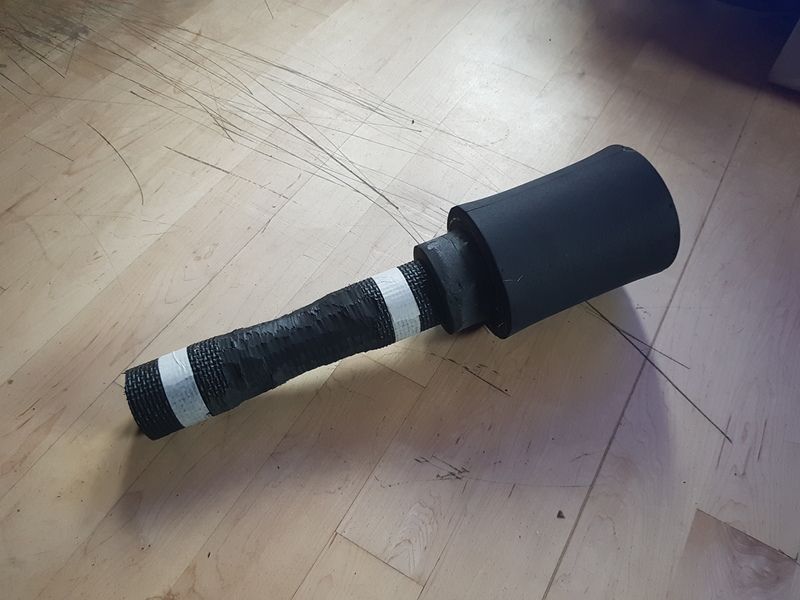
3mm foam glyphs the explosion: the explosion meaning "DAKKA" (Attack, noisy, shoot, explosion) and the teeth meaning "GRIM" (Ruthless, dangerous)
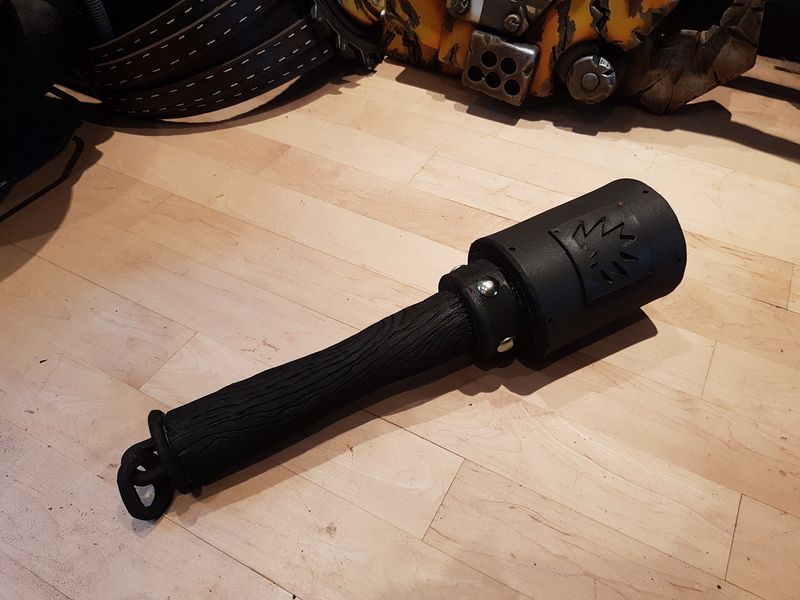
completed unit ready for priming... was quite happy with them...

Well while I'm waiting for material to turn up for the lower half of the body I decided to make so Stikkbomez that i can use in one of two ways.... or i could make more of them and use them both ways at once
So the first way will be to hang from the back of the belt once they are all complete. The second is to make a back pack for the Grot and he can carry them for me. I wasn't sure of the best way to make these an in hind sight a thick foam or insulation board may have been better for the handles but anyway they are done now. So i started with some 1.5" PVC pipe and wrapped that in 10mm EVA foam before shaping the handle for a bit more definition. The explosive end is just EVA rolled into cylinders and finally some 3mm foam just to add some Ork glytphs to add some extra detail and make them a little more interesting...
The most exciting pic ever: some pipe!!!

The main body of the Stikkbomb after being attacked with a knife! and after being dremeled!... starting to take shape...


3mm foam glyphs the explosion: the explosion meaning "DAKKA" (Attack, noisy, shoot, explosion) and the teeth meaning "GRIM" (Ruthless, dangerous)

completed unit ready for priming... was quite happy with them...


Looks amazing! I’m always in awe of these builds not only because of the craftsmanship, but also because I’d never be able to fit this scale in my flat. Ha!
McCarthy83
Active Member
... I just stumbled across this now after you commented on my thread... WOW.
I am in awe... like complete and total awe. This looks AMAZING. I cannot wait to see it done! :love :eek
Thanks, high praise indeed. I have to say i absolutely love all the work you've put into Chappie and like wise i can not wait to see how that turns out. Looks amazing
McCarthy83
Active Member
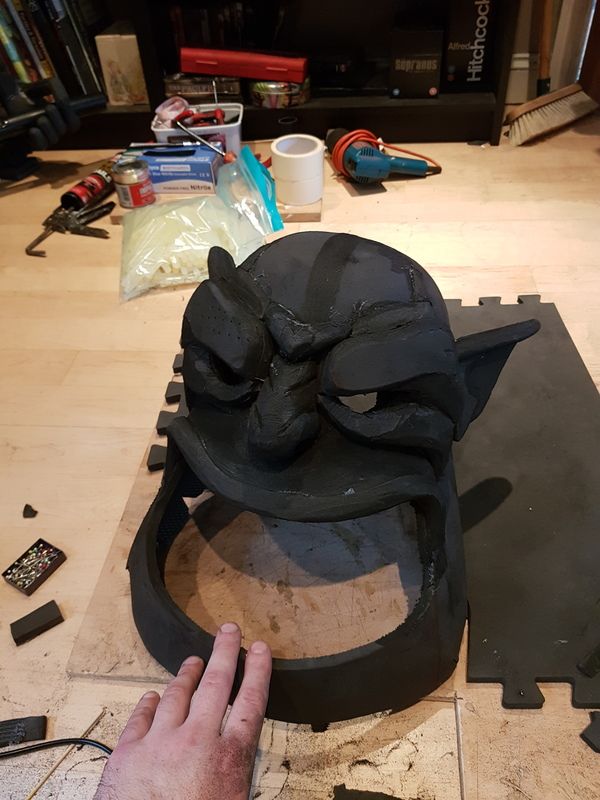
Managed to get the base colours down on the twin link, needless to say that took a while! I've also been working on the head. I was going to build the body first but the body proportions are related to the scale of the head so i made sense, in my mind, to do that first! Having never built a full face mask before i just started by making a very simple helmet for which u used a medium sized football to make the template then built from that. The top of the head is six wedges bonded together and then to scale it for the 'dropped' ork jaw i just started hacking at some shapes..... once i was happy with the size i then built up the features layering a shaping foam as i went.... I wasn't sure about this at all but where it is now i'm fairly happy with it.... so onto some pics
first off the twin link shoota....
This is what the head looks like under all the layers!.... Yeah i wasn't sure it would work at this stage either!!!!

Then with some features added... The area below the nose wasn't right at all at this point so i added an extra piece on top and then with the upper lip it looked a lot better...
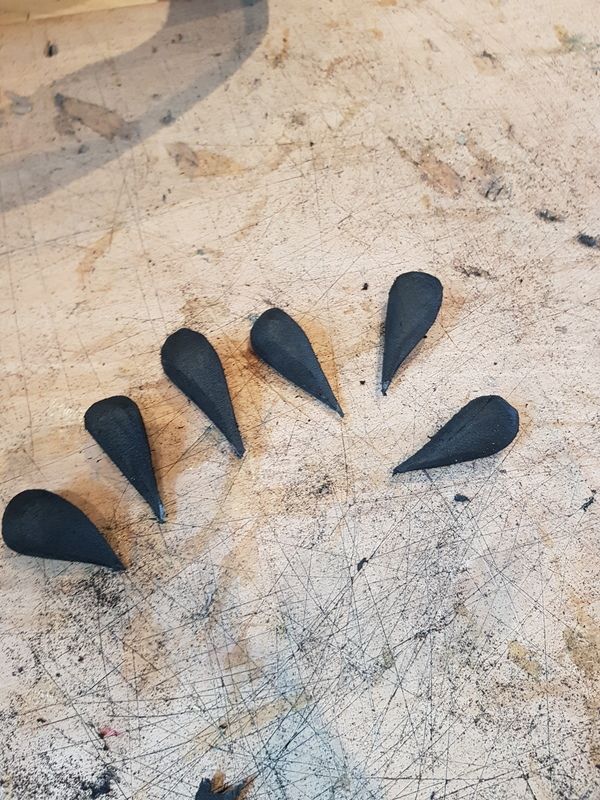
The teeth were simply two bits of 10mm eva stuck together and then dremmeled into shape... the big teeth were done in the same way but three or four pieces thick and again dremmeld into shape.....
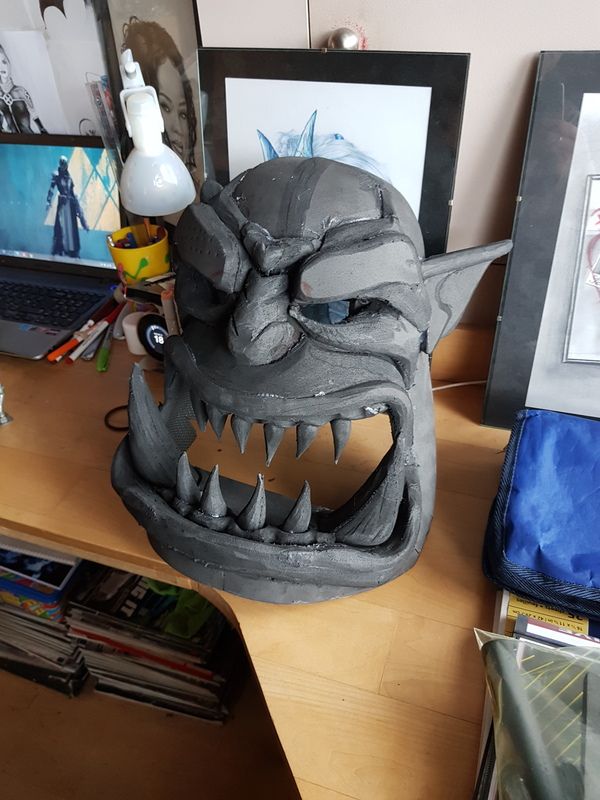
You can see in this pic with the teeth in that I made a little gum for them to sit in, this will be much more apparent once its painted and all that jazz....
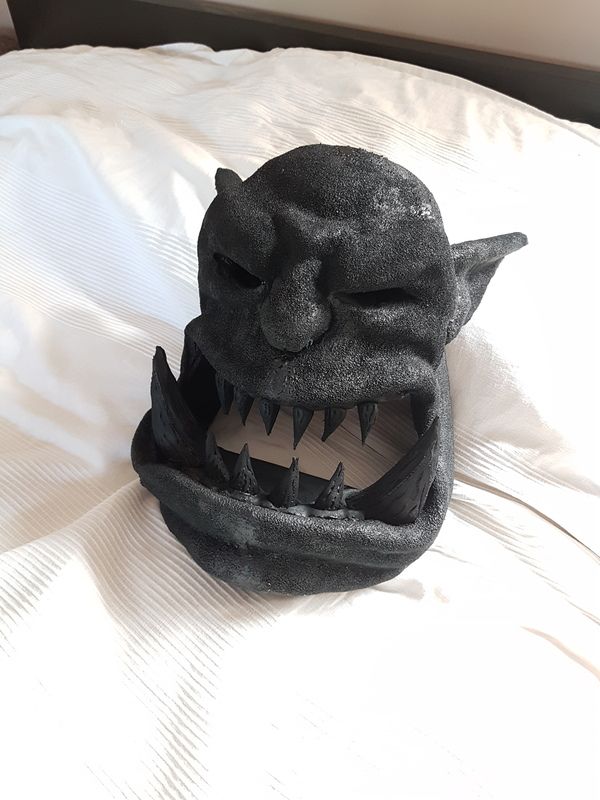
And finally, I have laid the fleece over the face using a spray glue for the most part and then some contact adhesive around the edges..... after the fleece a few layers of spray glue from a tin again to give it some texture ( like I did with the grot) but with the Ork i will then be covering this with a layer of latex so give a much more skin looking effect... that will have to wait until the body is done....
There are a few more bits that have been done, legs, trousers and the belt have been finished but I need to get some pics of those and get them up....
first off the twin link shoota....

This is what the head looks like under all the layers!.... Yeah i wasn't sure it would work at this stage either!!!!

Then with some features added... The area below the nose wasn't right at all at this point so i added an extra piece on top and then with the upper lip it looked a lot better...

The teeth were simply two bits of 10mm eva stuck together and then dremmeled into shape... the big teeth were done in the same way but three or four pieces thick and again dremmeld into shape.....

You can see in this pic with the teeth in that I made a little gum for them to sit in, this will be much more apparent once its painted and all that jazz....

And finally, I have laid the fleece over the face using a spray glue for the most part and then some contact adhesive around the edges..... after the fleece a few layers of spray glue from a tin again to give it some texture ( like I did with the grot) but with the Ork i will then be covering this with a layer of latex so give a much more skin looking effect... that will have to wait until the body is done....

There are a few more bits that have been done, legs, trousers and the belt have been finished but I need to get some pics of those and get them up....
McCarthy83
Active Member
I have had very little time to work on this in the last couple of months!!!! I did carry on with the head and got a few layers of the latex on the head to make it appear more skin like. So soon I will get on with basing and airbrushing the the wee beast....


SquishyShoes
New Member
Man, I'm so happy to see an update on this. You're work looks great mate. Is that a Jinx (and maybe Gragas?) I see in the corner of the first photo? (And Vi in the other corner?)
Slotted rotors and and a clutch, what beasty does that belong to?
Slotted rotors and and a clutch, what beasty does that belong to?
McCarthy83
Active Member
Man, I'm so happy to see an update on this. You're work looks great mate. Is that a Jinx (and maybe Gragas?) I see in the corner of the first photo? (And Vi in the other corner?)
Slotted rotors and and a clutch, what beasty does that belong to?
There hopefully will be a few more regular updates soon.... been so busy with other stuff i just haven't had the change to get stuck back in. Now i have the head i can start scaling the body to suit....
And yes it was a pic i did of Jinx a while back. I decided to do a set of four casual League of Legends characters. Not that is a game I actually ever got into to be fair the character design I really like.... its off topic of course but the pic you mentioned...
As for the clutch and brakes they are going on my R32 GTR. Its been pulled off the road so i can repair the bits of body work that are rusted and as such a few mods along the was once the old girl starts to go back together.... Fabrication/tuning is what I have done for the last ten plus years for work so it would be rude not too
McCarthy83
Active Member
I've not been on here to update this in a little while as I've been pretty ill and had a fairly lengthy stay in hospital, though I have been keeping an eye on everyone else's builds and getting rather jealous that I haven't been able to get on with mine!!!
I'm hoping to get back on this in the next couple of weeks and really get stuck into the upper body build, once that is done I can then build the shoulder armor. There is a few bits to finish off on the lower body still. I have to finish painting the grenades and get them mounted on the belt, add some more details to the cloth and weather it all. After that then the lower body is actually complete! That will be a nice feeling after all this time !!
Will best some pics up when i get back on it
I've not been on here to update this in a little while as I've been pretty ill and had a fairly lengthy stay in hospital, though I have been keeping an eye on everyone else's builds and getting rather jealous that I haven't been able to get on with mine!!!
I'm hoping to get back on this in the next couple of weeks and really get stuck into the upper body build, once that is done I can then build the shoulder armor. There is a few bits to finish off on the lower body still. I have to finish painting the grenades and get them mounted on the belt, add some more details to the cloth and weather it all. After that then the lower body is actually complete! That will be a nice feeling after all this time !!
Will best some pics up when i get back on it
Glad to hear you're on the mend. Great that you are looking forward to getting back into things, rather than dreading going back to the project!
Similar threads
- Replies
- 2
- Views
- 1,290
- Replies
- 14
- Views
- 2,710