Eastman and Laird Comic Book Shredder - WIP

Jumpman2315

Active Member
Hi all, wanted to share my journey on the road to a somewhat accurate version of The Shredder based on the original TMNT comics. Here's a Sideshow Collectible figure of what I am trying to achieve.

1.jpg

I contemplated making the helmet from scratch but seeing how I am still pretty new to all this, I decided to get this one from Amazon to start as a base and build off of: https://www.amazon.com/gp/product/B00C0PED88/ref=oh_aui_detailpage_o01_s00?ie=UTF8&psc=1

It is much flimsier in person and a bit large for me head but it has good bones overall. I have a soccer ball in it as a place holder until I get a foam head in there. the mask is connected to the side wings so it is all one piece. But due to the large size, the mask hangs a little too far down on my face and doesn't sit neatly on my nose. I am thinking about cutting the mask off and adding an elastic band to it so I can wear it separately to get the right fit. In doing so, I will have to reinforce the side wings with foam so they are sturdy and don't flop around every time I move my head. The third pic below shows the interior and the one stabilizing piece of foam it came with. I plan on reinforcing the top of the helmet with more foam so it will hold its shape better. I also plan on spraying the whole thing with Plasti Dip and then finishing it off with a couple coats of Plasti Dip Bright Aluminum Metalizer.

2.JPG 3.JPG 4.JPG

I'm debating between using craft foam to make the shoulder, forearm, hand. and shin guards/spikes or getting some soccer shin guards/shoulder pads with craft foam spikes glued on. As for the sash and wrappings around the forearm and lower legs, I'm deciding between making it all with brown duct tape and using velcro to secure them or using brown athletic tape (which would require a new application each time I use this costume). If I have time before Halloween or the next con, I want to get a black SecondSkin mask and draw on white eyes with a white Sharpie to get the shadowy look.

I'll continue to update this thread as I stumble my way through this! Any tips or suggestions would be greatly appreciated!

PS. How do I rotate images that I post? The helmet pics need to be rotated 90 degrees clockwise...
 
Last edited:
Update: Shirt and pants ordered from Amazon.

6.jpg 5.jpg

I'm a bit leery about the shirt until I see it in person. Concerned about the neck opening being too big. If it is, I'll end up returning it and getting a fitted or compression sleeveless tank top.
 
Update: Made a paper template of the forearm and shin guards. I traced them on 3mm thick craft foam and cut them out. Now waiting on my heat gun to arrive to shape them. Then I'll make the spikes from 5mm craft foam to ensure they are sturdy.

7.JPG 8.JPG

I've made some headway on the helmet as I've changed directions and added support to the crown via foam fillers with super glue and rubber cement. I'll also be using cheesecloth dipped in liquid latex to reinforce the sides and bottom of the helmet so it isn't so flimsy.
 
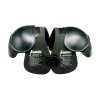
Update: Cut out the 4 longer blades for the hands and the 30(!) smaller blades for the shoulders, forearms, and shins from 5mm craft foam. Tedious but necessary work. I bought a costume youth shoulder pads from Amazon for $10 that I super glued the spikes on.
9.JPG 10.JPG11.jpg

I also started the process of reinforcing the helmet with cheesecloth soaked in liquid latex. Man, that ammonium smell is strong! It was a bit messy to work with but I was able to slop it on to the crown of the helmet. We'll see how it looks after its had some time to dry. I don't know if I will stick with this method to add support to the wings of the helmet or I'll revert back to super gluing foam inserts for those areas.

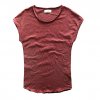
The shirt and pants came in and while the latter is perfect, my reservations about the former were confirmed. The neck opening is way too big. I'll be returning it and getting a regular maroon tank top instead.
 
Last edited:
Update: 3 coats of Plasti Dip on the shoulder pads followed by 2 coats of Plasti Dip Bright Aluminum Metalizer. I'm a fan of how they turned out. These will be attached to the shirt via velcro.

12.JPG 13.JPG

I ended up pulling all the cheesecloth soaked in liquid latex off as it still hadn't dried... It was a big sticky mess while they were in there but easily removed. I replaced them with more foam padding to firm up the helmet and provide a better fit. I have a couple more areas in the helmet I want to reinforce and then after that, it's off to Plasti Dip land.

I also cut off the mask that was attached to the helmet. I plan on using it still but with elastic bands attached to make the mask hug my face/jaw better. It was pretty droopy when it was still connected to the helmet. It will also go through the Plasti Dip routine.

The heat gun I ordered came in but I didn't get a chance to play around with it yet. Once I do, I'll start shaping the forearm and shin guards.
 
Update: Finished reinforcing the interior of the latex helmet with various strips of soft foam padding. Not sure how this will affect long-term wear in regards to temperature but at least the helmet isn't floppy anymore. Next up will be Plasti Dip spraying of the inside and outside along with the metalizer that I used on the shoulder pads.

14.JPG 15.JPG

I fired up the heat gun and added some curves to the forearm, hand, and shin guards. I'm letting them sit overnight to make sure the new shape holds before I glue on the spikes. The heat gun was a relatively inexpensive but well-reviewed model on Amazon.

16.JPG 17.JPG
 
The heatgun is a 'must' when working with foam.I was a little hesitant to use it at first because of the high temperatures,but now that I am used to it,I love using it.
 
The heatgun is a 'must' when working with foam.I was a little hesitant to use it at first because of the high temperatures,but now that I am used to it,I love using it.

I don't know what I was expecting but the pieces held their shape when I woke this morning. I now know why everyone raves about heat guns. I too was hesitant at first but now I wish I had adopted it for my earlier projects. They probably would have turned out better!
 
For the brown arm and leg wraps, I'm currently debating on a number of options. I found a seller on Etsy that can make them out of cotton pretty easily and for a reasonable price. Or I can make them out of brown duct tape like I am with the sash. A third option is to use craft foam and paint it brown while also drawing in lines to make it look like it is wrapped. I'm leaning towards the first choice. Will update.
 
Last edited:
Update: Finished 3 coats of Plastidip and 2 coats of Plastidip Metallizer on the helmet. I like the final color but thought it would cover up how messy it looks on the inside with the extra foam padding I glued on. I'm mostly disappointed with how the front/inside wings look with the foam sticking out so I'll need to clean that up somehow (see pic of the helmet from the front).

18.JPG 19.JPG 20.JPG

I also finished Plastidipping the hand guards with spikes. They held their shape very well through the process. I had some trouble finding the proper adhesive to glue the velcro strap to the inside of it as super glue and hot glue just wasn't cutting it. I think I picked up the wrong type of velcro (non sticky back, is advertised as velcro you can wrap up cords with). Luckily I had some E6000 glue left over from a previous project and that did the trick. I'm contemplating whether to add some metallic foam/tape to the velcro or to leave them black as is.

21.JPG

Next is to Plastidip/Metalize the forearm and shin guards. I'm waiting on the glue to set for the spikes before I do. I ended up ordering custom made forearm and leg wrarps from Etsy and I'll be getting those by Friday. The mask is also fully prepped and painted. Now it's a matter of attaching velcro so it sits well on my face. I ended up getting a t-shirt that matches my pants better than any of the tank tops I ordered. I'll cut the sleeves off and add velcro made for fabric to the shoulder region so I can attach the shoulder pads. Lastly, I made a sash out of multiple strips of brown duct tape. Once again, superglue and hot glue were not strong enough to bond the velcro to the duct tape but the E6000 is working. I need to add one last strip of velcro to it and the sash will be complete.
 
Last edited:
I love it. But I swear, every time I see this thread come back to the top of the forums, I think "Why on earth would anyone want to make a way to shred comic books?!?!". It's a short thought, it doesn't last long, but it's there. :p
 
I love it. But I swear, every time I see this thread come back to the top of the forums, I think "Why on earth would anyone want to make a way to shred comic books?!?!". It's a short thought, it doesn't last long, but it's there. :p

Now that you pointed it out, it's the only thing I can think of also. That will be my next project, a very specific comic book shredder. :)

Any thoughts on how to cover up the mess that is the inside-front of the helmet?
 
Update: I cut the sleeves off the t-shirt and applied the velcro with a sticky back made for fabrics to the shirt and the shoulder pads. Came out nice on the first try! There's some give to it so it doesn't restrict the range of motion of my arms at all. I'll just have to get used to walking through doorways at an angle as I've already bumped the spikes/shoulder pads.

22.JPG 23.JPG 24.jpg

I'm not entirely pleased with how the duct tape sash came out so I'm thinking about reaching out to the seller that made the forearm and shin wraps to see if she can make that as well. Stay tuned.
 
Last edited:
It is 3D printed. I rushed to get it done, mostly because I was tired of working on it and it kept falling off my "work bench" (aka the banister to my front porch) and breaking. It's modeled after the statue you posted above.
I really don't know anything about working with vinyl so I can't help you there. All I can suggest is keep trying stuff and see what works.
 
Update: Glued on velcro to the back of the shin guards with E6000. I might spray a layer of brown paint over the straps so they blend in better with the leg wraps. With the mask, I used what I cut off from the original vinyl helmet and experimented with different ideas to get it stabilized/comfortable on my face. I settled on gluing a breathable disposable mask with ear loops to maintain the form of the mask and then added velcro strips to hold the top securely against my face and also to the bottom so it doesn't flare out. Pretty comfortable from my test wearings, we'll see how it holds up at a con.

25.JPG 26.JPG 27.JPG

I just finished applying Plasti Dip Aluminum Metalizer to the forearm guards and will glue velcro on next. I received my forearm and shin wraps and they look great. Shin ones I had to send back for some alteration on the velcro and I'm also waiting on the sash to be delivered. I couldn't really find any pre-made shoes that resemble the wrapped nature of the source material. I tied a pair of my dark brown boots but they came up too high. I went in a different direction and ordered a pair of black water shoes with what looks like good cushioning and a strap-like design. If they don't work out, I'll probably end up getting some black kung-fu shoes. As for the helmet, I mocked up the inside with some grey felt but it would always catch on to the velcro of my mask. I also tried to physically velcro the inside of the wings to the side of the mask but was not able to hide the velcro well. Lining the inside of the helmet with tinfoil was too scratchy. I think I will just leave them as is for now. The more I look at it, the more unique and interesting it makes the helmet look. Or at least that's what I am telling myself.
 
Update: Etsy ordered forearm and leg wraps came in and they look/work great. Sash as well but I didn't take any individual pics of that. All the velcro straps on the various pieces have been painted silver to match. Overall, I'm very happy with how it all turned out. The black water shoes go well with the rest of the outfit. The test will be how they hold up over the course of an entire day's worth of convention walking. I'm finishing up with adding a little bit of tin foil to the front part of the side wings so that the stabilization foam I added isn't so obvious.

28.JPG 29.JPG 30.jpg 31.jpg
 
Here's some pics of the costume in action at a local con. Overall I'm happy with the way it turned out. My first modification will be to make a helmet from scratch and to add foam to the velcro so they stop catching on the sash and each other.

32.jpg 33.jpg 34.jpg
 
This thread is more than 6 years old.

Your message may be considered spam for the following reasons:

  1. This thread hasn't been active in some time. A new post in this thread might not contribute constructively to this discussion after so long.
If you wish to reply despite these issues, check the box below before replying.
Be aware that malicious compliance may result in more severe penalties.
Back
Top