MoeSizzlac
Active Member
I've been looking at the official cosplaysky threads of Captain America's suit (Civil War and Age of Ultron) and I wanted an updated suit for this year's Halloween with the kids.
2 warnings:
1) There isn't really much innovation from the original cosplaysky threads. Those guys led the way for what you see below.
2) My costume is nowhere near screen accurate but I like the finished product and it is far more comfortable than the base.
I love this community for how much it has taught me and I wanted to share what I did with people that will appreciate it. With that being said, let's do this.
Time to assemble a list of parts I needed for the build:
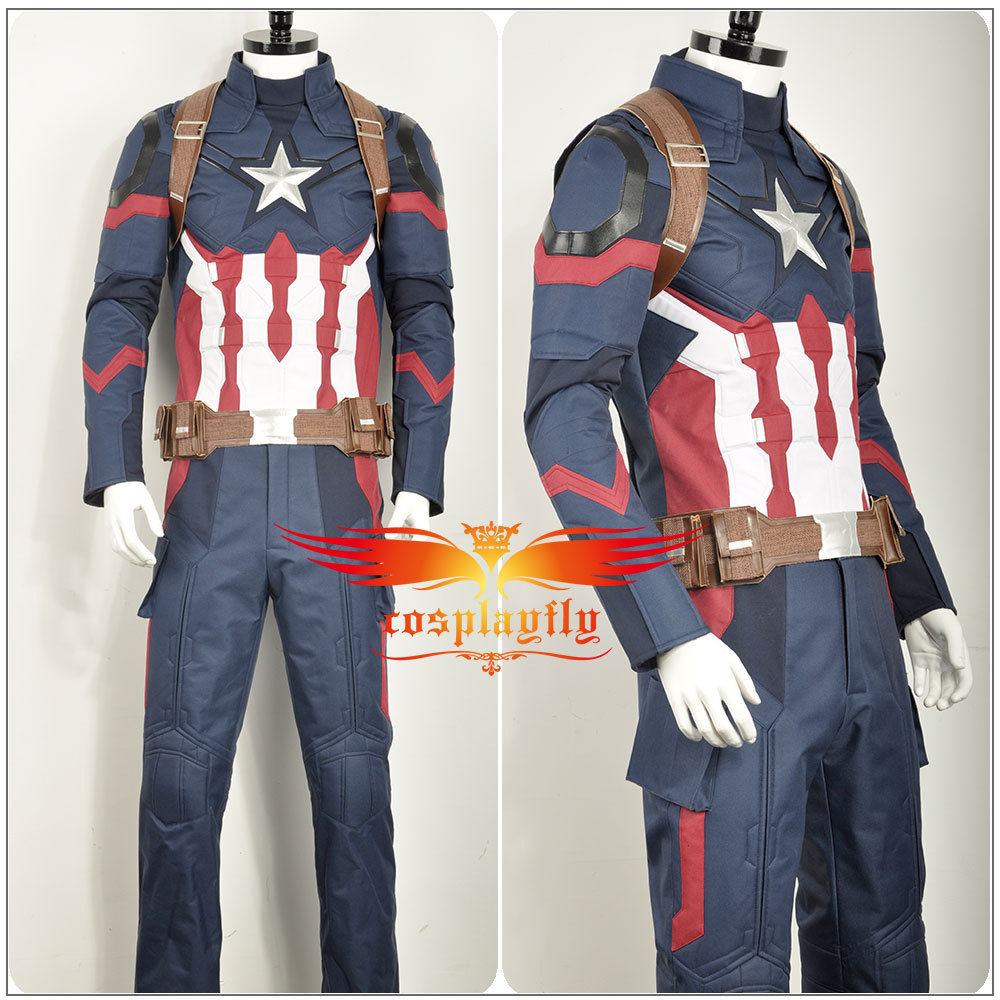
1) Cosplayfly makes a decent suit that can be modified.
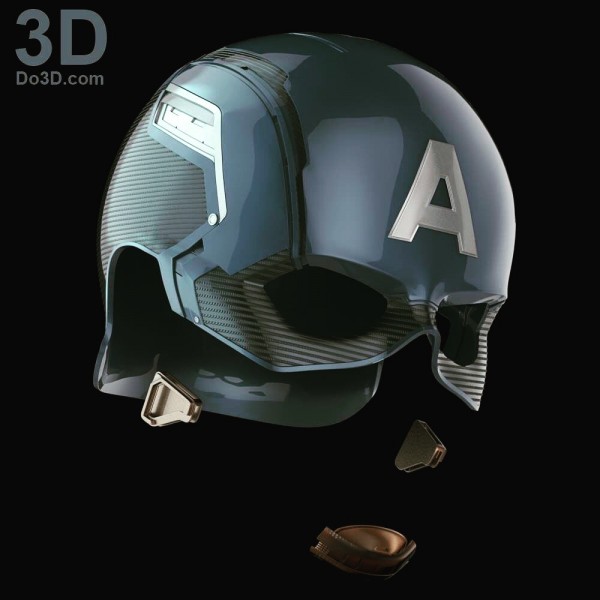
2) Captain America 3D Helmet File from DO3D (these guys do great modeling)
3) Belt and Spats from http://deltaleatherworks.com. (This is user Delta13's site.)
4) Super Magnets for the Shield
5) Leather Dye to make the belt and straps darker.
6) Pants that fit better and the cosplayfly ones do.
7) Shoe Goo for adhesive to the leather.
8) Brown Velcro
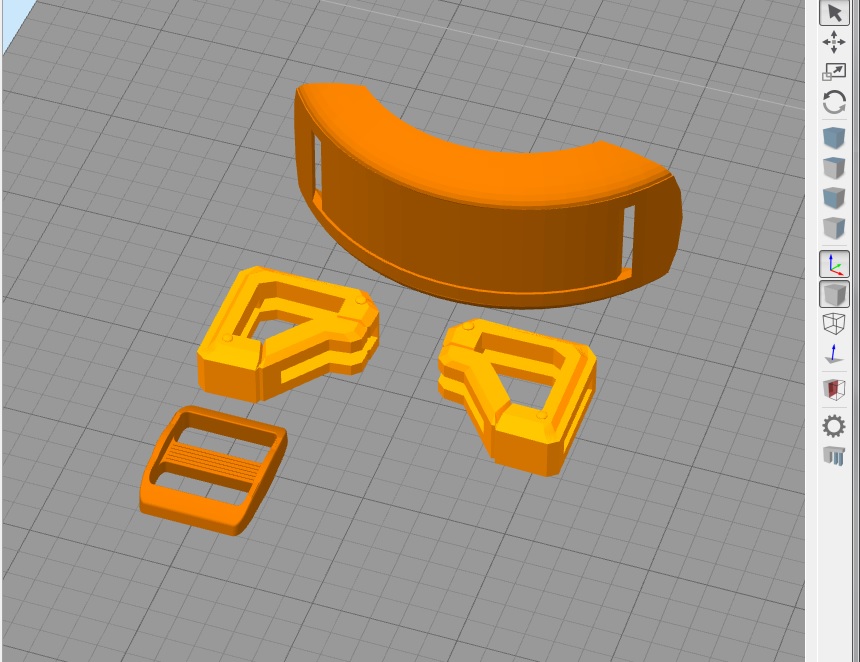
I started by printing the helmet with Blue ABS plastic:
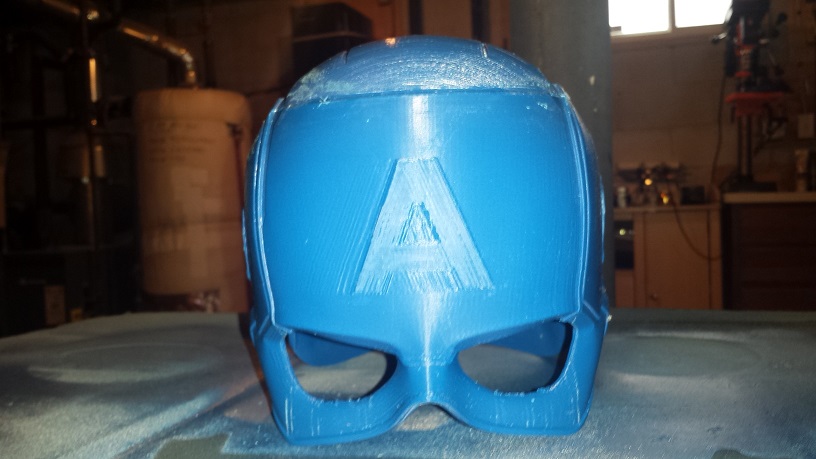
Glue it together using a combination of superglue and NCF Quick. This stuff makes it basically impossible to remove after you harden it up and if can be used to fill small gaps as well.
A little sanding and painting later

Add Aluminum for details and a soldering iron was used to create the divots along the accent panels below.
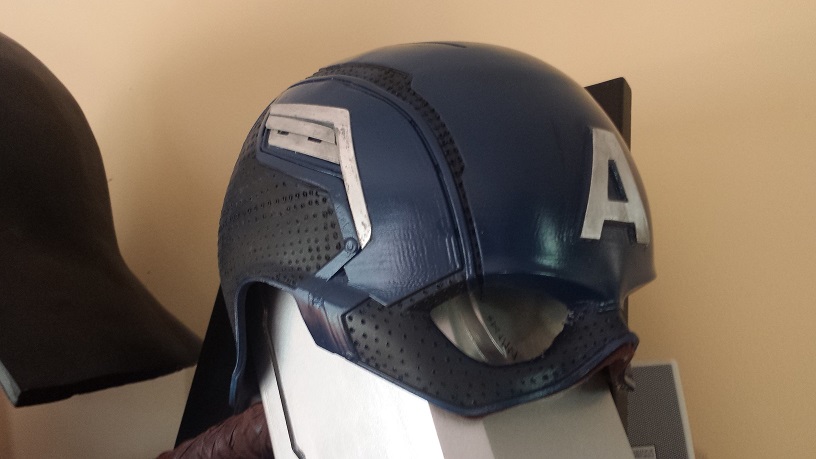
I 3D printed a chin strap and some other helmet kibble.
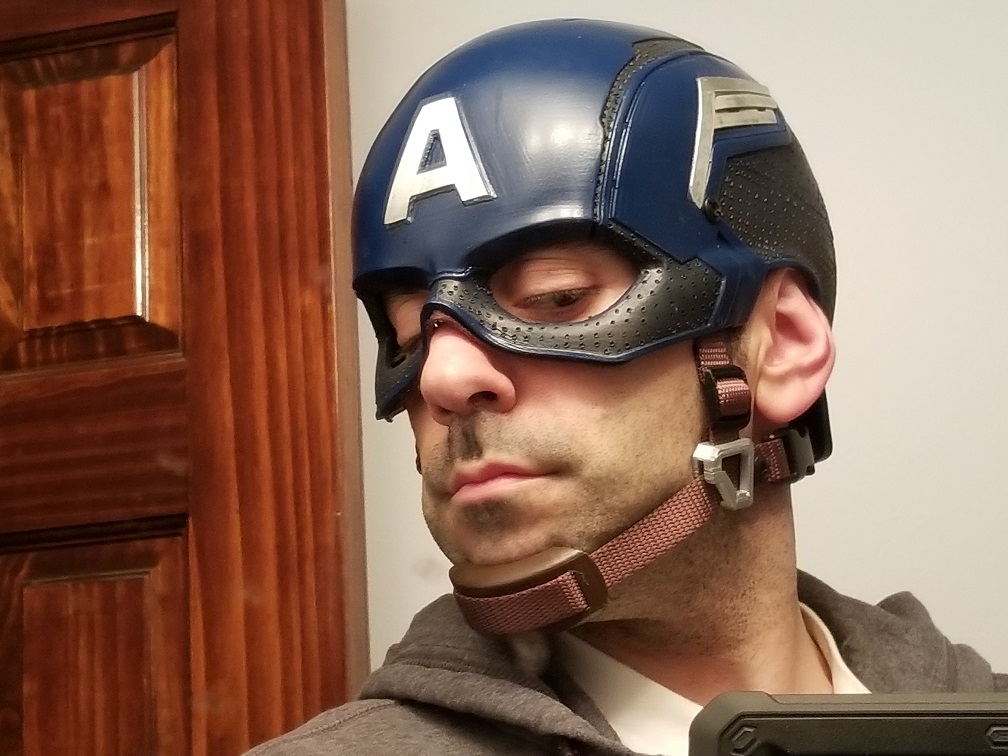
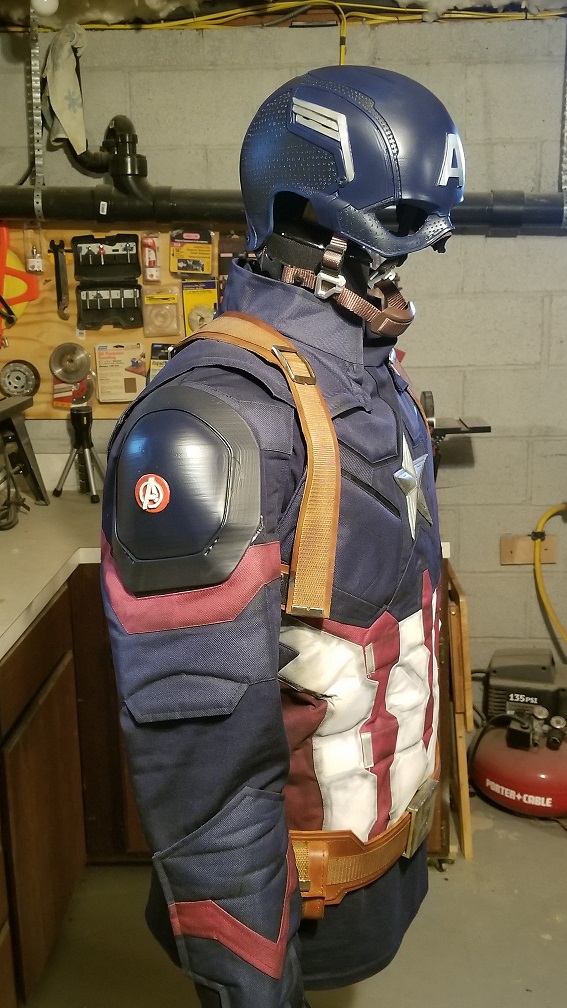
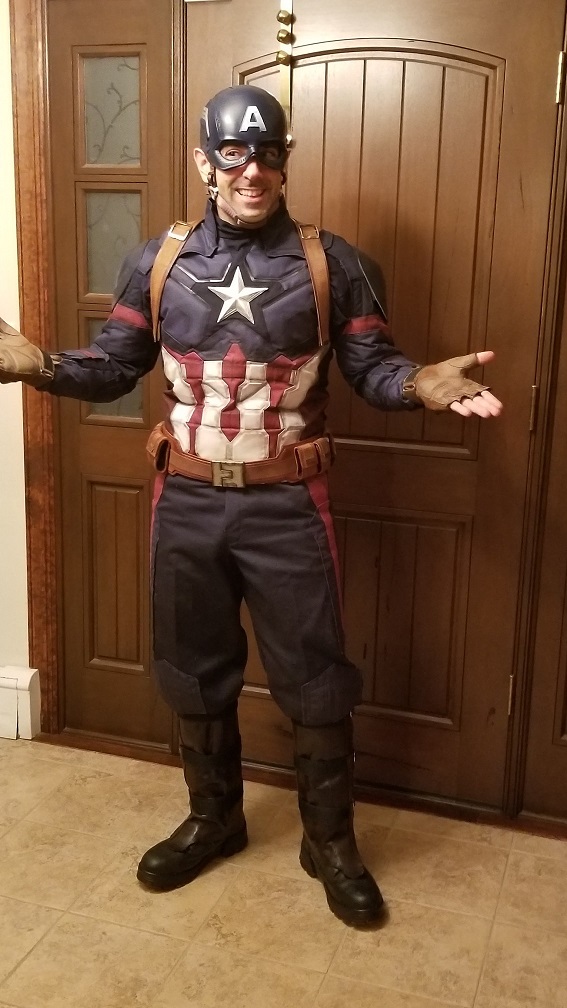
Below is the finished helmet
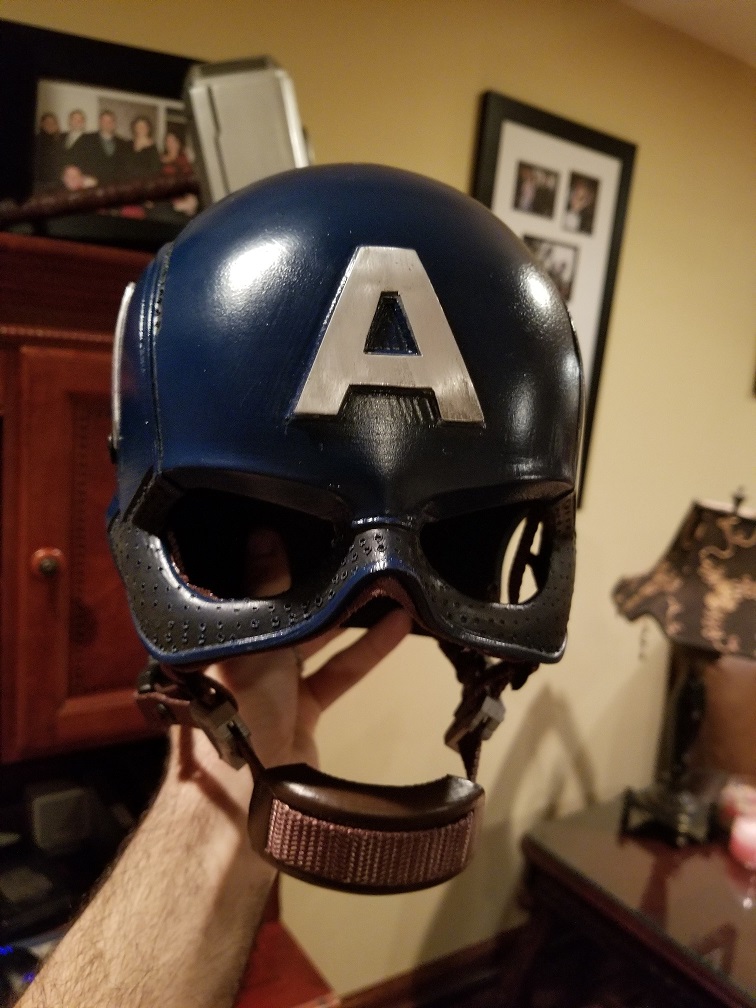
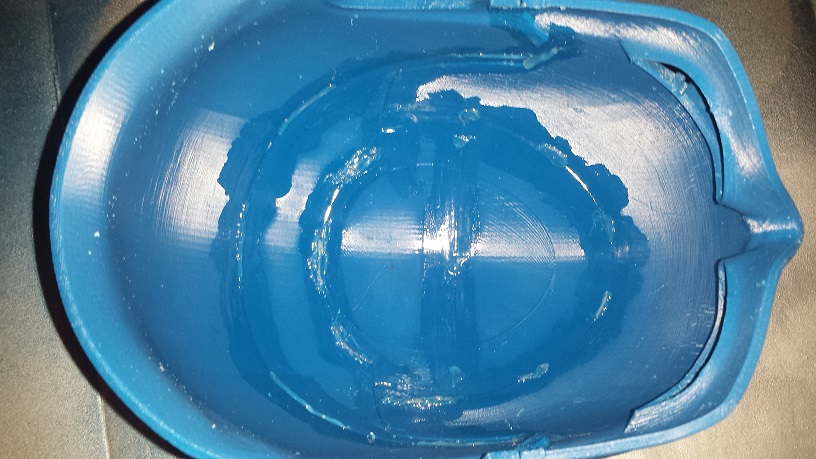
On the inside of the helmet I set up a piece of Velcro and a small terrycloth towel like what a goalie wears in hockey. Since I've been reading up on how much this outfit makes you sweat, I'm not taking any chances.
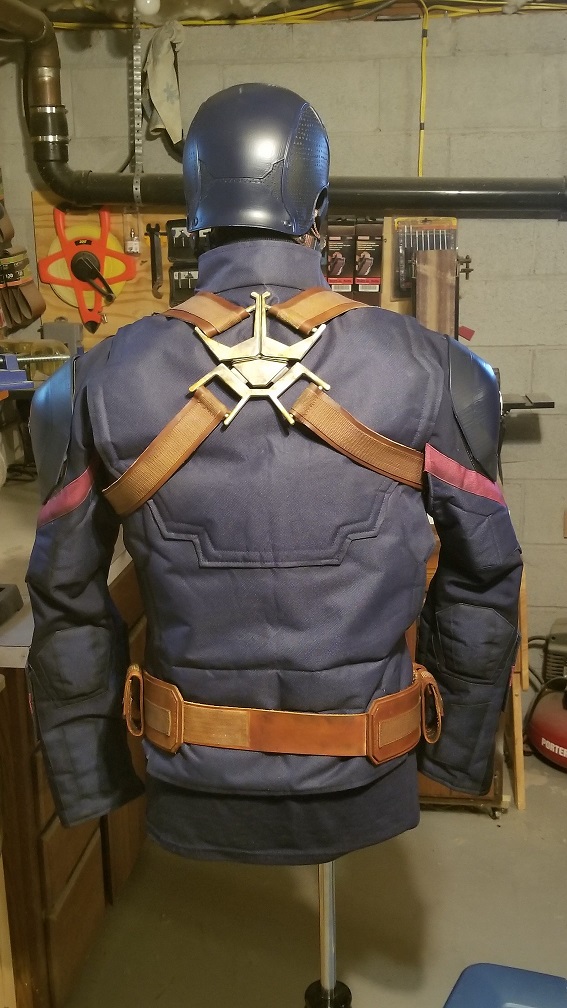
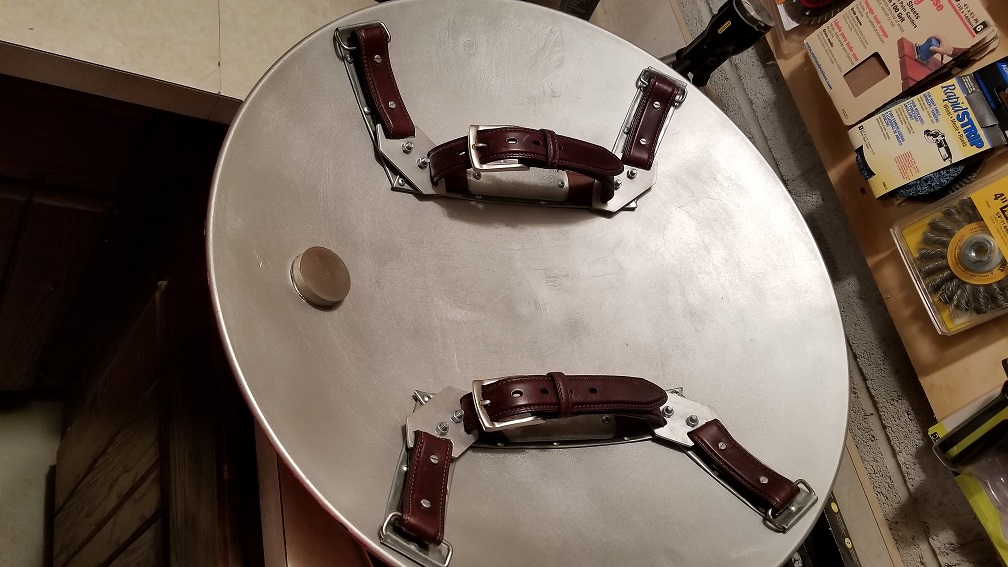
The back straps and belt went through a minor overhaul. I first started by dying the straps and belt darker. I didn't like how light they were. Using the leather dye and an air brush, I was able to control the darkness of the color I was putting on the belt.
Before Color:
After:
I also used it on the gloves I purchased to give it the same hue as the Belt and back Straps.
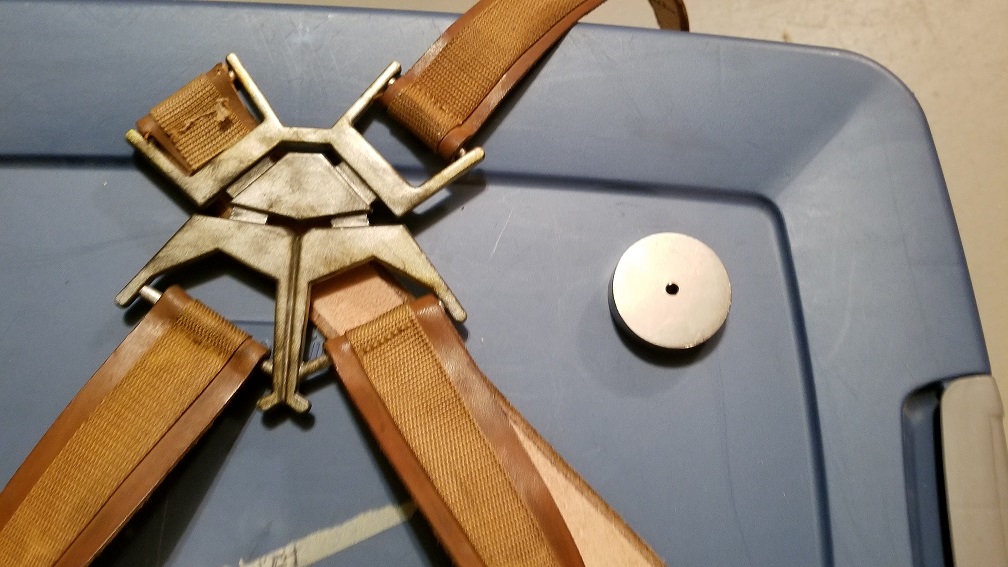
In addition to the darkening of the leather, I wanted a system to put the shield on and off my back easily. Using a super helpful video I found on YouTube which I believe was made by user Drakonnen of therpf.com, I bought 2 super strong magnets and attached one to the back of the metal holding the back straps together.
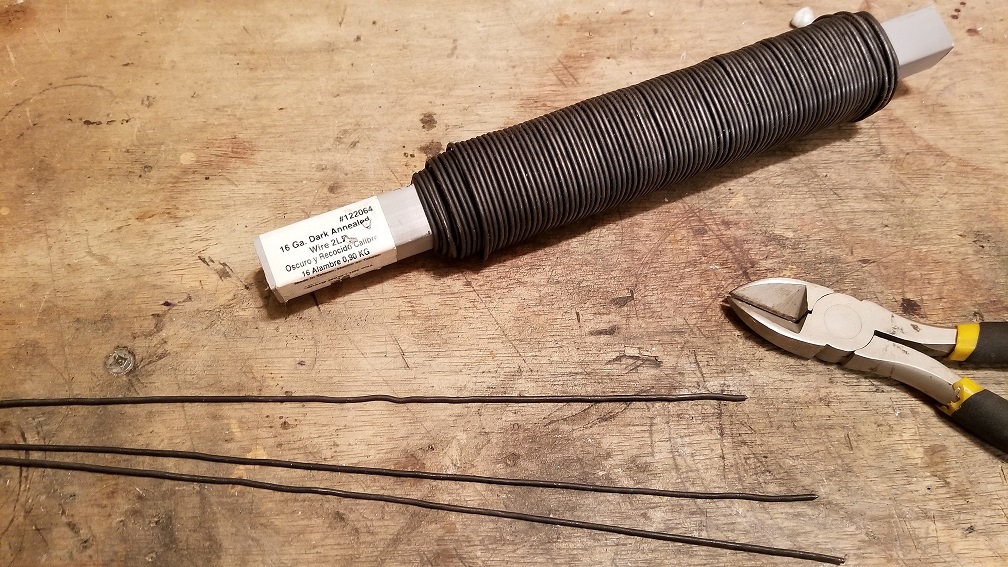
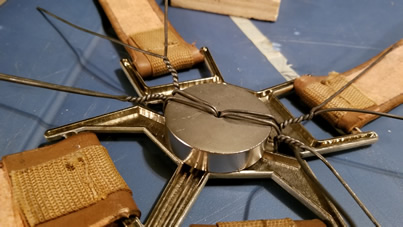
To attach, I used 16 gauge wires that I straightened,
I then fed it through the center of the back piece:
Here's something fun to do, try twisting steel wire around a super magnet using a steel pliers without the pliers getting yanked from your hand. I couldn't do it.
Here is a view from the front:
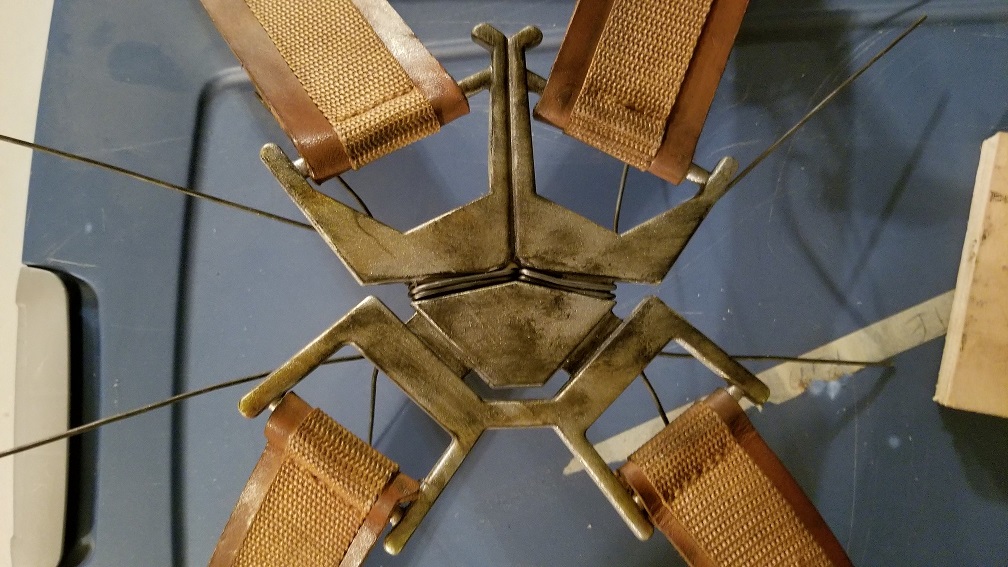
I used 4 pieces all together and twisted the remains.
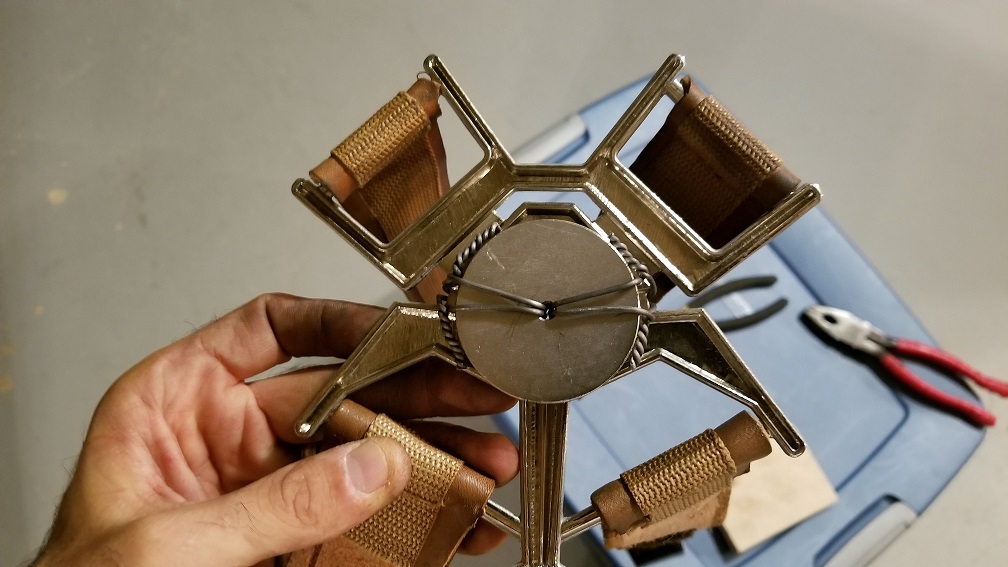
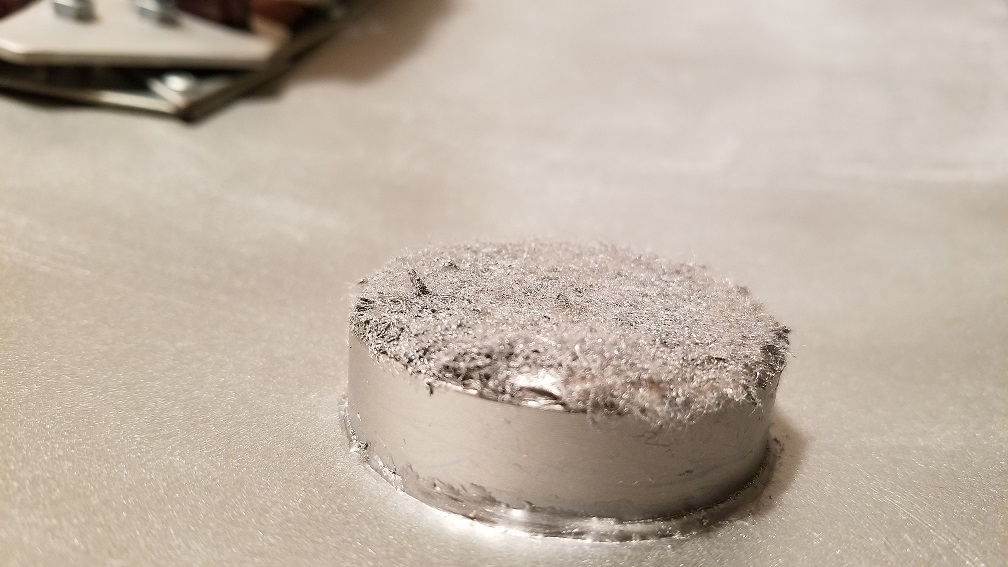
I attached another super magnet to my shield using an epoxy.
I also added a couple of layers of felt to the surface of the magnet to help the magnet slide off the back strap without damaging the paint. Learned that lesson the hard way.
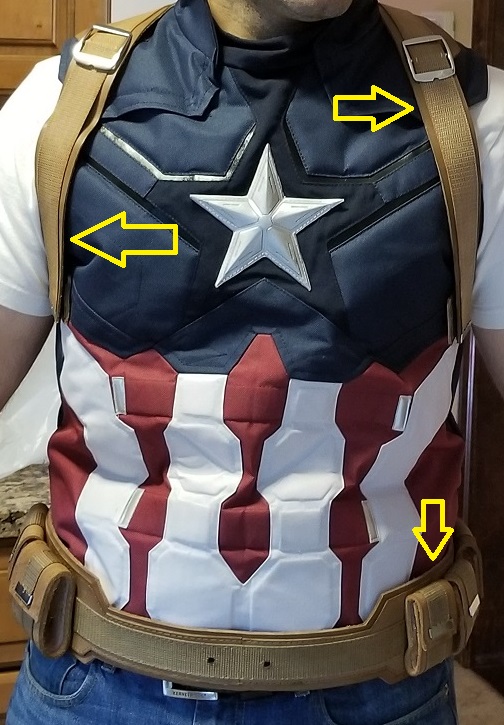
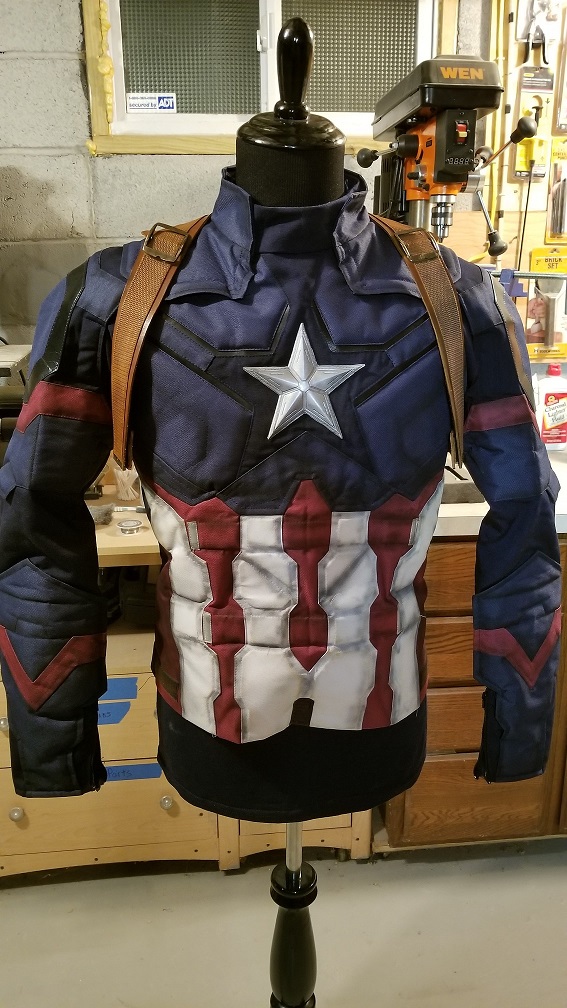
The top jacket looked awesome but needed a lot of reworking for my liking. After being rejected by 2 professional seamstresses, I took it upon myself to learn how to sew a little more out of my comfort zone. I basically did what others before me did to the Age of Ultron suit.
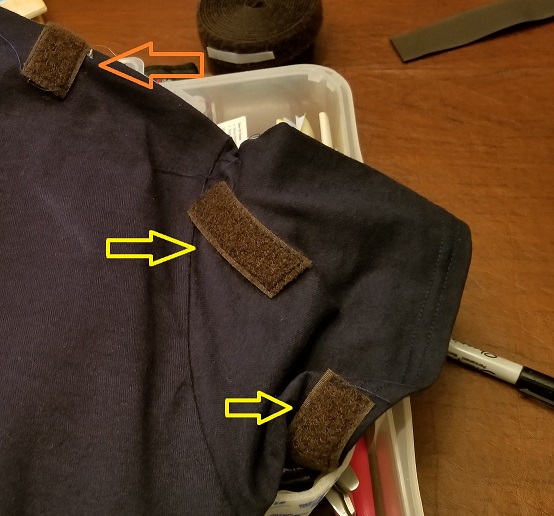
Lift my arms, the suit lifts up too. So, I cut the arms off and attached them to a navy blue t-shirt. The t-shirt is the new base of the outfit.
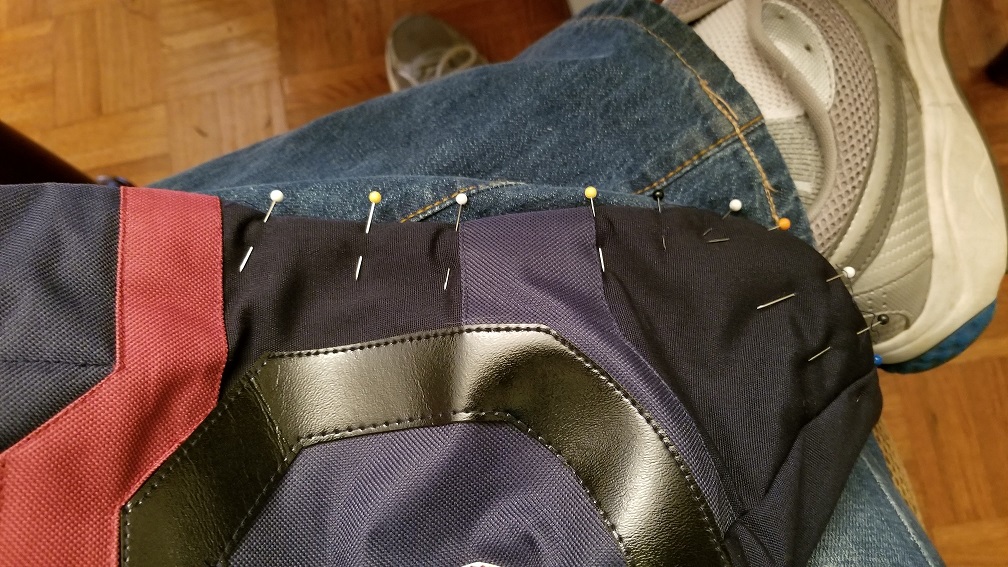
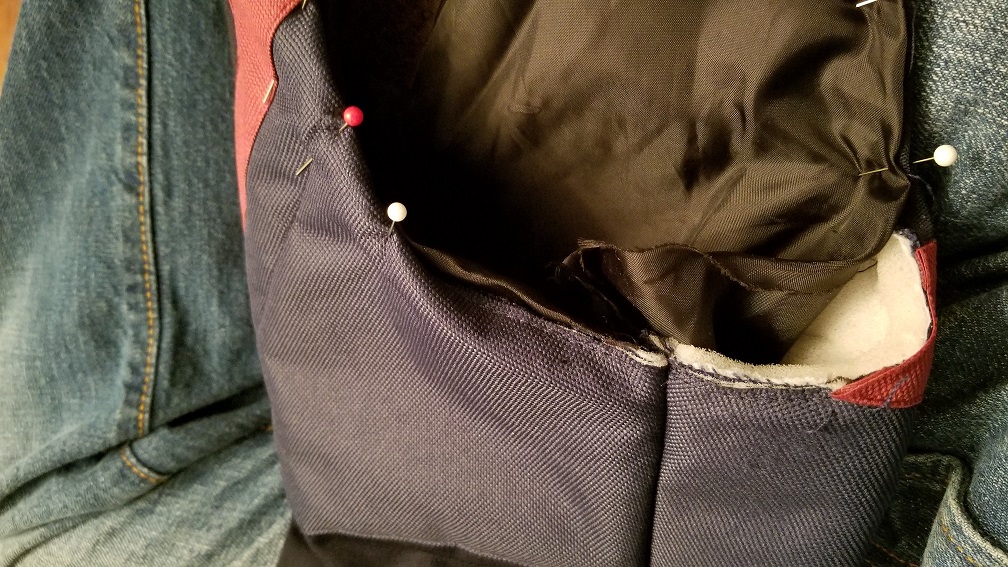
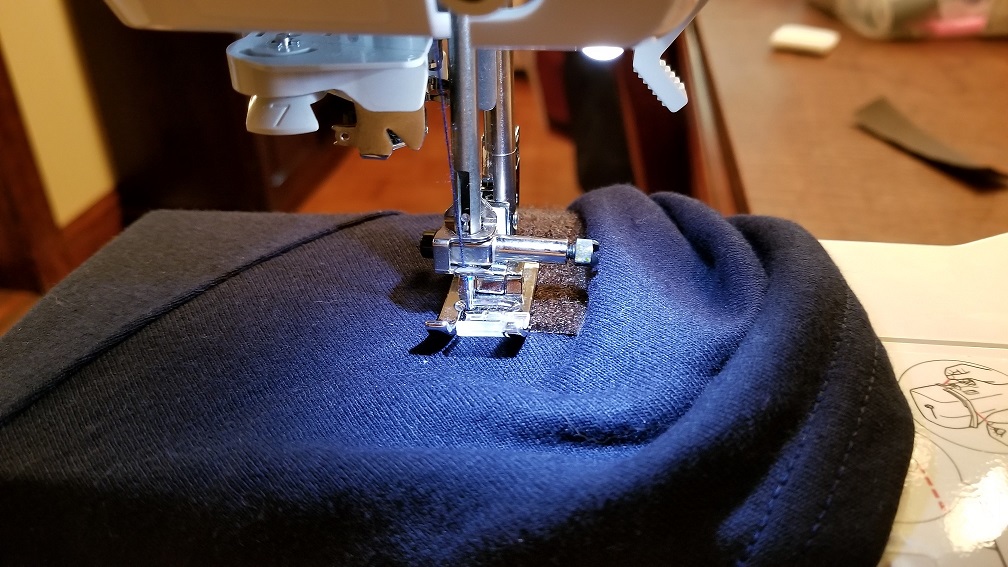
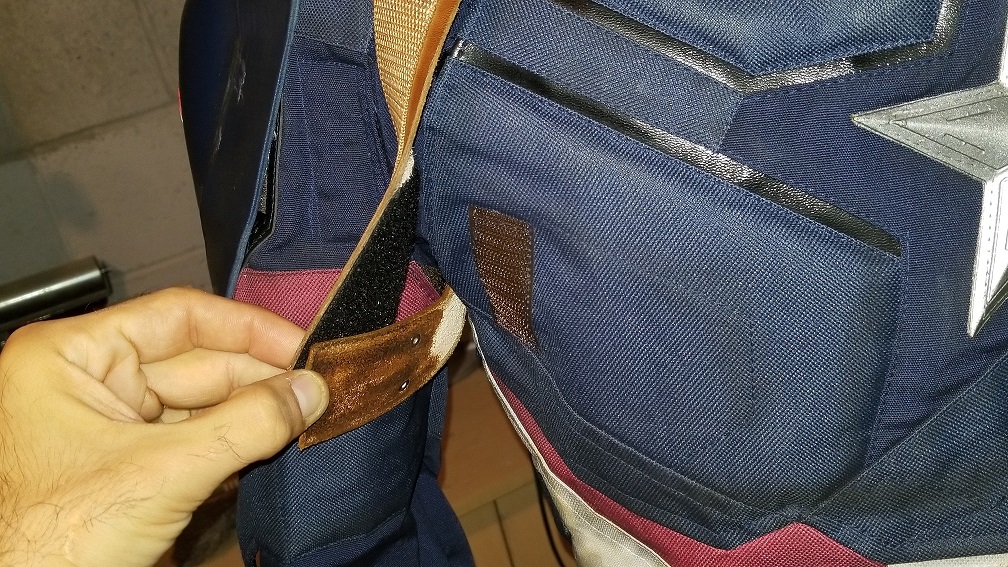
I attached Velcro to the loose jacket sleeves and the t-shirt so that I can easily attach/detach everything.

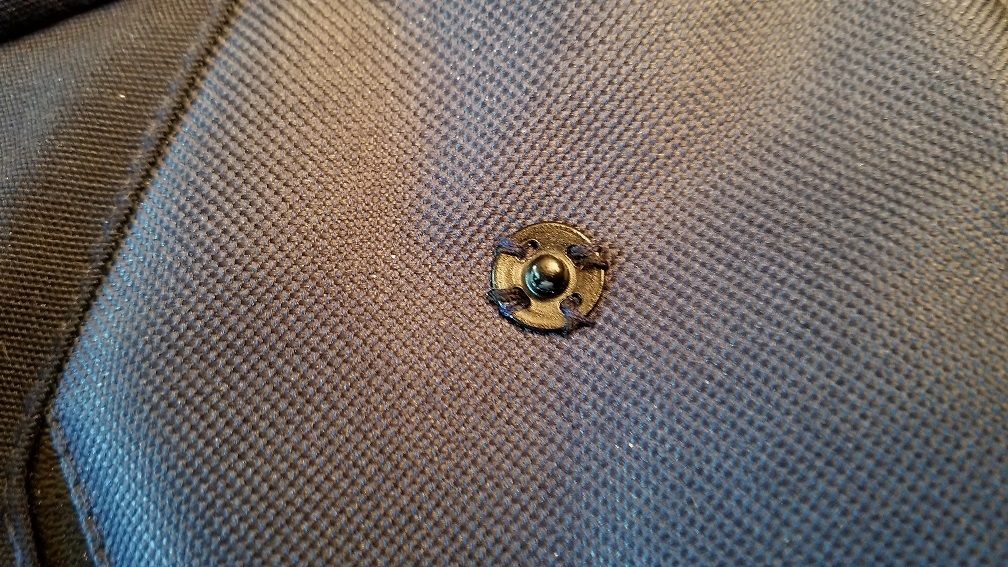
I reinforced and re-positioned most of the push buttons on the suit and also added Velcro to the suit to help hold everything together.
The shoulders also needed work. I did not like how they looked so I created shoulder bells with The Avengers symbol built in.
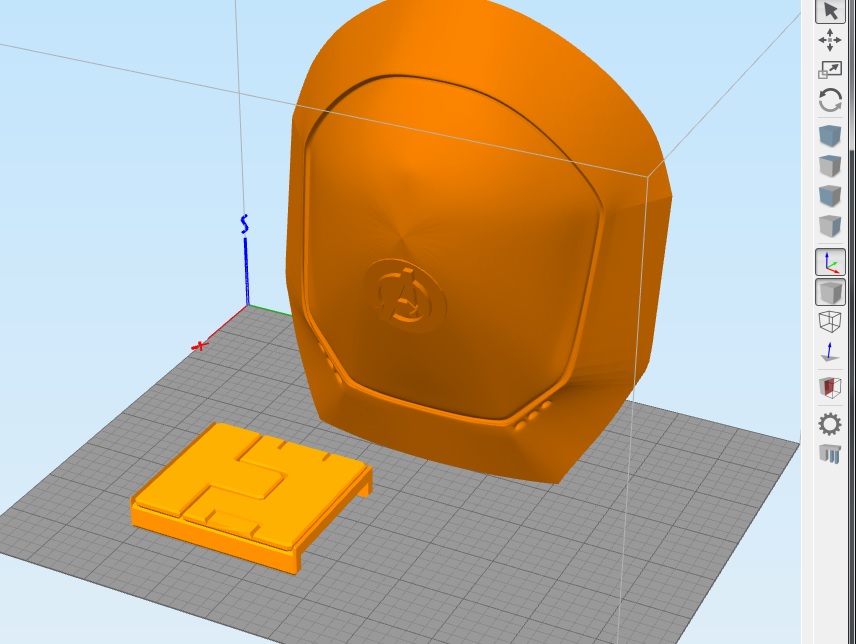
Sanded the 3D Print.
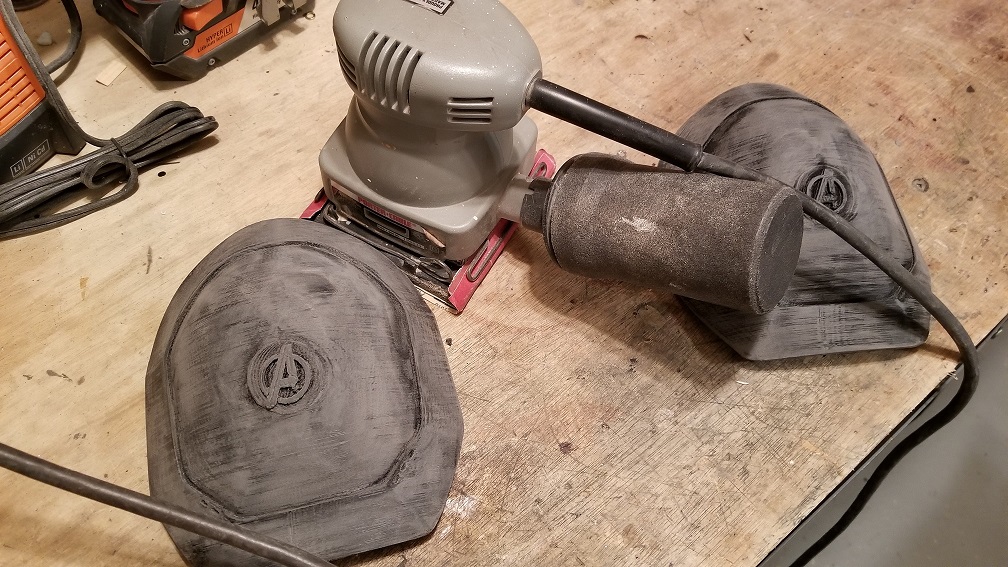
Gave it a coating of paint.
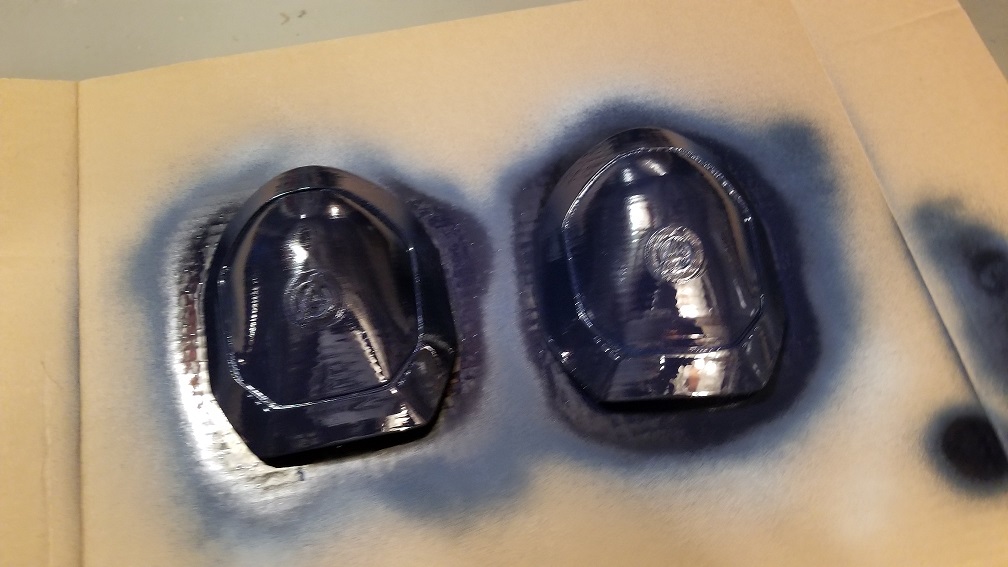
Airbrushed black along the sides and hand painted the "A" with acrylic. The whole thing then received a flat top coat to seal everything and take away any sheen.
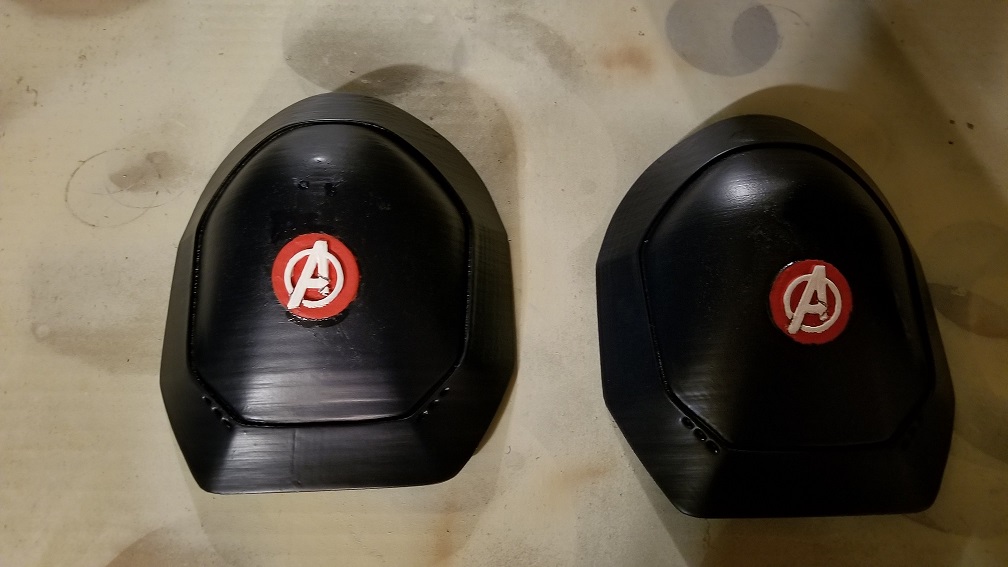
Attach with Velcro sewn into the shoulder and glued onto the bells and below is the result:
I weathered the midsection with airbrushing.
The pants:
Boy, were the original pants tough to wear. No breathability and mobility was also stunted.
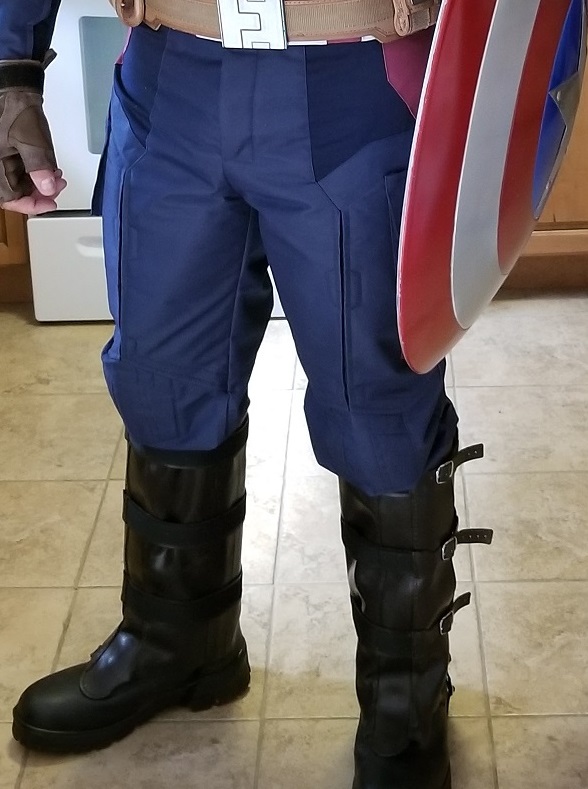
They look nice but I couldn't keep them the way they were even if I have to sacrifice the look. I bought a pair of comfortable relaxed fit pants and patched on parts of the cosplayfly's design.
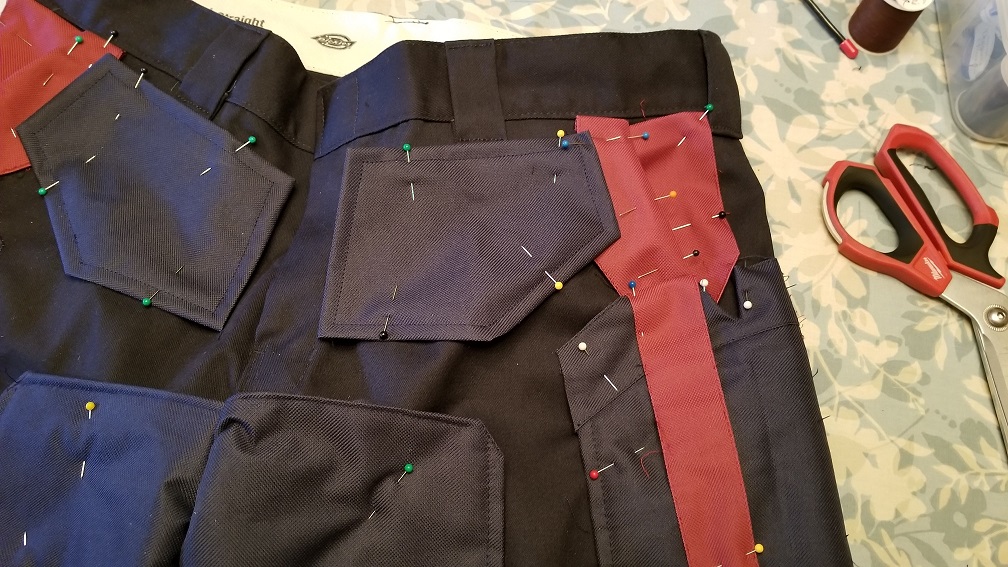
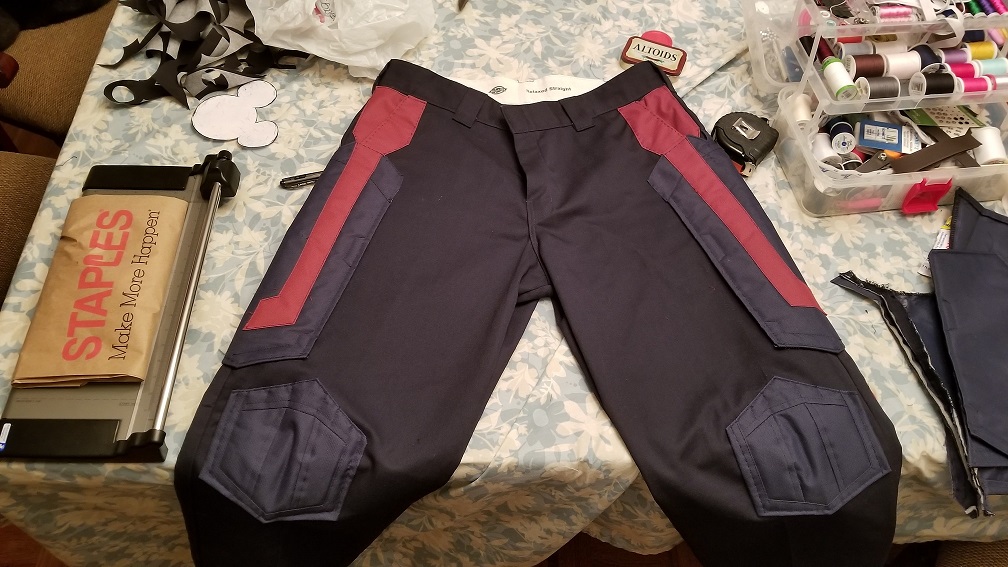
Most of it had to be hand sewn, which was not the fastest thing to do. I ended up keeping the patch work to a minimum on the pants based on popular household opinion.
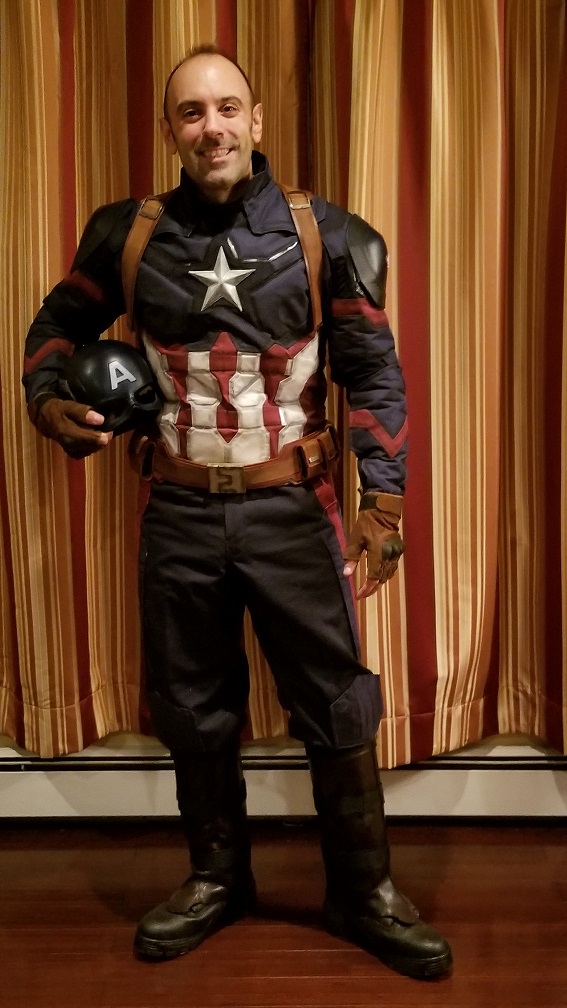
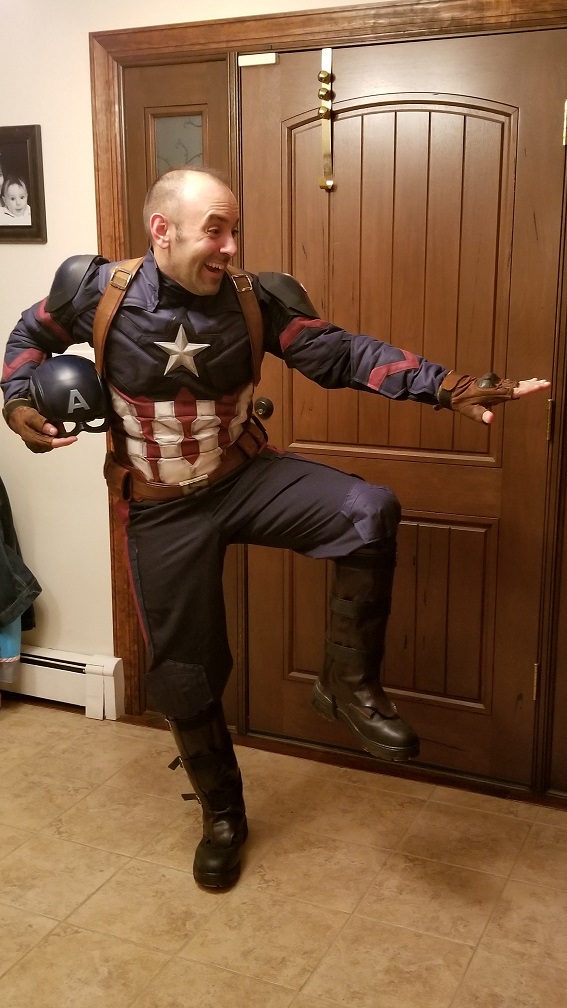
In the end, the outfit came out great and pretty comfy. Sure it is not screen accurate but I'm ready for Halloween 2017.
This is how the shield works.
[video]http://moesizzlac.com/assets/images/Camera%20Phone%20pics/Captain%20America%20Updated/Video/Untitled.webm[/video]
Thanks for looking.If you guys want any of the 3D files, I'll post what I can (obviously not DO3D's files).
Upon Mr. Spider's Request, I've updated the post to include the shoulder bells above.
2 warnings:
1) There isn't really much innovation from the original cosplaysky threads. Those guys led the way for what you see below.
2) My costume is nowhere near screen accurate but I like the finished product and it is far more comfortable than the base.
I love this community for how much it has taught me and I wanted to share what I did with people that will appreciate it. With that being said, let's do this.
Time to assemble a list of parts I needed for the build:
1) Cosplayfly makes a decent suit that can be modified.
2) Captain America 3D Helmet File from DO3D (these guys do great modeling)
3) Belt and Spats from http://deltaleatherworks.com. (This is user Delta13's site.)
4) Super Magnets for the Shield
5) Leather Dye to make the belt and straps darker.
6) Pants that fit better and the cosplayfly ones do.
7) Shoe Goo for adhesive to the leather.
8) Brown Velcro
I started by printing the helmet with Blue ABS plastic:
Glue it together using a combination of superglue and NCF Quick. This stuff makes it basically impossible to remove after you harden it up and if can be used to fill small gaps as well.
A little sanding and painting later
Add Aluminum for details and a soldering iron was used to create the divots along the accent panels below.
I 3D printed a chin strap and some other helmet kibble.
Below is the finished helmet
On the inside of the helmet I set up a piece of Velcro and a small terrycloth towel like what a goalie wears in hockey. Since I've been reading up on how much this outfit makes you sweat, I'm not taking any chances.
The back straps and belt went through a minor overhaul. I first started by dying the straps and belt darker. I didn't like how light they were. Using the leather dye and an air brush, I was able to control the darkness of the color I was putting on the belt.
Before Color:
After:
I also used it on the gloves I purchased to give it the same hue as the Belt and back Straps.
In addition to the darkening of the leather, I wanted a system to put the shield on and off my back easily. Using a super helpful video I found on YouTube which I believe was made by user Drakonnen of therpf.com, I bought 2 super strong magnets and attached one to the back of the metal holding the back straps together.
To attach, I used 16 gauge wires that I straightened,
I then fed it through the center of the back piece:
Here's something fun to do, try twisting steel wire around a super magnet using a steel pliers without the pliers getting yanked from your hand. I couldn't do it.
Here is a view from the front:
I used 4 pieces all together and twisted the remains.
I attached another super magnet to my shield using an epoxy.
I also added a couple of layers of felt to the surface of the magnet to help the magnet slide off the back strap without damaging the paint. Learned that lesson the hard way.
The top jacket looked awesome but needed a lot of reworking for my liking. After being rejected by 2 professional seamstresses, I took it upon myself to learn how to sew a little more out of my comfort zone. I basically did what others before me did to the Age of Ultron suit.
Lift my arms, the suit lifts up too. So, I cut the arms off and attached them to a navy blue t-shirt. The t-shirt is the new base of the outfit.
I attached Velcro to the loose jacket sleeves and the t-shirt so that I can easily attach/detach everything.
I reinforced and re-positioned most of the push buttons on the suit and also added Velcro to the suit to help hold everything together.
The shoulders also needed work. I did not like how they looked so I created shoulder bells with The Avengers symbol built in.
Sanded the 3D Print.
Gave it a coating of paint.
Airbrushed black along the sides and hand painted the "A" with acrylic. The whole thing then received a flat top coat to seal everything and take away any sheen.
Attach with Velcro sewn into the shoulder and glued onto the bells and below is the result:
I weathered the midsection with airbrushing.
The pants:
Boy, were the original pants tough to wear. No breathability and mobility was also stunted.
They look nice but I couldn't keep them the way they were even if I have to sacrifice the look. I bought a pair of comfortable relaxed fit pants and patched on parts of the cosplayfly's design.
Most of it had to be hand sewn, which was not the fastest thing to do. I ended up keeping the patch work to a minimum on the pants based on popular household opinion.
In the end, the outfit came out great and pretty comfy. Sure it is not screen accurate but I'm ready for Halloween 2017.
This is how the shield works.
[video]http://moesizzlac.com/assets/images/Camera%20Phone%20pics/Captain%20America%20Updated/Video/Untitled.webm[/video]
Thanks for looking.If you guys want any of the 3D files, I'll post what I can (obviously not DO3D's files).
Upon Mr. Spider's Request, I've updated the post to include the shoulder bells above.
Last edited: