Animatronic Terminator T-800 Endo Skull / Bust Scratch Build

Any update on this? Would love to see how a 3d printed terminator comes out.

Hey trymypatience! I've been inundated with work lately but planning to jump back on this project here very soon :) In the meanwhile I've been gathering misc electronics and other bits/bobs for the "animatronic" stage.
 
Last edited by a moderator:
Sorry for being late on the ball! :D I have been out of the RPF loop for a while but now I'm back!
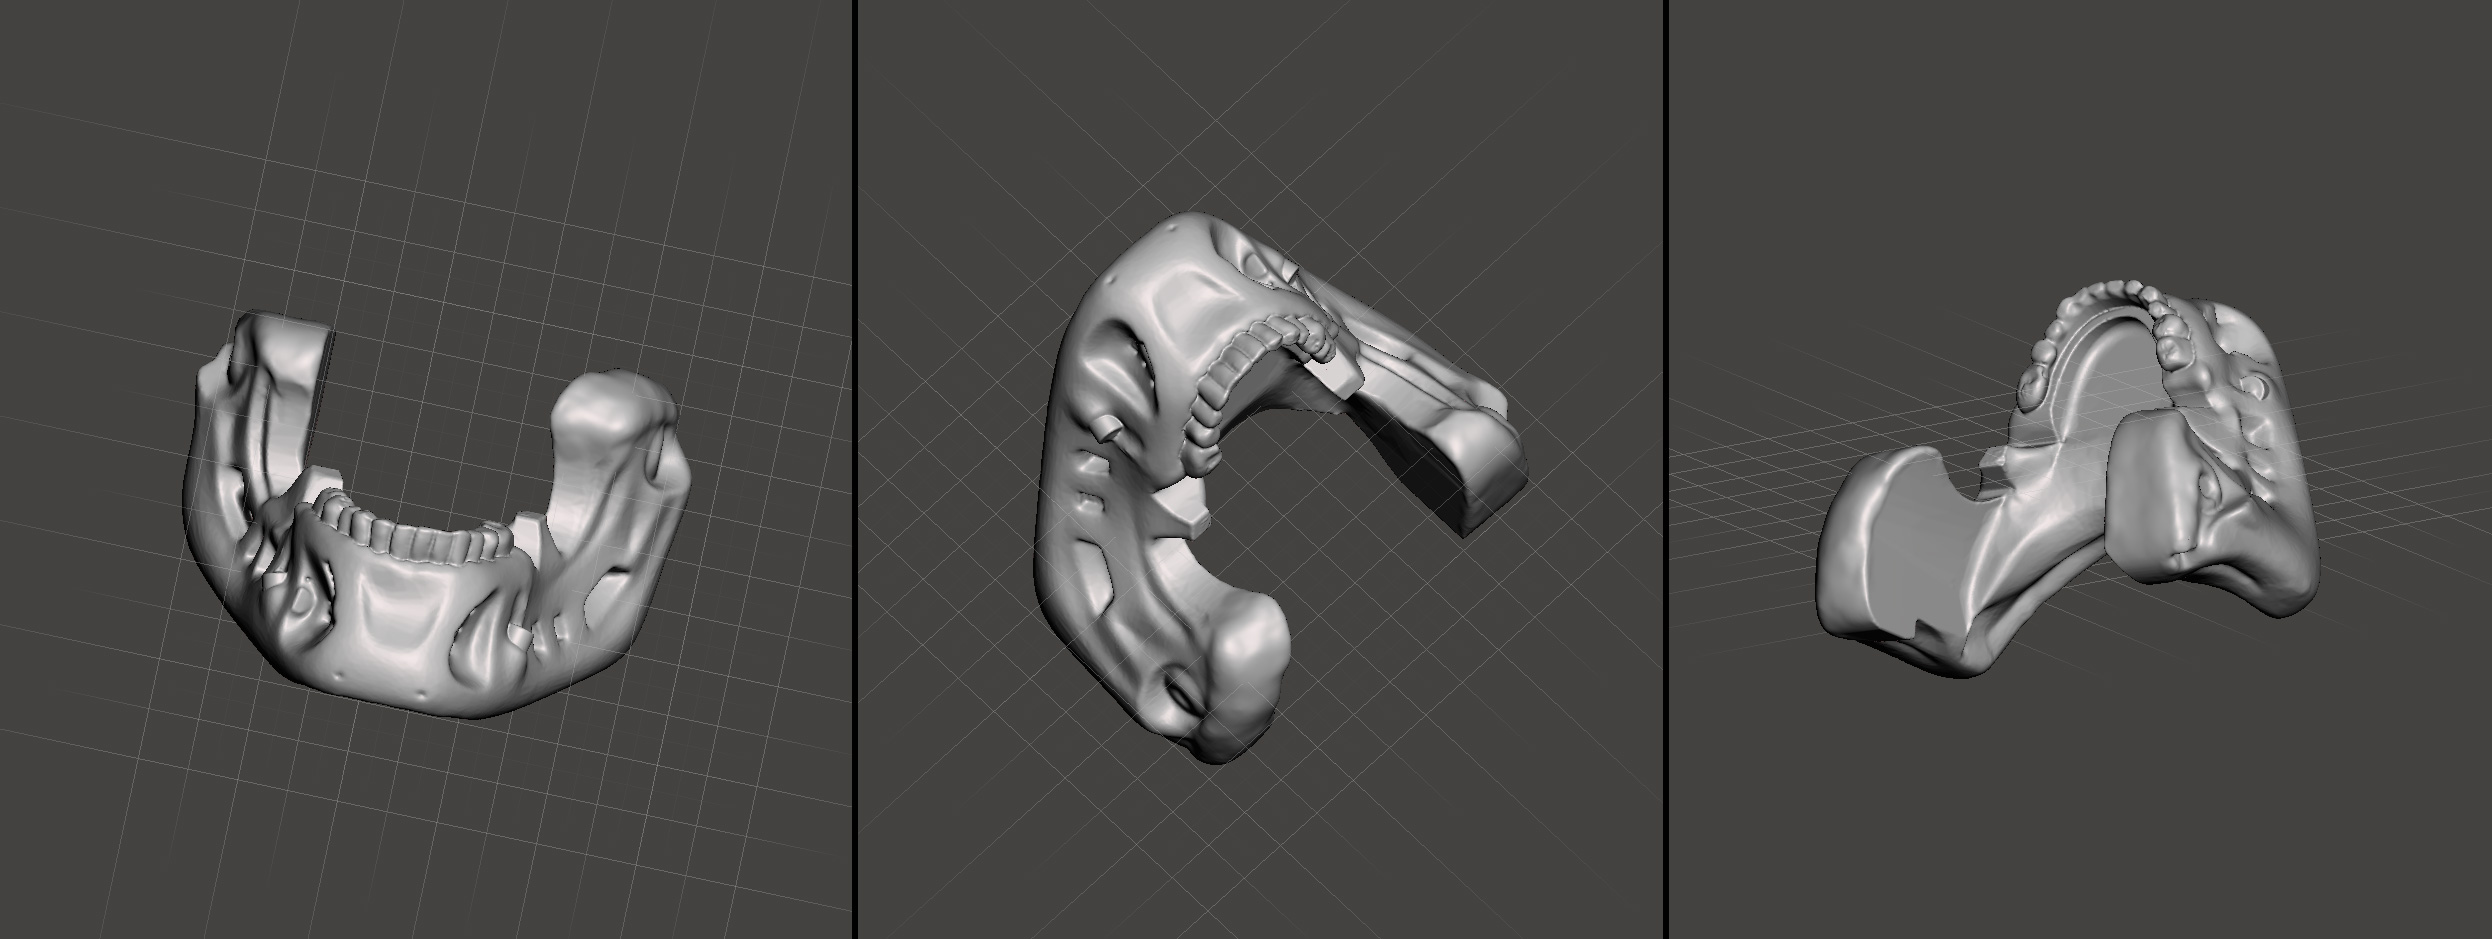
I think it looks like a pretty good scan, but I would probably try to optimize it a bit and make it more symmetrical, while sharpening those details.
Just a tip, as I have modeled one in clay from scratch. Do all the changes you possibly can in the 3D version before printing. digital modeling in 3D is a lot easier and faster process!
 
Doing some late night 3D work and managed to isolate the lower jaw from the scan (so I can articulate the jaw)... It's obviously not perfect...will need to drill out holes and add linkages etc. I anticipate a lot of post work and fixing/filling the final print with clay/plaster/bondo.

shareahack-t800-3d-model-terminator_09.jpg


Hoping a attempt a small scale 3D print tomorrow (maybe 1/5th) of the full skull just for a test :)
 
The first test print came out reasonably well at about 20% scale:

shareahack-t800-3d-model-terminator_10.jpg


However after thinking about it, I think I'm going to take chanfan's advice and work on the top part of the skull more. I want to make it as close to finalized as possible before printing. Hollowing out the skull and manually cutting all the pieces out from the solid skull model does not sound fun.

Here's the game plan:

1. Hollow out the skull as much as possible and make it a "shell" so I can put stuff inside
2. Remove the neural net processor port hole/door
3. Remove the eyes and model them separately
4. Completely remove the left/right side greeblies and print those separately
5. Add hinge points for the lower jaw to connect to the skull
6. Come up with a way for all the pieces to "click" into place like a puzzle.

Not quite sure If I'm going to remove the teeth yet. I'll probably also make a separate model of the teeth (for molding with resin later) but keep them on the 3D model because they'll be easy to remove as plastic if needed.
cavx I will also isolate the jaw pistons into their own model to print separately (I'll just use them as a scale reference to recreate in metal later). Hopefully you can use the model to print your own :)

Also removed the "M1 Copy" telltale holes from the cheek, thanks DeltaDesignRus!
 
Last edited by a moderator:
Setting 3D printers to print Terminators to make animatronic : Do you want Robot Apocalypse?! Because this is how you get Robot Apocalypse! :lol

Looking dope! Following with interest
 
Thanks drewthecostumer, I'm taking it a step further adding some Cyberdyne branding to the 3D printer :lol

I made an edge-lit sign that will serve as the back wall panel for the printer (in anticipation of the full size T-800 print when I get around to it).

Special thanks to cavx for the idea.

Decided to throw together a quick video of the build, feel free to download the logo files from the description:

shareahack-acrylic-cyberdyne-sign_video-thumbnail.jpg

https://www.youtube.com/watch?v=RaYVROHrPpI

shareahack-acrylic-cyberdyne-sign_photo-01.jpg

shareahack-acrylic-cyberdyne-sign_photo-01.jpg


shareahack-acrylic-cyberdyne-sign_photo-02.jpg
 
Last edited by a moderator:
1. Hollow out the skull as much as possible and make it a "shell" so I can put stuff inside
2. Remove the neural net processor port hole/door
3. Remove the eyes and model them separately
4. Completely remove the left/right side greeblies and print those separately
5. Add hinge points for the lower jaw to connect to the skull
6. Come up with a way for all the pieces to "click" into place like a puzzle.

Finally got around to making the above edits to the scanned 3D model. The final 3D models parted out:
shareahack-animatronic-terminator-T800-3d-model_001.jpg


Printing just this half of the skull took about 32 hours at 0.2mm layers to capture as much detail as possible (using translucent "natural" PLA):
shareahack-animatronic-terminator-T800-3d-model_002.jpg


The final parts of the skull, over 75 hours of printing....:wacko (My DIY printer is old and slow).
shareahack-animatronic-terminator-T800-3d-model_003.jpg


Test-fitting the assembled printed parts and stuck a couple LEDs in there for fun :)
shareahack-animatronic-terminator-T800-3d-model_004.jpg


Still lots of Bondo and sanding work to smooth it out and hit all the fine details.
shareahack-animatronic-terminator-T800-3d-model_006.jpg


I can't wait to install the servos :D
shareahack-animatronic-terminator-T800-3d-model_005.jpg
 
Printing just this half of the skull took about 32 hours at 0.2mm layers to capture as much detail as possible (using translucent "natural" PLA):

Still lots of Bondo and sanding work to smooth it out and hit all the fine details.

Looks cool! Any reason you didn't use ABS and try solvent smoothing?
 
Looks cool! Any reason you didn't use ABS and try solvent smoothing?

Thanks McFlyte! I actually attempted the first print with ABS and it failed miserably :lol My printer's extruder just doesn't seem to handle it well, especially for large prints. The temps need to be really high for it to go down right. The PLA prints much more reliably. The final prints aren't perfect but I fully anticipated I'll have to spend some time cleaning up with filler primer and bondo. Hopefully the prints will serve as a good base.
 
Last edited by a moderator:
This thread is more than 5 years old.

Your message may be considered spam for the following reasons:

  1. This thread hasn't been active in some time. A new post in this thread might not contribute constructively to this discussion after so long.
If you wish to reply despite these issues, check the box below before replying.
Be aware that malicious compliance may result in more severe penalties.
Back
Top