Re: Full Sized T-Rex Dinosaur Skull - advice on coating/finishing/painting rigid foam
Thanks all for the feedback! It's been a little bit harder working outside as the weather got cooler but I've made a bit of progress since the last post and have since moved the project indoors.
You could always coat it with cassini's plaster, or any P.I.P for that matter, that way you could cut out the pva glue stage altogether. It's made for outdoor sculptures and its pretty damn cheap. Also whilst its kicking you can add the little details like the stan cast has, i.e pits and whatnot. Just a thought! Keep going, its pretty amazing already and the teeth supports is a genius idea! Well done!
Thanks Jess for the great idea to use plaster! I think I'm going to attempt a combination of plaster + cheap clay over the foam on certain areas before applying the resin/fiberglass. I'm hoping the plastered areas dry with cracks (I may try to induce the cracks somehow) to better simulate the look of fragmented bone.
Here's a few more progress photos of the lower jaw and beginnings of the mounting system. I decided to keep the mounts super simple and easy to disassemble for transporting around.
I hot-glued some temporary wooden braces/supports to the lower jaw to maintain rigidity while building the mounts. For now, the base is just a piece of MDF with 4 castor wheels on the base. The skull will appear to 'float' over the much smaller base.
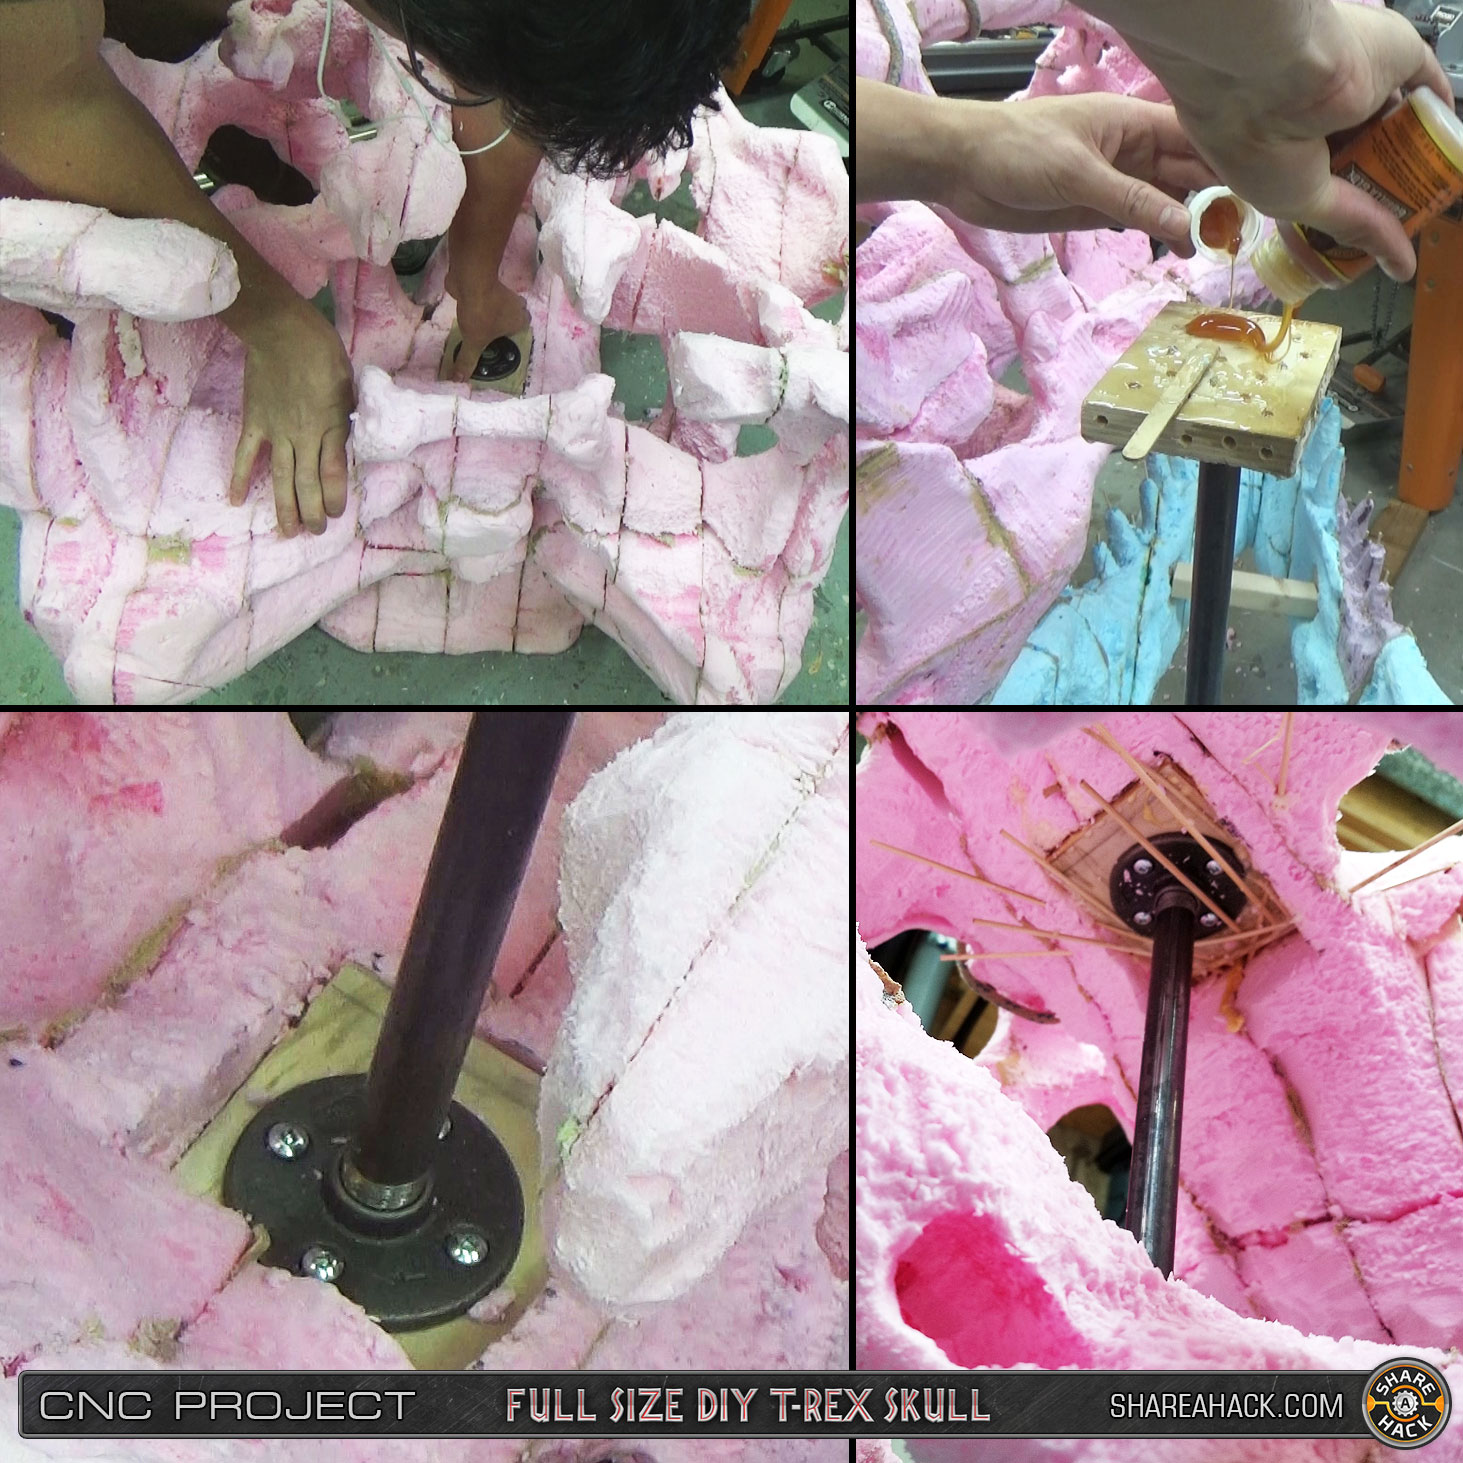
Here I cut out a small cavity in the top of skull and epoxied in a piece of plywood with a cast iron flange screwed on to it. I slathered epoxy and polyurethane glue so that the glue would puff up and expand into he foam cavities. Once In place I jammed a bunch of the bamboo BBQ skewers in and around the wood to reinforce and spread the tension over a wider area. I then added more poly glue to firm everything up. A 1/2" black iron plumbing pipe will do most of the work holding up the skull. This main connection point will be reinforced later with fiberglass mat and resin.
I hoisted the top part of the skull up with a rope to more easily balance it in position over the base:
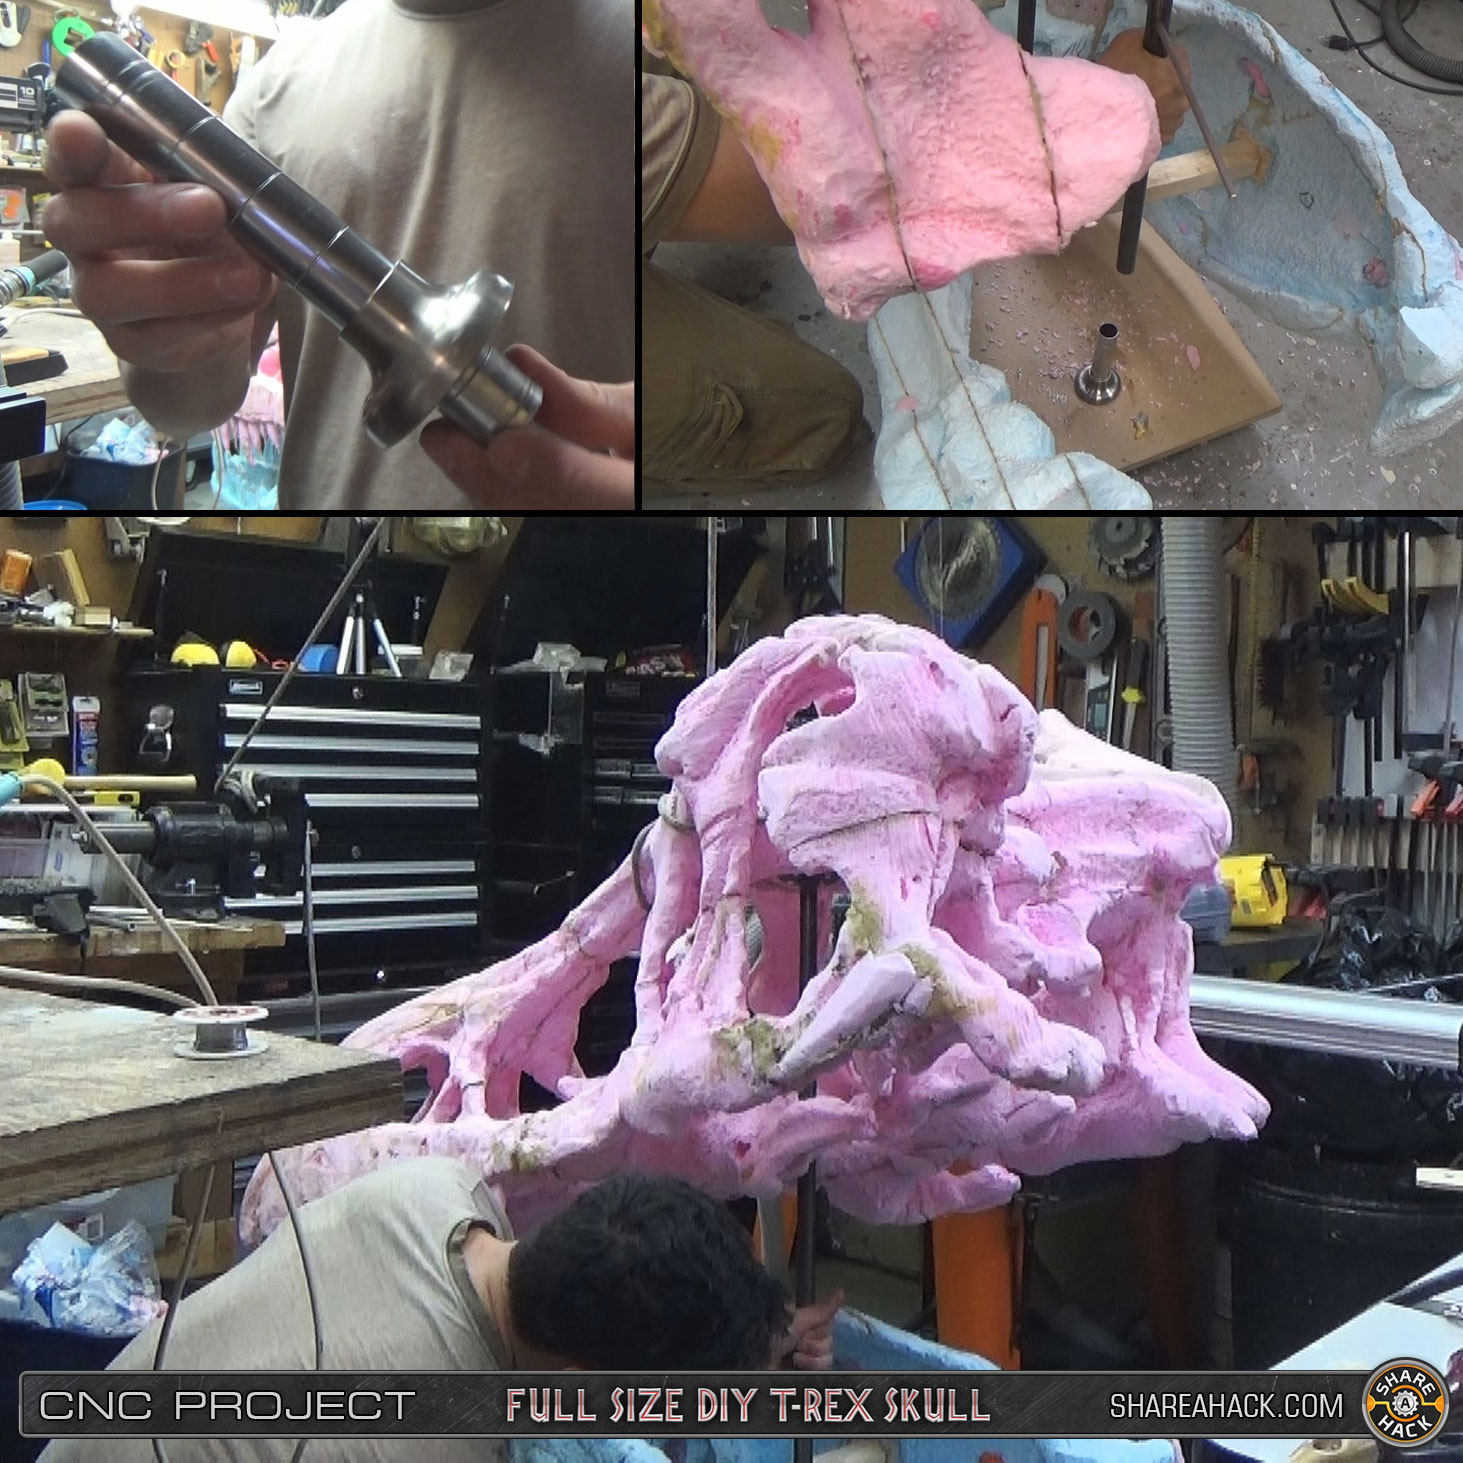
I used another scrap piece of pipe and a decorative flange/cover thing I found to act as the base's pipe holder that mates with the iron pipe:
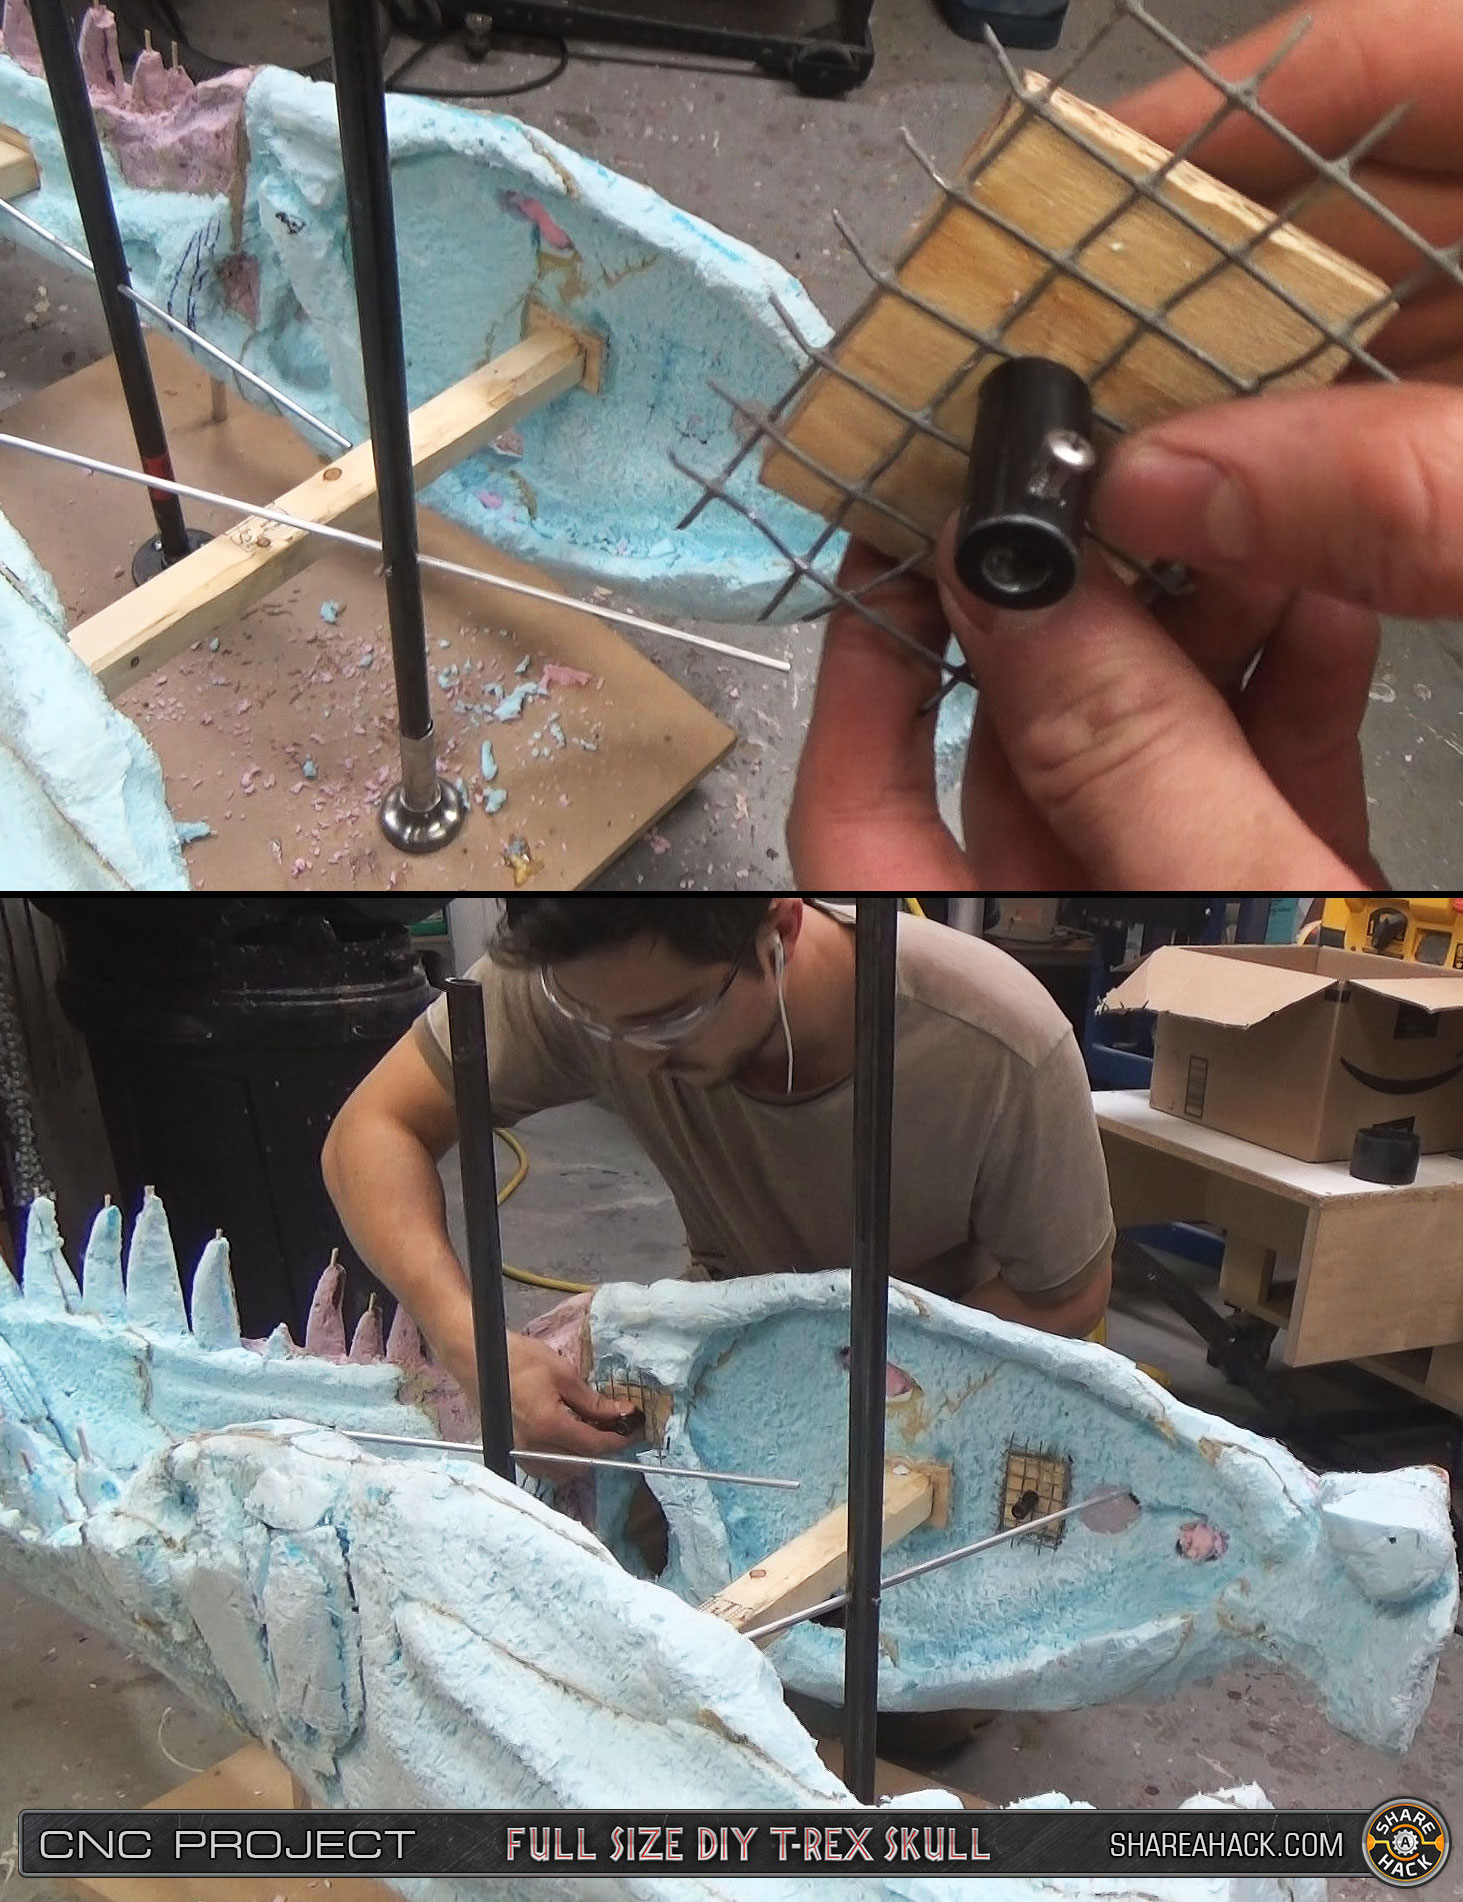
To hold up the lower jaw, I machined these little side-mounted connectors that are fastened to the sides of the jaw in 4 places. I mounted them on plywood so they have a firm base to hang on to instead of just the foam. Later on these connection points will also be reinforced with resin/fiberglass. The chicken wire was just an afterthought and I figured it might help with grabbing on to the fiberglass/foam.
Smaller steel dowels run through the pipes that will connect to t he side mounts. The mounts have set screws tapped into them to hang on to the dowels when in place.
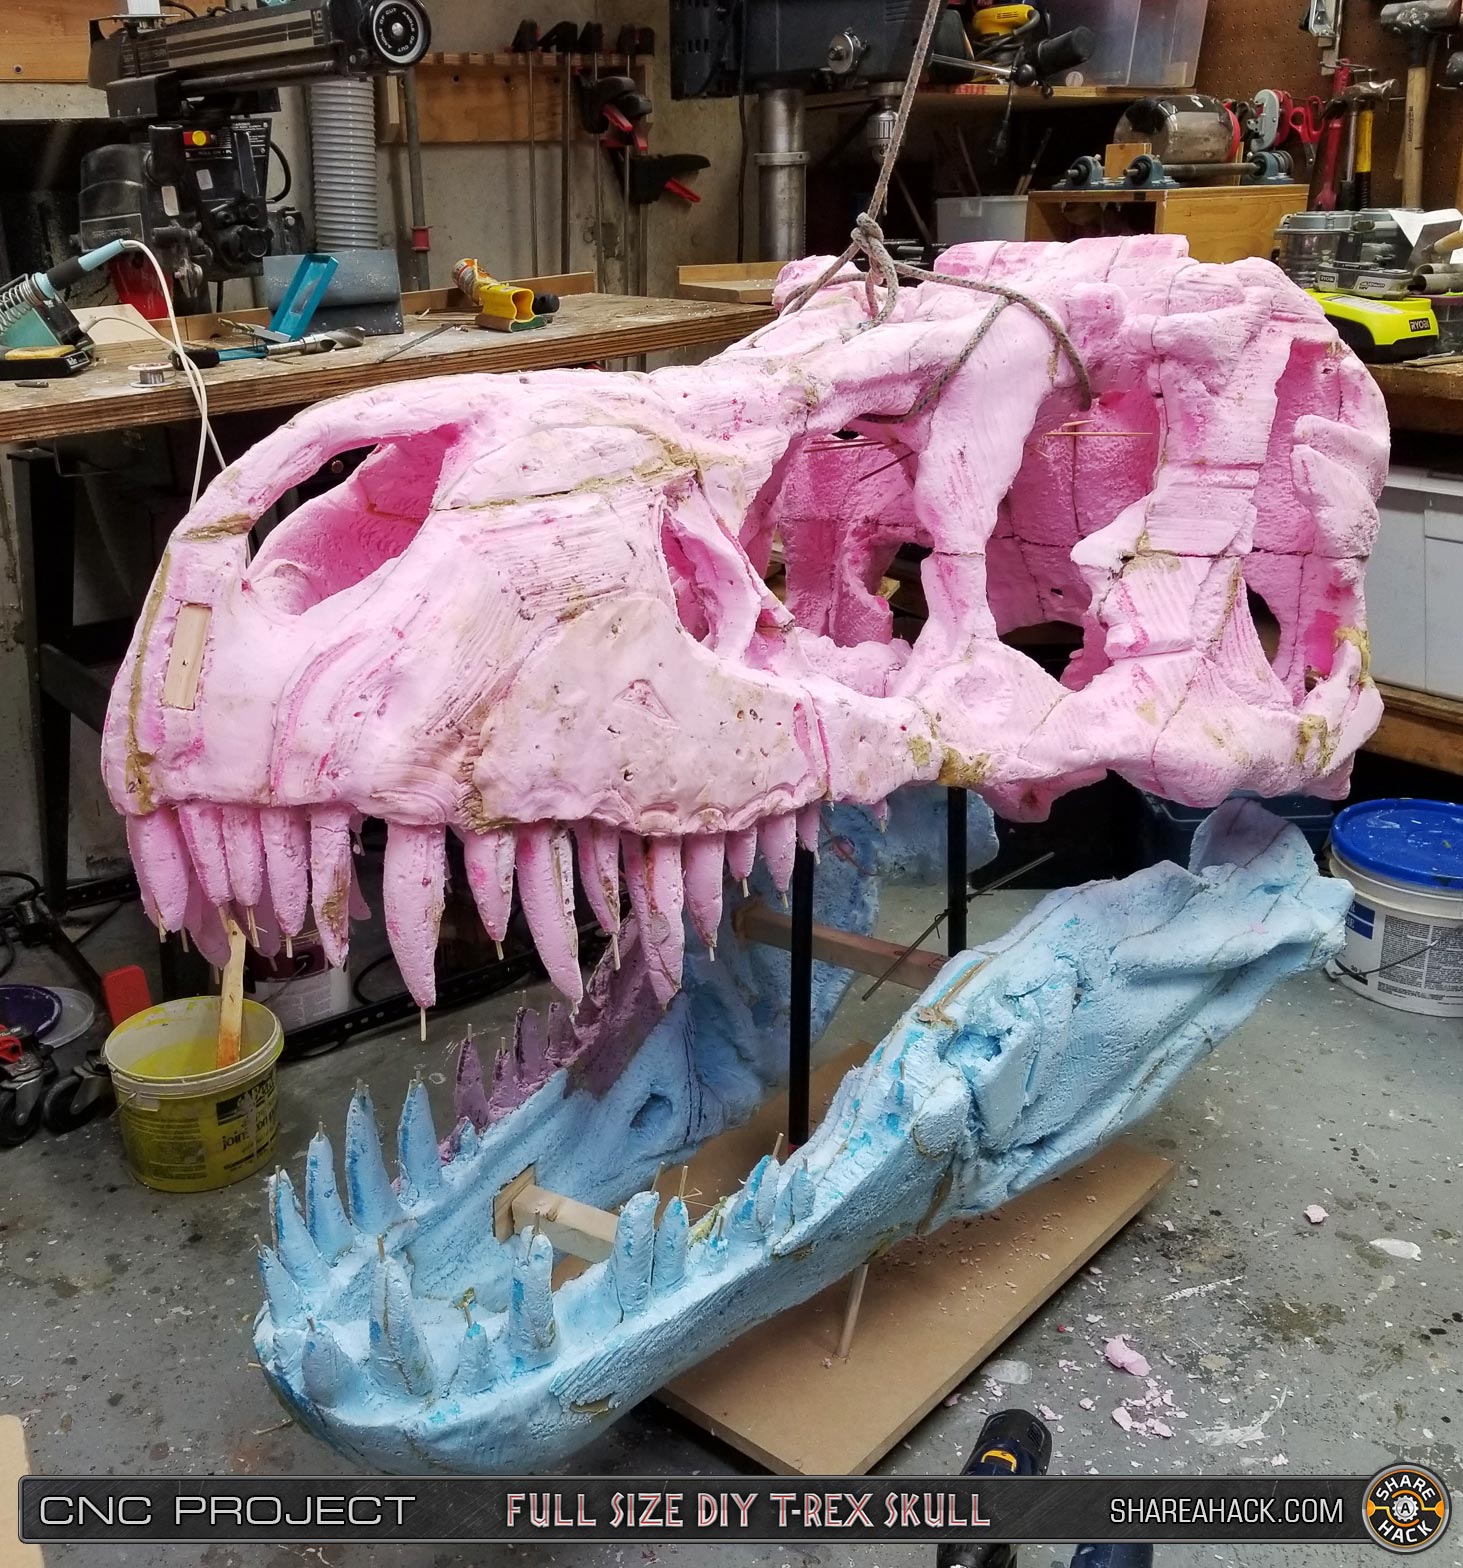
And here's a look at what the final orientation/positioning will be! I can modify the height, position of the jaw, and how open the mouth is just by changing the lengths of the iron pipes.
Every now and then I post some progress/videos on Instagram if anyone interested:
https://www.instagram.com/shareahack/
Hope everyone is gearing up for a great holiday! Cheers
") loving how this is coming together
loving how this is coming together