Mounting a FENIX TK76 to Your Brolin-BFG <$20USD w/o Expensive Tools
So I decided to whip up a quick “how-to” for the Fenix mounting using a Picatinny Quick-Detach Mount in an insanely sturdy way for under $20 USD, showing what I’ve whipped up for now.
I’m going to explain some of the process in detail for anyone that is interested, or doesn’t have access to the pieces I’ve used and is looking for insight into their own new way of tackling this small project. If you’re not interested in me babbling on; skip to the pictures. Since I actually decided this was a project worth sharing, I took pictures in such a way that they should speak for themselves (ish).
As mentioned by Kenney in a previous post, the Fenix actually has a threaded hole on the back of it. So my first major interest was figuring out what type of fastener/screw/bolt was supposed to go in there. Smart people would probably have started by looking at the box, but I found over the course of this project that I may actually be a complete bafoon. I proceeded to try for ten or so minutes to match threads and diameters by a complete blitz with some fasteners... Had I looked at the box, before I excitedly ripped it out and threw in batteries to almost accidentally blind myself, I may have noticed a very classy image of the torch mounted on a tripod. For years I had worked in the photography industry and instantly realized what it was; it’s the “standard” mounting screw for cameras! This takes a 1/4” diameter screw/bolt that has 20 threads per inch (the swivles / screwy bits). If you go to a hardware store, they are listed as 1/4”-20 and then followed by a number which represents their length (in the USA, this is usually in inches).
I had already bought a Quick-Detach mount for a bipod, as I figured it would be the easiest mount to attach the torch to without having the torch raised too far off of the weapon. The best part about these mounts, however, is the part that attaches to a bipod actually uses a lip/edge to keep from falling out (much like we need for a screw or bolt). So I measured roughly how long of a screw I needed, which was between 1/2” and 3/4”, and went from there. I ended up finding 1/4”-20 1/2” screws at the Home Depot near my work, which was about $1.50 USD for 2 screws. They fit PERFECTLY.
Alright, so here’s what we’ve got:


I picked up this exact mount (actually two of them - the other is being filed down and mounted to my Chip-Set for the BFG):
https://www.amazon.com/Quick-Detach...ipod+Sling+Adapter+for+Picatinny+Weaver+Rails
Then I snagged a package of Everbilt 1/4”-20 1/2” Button Cap (somewhat important, also called Crown as the can rest on the lip inside the mount) Socket Cap Screws. Like mentioned above, this cost me under $2 USD after tax for two. Also, the head you use is completely optional, probably pick one based off of what tools you have at your disposal. I’ve been using hex screws almost exclusively for this build, a personal preference, and the closest thing I could find on Amazon was:
https://www.amazon.com/Button-Socke...tainless+Steel,+Quantity+25+,+Allen+Hex+Drive
NOTE: you don’t need vice grips or an allen set to do this. Any type or wrench and a screw driver can easily be used, just buy you fastener accordingly.
First thing tou want to do is disassemble the QD mount. With the model I bought, I just slapped vice grips on the nut and voila. Be careful not to lose springs or washers, as most of these mounts will have & NEED them. Once it’s disassembled, get rid of that little nipple that would normally attach the bipod. Then you’ll see that lip I had mentioned earlier, and be ready to screw this sucker on.


Direction of mount is a strange thing. I tried a few configurations and landed with pulling the lever tight by bringing it back towards the stock while above the torch. If you want to know why I chose to mount it this way, PM me, as it’s a lot of relatively unneeded information that would only fascinate some tactically mindedfolks. So let’s step by step this part:
1.) Imagine how you want the lever to close while it’s attached to the side of your BFG
2.) Align your mount, lever, hardware, and torch
3.) Flip everything over in that same orientation, so you can access the threaded hole on the back of the TK76
4.) Screw your mount down to the Fenix (feel free to use lock-tite or some other product to keep the torch and mount straight, I just cranked it hard AF though, being careful not to wreck the threads or head). Once screwed down, place the springs into the mount


5.) Slide the lever into the mount, being mindful of the springs and preparing the rest of your hardware
6.) Grab a wrench/pliers/channel-locks/vice-grips/whatever and reassemble the mount. Truthfully, it’s best to tighten these in the closed position on a rail, but it’s not needed if you don’t have a rail laying about.
7.) Admire how pretty it is and how easy it was. You’re a rockstar!


Boom! Less than $20, and doesn’t require power tools. Not a bad way to do it. I know I plan to change this set up a little; drilling and countersinking one of the other holes so I can adjust and tighten the screw w/o having to tear down the whole mount. But for the time being, this will get me through the con in just over a week.
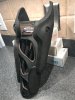
I’ve done a ton of work over the past couple weeks, but I have some more work to do this weekend. A little glimpse of how my BFG is looking:

I need to touch up the quick-detach stock mount (it’s not as sturdy as I’d like), refinish the entire shroud with a spritz of paint, and hopefully replace my butane lighters with something a little more accurate (those are the two I actually have at home). Other than that, this BFG is going to be filed as “con-ready” and left alone until I finish my arm and touch up my poncho. I’ll probably throw up a more in-depth post on how I mounted the shroud/stock/barrel soon, but wanted to get the torch mount explained for others first.
")


.jpg")


.jpg")
.jpg")