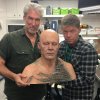
Deadpool 2:Cable

Thanks Toggle47 for letting others play for a bit. I encourage people to at least try and work it out before hitting him up for the answer. But then the game is still in play because even though you’ll know what it is.... you’ll still need to track down the actual item. Identifying the make model is going to be even harder. Lets just say that even if you knew that info and did a google search, theres maybe one pic. Then, where to get them. Thats another question.
 
So like Kenney mentioned, I drew what I was looking at. If you want to see my drawing that helped me figure it out, I’ve uploaded it. It’s not even remotely pretty, but a little nicer than that horrible screencap I put up haha

tumblr_pcqe29FZVY1sjdnvro3_r1_1280.jpg

And as it turns out, I had something that is a similar shape about 15 feet away from me when I drew this, turned out to be a similar thing indeed!
 
Hi kcpstudio! Maybe you can give us a hint on what those “thingies” are, so i wont be calling them “thingies” anymore hahaha

Did i get the upper shroud right? Or at least a little close to what you did?

My BFG is 15 pounds and it’s already damn heavy, I can’t imagine how Brolin can be carrying and working the whole day with his BFG which you said was about 30 pounds.

You did an amazing job on the prop!!! I love the design, the first time i saw it i knew i wanted one, it was an expensive and difficult build for me but all worth the effort. An awesome addition to my movie weapon collection.

Toggle47 those look like perfume/ liquid spray bottles hehe.
 
Last edited:
Sure... you can call them figamajigs. Ill take a look at your shrouds tomorrow bro... heading to bed now.

Cheers mate


Hi kcpstudio! Maybe you can give us a hint on what those “thingies” are, so i wont be calling them “thingies” anymore hahaha

Did i get the upper shroud right? Or at least a little close to what you did?

My BFG is 15 pounds and it’s already damn heavy, I can’t imagine how Brolin can be carrying and working the whole day with his BFG which you said was about 30 pounds.

You did an amazing job on the prop!!! I love the design, the first time i saw it i knew i wanted one, it was an expensive and difficult build for me but all worth the effort. An awesome addition to my movie weapon collection.

Toggle47 those look like perfume/ liquid spray bottles hehe.
 
I happened across some new (to me) pictures on a review site, and wanted to share. The one of Brolin’s prosthetics is going to be particularly useful when I Eventually redo mine.

tumblr_pcs6w3iSo41sjdnvro1_640.jpgtumblr_pcs6w3iSo41sjdnvro2_1280.jpg

And I’ve been working on a late of things simultaneously, so no finished bits to share, but here are a couple images of things I’ve been knocking out:

tumblr_pcs6h13kXq1sjdnvro1_1280.jpgtumblr_pcs6h13kXq1sjdnvro2_1280.jpgtumblr_pcs6h13kXq1sjdnvro3_1280.jpgtumblr_pcs6h13kXq1sjdnvro4_1280.jpg

tumblr_pcs6h13kXq1sjdnvro5_1280.jpgtumblr_pcs6h13kXq1sjdnvro6_1280.jpgtumblr_pcs6h13kXq1sjdnvro7_1280.jpgtumblr_pcs6h13kXq1sjdnvro8_1280.jpg

tumblr_pcs6k6Lo3O1sjdnvro2_1280.jpgtumblr_pcs6k6Lo3O1sjdnvro4_1280.jpgtumblr_pcs6k6Lo3O1sjdnvro6_r1_1280.jpg

Needs to be filed and sanded a lot more, on top of the hours of filing and sanding already done haha

Rough final depth and shape:

tumblr_pcs6k6Lo3O1sjdnvro3_1280.jpg

Then I’ve also been working on finishing the shroud and stock mount:

tumblr_pcs9u9ZppL1sjdnvro2_1280.jpgtumblr_pcs9u9ZppL1sjdnvro3_1280.jpgtumblr_pcs9u9ZppL1sjdnvro4_1280.jpgtumblr_pcs9u9ZppL1sjdnvro5_1280.jpg

tumblr_pcs9u9ZppL1sjdnvro6_1280.jpgtumblr_pcs9wsnZOk1sjdnvro2_1280.jpgtumblr_pcs9wsnZOk1sjdnvro3_1280.jpgtumblr_pcs9wsnZOk1sjdnvro4_1280.jpg

tumblr_pcs9wsnZOk1sjdnvro5_1280.jpgtumblr_pcs9wsnZOk1sjdnvro6_1280.jpg

Less than a month out now, so I’m going to be feeling the crunch to rush a lot of these projects to “okay enough for con” status. So expect a few big updates like this over the next couple weeks!
 
Toggle47 great work bro. What’s the crunch for? A con?

I happened across some new (to me) pictures on a review site, and wanted to share. The one of Brolin’s prosthetics is going to be particularly useful when I Eventually redo mine.

View attachment 834400View attachment 834401

And I’ve been working on a late of things simultaneously, so no finished bits to share, but here are a couple images of things I’ve been knocking out:

View attachment 834402View attachment 834403View attachment 834404View attachment 834405

View attachment 834406View attachment 834407View attachment 834408View attachment 834409

View attachment 834410View attachment 834411View attachment 834413

Needs to be filed and sanded a lot more, on top of the hours of filing and sanding already done haha

Rough final depth and shape:

View attachment 834414

Then I’ve also been working on finishing the shroud and stock mount:

View attachment 834417View attachment 834418View attachment 834420View attachment 834421

View attachment 834422View attachment 834424View attachment 834425View attachment 834426

View attachment 834427View attachment 834428

Less than a month out now, so I’m going to be feeling the crunch to rush a lot of these projects to “okay enough for con” status. So expect a few big updates like this over the next couple weeks!
 
Toggle47 great work bro. What’s the crunch for? A con?

Yessir! Windy City Wizard World / Chicago Comic Con / Wizard World Chicago the con of many names haha. Second biggest we have out here, right behind the lovely C2E2. This will be my costume for Saturday. That gives me just over 3 weeks to finish a ton of small things (securing the stock and shroud, adjusting my poncho for comfort and screen accuracy, reposition the pockets on the BDU trousers, paint my prosthetics, etc), a couple big things (finally finish my arm build, adjust the french-lace on the hair piece and restyle, finish electronics on my "time travel device", put an even finish on the shrouds), and bring in a few more bits & bobs (the right M203, the Fenix, some more screen accurate rails, the figamajigs for my stock, bring in the right stock, stuff like that).

*****, almost 5K deep on this project and still throwing money at it, this is definitely one of my most expensive costumes haha. I will definitely have to line up a professional photoshoot for that Saturday, once I'm all geared up and in makeup.
 
Last edited:
Thanks Soulinertia! Unfortunately I'm not much of an internetterizor... I have an email address, and a couple forum accounts, but none of the social media bits (apart from a tumblr thing for hosting image files - don't tell them I'm abusing their unlimited hosting). Is it something I could find without an account?
 
Last edited by a moderator:
And Soulinertia is the only one i told what the figamagis are. He had a shirt i needed. A trade it was. Lol Anyway... yeah... that pic Soul really should help.
 
Has anyone here made any attempt to find the sunglasses he wears for all of 3 seconds? May be a fun little addition to throw in the fanny pack.. erm.. utility bag.

tumblr_pcs6w3iSo41sjdnvro3_r1_1280.png
 
Well, hit more snags on my BFG build. I should have figured out my whole design before I started piecing it together. Some pointers for others (things that pushed me back to nearly ground zero on sections of my build):

The order of operactions for fabrication that I should have used: Cut/Sand/Drill/Machine —> Braze —> Epoxy

Some things I didn’t consider:

- If you epoxy before you braze, the workable temperature for the epoxy is WAY lower than the brazing temp. Attempting to braze will scorch the epoxy, breaking its bond and roasting it onto the metal, resulting in the need to heavily sand/file or refabricate the piece...

tumblr_pczxx7s79p1sjdnvro1_1280.jpg

-The brazed pieces are incredibly durable when it comes to handling the prop roughly. I could hold the entire 15+lb weapon up by the reddot attached to the scooe, shaking it around, and have no movement throughout the shroud. That being said; the brazing is not durable to excessive pressure, heat, or friction caused by power tools. Or at least my skill in brazing has that limitation. Sanding small pieces on the belt sander broke brazes and epoxied joints. Drilling through my shroud support rod to get access to my mounting screws for the barrel and stock was a combination of pressure and friction heat, completely breaking my braze...

tumblr_pczvc7TCco1sjdnvro5_1280.jpgtumblr_pczvc7TCco1sjdnvro6_1280.jpgtumblr_pczvc7TCco1sjdnvro7_1280.jpgtumblr_pczxx7s79p1sjdnvro5_r1_1280.jpg

So yeah.. productive week, I suppose. Lots of learning, which I am all for, and truly enjoy, though it can be disheartening when so much happens at once.

Also had some filing issues with my Chipset, and completely ruined that whole piece. So i have to do that from the begining as well. I wonder if my rushing to finish for the con is opening me up for more mistakes. I’ll think on that and figure some more stuff out before I try this all again, and definitely have to figure out the full assembly before I do a single thing more. I can’t afford to have mistakes like these happen again if I want this done in two weeks.

On a positive note, I found exactly where the rail goes to mount the Fenix, and had actually already had my rail in the exact spot. A micro success in an ocean of fails haha.

tumblr_pczx0sUwlw1sjdnvro6_r2_1280.jpg
 
Lol... on that bottom pic, i had to look three times. I was like.... “Toggle47, what the **** did you do? Did you go back and redo your guards? you ****ing nailed the guards!!!”. Then i realized that was my pic...”. Lol Keep in mind, mounting points for the rails changed constantly. I’ll check my final setup pics and make sure you’re good on the light location. Im pretty sure thats the location in that pic.


Well, hit more snags on my BFG build. I should have figured out my whole design before I started piecing it together. Some pointers for others (things that pushed me back to nearly ground zero on sections of my build):

The order of operactions for fabrication that I should have used: Cut/Sand/Drill/Machine —> Braze —> Epoxy

Some things I didn’t consider:

- If you epoxy before you braze, the workable temperature for the epoxy is WAY lower than the brazing temp. Attempting to braze will scorch the epoxy, breaking its bond and roasting it onto the metal, resulting in the need to heavily sand/file or refabricate the piece...

View attachment 834995

-The brazed pieces are incredibly durable when it comes to handling the prop roughly. I could hold the entire 15+lb weapon up by the reddot attached to the scooe, shaking it around, and have no movement throughout the shroud. That being said; the brazing is not durable to excessive pressure, heat, or friction caused by power tools. Or at least my skill in brazing has that limitation. Sanding small pieces on the belt sander broke brazes and epoxied joints. Drilling through my shroud support rod to get access to my mounting screws for the barrel and stock was a combination of pressure and friction heat, completely breaking my braze...

View attachment 834996View attachment 834997View attachment 834999View attachment 835002

So yeah.. productive week, I suppose. Lots of learning, which I am all for, and truly enjoy, though it can be disheartening when so much happens at once.

Also had some filing issues with my Chipset, and completely ruined that whole piece. So i have to do that from the begining as well. I wonder if my rushing to finish for the con is opening me up for more mistakes. I’ll think on that and figure some more stuff out before I try this all again, and definitely have to figure out the full assembly before I do a single thing more. I can’t afford to have mistakes like these happen again if I want this done in two weeks.

On a positive note, I found exactly where the rail goes to mount the Fenix, and had actually already had my rail in the exact spot. A micro success in an ocean of fails haha.

View attachment 835008
 

Your message may be considered spam for the following reasons:

If you wish to reply despite these issues, check the box below before replying.
Be aware that malicious compliance may result in more severe penalties.
Back
Top