HELP! I've put the Tomenosuke triggers in 57 different ways and I can't get the cylinder to advance. The pawl arm looks like it is slipping off the ratchet bits on the ejector. I know where the springs go on the triggers are key and not super well documented.
You are using an out of date browser. It may not display this or other websites correctly.
You should upgrade or use an alternative browser.
You should upgrade or use an alternative browser.
Tomenosuke blaster assembly kit tips and tricks, help the new builders
- Thread starter eethan
- Start date
nusilver
Active Member
Cut it off with a hack saw. It’s literally terrifying. You’ll be left with like a horizontal metal bit inside the remaining body, and that’s what your new barrel will slot into. I’ll try and find a pic
Thanks! I was, indeed, referring to the cylinder. Haven't pulled the trigger on a barrel yet (though I'm open to suggestions on where to get one if eBay isn't the best/only option!)
Bash, I think he was talking about the cylinder, not the barrel, it's literally just one screw to unscrew by hand if I remember correctly. pretty easy.
for the barrel, I made an explaination earlier on that thread:
https://www.therpf.com/showthread.php?t=279095&page=4&p=4344245&viewfull=1#post4344245
I actually found it impossible to unscrew by hand (my fingers are still sore this morning from trying), but dug some pliers out of my tool box to loosen it and it then came right out! Since I had to ask around before figuring this all out though, I'll be updating my thread with this info once my replacement cylinder arrives. Hopefully it's useful to someone
")
I knew what to do but the pliers is a helpful tip. I would’ve been there trying all day with my fingers if you hadn’t mentioned it.
:thumbsup
:thumbsup
Haven't pulled the trigger on a barrel yet (though I'm open to suggestions on where to get one if eBay isn't the best/only option!)
Teddz's in the project runs is great:
https://www.therpf.com/showthread.php?t=271913&highlight=teddz
edit: although you are in US, so ebay might indeed be your best option
Metal cylinder, check.

Still needs weathering but I couldn’t resist throwing it on.
Still needs weathering but I couldn’t resist throwing it on.
Hey there,
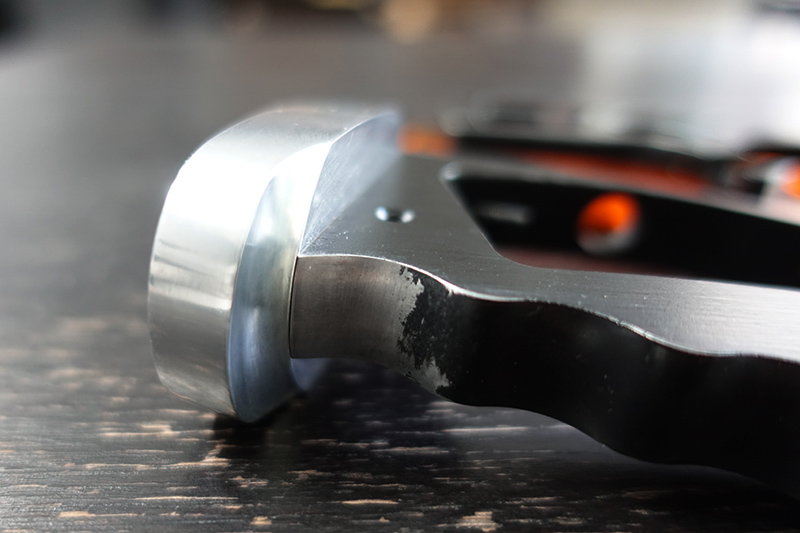
the last few days, I've been working on the handle butt plate of my blaster. trying to find a good way to reproduce the scratches. I tried to transfer printer ink with acetone on metal but it didn't work. I think there might be a way to do it though. I guess someone could also print vinils decals or waterslide decals maybe. I wonder how that would look, if it would look great or if it would be too obvious.
In the end, I just went totally by hand... so here is my approach:
First, I sprayed 2 thin coats of black without primer (tamiya TS29), which was a really fragile result.
I printed the original plates to use as reference. I tried to cut the contour and try to do the scratches with that as a model, It helped a bit. by I mostly eyeballed it.
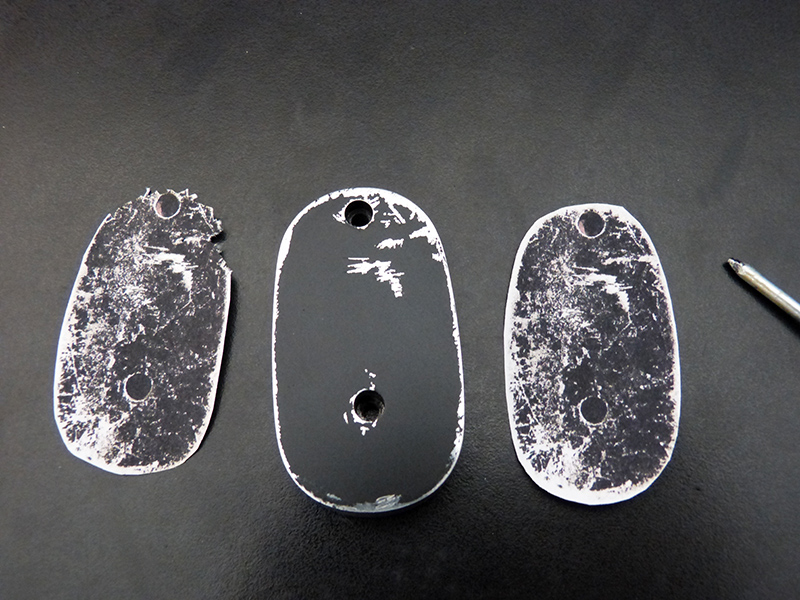
finished scratches:
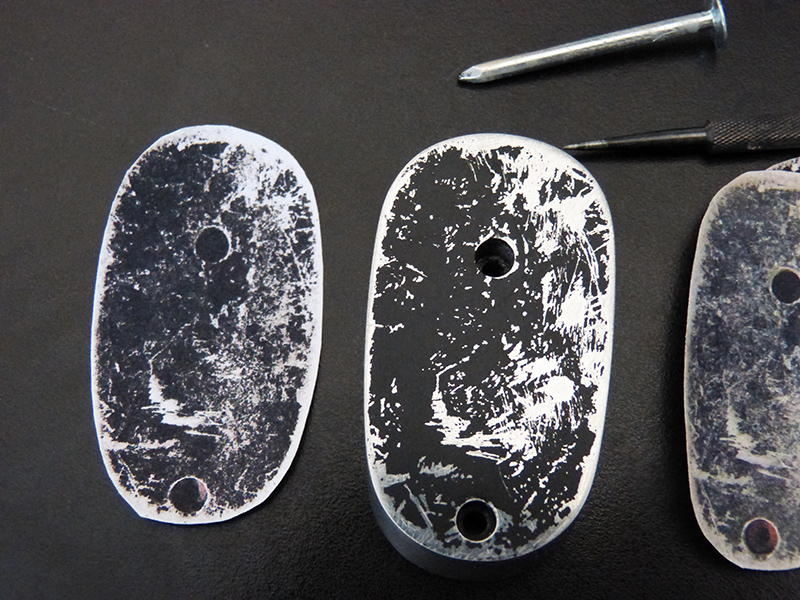
What was a bit frustrating to me is that the original looks very sharp and detailled and that when I was removing the paint, it was never removing the super tiny amount of paint that I wanted to remove. for instance, I have big areas with no paint at all when on the original you can still see a little bit of grain in the most used area.
so, what I did was to spray from a long distance with gray primer, then black paint and then finally clear coat. sanded lighly (I mean lightly, with 1200grain) before and after the clear coat to remove the grain. I really prefer the result like that, it added black grain on the metal areas and gray grain on the black to make it less uniform. those 3 light spray are also reinforcing my really fragile paint and I feel that it should hold better now.
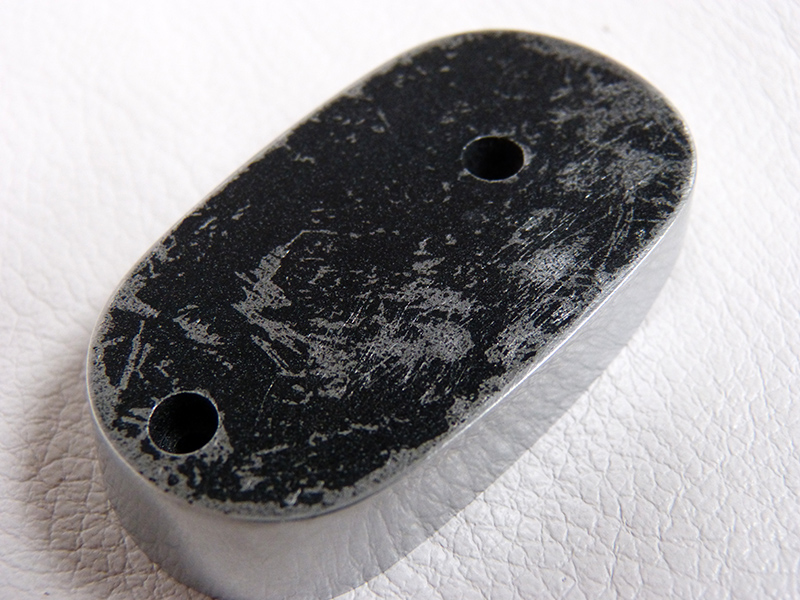
here is a small comparison with the original. Of course I'm still far from it but it looks quite ok for me already.

I'm actually quite moving forward on my blaster this days, painted the covers in black, modified and scratched the steyr ammo clip, painted the butt plate, blued the cylinder! never did that much in the last year that I had this kit
I hope you guys like it.
cheers
the last few days, I've been working on the handle butt plate of my blaster. trying to find a good way to reproduce the scratches. I tried to transfer printer ink with acetone on metal but it didn't work. I think there might be a way to do it though. I guess someone could also print vinils decals or waterslide decals maybe. I wonder how that would look, if it would look great or if it would be too obvious.
In the end, I just went totally by hand... so here is my approach:
First, I sprayed 2 thin coats of black without primer (tamiya TS29), which was a really fragile result.
I printed the original plates to use as reference. I tried to cut the contour and try to do the scratches with that as a model, It helped a bit. by I mostly eyeballed it.
finished scratches:
What was a bit frustrating to me is that the original looks very sharp and detailled and that when I was removing the paint, it was never removing the super tiny amount of paint that I wanted to remove. for instance, I have big areas with no paint at all when on the original you can still see a little bit of grain in the most used area.
so, what I did was to spray from a long distance with gray primer, then black paint and then finally clear coat. sanded lighly (I mean lightly, with 1200grain) before and after the clear coat to remove the grain. I really prefer the result like that, it added black grain on the metal areas and gray grain on the black to make it less uniform. those 3 light spray are also reinforcing my really fragile paint and I feel that it should hold better now.
here is a small comparison with the original. Of course I'm still far from it but it looks quite ok for me already.
I'm actually quite moving forward on my blaster this days, painted the covers in black, modified and scratched the steyr ammo clip, painted the butt plate, blued the cylinder! never did that much in the last year that I had this kit
I hope you guys like it.
cheers
KramStaar
Sr Member
http://www.eethan.fr/ftp/props/blaster/handle_plate_04.JPG
I'm actually quite moving forward on my blaster this days, painted the covers in black, modified and scratched the steyr ammo clip, painted the butt plate, blued the cylinder! never did that much in the last year that I had this kit
I hope you guys like it.
cheers
That's a great result, thanks for sharing. I used a flat paint and a thin brush so that the effect was not so much scratched as weathered.

Nicely done,
MARK
thanks Mark, much appreciated. Your blaster was a real inspiration when I started and I read your build carefully before starting mince as it's the most documented I could find on internet. Yours is actually the only butt plate I could find yersterday when I searched. thanks for sharing too :thumbsup
Thanks for the reply, BASH.
It's worse than I thought: several hooks on the ejector have broken off. The cylinder hand slips off them. Some still work, but the others won't engage. Wonder if I can get a new ejector.
It's worse than I thought: several hooks on the ejector have broken off. The cylinder hand slips off them. Some still work, but the others won't engage. Wonder if I can get a new ejector.
Hey there,
another small update for those wanting to accurize their Tomen a bit more again,
I wanted to change a bit the grip frame, here we go,
first, overlaid a photo of my gun with a photo of the original grips found on Coyle website I think. I added red lines where I wanted to tweak my grips and printed that:
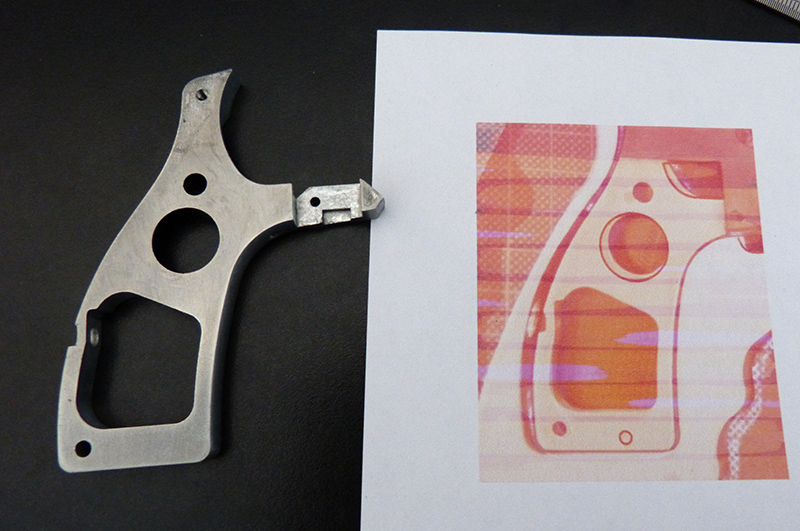
I cut the paper template and used a maker to fill in black the areas that should be removed
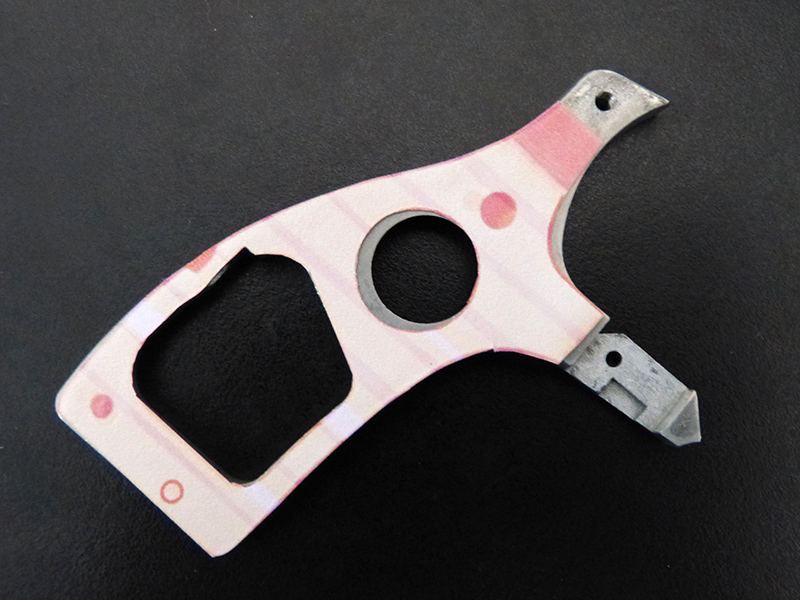
here with the additionnal hole at the bottom right already:
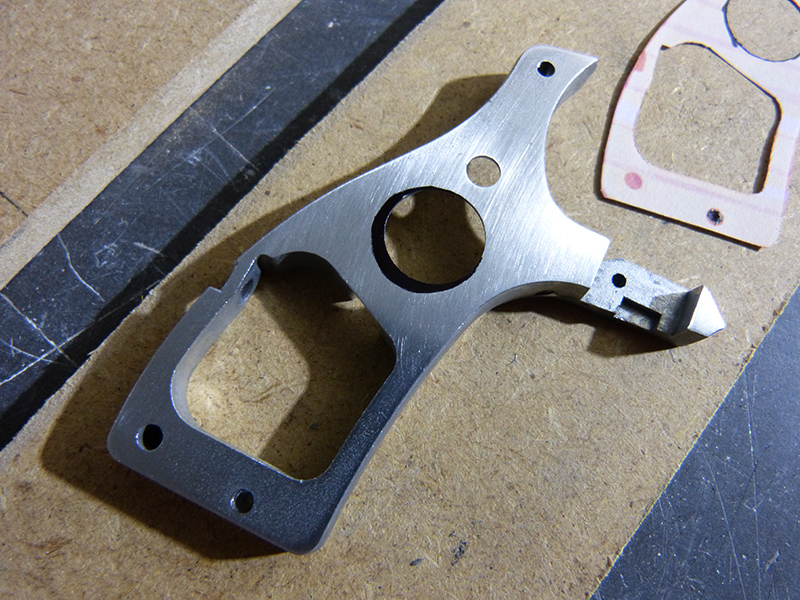
here I don't have a picture with the template, but the way I did that was, cut a 16mm hole in a wood template with my drill, position the template, hold with double side tape and clamps, use a router with a copy bit with ball bearings and voila!
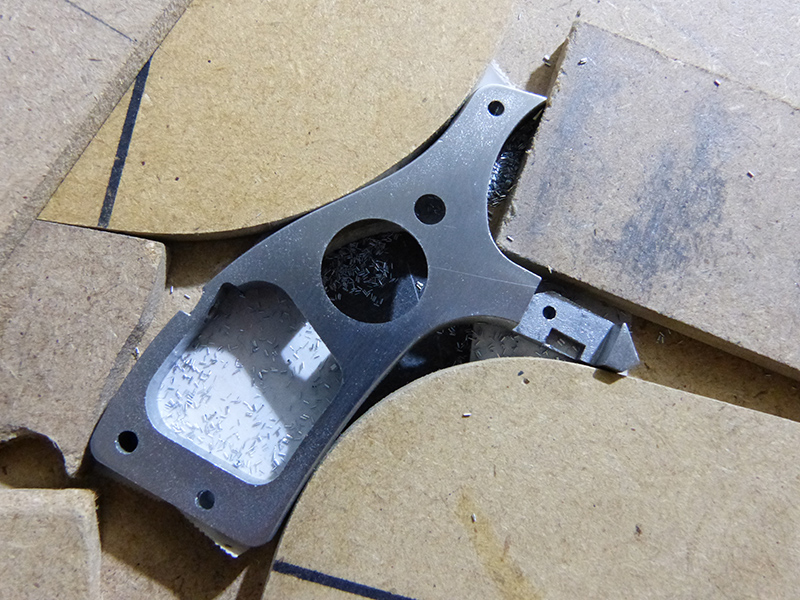
same for the top area, I actually used the same 16mm hole and filed a bit the result afterwards:
of course, there is nothing I can do with the oversized and misplaced hole on top of the 16mm hole so this one stays as is. Much better already
another small update for those wanting to accurize their Tomen a bit more again,
I wanted to change a bit the grip frame, here we go,
first, overlaid a photo of my gun with a photo of the original grips found on Coyle website I think. I added red lines where I wanted to tweak my grips and printed that:
I cut the paper template and used a maker to fill in black the areas that should be removed
here with the additionnal hole at the bottom right already:
here I don't have a picture with the template, but the way I did that was, cut a 16mm hole in a wood template with my drill, position the template, hold with double side tape and clamps, use a router with a copy bit with ball bearings and voila!
same for the top area, I actually used the same 16mm hole and filed a bit the result afterwards:
of course, there is nothing I can do with the oversized and misplaced hole on top of the 16mm hole so this one stays as is. Much better already
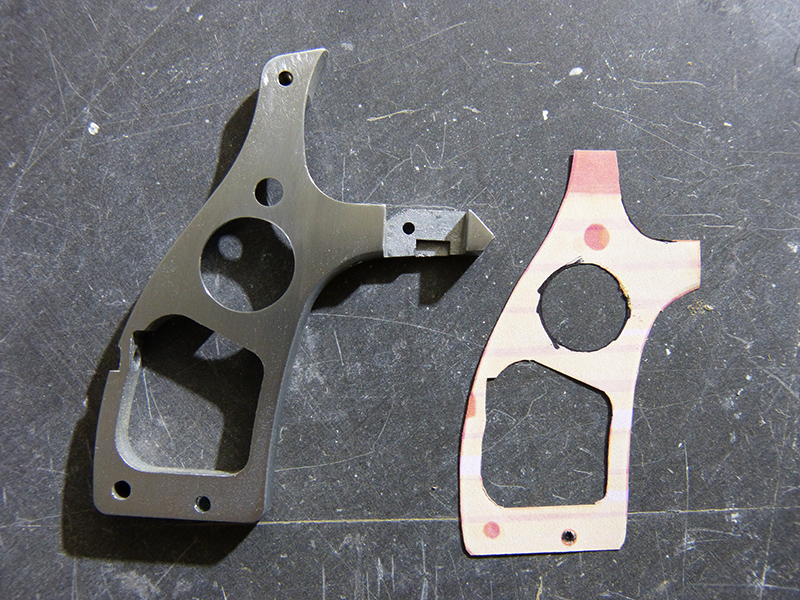
a bit of paint now
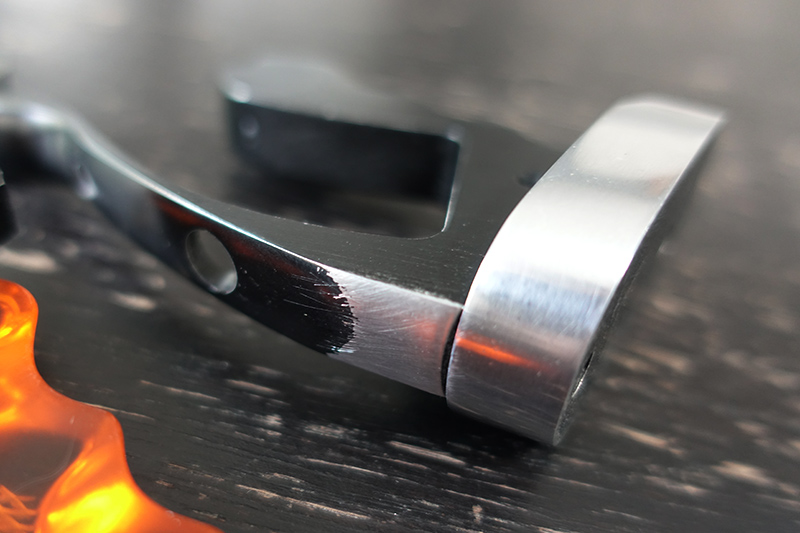
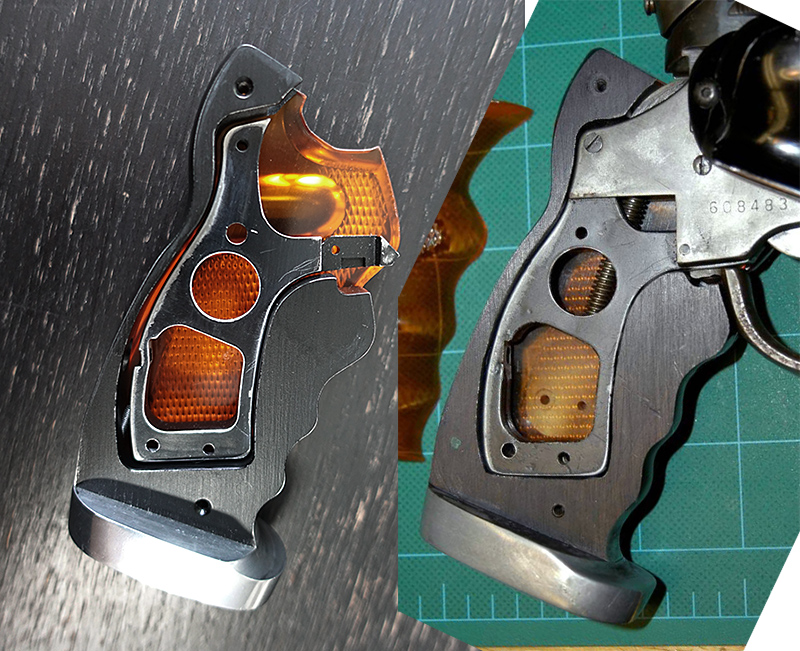
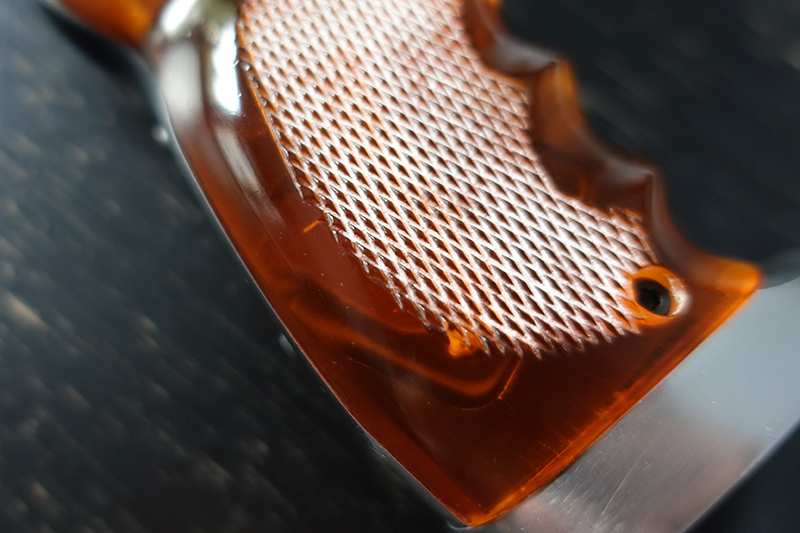
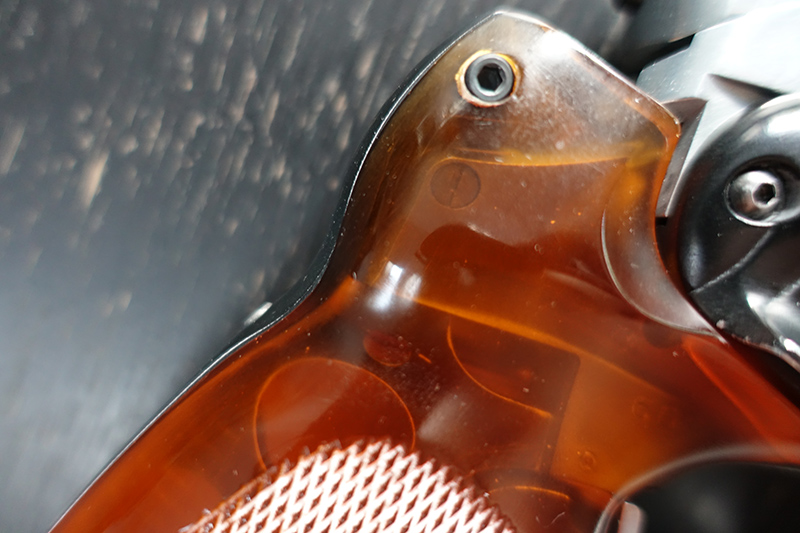
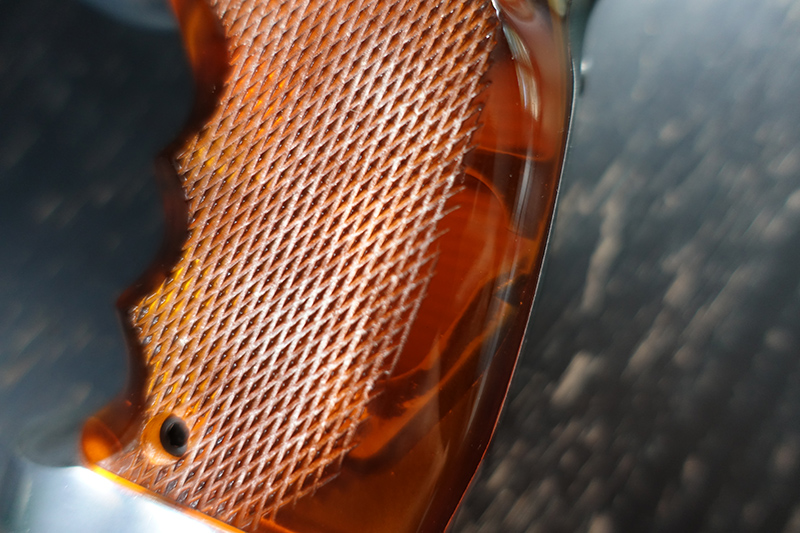
I really recommend going into this kind of details for the inside frame as it shows through the transparent grips and really adds that silver contour and realism to the grips that is clearly visible in all the photos of the real blaster.
I really recommend going into this kind of details for the inside frame as it shows through the transparent grips and really adds that silver contour and realism to the grips that is clearly visible in all the photos of the real blaster.


Fragment
Active Member
There are many Tomenosuke's out there... This one is mine. This is from the first run of 2049 assembly kit models. This also has the steel barrel, steel cylinder, and laser sight. I assembled and blued this myself. I must say that I have been viewing posts of the Tomen build for a while and this took me a while. Here is a tip for anyone that hasn't started yet..
Do NOT use steel wool to buff this! If you have a polishing wheel, I suggest giving the Steyr receiver a nice polish to shine it all up. I used Birchwood Casey Aluminum Black for the zinc parts and PermaBlue for the steel parts. If you get the parts to a polished shine first, and then rinse and clean with soap and water, you can then start bluing. I used a plastic bin about the length of the receiver and filled it with water and one quarter bottle of the Aluminum black. Be sure that you assemble the entire top together. All parts put together so when you're bluing, you are getting a consistent blue across the whole thing. I tried doing mine in parts and the blue was darker on receiver than on the back. If the whole top is assembled, you can just dip it into the tub of water and AL black. You will see it start to get dark. Once it gets somewhat dark, PULL IT OUT. Use a cloth to wipe it and wipe it all downward. As you wipe it will show the streaks until it is clean of the AL black. IF it is still not dark enough, repeat the process. Be ready to pull it out because it will get dark pretty quickly. After this method was finished, I gave this top section another VERY light pass with the polisher. The pits you see on the receiver are from first using steel wool! That method is going to give you pits! If you're looking to create a very old used rusty type model, then go for it. One thing I still have to do is tap in the knob some more. Hope you like my model, I am looking forward to seeing more from others.


Do NOT use steel wool to buff this! If you have a polishing wheel, I suggest giving the Steyr receiver a nice polish to shine it all up. I used Birchwood Casey Aluminum Black for the zinc parts and PermaBlue for the steel parts. If you get the parts to a polished shine first, and then rinse and clean with soap and water, you can then start bluing. I used a plastic bin about the length of the receiver and filled it with water and one quarter bottle of the Aluminum black. Be sure that you assemble the entire top together. All parts put together so when you're bluing, you are getting a consistent blue across the whole thing. I tried doing mine in parts and the blue was darker on receiver than on the back. If the whole top is assembled, you can just dip it into the tub of water and AL black. You will see it start to get dark. Once it gets somewhat dark, PULL IT OUT. Use a cloth to wipe it and wipe it all downward. As you wipe it will show the streaks until it is clean of the AL black. IF it is still not dark enough, repeat the process. Be ready to pull it out because it will get dark pretty quickly. After this method was finished, I gave this top section another VERY light pass with the polisher. The pits you see on the receiver are from first using steel wool! That method is going to give you pits! If you're looking to create a very old used rusty type model, then go for it. One thing I still have to do is tap in the knob some more. Hope you like my model, I am looking forward to seeing more from others.
There are many Tomenosuke's out there... This one is mine. This is from the first run of 2049 assembly kit models. This also has the steel barrel, steel cylinder, and laser sight. I assembled and blued this myself. I must say that I have been viewing posts of the Tomen build for a while and this took me a while. Here is a tip for anyone that hasn't started yet..
Do NOT use steel wool to buff this! If you have a polishing wheel, I suggest giving the Steyr receiver a nice polish to shine it all up. I used Birchwood Casey Aluminum Black for the zinc parts and PermaBlue for the steel parts. If you get the parts to a polished shine first, and then rinse and clean with soap and water, you can then start bluing. I used a plastic bin about the length of the receiver and filled it with water and one quarter bottle of the Aluminum black. Be sure that you assemble the entire top together. All parts put together so when you're bluing, you are getting a consistent blue across the whole thing. I tried doing mine in parts and the blue was darker on receiver than on the back. If the whole top is assembled, you can just dip it into the tub of water and AL black. You will see it start to get dark. Once it gets somewhat dark, PULL IT OUT. Use a cloth to wipe it and wipe it all downward. As you wipe it will show the streaks until it is clean of the AL black. IF it is still not dark enough, repeat the process. Be ready to pull it out because it will get dark pretty quickly. After this method was finished, I gave this top section another VERY light pass with the polisher. The pits you see on the receiver are from first using steel wool! That method is going to give you pits! If you're looking to create a very old used rusty type model, then go for it. One thing I still have to do is tap in the knob some more. Hope you like my model, I am looking forward to seeing more from others.
View attachment 822170View attachment 822171View attachment 822172View attachment 822173View attachment 822174
Nicely done!
Some of you ladies and germs have seen these.


Very much a novice w/ photography and I’m still messing around with my new camera.
But, I love this blaster. So any reason to throw some pictures up is a good enough one for me. Enjoy
Very much a novice w/ photography and I’m still messing around with my new camera.
But, I love this blaster. So any reason to throw some pictures up is a good enough one for me. Enjoy
So you would recommend using something like a dremel with a polishing kit over sanding from 600 grit all the way to steel wool to polish the bare metal before blueing ?There are many Tomenosuke's out there... This one is mine. This is from the first run of 2049 assembly kit models. This also has the steel barrel, steel cylinder, and laser sight. I assembled and blued this myself. I must say that I have been viewing posts of the Tomen build for a while and this took me a while. Here is a tip for anyone that hasn't started yet..
Do NOT use steel wool to buff this! If you have a polishing wheel, I suggest giving the Steyr receiver a nice polish to shine it all up. I used Birchwood Casey Aluminum Black for the zinc parts and PermaBlue for the steel parts. If you get the parts to a polished shine first, and then rinse and clean with soap and water, you can then start bluing. I used a plastic bin about the length of the receiver and filled it with water and one quarter bottle of the Aluminum black. Be sure that you assemble the entire top together. All parts put together so when you're bluing, you are getting a consistent blue across the whole thing. I tried doing mine in parts and the blue was darker on receiver than on the back. If the whole top is assembled, you can just dip it into the tub of water and AL black. You will see it start to get dark. Once it gets somewhat dark, PULL IT OUT. Use a cloth to wipe it and wipe it all downward. As you wipe it will show the streaks until it is clean of the AL black. IF it is still not dark enough, repeat the process. Be ready to pull it out because it will get dark pretty quickly. After this method was finished, I gave this top section another VERY light pass with the polisher. The pits you see on the receiver are from first using steel wool! That method is going to give you pits! If you're looking to create a very old used rusty type model, then go for it. One thing I still have to do is tap in the knob some more. Hope you like my model, I am looking forward to seeing more from others.
View attachment 822170View attachment 822171View attachment 822172View attachment 822173View attachment 822174
I've seen so many how-to's saying to sand it, I'm a bit confused... Looking good by the way !
Just got my kit delivered, eager to build it, but reading this thread, there is so much more to do than I thought ! Already have the bueing kit, and a barrel on the way, but I was unable to find a cylinder unfortunately, nobody does them anymore. Found a weaver knob and a EE-8 one as well, but not sure I want to spend 100$ on each, the ones in the kit seem ok to me.
edit: while I’m at it, any advice on the paint for the few black parts ? Humbrol ? Tamyia ?
Last edited:
Fragment
Active Member
I did not sand mine down using sand paper so I really can't comment on using it. I can only say Do Not Use Steel Wool. I used a large buffing wheel but a dremel with a large enough buffer should be fine. As long as it is polished up prior to bluing. Since others have used 600 grit sand paper, that is probably a good way to get rid of any issues you may see on the metal prior to buffing it out. I just used a gloss black spray can from Home Depot for the black parts. You will need flat black for the butt plate and the internal grip parts. Spray the metal grip part flat black, then mask off the grip area leaving the outer edge. Spray gloss black on and remove the mask. This will give you the glossed outer edge of the grip and keep the inner part dark. Hope that helps. Just be sure the entire top piece is all together before you blue. This will keep a nice consistency on all pieces.
Similar threads
- Replies
- 0
- Views
- 316
- Replies
- 5
- Views
- 923
- Replies
- 28
- Views
- 3,681