T600 - terminator salvation

gothic

Sr Member
I have been wanting to build this for ages but needed to build up the skills to be able to complete a full suit build. most of the elements are built to completion and some are awaiting paint and weathering but financial reasons means i have them on hold temporary so i thought i would post my progress so far, ill post each element seperatly in the same thread.

I wanted to get a finish that was between these two looks

1.jpg 2.jpg


and wanted to base the endoskeleton on the suit worn by Brian Steele

jjj.jpg Making-Of-T-600-image-11.jpg

1.jpg


jjj.jpg


2.jpg


Making-Of-T-600-image-11.jpg
 
Last edited:

HEAD

I have no clay sculpting/casting skills yet so i bought a mask that i could modify. the original mask was basically a toy, i first removed all the teeth as the original were to small, i next cut a v channel in the top to narrow the mask as it was to wide, i then removed all the piston and cheek section as it was all molded together, next was removing the battery pack and the electronics for the lights and voice changer i also removed all the reflective lenses. As ill wear a full latex mask over the top i only need to focus all my efforts on the front and sides.

1.jpg 2.jpg 3.jpg 4.jpg 6.jpg
 
Last edited:
To add the new teeth i first had to remove the jaw section and lower it, i made flat plastic teeth as a base then built them up using milliput to give him his Hollywood smile. the new piston rods for the cheeks were made from Biro pens (the inside of the mask looks terrible but the outside is finished) i added fine wire mesh to fill the eye sockets and made new eyes out of small plastic domes and the lenses were from a pair of red lens swimming goggles. there will be red LED lights for the lens and a battery pack a the top of the skull. just need to make a tongue operated on/off switch as both hands will have weapons.

8.jpg 9.jpg 10.jpg 15.jpg

the base coat is a black and metallic silver mix and the rust is real rust powder then a dry brush of light earth was applied

8.jpg


9.jpg


10.jpg


15.jpg
 
AMMO PACK

The ammo pack was reasonably easy as it was just a box section, originally i was just going to build a minigun but later i decided to build the 40mm grenade launcher so adapting the ammo pack was easy.
Main material is 10mm EVA foam the cable ties sticking out the back are to be attached to an ALICE back pack frame, these are cheap an easy to find in the states but in the uk cheapest i found so far is £30.00...........it can wait.

1.JPG 2.JPG 3.JPG 12.jpg 13.jpg 18.jpg 19.jpg

The base colour is an olive drab and i weathered areas with pewter rub and buff then mist sprayed a watered down light earth acrylic then a watered down darker earth acrylic

1.JPG


2.JPG


3.JPG


12.jpg


13.jpg


18.jpg


19.jpg
 
Last edited:
FEED CHUTE

There is plenty of reference material for this but i couldn't find a cosplay build reference so i come up with my own solution. Main construction is 10mm EVA foam, i made a trench that the plastic bullets would sit in then strips of 2mm EVA would wrap around it. this would strengthen the trench. there ended up being 65 strips and i punched out 390 holes :wacko a few coats of black paint then i dry brushed pewter rub and buff with my finger, i gave the plastic bullets a coat of gloss modge podge as they were a dull brass colour.

4.jpg 5.JPG 6.jpg 7.jpg 9.jpg 11.jpg 14.jpg 15.jpg 16.jpg


I am looking for the clips that attach the feed chute to the ammo box or similar would do , its purely cosmetic as the belt is held in place already if anyone knows what there called let me know

qwerty 3.jpg

4.jpg


5.JPG


6.jpg


7.jpg


9.jpg


11.jpg


14.jpg


15.jpg


16.jpg


qwerty 3.jpg
 
Last edited:
BOOTS

The T600 were supposed to be 7ft 3" im 6ft so to gain more height i wanted to make extra large boots that my own boots would sit on top of equib had a cool idea for his blood bowl ork by making the boots from expanding foam, luckily there was building work near by and i managed to get a large sheet of foil backed insulation foam to use as a base.
The idea was to make the sole from EVA foam and have thin plywood top and bottom of the foam section to distribute the weight then cover the boot in pleather to make it look like a steel toe cap boot.
I also wanted to damage the toe section and expose the toes i made some EVA toes and fixed them inside i thought it would make it look cool and original.

1.jpg 4.jpg 6.jpg 7.jpg 8.jpg 11.jpg 12.jpg 14.jpg 15.jpg 17.jpg

My trainers are UK size 10 to give a rough scale, i need to add a small plywood plate then attach my boots with glue and long screws. i have made combat/cargo trousers that are extra long to cover the transition between the bottom of my actual boot and the beginning of the new boots.

1.jpg


4.jpg


6.jpg


7.jpg


8.jpg


11.jpg


12.jpg


14.jpg


15.jpg


17.jpg
 
Last edited by a moderator:
40mm GRENADE LAUNCHER

The base is four layers of 10mm EVA and plastic waste pipe, the channel in the pipe is to make it easier to hold the pipe in place

1.jpg

I then added some 2mm craft foam to make some of the details, i drilled holes in top of plastic half pearls to make them look like allen key bolts. the end section is to be connected to a 40mm ribbed hose this originally was part of a miniature screw driver set

6.jpg


I made the grip out of three layers 10mm EVA foam, it was the first time i tried spot filling using the super glue an baby powder mix i had seen frank use on TESTED the button was in my plastic junk box i have no idea what it was before.

11.jpg

I made the top supporting rail from a plastic rod that was from a twist open venetian blind the back pipe was a 6" waste pipe, quick test fit to see if it aligns up.

9.jpg


This was purely cosmetic but i wanted to add a shell inside the barrel, i re-purposed a roll on deodorant top

10.jpg

All the main build elements are finished, the rear hose will be fitted at a later date, just need to prime and paint it then weather it.

17.jpg
 
Last edited:
CHEST PLATE part 1

This is the only original picture of the endoskeleton laid out in raw EVA foam

1.jpg

The rest of the pics are from my new phone, i used the PUNISHED PROPS method of raising and sinking the EVA foam and holding it in place with hot glue to give it more levels

2.JPG 3.JPG

The shoulder bell joints were EVA layered over the top of each other, nylon nuts was fixed inside for adding the pistons later

5.JPG 6.JPG

The pistons were made from 22mm overflow plastic pipe that were painted black then pewter rub & buff was lightly applied

7.JPG 8.JPG

The bolts were nylon M10 10mm, i stupidly bought real bolts to start with without thinking about how much they weighed :wacko these were painted with black acrylic then pewter rub & buff was lightly applied

9.JPG 10.JPG
 
Beautiful work!
How do you build a minigun vulcan?

Thanks, means a lot :)

As for the minigun in principle its just a series of tubes/pipes but i want to build a spinning one. watch loads of "how too" on YouTube in theory its just attaching a cheap cordless drill and im no good with electrics but ill keep at it till i have built one because a spinning one is way cooler
 
Last edited:
CHEST PLATE part 2

I needed a back plate to hide my chest so i used loads of scrap pieces of 2 and 3mm craft foam and stuck them to a couple of sheets of craft foam then paint matched and added rust then fixed the shoulder bells to it.

11.jpg 12.jpg 13.jpg

I then fixed the front plate then attached the pistons, the nylon bolts screw through the front chest plate into the shoulder bells

14.jpg 15.jpg

There was a fair bit of conduit/tubing on the original so i bought some 20mm conduit/tube and sanded it to take off the shine then added a watered down burnt sienna and wiped most of it away.

The chest piece is now finished, there are Velcro patches and 1" nylon straps to keep it attached to me.

16.jpg 17.jpg 18.jpg
 
ARMS/SHOULDERS

This consists the bicep shoulder bell and im guessing the terminators collar bone area. The bicep pistons were plastic pipe cut in half painted black then pewter rub & buff was lightly applied.

6.JPG 7.JPG 5.JPG

The bicep is 10mm EVA foam with levels sunk in and held with hot glue, was then colour matched and weathered

4.JPG 8.jpg

The remaining areas are a shoulder ball joint a cover shroud and what i assume is a terminators version of a collar bone, these were all 10mm EVA foam shaped with a heat gun then colour matched and weathered

11.jpg 10.jpg 9.jpg

There will be a connecting strap underneath to align all the pieces and velco on the collar bone area, this is how it looks all together.

12.jpg
 
HANDS/GLOVES

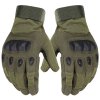
I bought a pair of black cotton gloves and added elements of the fingers to it as they would be worn under tactical gloves, these were made from craft foam that was painted black then pewter rub & buff was lightly applied i then dabbed a rust colour on the areas between the Armour pieces to disguise the gloves

1.jpg 2.jpg 3.jpg 4.jpg

The upper gloves were cheap tactical gloves that i weathered buy cutting areas with scissors and a craft knife then putting them on a hard surface and dragging them across it, i then added some paint weathering

0.jpg 5.jpg 8.jpg 7.jpg

Finally i slid the inner gloves inside the tactical gloves (not easy with the added armour ) with two pairs of gloves there is only a medium amount of dexterity but it works for what i need it to do.

9.jpg
 
Wow. That's really great work so far. I'm particularly impressed how you salvaged a great looking endoskeleton head from that toy mask.
 
Wow. That's really great work so far. I'm particularly impressed how you salvaged a great looking endoskeleton head from that toy mask.

Thanks Dogless, i dont have the skill the make my own mask and a pepakura one would have been a pain. The toy one had most of the elements i wanted it just needed major surgery and a bit of dentistry :lol
 
FOREARMS

These were mainly 10mm EVA foam, the pistons were plastic pipe cut in half with wooden rods covered in craft foam. It was then painted black and pewter rub & buff was lightly applied

1.JPG 2.JPG

I test fitted for spacing and to match up with the under gloves i was making, i held them in place with craft foam on the inside

3.jpg 4.jpg 5.jpg

All finished paint matched and weathered

6.jpg
 
THIGHS & SHINS

(THIGH) These were mainly 10mm EVA foam with craft foam added for detailing, to hold them in place there is a Velcro patch on the back and nylon straps

IMG_20170331_213032.jpg

(SHINS)

Again its mainly 10mm EVA foam with craft foam for detailing, the spring is a half plastic tube and the coils are craft foam. Its held in place by a Velcro patch and nylon straps

IMG_20170331_213003.jpg IMG_1560.JPG
 
This thread is more than 5 years old.

Your message may be considered spam for the following reasons:

  1. This thread hasn't been active in some time. A new post in this thread might not contribute constructively to this discussion after so long.
If you wish to reply despite these issues, check the box below before replying.
Be aware that malicious compliance may result in more severe penalties.
Back
Top