Hey guys, I’ve wanted to start making stuff for a while now and I’ve spent a lot of my time gathering techniques and materials in order to start, and have just finished my first build; the Sheikah Slate from Breath of the Wild.
I started by creating a template to use from art within the game and turned this into a paper template.

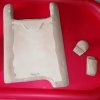
For the handle I wrapped stuck together and wrapped around some 4mm (or 5mm, I can’t remember) foam around a handle from a tube water gun. I forgot to take a photo of the handle just after it had been wrapped, but this was the template.

The main body was made from 6 layers of foam board (foam core) and three layers of the same foam used for the handle, as well as the gold details that stick out of the bottom. Once they were cut to the correct shape using my paper template the edges were smothered in more wood filler than needed, and then sanded down.
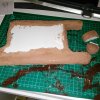
After sanding there were a few imperfections where the filler wasn’t solidly filling the area, so I did a couple more passes of filler and sanding. One of the bottom parts were epoxied into place and a slot for the screen was cut from the front.


The smaller details that go on the back were then cut from more foam and coated in a few layers of glue, as well as the main body to seal it. After this was done the smaller decorative details were molded from Milliput (this was a fun experience as the only time I’ve used something like this is playdoh when I was five) and stuck onto the main body.


After the rings were planned out and the initial ones were on, I started to build the walls that connect from the front to the back. Due to not having much experience, I hadn’t mixed some of the two parts together and it wasn’t drying properly and so I had to scrape off what I had done and re do it, however this allowed me to make the markings more accurate.


Now I could start priming and painting everything. All the paint I used was Rustoleum brand as that’s what I learnt to work with and have found it the most effective. I realised that rather than having a pupil on the back, it’s a blue iris, so I cut a circle out of foam and added it to the template (which is why it’s on the first photo as that was taken after everything).


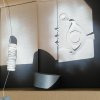

I hadn’t taken a photo of when it was all brown, but the walls and rings were also painted brown and then painted by hand. After this the walls edges were cleaned up by hand with the brown and the yellow parts were applied within the rings and triangles after glue everything to the back.

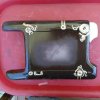


To finish it off I cleaned all the gold after painting on the orange, blue and yellow, epoxied on the handle and sprayed three layers of Rustoleum Matte Clear Coat to seal it all and protect it.
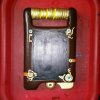
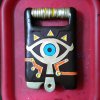
I wasn’t too worried about any imperfections in the shape or finish, as I’m undecided on whether or not I’ll weather it, as weathering would make sense, seeing as link falls down hills when his shield breaks, is used by Moblins for baseball practice and used as a Lynels chew toy.
I do intent to make the full costume from BotW so the Champions Tunic, Links belts, the Master Sword, Hylian Shield and some boot covers, but I think I’ll practice making wooden blades by making the travelers sword or something.
I can provide the templates I made if anyone wants them, as well as my Instagram where I post projects as I make them, even if it is barren with this being my first proper build.
Thanks for looking!
I started by creating a template to use from art within the game and turned this into a paper template.

For the handle I wrapped stuck together and wrapped around some 4mm (or 5mm, I can’t remember) foam around a handle from a tube water gun. I forgot to take a photo of the handle just after it had been wrapped, but this was the template.

The main body was made from 6 layers of foam board (foam core) and three layers of the same foam used for the handle, as well as the gold details that stick out of the bottom. Once they were cut to the correct shape using my paper template the edges were smothered in more wood filler than needed, and then sanded down.


After sanding there were a few imperfections where the filler wasn’t solidly filling the area, so I did a couple more passes of filler and sanding. One of the bottom parts were epoxied into place and a slot for the screen was cut from the front.


The smaller details that go on the back were then cut from more foam and coated in a few layers of glue, as well as the main body to seal it. After this was done the smaller decorative details were molded from Milliput (this was a fun experience as the only time I’ve used something like this is playdoh when I was five) and stuck onto the main body.


After the rings were planned out and the initial ones were on, I started to build the walls that connect from the front to the back. Due to not having much experience, I hadn’t mixed some of the two parts together and it wasn’t drying properly and so I had to scrape off what I had done and re do it, however this allowed me to make the markings more accurate.


Now I could start priming and painting everything. All the paint I used was Rustoleum brand as that’s what I learnt to work with and have found it the most effective. I realised that rather than having a pupil on the back, it’s a blue iris, so I cut a circle out of foam and added it to the template (which is why it’s on the first photo as that was taken after everything).


I hadn’t taken a photo of when it was all brown, but the walls and rings were also painted brown and then painted by hand. After this the walls edges were cleaned up by hand with the brown and the yellow parts were applied within the rings and triangles after glue everything to the back.


To finish it off I cleaned all the gold after painting on the orange, blue and yellow, epoxied on the handle and sprayed three layers of Rustoleum Matte Clear Coat to seal it all and protect it.


I wasn’t too worried about any imperfections in the shape or finish, as I’m undecided on whether or not I’ll weather it, as weathering would make sense, seeing as link falls down hills when his shield breaks, is used by Moblins for baseball practice and used as a Lynels chew toy.
I do intent to make the full costume from BotW so the Champions Tunic, Links belts, the Master Sword, Hylian Shield and some boot covers, but I think I’ll practice making wooden blades by making the travelers sword or something.
I can provide the templates I made if anyone wants them, as well as my Instagram where I post projects as I make them, even if it is barren with this being my first proper build.
Thanks for looking!
Last edited:
