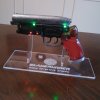
Cheap PKD (Water Gun)

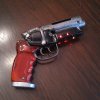
Here's my attempt. This is my first time modding anything, so thanks to everyone in here for all the info. I was going for a very metallic/shine look and I like how it turned out. It isn't done yet. I still need to figure out what to do for the lights. I don't want to cut into anything, and I don't like the idea of just filling with red acrylic either. I may do the stick-on jewels solution someone else in here suggested, if I can find the right size.

View attachment 775249

The paint on that looks excellent and reads very much like metal in photos. Can you please tell us about how you did it?
 
The paint on that looks excellent and reads very much like metal in photos. Can you please tell us about how you did it?

Sure. I was going for the color scheme from a couple of pics of the original prop posted by KramStaar in the BR 2049 props thread here. https://www.therpf.com/showthread.php?t=276755&p=4343263&viewfull=1#post4343263 Great pics

I did a scotchbrite scouring and primed with dark grey. To get the metallic look for both the black and silver parts, I decided to do the entire gun with Rub n Buff, which made it more labor intensive than it probably needed to be. For the black areas, I used RnB Ebony. For the inside bolt, major screws, and metal at the bottom of the grips (I know very little about correct pistol terminology) I used RnB Silver Leaf. I've seen other people that have used RnB Pewter on the rest of the metal parts (receiver, barrel), but to achieve the gunmetal color I was going for, I decided on a 1.5:1 mixture of the ebony and silver leaf.

Rub n Buff is trickier than I thought it would be. The silver leaf goes on easy and smooth without much trouble in a thin application with a soft cloth. The ebony is more temperamental. You apply too much with too much pressure and it clumps and smears and dries up quickly, which can screw up a smooth finish. Apply too thinly and lightly, and it won't get that nice even shine. Adding the ebony to the silver leaf made it behave in much the same way, so I found the best way to apply it was to mix on a palette, dab a soft cloth, and then pat it out on a paper towel before applying. Then, just buff the hell out of it, smoothing out clumps as best as you can, and hope for the best. I used q-tips to try to get to the hard to reach areas, but there's a lot of little crevices on this thing. Luckily, RnB clumping in those areas looks much like general grime anyway, and I wasn't going for an out of the box look, so it worked out fine.

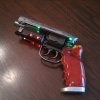
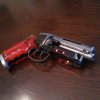
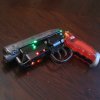
Here's a few more shots, just to give an idea how the light affects the look.

gunsmall0.jpggunsmall1.jpggunsmall2.jpggunsmall3.jpg
 
Sure. I was going for the color scheme from a couple of pics of the original prop posted by KramStaar in the BR 2049 props thread here. https://www.therpf.com/showthread.php?t=276755&p=4343263&viewfull=1#post4343263 Great pics

I did a scotchbrite scouring and primed with dark grey. To get the metallic look for both the black and silver parts, I decided to do the entire gun with Rub n Buff, which made it more labor intensive than it probably needed to be. For the black areas, I used RnB Ebony. For the inside bolt, major screws, and metal at the bottom of the grips (I know very little about correct pistol terminology) I used RnB Silver Leaf. I've seen other people that have used RnB Pewter on the rest of the metal parts (receiver, barrel), but to achieve the gunmetal color I was going for, I decided on a 1.5:1 mixture of the ebony and silver leaf.

Rub n Buff is trickier than I thought it would be. The silver leaf goes on easy and smooth without much trouble in a thin application with a soft cloth. The ebony is more temperamental. You apply too much with too much pressure and it clumps and smears and dries up quickly, which can screw up a smooth finish. Apply too thinly and lightly, and it won't get that nice even shine. Adding the ebony to the silver leaf made it behave in much the same way, so I found the best way to apply it was to mix on a palette, dab a soft cloth, and then pat it out on a paper towel before applying. Then, just buff the hell out of it, smoothing out clumps as best as you can, and hope for the best. I used q-tips to try to get to the hard to reach areas, but there's a lot of little crevices on this thing. Luckily, RnB clumping in those areas looks much like general grime anyway, and I wasn't going for an out of the box look, so it worked out fine.

Here's a few more shots, just to give an idea how the light affects the look.

View attachment 775457View attachment 775458View attachment 775459View attachment 775460


Looks absolutely amazing! and I have totally underestimated the powers of Rub N buff. going to have to check it out further for sure. very nice work:thumbsup
 
Does anyone know if they stock these blasters in stores in Japan? Heading to Tokyo next week and wouldn't mind picking another one up while i'm there for hopefully a cheaper price!

Sent from my SM-G935F using Tapatalk
 
Does anyone know if they stock these blasters in stores in Japan? Heading to Tokyo next week and wouldn't mind picking another one up while i'm there for hopefully a cheaper price! 爛

Sent from my SM-G935F using Tapatalk

Hi! I don't think you'll find any of those, except if you are really lucky! It was mainly sold in airsoftgun shops and some "hobby & toy" shops over Japan. Still a huge number of those were sold through webstores. The only we can find now here in Japan are sold through AMAZON at about 5000 yen.

According to the maker there won't make a second batch... some kind of licence issue.
 
Love this thread!
Just wanted to share my home made oak case :)
Once I finished my gun I had had so much fun I wasn't ready for it to end..
The logo lights up when you open it... I deconstructed one of those toilet lights and made a pinhole for the motion sensor in the lid, then just set the light for white. I got the latch off of etsy from a seller in India, it's brass painted black. The corners are protective speaker corners I got off of amazon and cut to fit. The badge on top is 3d printed. I made the steyr logo with sculpey from an old original steyr badge I got off of ebay.
Thanks everybody for the inspiration!
br case.jpgbr case open.jpg20171102_011952.jpg
 
I love the box, It is gorgeous! I was thinking of doing something similar but with brass corners. I especially like the light, very ingenious.
 
A couple more pics of my progress. I have decided to spray the receiver and barrel silver before using the black oil paint wipe on wipe off method. Hopefully get to do that this weekend after I have painted the ammo box area satin black :)
IMG_1942.jpgIMG_1941.jpg
 
Last edited:
I just find out this thread :)

just have one question : which is the best place to get these and how long did you have to wait to get it ?

Thanks for this great finding !
 
I just find out this thread :)

just have one question : which is the best place to get these and how long did you have to wait to get it ?

Thanks for this great finding !

there is one available in the Junkyard right now. For a good price too.
 
Hey Kylo1 ,

Mate your PKD is turning out beautifully . Congrats . Remember you saying you used a marker / sharpie (?) and darkened up the grips ( from the inside ) was wondering , did you add anything to them ( outside ) as well ? .... Anyhoo , looking forward to seeing her all finished up ( Leds ) !

Thanks for sharing ,:thumbsup

Ged
 
Last edited by a moderator:
Hey @Kylo1 ,

Mate your PKD is turning out beautifully . Congrats . Remember you saying you used a marker / sharpie (?) and darkened up the grips ( from the inside ) was wondering , did you add anything to them ( outside ) as well ? .... Anyhoo , looking forward to seeing her all finished up ( Leds ) !

Thanks for sharing ,:thumbsup


Ged

Thanks for your comments gedmac66 :) Yeah I used a brown sharpie to completely cover the inside of the grip then I used fine wire wool to lightly remove some which leaves a nice used look. I didn't do anything at all to the outside of the grips....YET! lol!
 
Last edited:
This thread is more than 3 years old.

Your message may be considered spam for the following reasons:

  1. This thread hasn't been active in some time. A new post in this thread might not contribute constructively to this discussion after so long.
If you wish to reply despite these issues, check the box below before replying.
Be aware that malicious compliance may result in more severe penalties.
Back
Top