You are using an out of date browser. It may not display this or other websites correctly.
You should upgrade or use an alternative browser.
You should upgrade or use an alternative browser.
There's a lot of space inside this thing. To fit someone shorter like me, I build in taller platforms and longer arm extensions. There will be less waist showing in the middle. For someone taller, it'll be more comfortable and look better.
Keep an eye on this thread. I've suddenly got some time to spend and a reason to hurry this project up a bit.
Keep an eye on this thread. I've suddenly got some time to spend and a reason to hurry this project up a bit.
")
Alright.
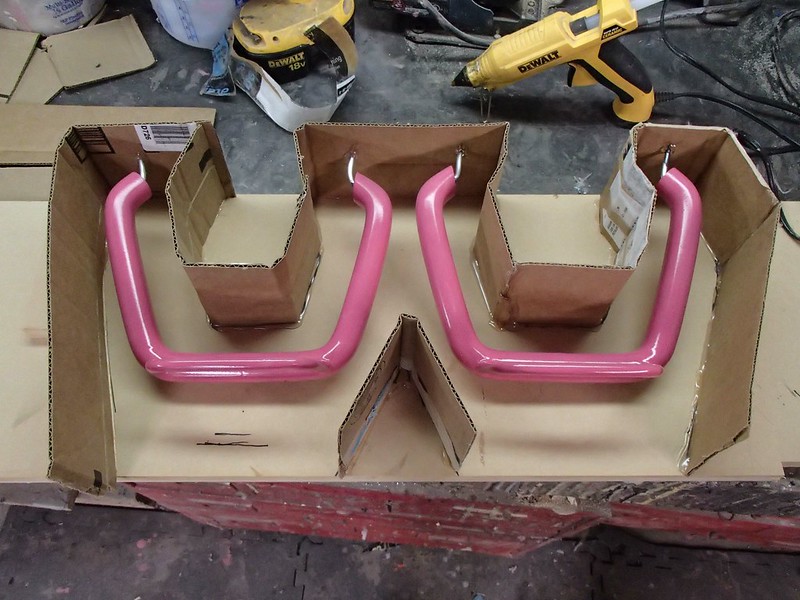
I'm back in the workshop and off to the slowest start ever. I decided to focus on the brackets that will hold the shoulder armor in place. These ones:

There's a pair of them:

Compared to the in-game renders, my 3D printed parts are missing some details. There's a series of recessed areas along the visible portion at the front end. So I made me a template:

The template was traced onto a piece of 1/8" Sintra twice (mirrored the second time) and then cut out. Those pieces were then glued onto the printed brackets:

Here they are after a bit of filler and sanding:

They looked pretty awful until the primer went on:

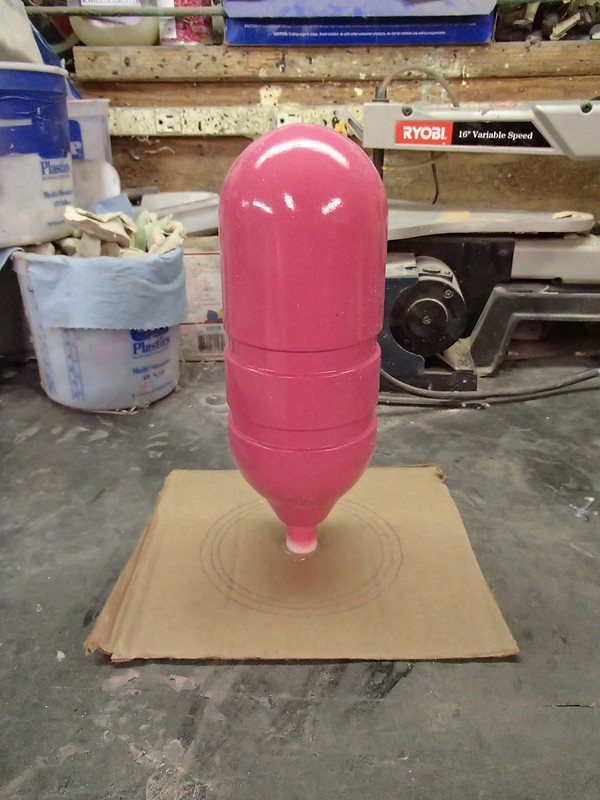
Now they're painted shiny and pink and I will be molding them in the morning.
As long as I was tinkering, I went ahead and built the platforms for the boots. I started with a couple of strips of wood and a hinge:

The straight end will attach to the heel:

The crosspiece at the front end will be installed inside the toe:

The whole thing has a plywood platform built on top:

Then it gets installed in the fiberglass foot parts:

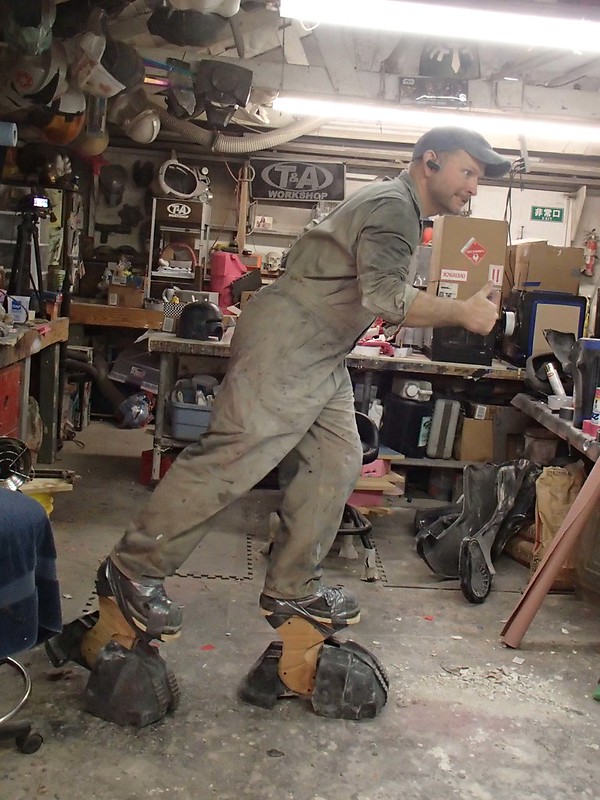
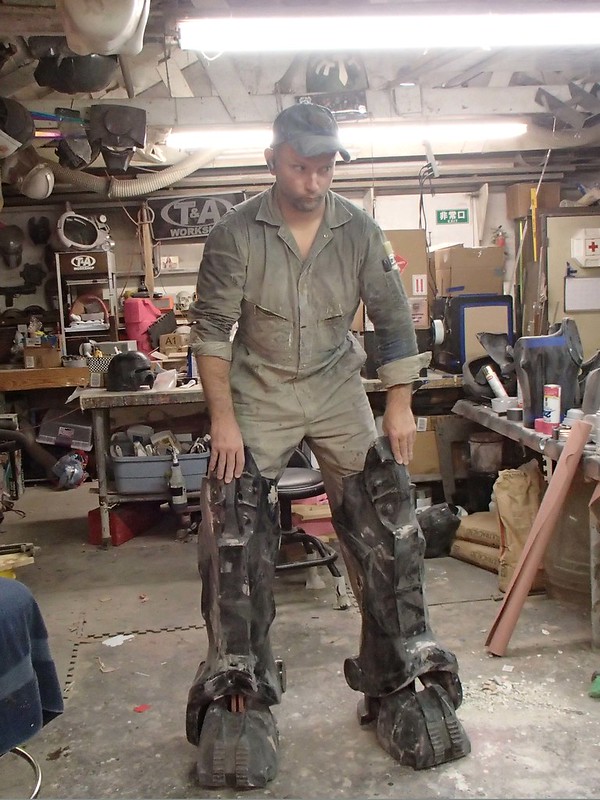
I duct taped them onto my shoes and did some walking around. They're a bit wobbly, so I'm thinking of doing some reinforcement in there somewhere.
The best part is that the platform still fits inside the shin section:

The other thing I've made small progress on is the hands. My initial aim is to articulate the fingers on this beast, so they'll take a bit more thinking in order to get the functionality I'm after. For now, they're rigged like so:

When I pull the strings on the palm side, the fingers curl up thusly:

On the back side, each finger has a spring to pull it back to straight:

So that's all very promising. I just need to sand all of the pieces a bit more to open up the tolerances and keep the knuckles from binding up.
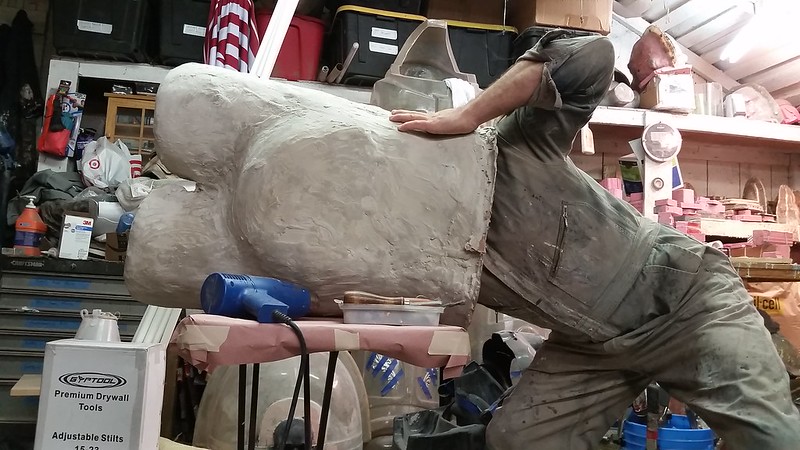
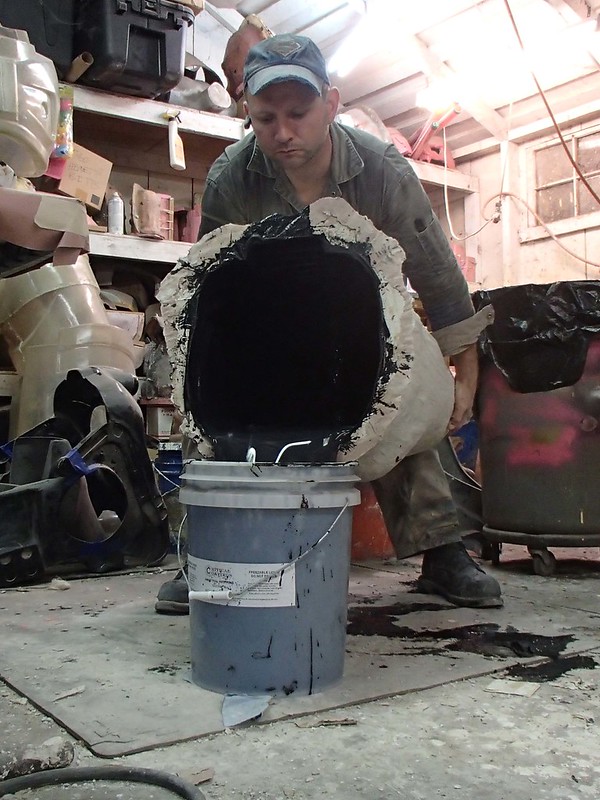
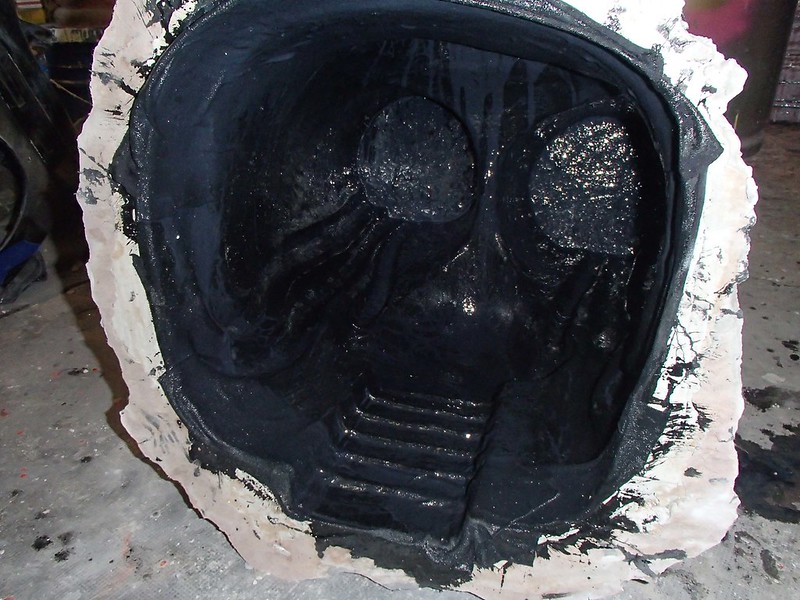
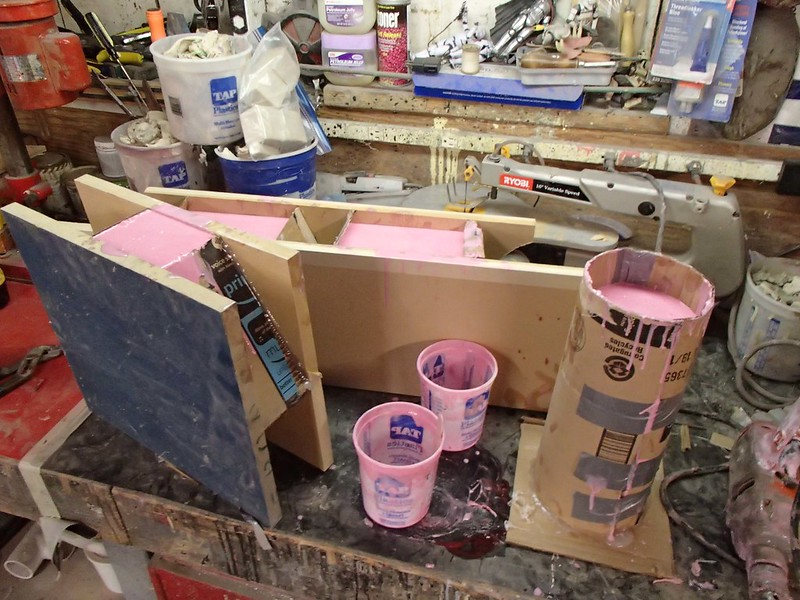
Finally, I've cleaned most of the sculpt out of the mold for the rubber mid-section:

From now on, it will be known as "thunderwear."
I'm back in the workshop and off to the slowest start ever. I decided to focus on the brackets that will hold the shoulder armor in place. These ones:
There's a pair of them:
Compared to the in-game renders, my 3D printed parts are missing some details. There's a series of recessed areas along the visible portion at the front end. So I made me a template:
The template was traced onto a piece of 1/8" Sintra twice (mirrored the second time) and then cut out. Those pieces were then glued onto the printed brackets:
Here they are after a bit of filler and sanding:
They looked pretty awful until the primer went on:
Now they're painted shiny and pink and I will be molding them in the morning.
As long as I was tinkering, I went ahead and built the platforms for the boots. I started with a couple of strips of wood and a hinge:
The straight end will attach to the heel:
The crosspiece at the front end will be installed inside the toe:
The whole thing has a plywood platform built on top:
Then it gets installed in the fiberglass foot parts:
I duct taped them onto my shoes and did some walking around. They're a bit wobbly, so I'm thinking of doing some reinforcement in there somewhere.
The best part is that the platform still fits inside the shin section:
The other thing I've made small progress on is the hands. My initial aim is to articulate the fingers on this beast, so they'll take a bit more thinking in order to get the functionality I'm after. For now, they're rigged like so:
When I pull the strings on the palm side, the fingers curl up thusly:
On the back side, each finger has a spring to pull it back to straight:
So that's all very promising. I just need to sand all of the pieces a bit more to open up the tolerances and keep the knuckles from binding up.
Finally, I've cleaned most of the sculpt out of the mold for the rubber mid-section:
From now on, it will be known as "thunderwear."
Hot as balls. Maybe not. There will be a lot of room for air to move around inside this suit.
I mentioned trying on the platform shoes. Last night I got someone to snap some pics. Here's my favorites:
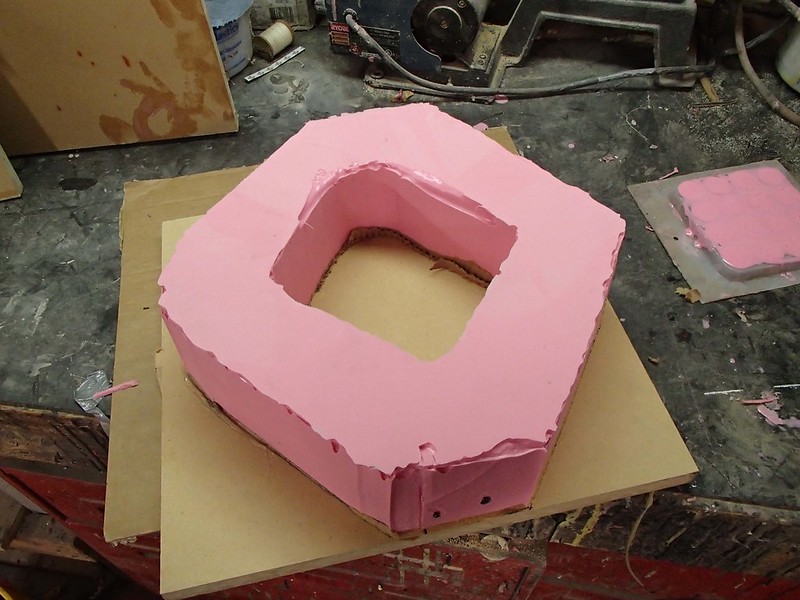
I also spent some more quality time cleaning out the Thunderwear mold:
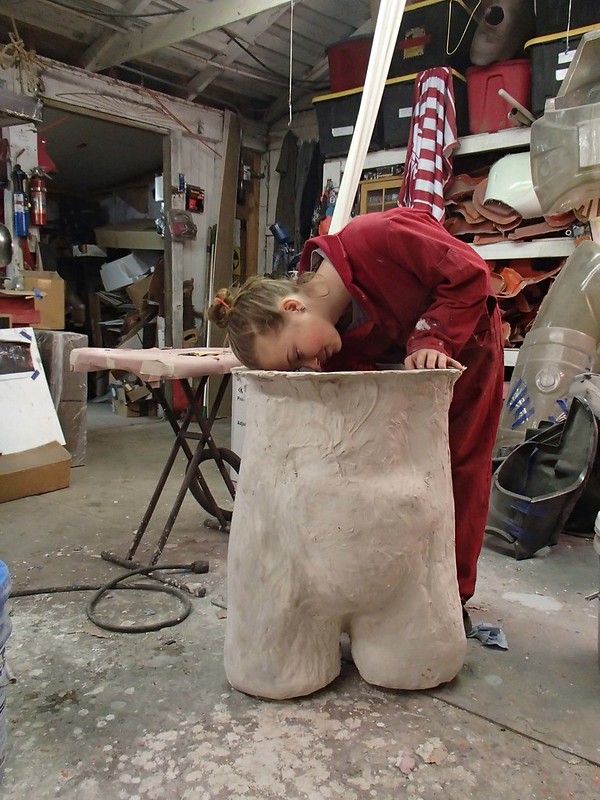
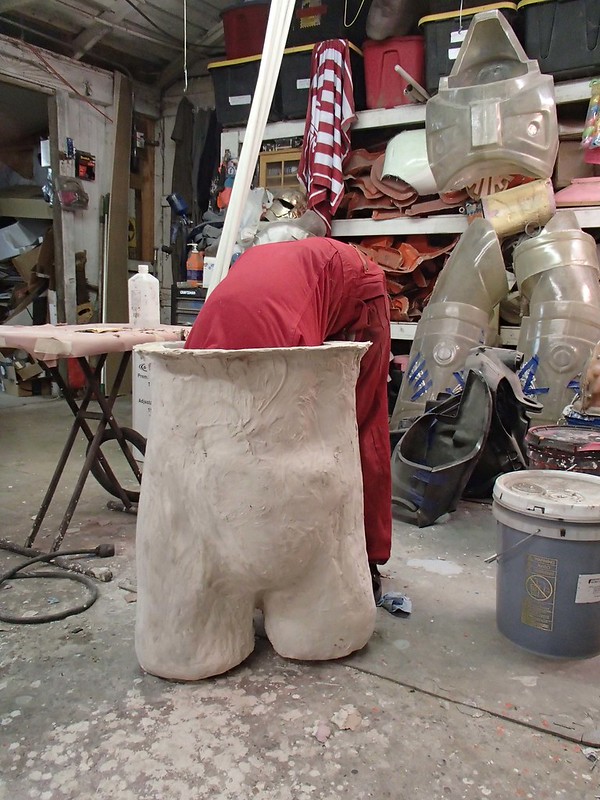
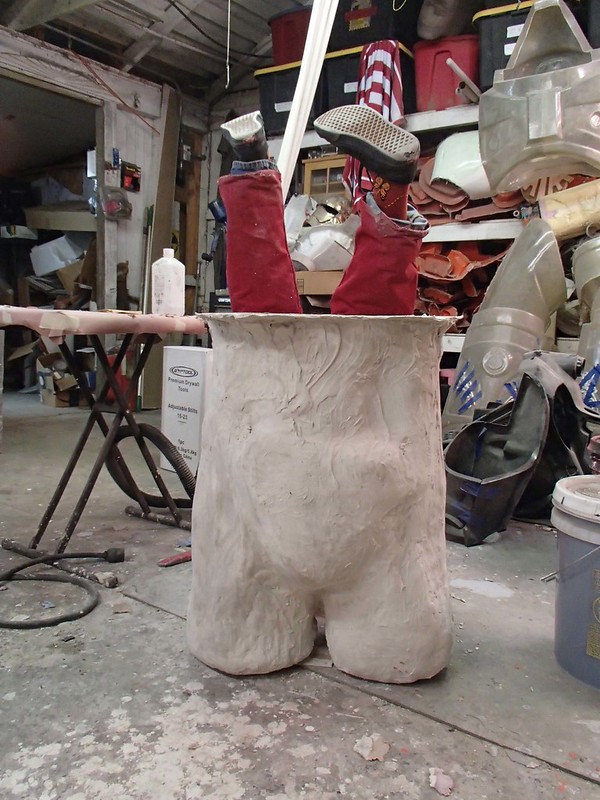
After spending too much time with my head up my butt, I realized that this is what minions are for. So I set my assistant Chuck to work cleaning out the rest of the clay bits inside the mold:
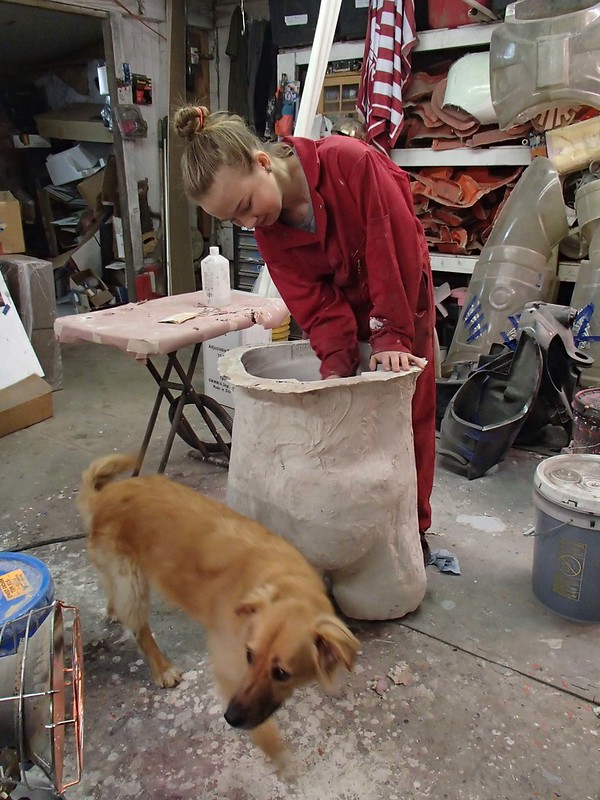
She really got into it:
Once she was done fooling around with that, I went ahead and poured a bucket of liquid neoprene into the mold:
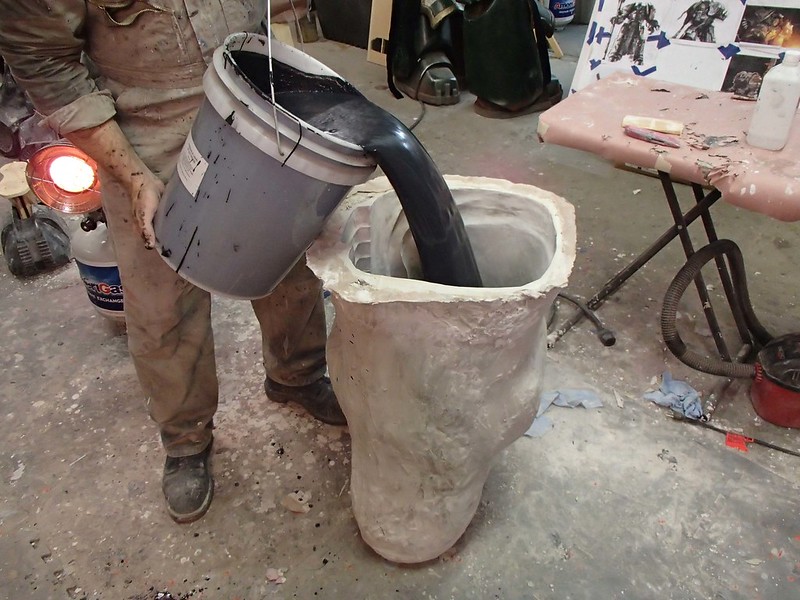
The mold was rolled around to coat the interior and I used a brush to get coverage on some of the high spots. Then the excess neoprene was poured back into the bucket:
This leaves a rubber skin on the inside of the mold:
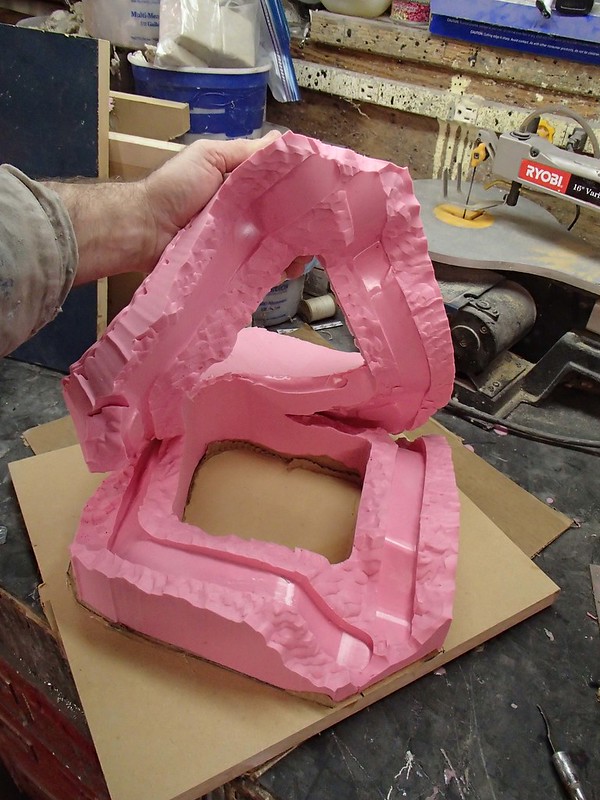
I may end up adding another layer or two today before I peel it out of the inside of the mold.
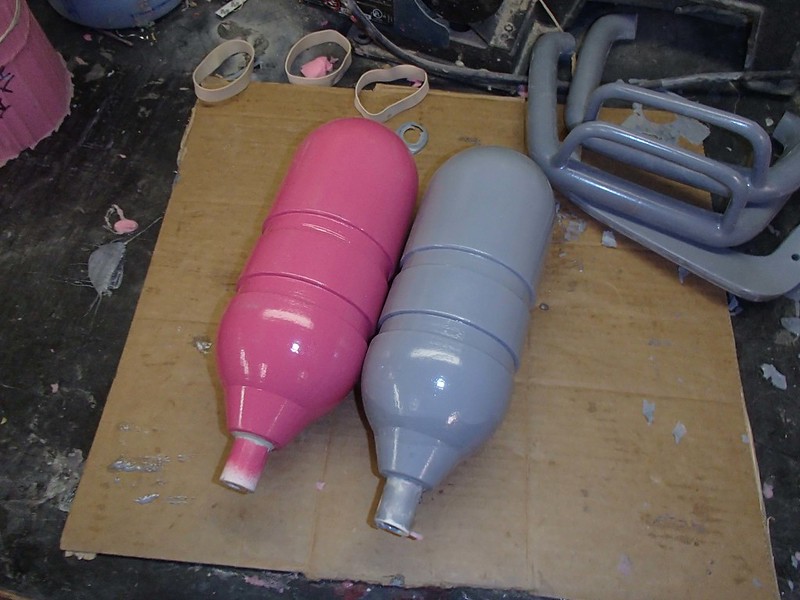
In other news, I molded the toe rails, the shoulder brackets, and the tanks that go on the back of the armor. Here's the tank prepped for molding:
And the toe rails:
I neglected to get enough "during" photos of the process, but here's all three molds filled with silicone:
After they'd cured, here's the mold for the shoulder brackets with the cardboard removed:
Once the prototype was cut out, the mold looked like so:
Here's the first pair of cast toe rails:
And the first copy of the rear tank next to the prototype:
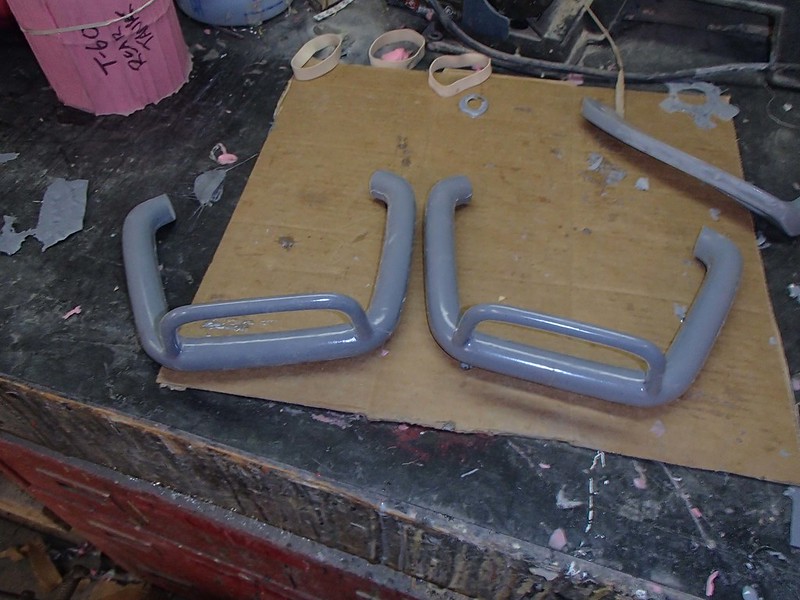
I didn't take any pictures of the cast shoulder brackets until after I'd drilled them and bolted them into place:
They'll do the trick. I just need to tighten everything up and maybe add one more bolt to keep the shoulders from sagging outward:

Finally, I went ahead and installed the rails on the chest so I wouldn't lose them in the shop somewhere:
So that's a bit of progress. Stay tuned...
I mentioned trying on the platform shoes. Last night I got someone to snap some pics. Here's my favorites:
I also spent some more quality time cleaning out the Thunderwear mold:
After spending too much time with my head up my butt, I realized that this is what minions are for. So I set my assistant Chuck to work cleaning out the rest of the clay bits inside the mold:
She really got into it:
Once she was done fooling around with that, I went ahead and poured a bucket of liquid neoprene into the mold:
The mold was rolled around to coat the interior and I used a brush to get coverage on some of the high spots. Then the excess neoprene was poured back into the bucket:
This leaves a rubber skin on the inside of the mold:
I may end up adding another layer or two today before I peel it out of the inside of the mold.
In other news, I molded the toe rails, the shoulder brackets, and the tanks that go on the back of the armor. Here's the tank prepped for molding:
And the toe rails:
I neglected to get enough "during" photos of the process, but here's all three molds filled with silicone:
After they'd cured, here's the mold for the shoulder brackets with the cardboard removed:
Once the prototype was cut out, the mold looked like so:
Here's the first pair of cast toe rails:
And the first copy of the rear tank next to the prototype:
I didn't take any pictures of the cast shoulder brackets until after I'd drilled them and bolted them into place:
They'll do the trick. I just need to tighten everything up and maybe add one more bolt to keep the shoulders from sagging outward:
Finally, I went ahead and installed the rails on the chest so I wouldn't lose them in the shop somewhere:
So that's a bit of progress. Stay tuned...
One, why is her name Chuck? :lol Two, is there any downside to molding a part like that where you cut the mold into halves rather than mold it in halves?
One, why is her name Chuck? :lol Two, is there any downside to molding a part like that where you cut the mold into halves rather than mold it in halves?
The downside is an ugly seam line if you're not good at the jeweler's cut. The upside is that you don't spend as much time setting up your parting wall. The other downside is potentially having extra bubbles to deal with since they'll flow along the part instead of away from it.
Her name is Chuck because I've decided that's a good shortening of "Charlotte."
...concerning the neoprene: can you keep sealed tight and re-use it and for how long...or is there a "best before date" on that bucket?
It's an air-dry product. I haven't seen an expiration date on it, so I suppose it's going to be good as long as it doesn't dry out, freeze, or sit still long enough to settle and separate.
In other news, we did a duct tape test fit the other day and, being a complete idiot, I neglected to take decent photos. This is one of the best:
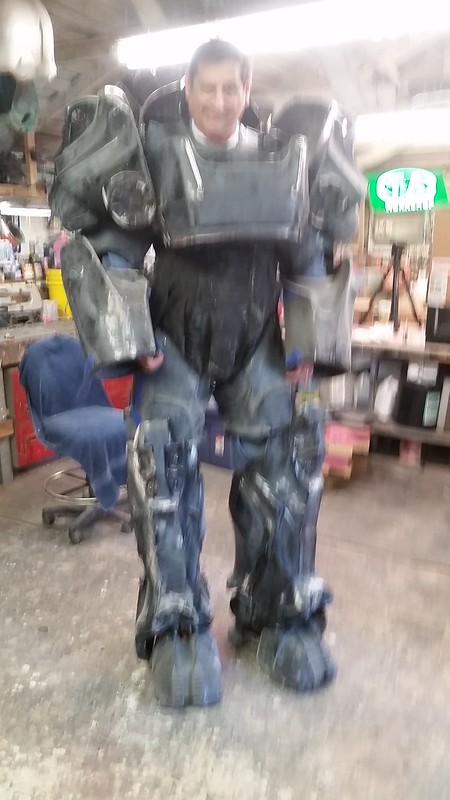
The rest are like this:
I'll have to do another fit test once I've done a bit more prep work and gotten the rigging started.
Awesome! Remove the core so one of the NPCs doesn't jack it! :lol
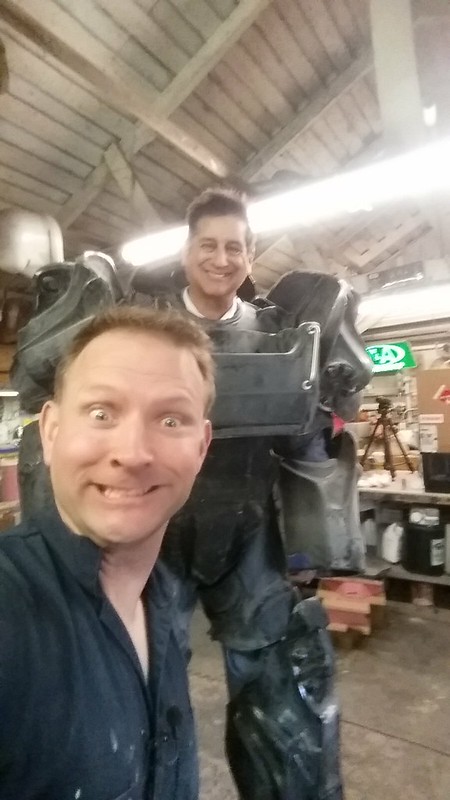
I mentioned we did a test fit the other day and that I didn't get any good photos.
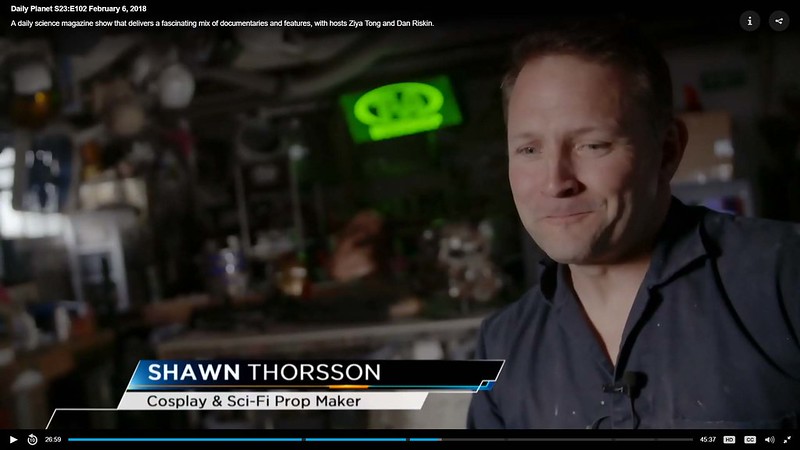
The reason for both was because there was a film crew in the workshop from a Canadian TV show called "Daily Planet." They came out to interview me about some of the stuff I build:
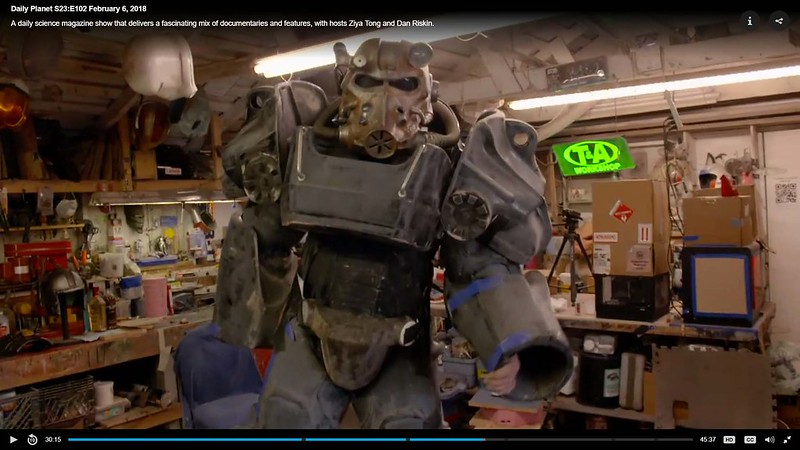
Here's a good screen grab of the test fit:
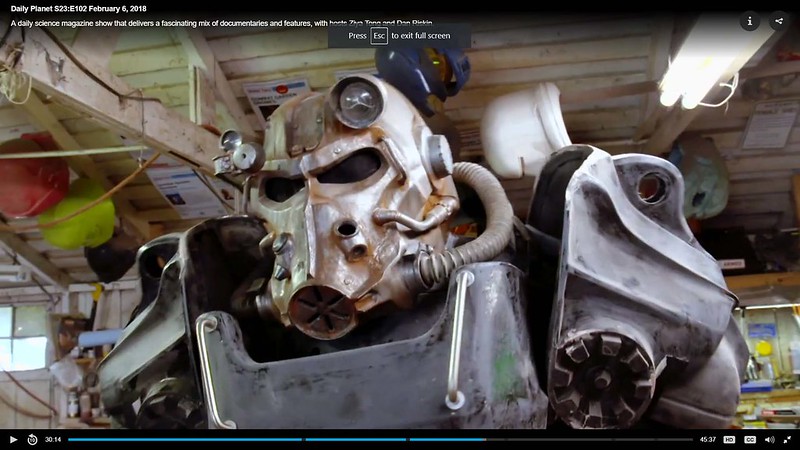
And another:
You can see the whole episode here: https://www.discovery.ca/Shows/Daily-Planet/Video?vid=1247436
My segment begins at around 24:55.
The reason for both was because there was a film crew in the workshop from a Canadian TV show called "Daily Planet." They came out to interview me about some of the stuff I build:
Here's a good screen grab of the test fit:
And another:
You can see the whole episode here: https://www.discovery.ca/Shows/Daily-Planet/Video?vid=1247436
My segment begins at around 24:55.
Does this mean the your work goes up in value :love or Down :wacko nice segment...
At this point, I've been on enough different media outlets that I doubt it really changes anything. What was weird was the fact that I didn't get the usual flood of messages in my inbox from random folks trying to get me to build them things after showing up in some big media outlet.
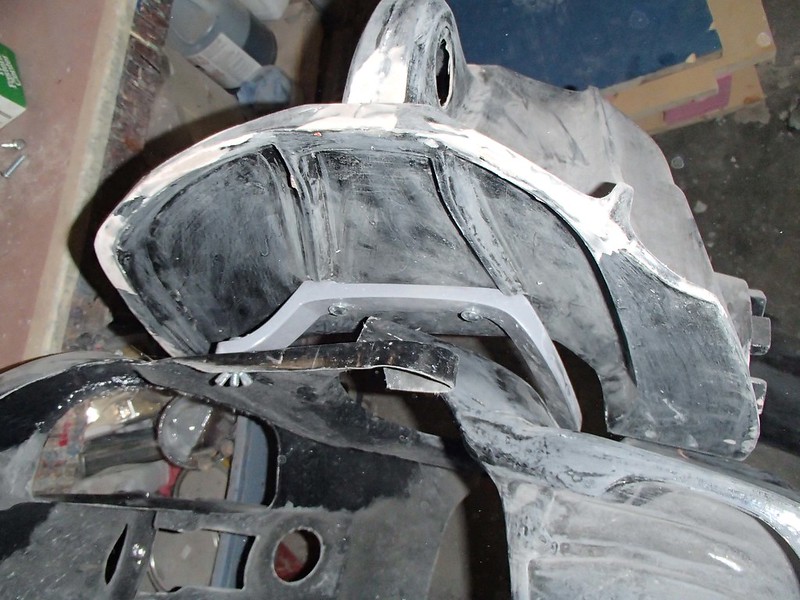
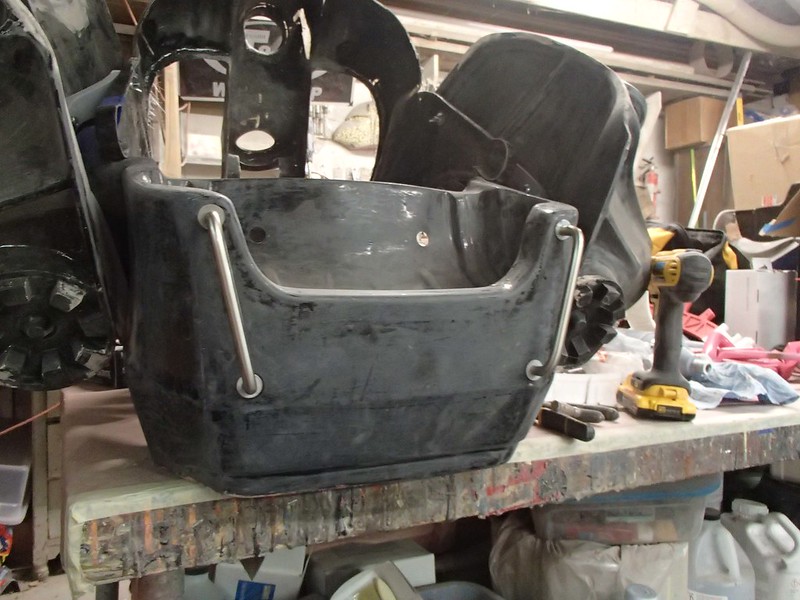
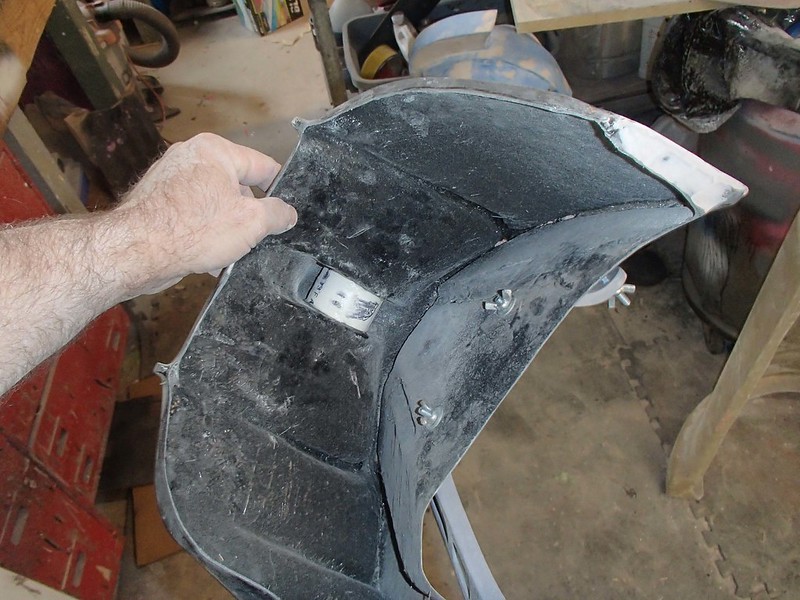
Anyhow, we dusted off some of the parts of this project yesterday and did a bunch of the prep work they'll need before priming and painting.
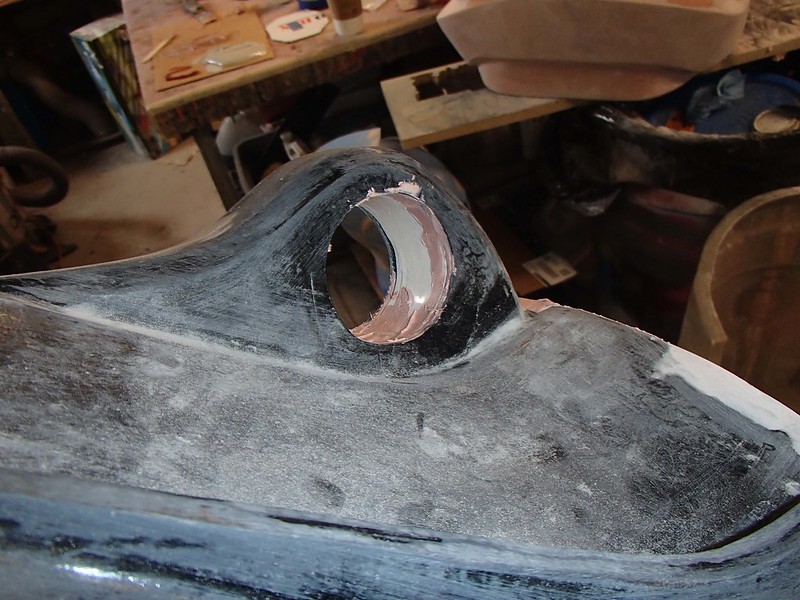
Most of it was just applying filler and sanding down the mold lines, but the main highlight would probably be adding the insides to the shoulder lifting eyes:
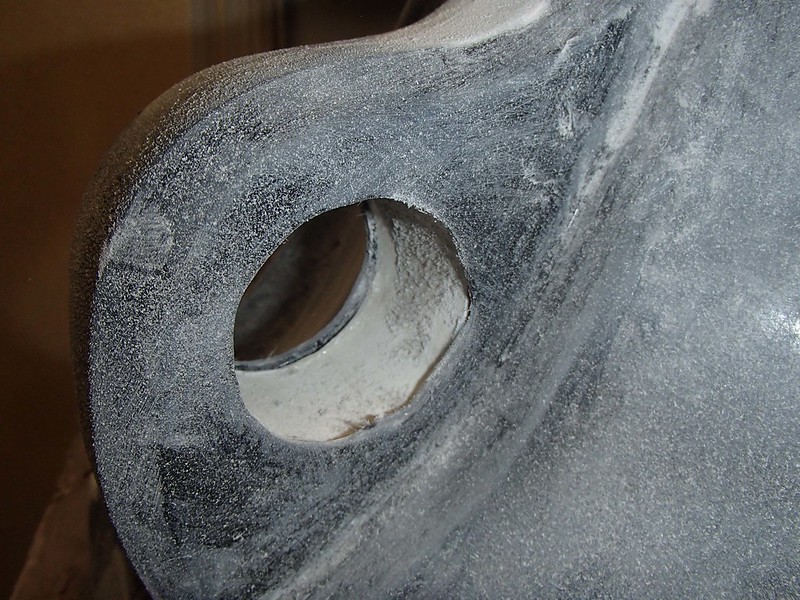
They're really just some short lengths of PVC pipe glued into place inside the fiberglass parts:
Then the hole was trimmed back to fit the inside diameter of the pipe and the seam was gooped with a bit of Bondo to hide the joint:
We also went ahead and got started making the little add-on details for either side of the chest:
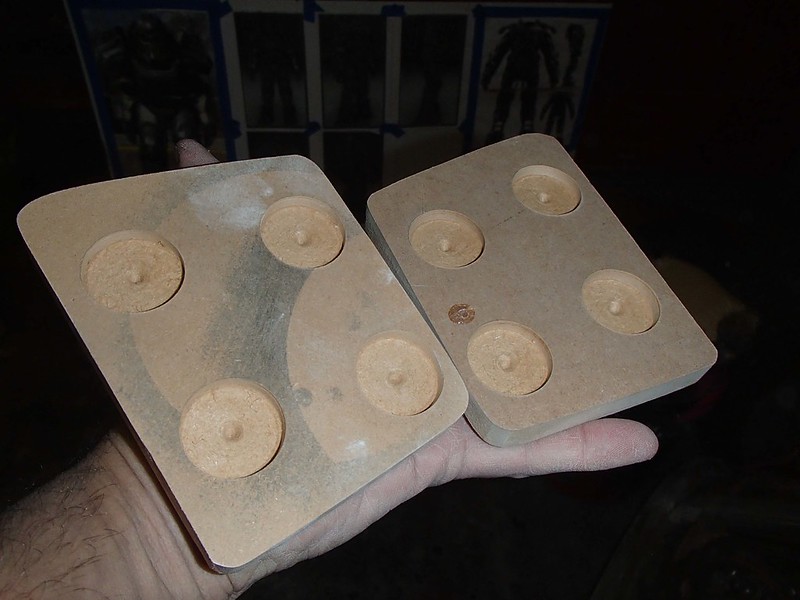
Now I just need to add bolt heads to the recesses and then it'll be time to mold these parts and cast them in resin.
More to come as soon as I get these pieces in primer and possibly paint.
Woo-hoo!
CAKComedyProps
Active Member
Any new stuff? How are the sanding girls doin'? :lol
Similar threads
- Replies
- 1
- Views
- 858