Rad cant wait.
You are using an out of date browser. It may not display this or other websites correctly.
You should upgrade or use an alternative browser.
You should upgrade or use an alternative browser.
Star Lord's new scanner
- Thread starter Zuiun
- Start date
More toys came in, yay!


Kerberos23
Well-Known Member
Was it 1 or 4 ohm? Will be hard to get one with the exact markings, especially from online vendors. Pictures are going to be stock photos and they will just grab one out of a big parts bin.
1Ω
Looks right to me
Looks right to me
Soulinertia Damn you move fast!
Last edited by a moderator:
smithjohnj
Sr Member
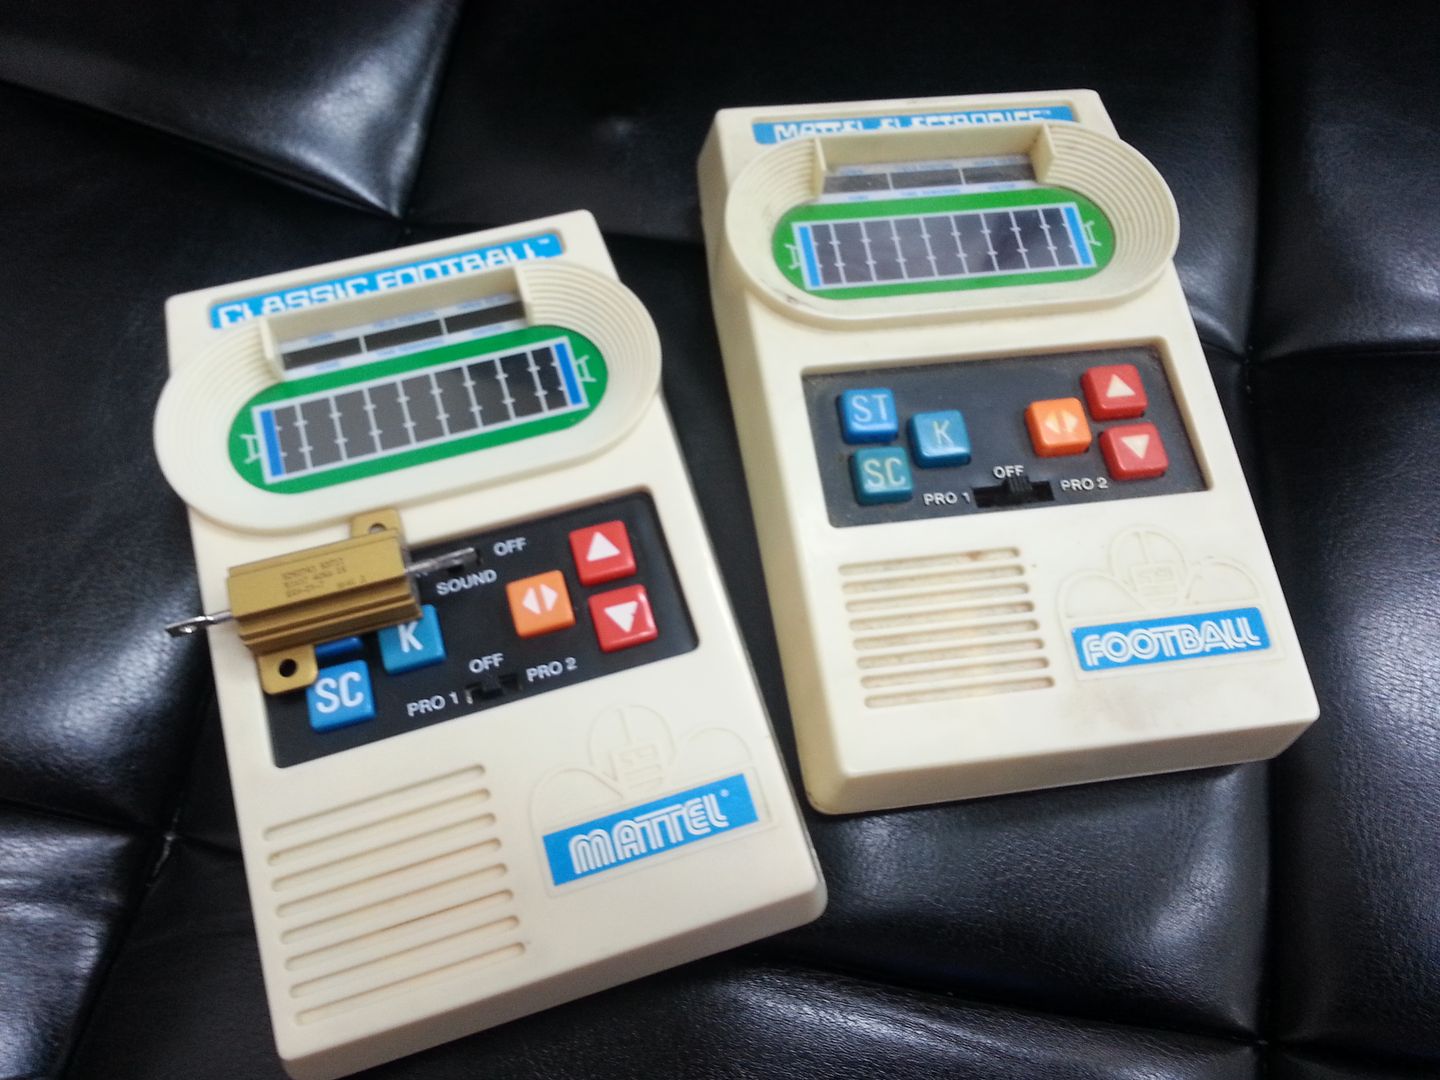
Here are some comparisons between the three “white” case Mattel handheld football games. I did not include information about the“green” case Football 2/II version from 1978. This photo provides a comparison of the front covers of the 1977, 2000, and 2016 versions.

Mattel Football, Football I (1977)
External Characteristics:
Top Label: MATTEL ELECTRONICS, White on Blue
Bottom Label: FOOTBALL/FOOTBALL I, White on Blue
Front Cover:
Deep Recess (10 Tier Seating), “90-yard” Oval Stadium
Slightly Tapering at Top
Buttons
NO Sound Control
Three Blue: ST, SC, K
One Orange: Left/Right Arrows
Two Red Up Arrow, Down Arrow
3-Position Slider Switch
PRO I OFF PRO 2
Power Adapter Jack (right side when facing front)
Back Cover:
Sealed with 3, Tri-Lobal (TP3) Security Screws.
Some people have indicated these are TriAngular or TA screws however TA screw heads have straight sided recesses and these seem to haves loping recess like the TP3 (similar to the difference between Phillips heads and Cross heads). All of the few examples I have examined have had their heads damaged to some degree. There is obvious TP3 drivers but with care either Flat bladed or Torx drivers can be used successfully.
Some have Molded Covers with;
©MATTEL, INC. 1977
Other Covers do not have any molded copyright information.
Back Label
FOOTBALL INSTRUCTIONS
which includes “IF GAME MALFUNCTIONS...” instructions
Battery Cover Type:
Push and Slide (to left when facing the rear)
Power:9 Volt Battery, or 9 volt Battery Adapter via Mono Plug on Left (whenfacing the rear)
Internals:
Display Screen: 1/8” Red (Acrylic?) Plastic Plate with Green, White andBlue screen printed details on front surface.
Display Unit Provided by Rockwell CMC -D103 Board which includes;
Game Statistics Display: Multi-Segment LED
2 to Display Down
3 to Display Field Position/Time Remaining
2 to Display Yards to Go
Game Play Display: 3 x 9 LED Bar Matrix
Approximate internal volume with electronics, battery, and some internal supports removed, but red screen in place;
62 mm x 131 mm x 9 mm
Mattel Classic Football I (2000)
External Characteristics:
Top Label: CLASSIC FOOTBALL, White on Blue
Bottom Label: MATTEL, White on Blue
Front Cover:
Same Deep Recess (10 Tier Seating), “90-yard” Oval Stadium
Slightly Tapering at Top
Added New 2-position Sound Slider
Labeled ON SOUND OFF
Same 6 Buttons
Same 3-Position Slider Switch
No Power Jack
Back Cover:
Sealed with 4 Phillips Head Screws.
THE 4 SCREW BACK COVER AND ABSENCE OF A POWER JACK IDENTIFIES THIS AS THE CASE USED IN THE GOTG 2 FINAL TRAILER WITH THE TOP FRONT LABEL REPLACED
Some have Molded Covers with;
©MATTEL, INC. 2000 CHINA
Back Label
FOOTBALL INSTRUCTIONS
Separate“IF GAME MALFUNCTIONS...” label
Battery Cover Type:
Phillips Head Screw with Tab (NOT interchangeable with 2016 version)
Power: 3 Volt via 2 AA Batteries
Internals:
Display Screen: Thin, Clear (Acrylic?) Plastic Sheet with Green, White and Blue screen screened details on frontsurface.
Display Unit: Provided by 35-connector Liquid Crystal Display which provides;
Game Statistics
Game Play Display
LCD Back-lighting: 6 RED Light Emitting Diodes (LEDs)
Internal volume limited unless significant removal of supports and battery casing.
Mattel Electronic Football (2016)
External Characteristics:
Top Label: NONE
Bottom Label: ELECTRONIC FOOTBALL, White on Black
Front Cover:
Shallow Recess (Five Tier Seating) “100-yard” Oval Stadium
Square Sided
Toggled Push-ON Push-OFF Sound Control
Labeled SOUND Only
Same Six Buttons
Same 3-Position Slider Switch
No Power Jack
Back Cover:
Sealed with 6 Phillips Head Screws.
Molded Cover Containing approximate 65 words including;
©MATTEL
and a seven-character manufacturing code.
Back Label
FOOTBALL INSTRUCTIONS
NO “IF GAME MALFUNCTIONS...” instructions or label
Battery Cover Type:
Phillips Head Screw with Tab (NOT interchangeable with 2000 version)
Power: 4.5Volt via 3 AAA Batteries
Internals:
Display Screen: Thin, Clear (Acrylic?) Plastic Sheet with Green, White andBlue screen screened details on front surface.
Display Unit: Provided by 35-connector Liquid Crystal Display which provides;
Game Statistics
Game Play Display
LCD Back-lighting: 4 RED Light Emitting Diodes (LEDs)
Internal volume limited unless significant removal of supports and battery casing.
This photo provides a comparison of the inside of the front covers 1977,2000, and 2016 versions.
Last edited by a moderator:
smithjohnj
Sr Member
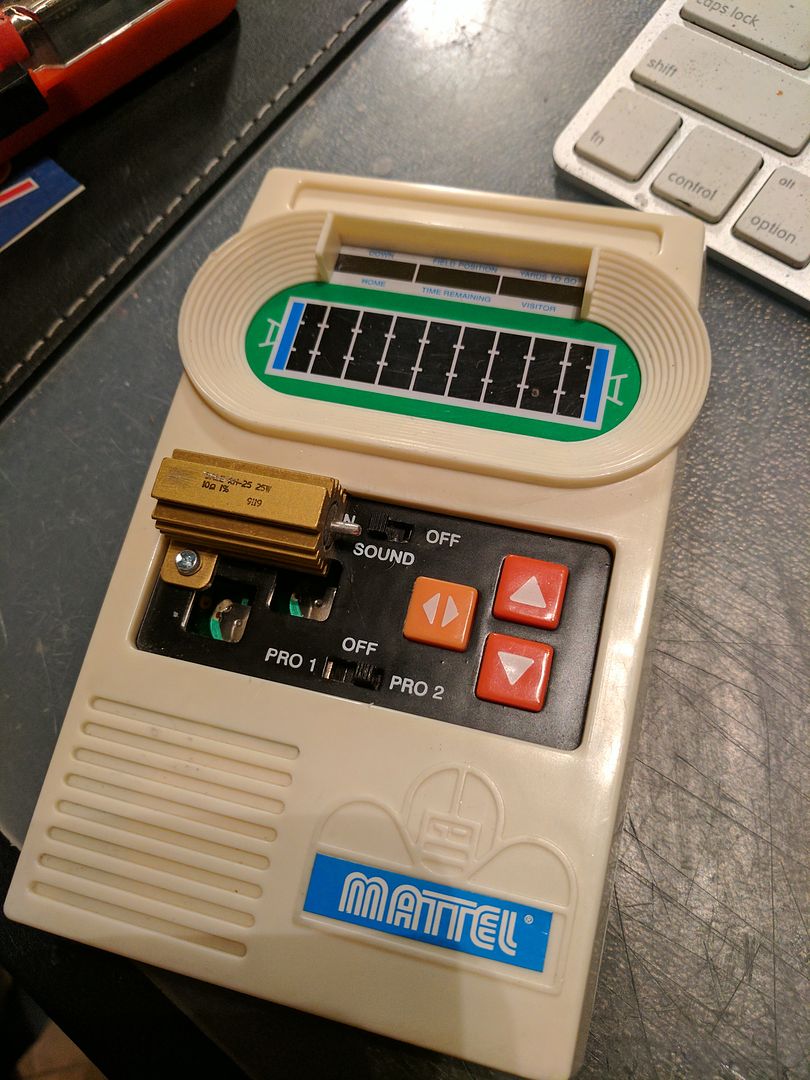
I think I see where one of my eBay wire wound resistors went when my seller told me it was no longer available after a "Buy It Now" purchase.
So yeah, I made some upgrades . . .
Here it is in motion:
https://www.youtube.com/watch?v=hlnnKvqOr9w
Ok...woah. This is just too cool
zeroKilo
New Member
Nice! I love how fast everyone has jumped on this prop! I bought the 77 version before I was done watching the trailer last Tuesday and just grabbed the 2000 version as well. My plan is to use a Raspberry Pi Zero to power a small TFT display (possibly with touchscreen) for the graphics. Can anyone tell me what is the vertical and horizontal dimensions of the display?
Capn_Jack_Savvy
Sr Member

smithjohnj
Sr Member
In trying to identify unknown parts I sometimes break the elements down and model them to see if they can trigger new ideas or new ways of looking at things. I did that with the scanner control which lead me into areas as diverse as camera advance levers, camera thumbs up grips, gun safety levers, to string instrument tuning pegs. Perhaps a rough representation might trigger better ideas from others on this thread. I do not know how accurate my quick rendering is but if there are corrections or suggestions for improvement I can try to incorporate them in the hopes of someone having a "eureka" moment.

zeroKilo
New Member
Wow! I guess I wasn't the only one to jump on eBay as soon as the trailer was over, LOL! My plan is to mod it with a Raspberry Pi zero and TFT display for the graphics. Lots of guides online for doing portable raspberry pi computers so I'm thinking it *should be* reasonably easy.
beardo
Active Member
So yeah, I made some upgrades . . .
Here it is in motion:
https://www.youtube.com/watch?v=hlnnKvqOr9w
VERY nice!
smithjohnj
Sr Member
It seems you can find some Mattel Handheld Games with missing battery covers. These are often slightly less expensive to obtain. There is always the possibility of a 3D printed replacement (which I am considering) but there is another option of getting a similar cover from a different (currently) less expensive game. Here are some examples and cautions I have researched.
Possible fill-ins for the Mattel Football/Football I 1977 game battery cover.
The battery cover for the 1978 Baseball game seems to be the same but it is tan plastic not white.
The battery cover for the 1979 Basketball 2 game seems to be the same but it is orange plastic not white. The earlier 1978 Basketball version is NOT suitable as it uses a Press and Slide (to the bottom) cover.
The battery cover for the 1978 Football 2 game seems to be the same but it is green plastic not white.
The battery cover for the 1978 Soccer is NOT suitable as it uses a Press and Slide(to the bottom) cover and it is brown plastic not white.
The battery cover for the 1978 Hockey is NOT suitable as it uses a Press and Slide(to the bottom) cover and it is blue plastic not white.
Possible fill-ins for the Mattel Classic Football 2000 game battery cover.
2001 Classic Baseball, brown instead of white,requires internal tab to be narrowed slightly.
2003 Classic Basketball, not at all suitable, cover has a recess and the screw end is angled, not flat it is orange plastic not white.
The battery cover for the 1978 Classic Football 2 game seems to be the same but it has a recess in the center of the cover, it is a reverse design with the screw to the left (but it is a symmetrical design so this is probably not an issue) it is green plastic not white.
Last edited by a moderator:
Here are some comparisons between the three “white” case Mattel handheld football games. I did not include information about the“green” case Football 2/II version from 1978. This photo provides a comparison of the front covers of the 1977, 2000, and 2016 versions.
View attachment 712282
Mattel Football, Football I (1977)
External Characteristics:
Top Label: MATTEL ELECTRONICS, White on Blue
Bottom Label: FOOTBALL/FOOTBALL I, White on Blue
Front Cover:
Deep Recess (10 Tier Seating), “90-yard” Oval Stadium
Slightly Tapering at Top
Buttons
Three Blue: ST, SC, K
One Orange: Left/Right Arrows
Two Red Up Arrow, Down Arrow
3-Position Slider Switch
PRO I OFF PRO 2
Power Adapter Jack (right side when facing front)
Back Cover:
Sealed with 3, Tri-Lobal (TP3) Security Screws.
Some people have indicated these are TriAngular or TA screws however TA screw heads have straight sided recesses and these seem to haves loping recess like the TP3 (similar to the difference between Phillips heads and Cross heads). All of the few examples I have examined have had their heads damaged to some degree. There is obvious TP3 drivers but with care either Flat bladed or Torx drivers can be used successfully.
Some have Molded Covers with;
©MATTEL, INC. 1977
Other Covers do not have any molded copyright information.
Back Label
FOOTBALL INSTRUCTIONS
which includes “IF GAME MALFUNCTIONS...” instructions
Battery Cover Type:
Push and Slide (to left when facing the rear)
Power:9 Volt Battery, or 9 volt Battery Adapter via Mono Plug on Left (whenfacing the rear)
Internals:
Display Screen: 1/8” Red (Acrylic?) Plastic Plate with Green, White andBlue screen printed details on front surface.
Display Unit Provided by Rockwell CMC -D103 Board which includes;
Game Statistics Display: Multi-Segment LED
2 to Display Down
3 to Display Field Position/Time Remaining
2 to Display Yards to Go
Game Play Display: 3 x 9 LED Bar Matrix
Approximate internal volume with electronics, battery, and some internal supports removed, but red screen in place;
62 mm x 131 mm x 9 mm
Mattel Classic Football I (2000)
External Characteristics:
Top Label: CLASSIC FOOTBALL, White on Blue
Bottom Label: MATTEL, White on Blue
Front Cover:
Same Deep Recess (10 Tier Seating), “90-yard” Oval Stadium
Slightly Tapering at Top
Same 6 Buttons
Same 3-Position Slider Switch
No Power Jack
Back Cover:
Sealed with 4 Phillips Head Screws.
THE 4 SCREW BACK COVER AND ABSENCE OF A POWER JACK IDENTIFIES THIS AS THE CASE USED IN THE GOTG 2 FINAL TRAILER WITH THE TOP FRONT LABEL REPLACED
Some have Molded Covers with;
©MATTEL, INC. 2000 CHINA
Back Label
FOOTBALL INSTRUCTIONS
Separate“IF GAME MALFUNCTIONS...” label
Battery Cover Type:
Phillips Head Screw with Tab (NOT interchangeable with 2016 version)
Power: 3 Volt via 2 AA Batteries
Internals:
Display Screen: Thin, Clear (Acrylic?) Plastic Sheet with Green, White and Blue screen screened details on frontsurface.
Display Unit: Provided by 35-connector Liquid Crystal Display which provides;
Game Statistics
Game Play Display
LCD Back-lighting: 6 RED Light Emitting Diodes (LEDs)
Internal volume limited unless significant removal of supports and battery casing.
Mattel Electronic Football (2016)
External Characteristics:
Top Label: NONE
Bottom Label: ELECTRONIC FOOTBALL, White on Black
Front Cover:
Shallow Recess (Five Tier Seating) “100-yard” Oval Stadium
Square Sided
Same Six Buttons
Same 3-Position Slider Switch
No Power Jack
Back Cover:
Sealed with 6 Phillips Head Screws.
Molded Cover Containing approximate 65 words including;
©MATTEL
and a seven-character manufacturing code.
Back Label
FOOTBALL INSTRUCTIONS
NO “IF GAME MALFUNCTIONS...” instructions or label
Battery Cover Type:
Phillips Head Screw with Tab (NOT interchangeable with 2000 version)
Power: 4.5Volt via 3 AAA Batteries
Internals:
Display Screen: Thin, Clear (Acrylic?) Plastic Sheet with Green, White andBlue screen screened details on front surface.
Display Unit: Provided by 35-connector Liquid Crystal Display which provides;
Game Statistics
Game Play Display
LCD Back-lighting: 4 RED Light Emitting Diodes (LEDs)
Internal volume limited unless significant removal of supports and battery casing.
This photo provides a comparison of the inside of the front covers 1977,2000, and 2016 versions.
View attachment 712283
A very comprehensive well researched post.
Thank you
")
Last edited by a moderator:
smithjohnj
Sr Member
Before someone else catches my error, there is one more distinguishing characteristic between the three Mattel "white" case handheld games. That is the SOUND control.
On the 1977 version, there is NO sound control. Sound is always on.
On the 2001 version, there is a 2-position SLIDER SWITCH labeled ON SOUND OFF.
On the 2016 version, there is a toggled, PUSH-ON PUSH-OFF Button labeled only SOUND
I have edited my earlier post so all of the information is in a single location.
This is also another validation the GOTG Trailer 2 prop is based upon the 2001 version. The SOUND and OFF labels are displayed and the ON has been cut out. Yes, in case you have not realized it yet, the $80 vintage game you just got on eBay has to have part of the control panel cutaway so the wire wound power resistor and new control will fit. On the right-hand side of the cutout, the opening for "K" button is extended up to the top of the recessed control panel. This is evident from screen captures from the trailer.
CAUTION: The rest of the "possible" cutoff is conjecture on my part until better information is available. The bottom of the cutout "may" follow to the left along the bottom of the"K" opening, thru the middle of the "SC" button opening and on to the recess line. If this is the situation, the top and left side of the of the cutout "may" follow the upper left corner of the control panel recess line.
View attachment Cutout.pdf
Also if the game printed circuit board (PBC) is not replaced with a different piece of electronic gear, the foam "button return" covering which lies on top of the original PCB must be removed from under the "ST", "SC" and "K" buttons. Originally the "springy" nature of the foam provided all the rebounding force necessary to return the control keys to their "up" position once they are released.
I haven't cut the panel yet, but I did remove the buttons and the foam pad to install my resistor.
Unless I can find a suitable knob, I'll be modeling and 3D printing or and the lever. I'll also be making a replacement sticker for the top
Unless I can find a suitable knob, I'll be modeling and 3D printing or and the lever. I'll also be making a replacement sticker for the top
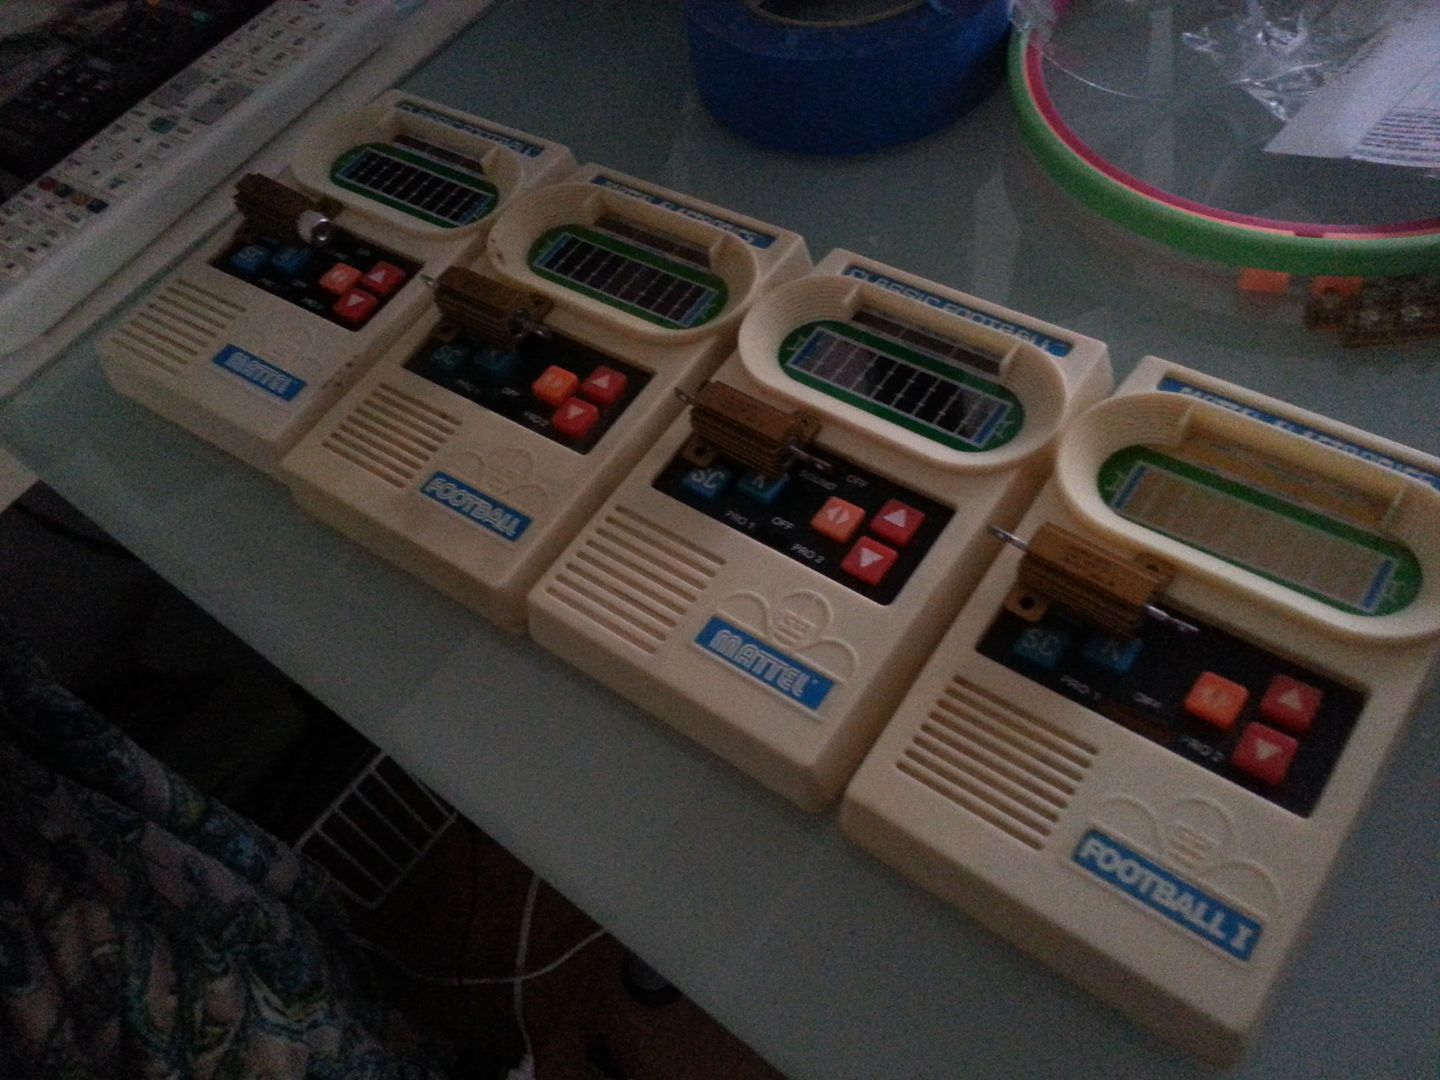
I've acquired a few more myself:
Similar threads
- Replies
- 3
- Views
- 942
- Replies
- 0
- Views
- 650
- Replies
- 5
- Views
- 1,247
- Replies
- 6
- Views
- 1,859