You are using an out of date browser. It may not display this or other websites correctly.
You should upgrade or use an alternative browser.
You should upgrade or use an alternative browser.
PieSix
New Member
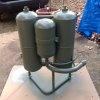
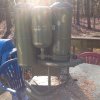
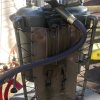
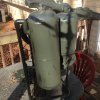
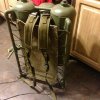
Rear side of the tanks, with the back pad and shoulder straps added. I used a WW2 packboard canvas strung with paracord and two straps from a large Alice pack. The tank seams are visible but as this is going to be against my body and not visible, I am not terribly fussed about it. Weathering with steel color paint still needs to be done to simulate scuffs in the paint.

PieSix
New Member
beyond awesome...tanks need some fading stencil(s)
Good call! I'm gonna have to freeze frame the dvd to see what, if anything, might be stenciled on the screen used flamethrower.
PieSix
New Member
Ok, so as promised here is a walkthrough of how I made the hat. I was unable to find a blank or capeline with a large enough brim to work, so I came to the conclusion that I wouls have to make one from scratch, using a large piece of hatters felt.
To start with, you need a hat block and ring. Professional versions of these are hard to find and expensive. Once more they are spcifically sized, so you would have to get one in your own size...
or...
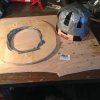
You can just make one. It is not difficult. First get a piece of 10ga ground wire and wrap it around the widest part of your head. The wire is malleable enough to form to your skull but sturdy enough to retain the shape, and you now have a ring the exact shape of your own head. Take this ring and lay it on a piece of 1x8 board and trace it out. Do this 4 or 5 more times so you can cut out 6 or so wood ovals. Stack them on top of each other and secure them together with screws, making a tower. Then take a belt sander and sand the sides smooth. You can addmore ovals on top and round it off with a belt sander to make a dome shape, or do what I did and ball up a hand towel and use duct tape to make a rounded form.
Next is the ring. Simply place the block on a piece of plywood, trace the base, and draw another ring about 4 inches from the inner oval, then cut it out so you have a ring or donut shape.

PieSix
New Member
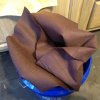
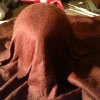
Place the hat block on a flat surface. I used another piece of plywood pecause I knew there was going to be water and sizing all over. Spread the felt over the top of the block, keeping it roughly centerd. You will then need to start stretching the felt over the block gently but firmly. As you do this it will begin to form a dome shape that will become the crown. Do not rush this process. Patience is key here.

PieSix
New Member
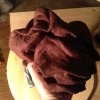
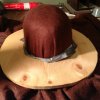
Next is the ring. Once you have the crown roughly to form, take the ring and slide it down over the block, trapping the felt on the block. You will see a ton of wrinkles here. Don't panic. Take a couple iron dumbells (or anything heavy that you have around) and place them on the ring to hold it in place. Then start pulling the excess felt from the outside of the ring away from the crown block. You will start to notice the wrinkles lessen and some will disappear entirely. Keep at this working randomly around the outside of the ring. Again patience is key. Eventually all the creases disappear.
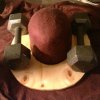
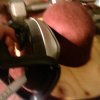


PieSix
New Member
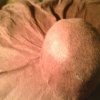
At this point, you should apply some sizing to the crown to help it keep its shape. Originally I was going to use Kahls hat stiffener, but quickly learned that it is for stiffening hats that already have sizing, not pieces of raw felt.
why is sizing important? Well, simply put, sizing is what allows the hat to retain its hat shape and not return to a flat piece of fabric. As 100 hatters what is a good sizing and you will get 100 answers (as long as they aren't using some "secret formula") but most of them use watered down white glue in some form or other, so that is what I decided to go with at about a 5:1 ratio of water to glue. Apply evenly and allow to completely dry before adding more.
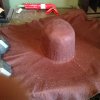
once the crown has some sizing in it, take a steam iron and press the wrinkles out of the brim, making it as flat and smooth as possible. Now you can measure out the desired brim width and mark with chalk. Cut to the correct width with a razor knife.
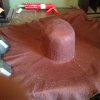
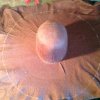
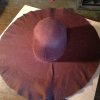
- - - Updated - - -
Put some more sizing around the base of the crown and allow to dry completely. Replace the ring and iron out the remaining wrinkles in the brim.
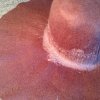
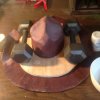
- - - Updated - - -
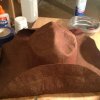
At this point I also wet the top of the crown with more sizing and added the 4 dents. Once dry I removed the ring, and applied sizing to the vrim, and made the bends one at a time, letting them dry completely before doing the next.
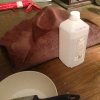
- - - Updated - - -
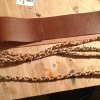
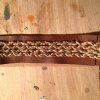
Next the hat band. MacReady's hat had a wide leather band with 4 braided leather cords, called stampede strips, aroud the center, on top of the leather band.
- - - Updated - - -
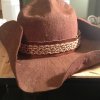
Finished hat. All that is then left is to add a 1inch thin leather tie strap on each side. These tie around the hat band itself and slip through slits in the brim at the base of the crown.


why is sizing important? Well, simply put, sizing is what allows the hat to retain its hat shape and not return to a flat piece of fabric. As 100 hatters what is a good sizing and you will get 100 answers (as long as they aren't using some "secret formula") but most of them use watered down white glue in some form or other, so that is what I decided to go with at about a 5:1 ratio of water to glue. Apply evenly and allow to completely dry before adding more.
once the crown has some sizing in it, take a steam iron and press the wrinkles out of the brim, making it as flat and smooth as possible. Now you can measure out the desired brim width and mark with chalk. Cut to the correct width with a razor knife.


- - - Updated - - -
Put some more sizing around the base of the crown and allow to dry completely. Replace the ring and iron out the remaining wrinkles in the brim.


- - - Updated - - -
At this point I also wet the top of the crown with more sizing and added the 4 dents. Once dry I removed the ring, and applied sizing to the vrim, and made the bends one at a time, letting them dry completely before doing the next.


- - - Updated - - -
Next the hat band. MacReady's hat had a wide leather band with 4 braided leather cords, called stampede strips, aroud the center, on top of the leather band.


- - - Updated - - -
Finished hat. All that is then left is to add a 1inch thin leather tie strap on each side. These tie around the hat band itself and slip through slits in the brim at the base of the crown.


Chairman Kaga
Well-Known Member
This is absolutely stunning.
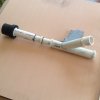
If I may ask what type of hose did you use for the flame thrower wand?
If I may ask what type of hose did you use for the flame thrower wand?
That looks 100% awesome!!!
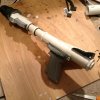
What did you use for the pistol, and did you use the file made available here for the wrap on the dynamite?
What did you use for the pistol, and did you use the file made available here for the wrap on the dynamite?
Similar threads
- Replies
- 43
- Views
- 3,670
- Replies
- 1
- Views
- 134
- Replies
- 0
- Views
- 230
- Replies
- 5
- Views
- 392

