Correct.
Awsome, I thought my esb mpp was complete until I read this. Thanks for helping me finish it. Also, I already have a few of your cards on my sabers, great products.
You are using an out of date browser. It may not display this or other websites correctly.
You should upgrade or use an alternative browser.
You should upgrade or use an alternative browser.
Vader MPP bubble mounting
- Thread starter parfaitelumiere
- Start date
I also wanted to add, I think the board in the MPP is not as wide as the bubble strip. The MPP clamp wraps around the bubble strip only, and the board is flipped, cut and glued to the bottom in between the clamp sides.


- - - Updated - - -
you can see it here too - thanks to Chaim!
http://s833.photobucket.com/user/Sym-Cha/media/MPP09-1.jpg.html
- - - Updated - - -
you can see it here too - thanks to Chaim!
http://s833.photobucket.com/user/Sym-Cha/media/MPP09-1.jpg.html
I do appreciate the collaboration and information provided by you guys regarding the Exactra parts, and offering up information so that they can be accurately replicated.
FWIW, I'd be interested in 1 Exactra for a Vader and 1 "Luke ROTJ Hero" on blue for his lightsaber.
FWIW, I'd be interested in 1 Exactra for a Vader and 1 "Luke ROTJ Hero" on blue for his lightsaber.
The ones I will provide are card only. You'll have to source the bubblestrip elsewhere.
That all depends on what people agree should be made first. Eventually, if sales are good, I can justify doing other colors, but I'd like a consensus on the "most wanted" color first.
Has it not been determined yet what color the board was under the remaining Vader saber? I don't have those pics handy...
As far as blue, I have some blue (not just solder mask, but blue through and through) circuit board material that I was going to use to make my own Luke ROTJ V1 board with. I would gladly donate it if it would help get that 13-trace board done in the accurate blue color, though I may only have enough for about 10 cards or so.
Ok folks, finally got some progress on this layout...

Those thin lines are at 0.01 inch, very thin. I've had my digital calipers all across this thing very delicately, as to not scratch up the sample. Trying to be very careful with it.
Will adjust a few things tomorrow, but that's my first crack. Holes in the middle pads down the center are every 0.25 inch.
Seems like the card is pretty wide, might not need that much real estate, but not sure yet. Right now it's as wide as my normal cards at 0.625 inch.
DARTH SABER
Master Member
Ok folks, finally got some progress on this layout...
http://www.slothfurnace.com/images/clampcard/slothfurnace_mpp_card_01.jpg
Those thin lines are at 0.01 inch, very thin. I've had my digital calipers all across this thing very delicately, as to not scratch up the sample. Trying to be very careful with it.
Will adjust a few things tomorrow, but that's my first crack. Holes in the middle pads down the center are every 0.25 inch.
Seems like the card is pretty wide, might not need that much real estate, but not sure yet. Right now it's as wide as my normal cards at 0.625 inch.
Looking good, man!
Ok folks, finally got some progress on this layout...
http://www.slothfurnace.com/images/clampcard/slothfurnace_mpp_card_01.jpg
Those thin lines are at 0.01 inch, very thin. I've had my digital calipers all across this thing very delicately, as to not scratch up the sample. Trying to be very careful with it.
Will adjust a few things tomorrow, but that's my first crack. Holes in the middle pads down the center are every 0.25 inch.
Seems like the card is pretty wide, might not need that much real estate, but not sure yet. Right now it's as wide as my normal cards at 0.625 inch.
You should switch to millimeters
Ok folks, finally got some progress on this layout...
http://www.slothfurnace.com/images/clampcard/slothfurnace_mpp_card_01.jpg
Those thin lines are at 0.01 inch, very thin. I've had my digital calipers all across this thing very delicately, as to not scratch up the sample. Trying to be very careful with it.
Will adjust a few things tomorrow, but that's my first crack. Holes in the middle pads down the center are every 0.25 inch.
Seems like the card is pretty wide, might not need that much real estate, but not sure yet. Right now it's as wide as my normal cards at 0.625 inch.
Beautiful!!
Sent from my iPhone using Tapatalk
Sym-Cha
Master Member
Okay ... I'm back again after a short leave and I want to rattle the cage once more with the bubblestrip in question ... do y'all see what I see?
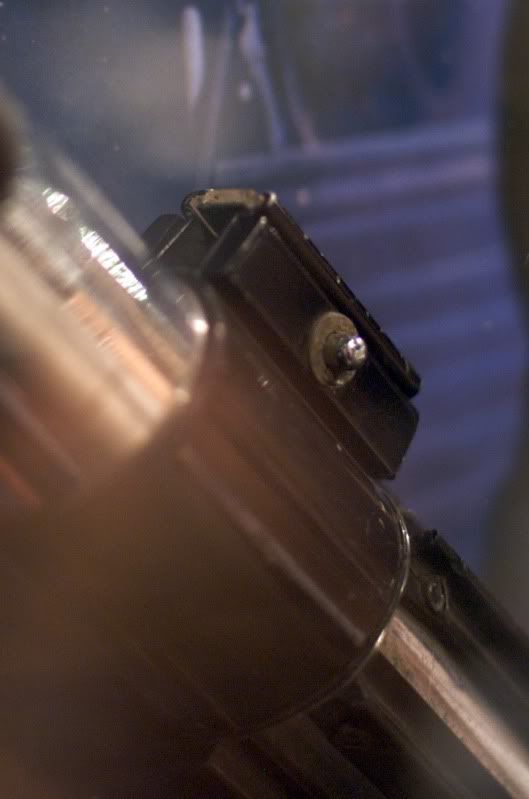
It seems the edge along the entire bubblestrip has been filed just a bit so that the bubbles themselves and surrounding frosting sit almost flush with the MPP clamp teeth ... there seems to be an angle of some sorts at least on the down edge according to that last picture, which is also clearly visible on the shroud side of the bubblestrip which sticks out just a bit . . . or am I mistaken?
Chaïm
Last edited:
:confused
Not sure I even understand what you're referring to
Not sure I even understand what you're referring to


There is a further darker colour nearer a tan too. If I get chance and if I can find them in the house at the moment I'll post a pic of the various colours I have.I've got another weird color:
https://uploads.tapatalk-cdn.com/20170118/307bc2e6e526ea4801ccdfdaead08b07.jpg
I have two of those, from Exactras 20.
The bubble strips have two additional bosses going in the small holes.
Sym-Cha
Master Member
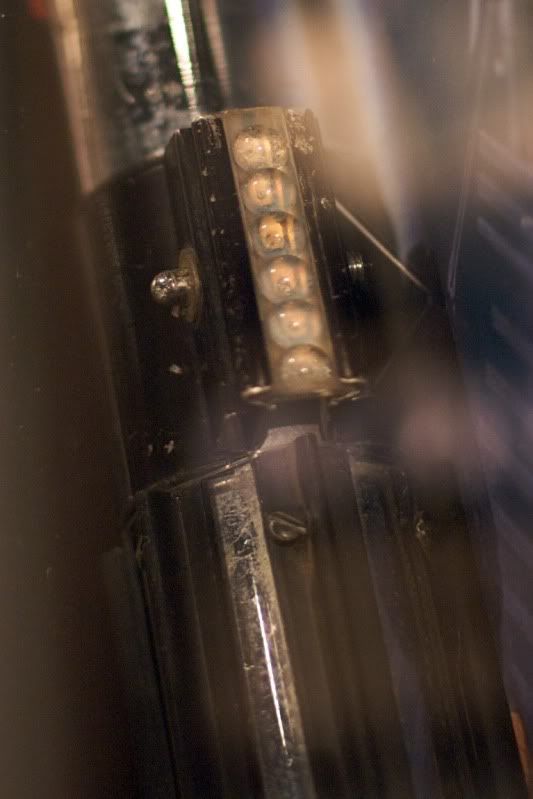
Indeed ... thanks for letting me know veektohr ... the added pictures with red outlines clearly show a filed edge to lift the bubblestrip up a notch
Chaïm
Chaïm
@Sym-Cha I've filed the edges of my strips to a taper like that to make them fit in graflex clamps, so I'd say it's entirely possible.
Last edited by a moderator:
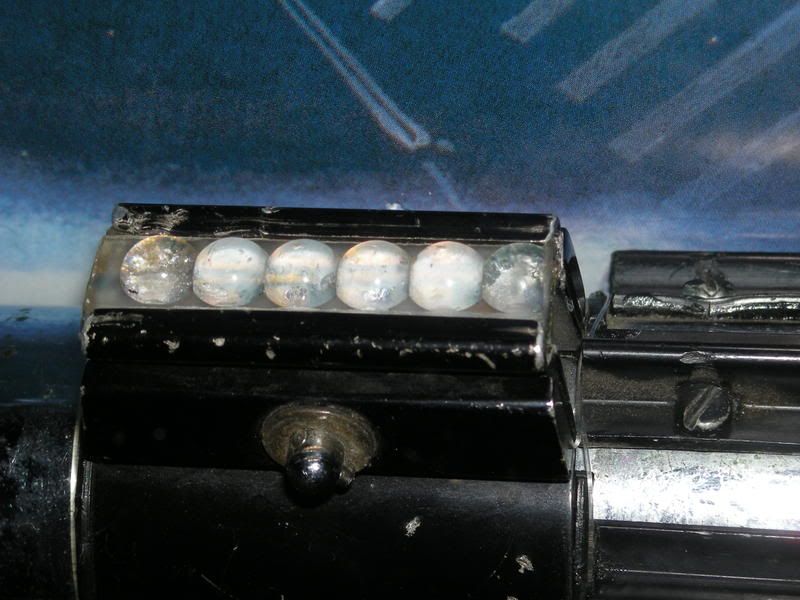
It's possible they only filed a bit from the front of the bubblestrip lengthwise just enough to slide the rest in more easily, because one can see the edge of the clamp teeth almost midway to the end of the cut-off bubble as seen in the third picture above :wacko
Chaïm
Danke je for the clarification
Looks weird, I have not noticed that before
yup it's thread existence reason.
Last edited:
Thanks to you for pointing the "white line on inside" meaning for me: narrow cut plus flipping plus pin shaving on bubble.
This was very helpful to get the final correct design on my lightsaber.
Now I have to find a damager axis to complete the ESB version without removing my lever.
This was very helpful to get the final correct design on my lightsaber.
Now I have to find a damager axis to complete the ESB version without removing my lever.
Similar threads
- Replies
- 46
- Views
- 2,354
- Replies
- 8
- Views
- 1,042
- Replies
- 9
- Views
- 409