Graflex hardware saber

Hello all.
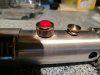
Does anyone have good pics of the ears on the Graflex and the sleeve that's in the middle? Been looking and trying to see the sleeve that covers the pin. I bought small diameter tubing from Lowe's. It's 3/16 in size.
 
Someone with calipers that include the "inner" and "outer" diameter tines could find that. you could even take regular calipers and find the OD of the tube, the wall can't be more than 1/32 or 1/16 thick.

(don't have calipers here)
 
Use caution if you use that old tutorial that's floating around (diagram above is from them). Some parts are ok, but I build one years ago and just compared it to my new Roman's replica. Many dimensions are off. I'm looking forward to seeing what you come up with! If you need any dimensions you can PM me, I have calipers and will try to get them for you. The PM would be so I don't space checking this thread. ;)
 
It just goes to show you that even without fancy tools or a lathe or something, you can still make some really cool and fairly accurate props! Keep up the good work!
 
Cool thanks guys. I got my coax knobs from radio shack. These won't work for me because theres a knurled pattern on the connector. The website showed the old style with straight lines. So it looks like I'm buying two repro red buttons. I'll save the knurled knobs for another project.
 
Cool thanks guys. I got my coax knobs from radio shack. These won't work for me because theres a knurled pattern on the connector. The website showed the old style with straight lines. So it looks like I'm buying two repro red buttons. I'll save the knurled knobs for another project.
Hey man do what I do... When I get parts that I can't use for one project they usually pop up on custom sabers[emoji38].

Keep it up can't wait to see how this turns out[emoji106]
 
Here's pics of the radio shack parts that I got. And pic of the old red button knob that I used to make.

- - - Updated - - -

IMG_20170127_165628.jpg here's the new knobs and the threads
 

Attachments

  • IMG_20170127_165516.jpg
    IMG_20170127_165516.jpg
    3.3 MB · Views: 343
If you haven't made the ears/emitter from the template on the first page, just a heads up: I built one yesterday and the ears seemed a bit long and the "loop" is definitely too small. For the "loop", increase the center length (between the tabs) of the template by about 3/8".

Edit: The loop isn't too small, as my adjustment made it too big. The actual problem is that the tabs are too far from the end of the ears (by about 3/16"). I made the adjustment and it work out fine.
 
Last edited:
Thanks good to know. I got a real flash couple of weeks ago for a nice price but the builder in me still may make one. Have an actual graflex black bulb socket with the pins that another member sent me. Any pics of your build?
 
Aliexpress sells a wide assortment of knurled and ribbed nuts at an affordable price (if you don't mind waiting for a month or so...). If you have the equipment, you could drill one out for the red button housing.

Sample nut: https://www.aliexpress.com/item-img/Knurled-Thumb-Nuts-Steel-M6-Metric/32359454710.html

I'd also recommend a trip to the plumber as well as Radio Shack. Shower hose nuts often also have the correct type of ribbing:
https://www.amazon.co.uk/Shower-Reducer-Chrome-Plated-Adapter/dp/B00DWIFSC2

Aliexpress also sell bakelite nuts that I think might be perfect for the red button itself:
https://www.aliexpress.com/item-img...00200.html?spm=2114.10010108.1000017.2.rLOIJr
 
Last edited:
If you can find an Anakin saber in a thrift shop for cheap, you can scavenge the button from that. I've got two on my WIP ESB, though the button itself is wrong. For that I dremeled the button into dish and used the top of a red pushpin/tack to dress it. Looks pretty good. Just need to make the little switch, and she's done!

BTW, the color change ROTS Anakin sabers from 2005 are a good source for red buttons, ears, and activation cards. Check 'em out.
 
Okay, the bars for the clamp. I know the standard procedure is just to use 1/4" metal stock. I'm down to my last two bars worth of the styrene I usually use (with no good way to replace it) and I need one for a Luke ROTJ v2, but I didn't want half of it to go to waste.

So I thought: I have some aluminum left from fabricating the clamp, why not make it out of that? Even with my limited metal working skills, it turned out surprisingly good. So good, in fact, that I made two more for the next saber.

I've never seen it before, but has anyone else ever done this?
 
Stupid question: I know the tube can be sourced from the likes of online metals, but what size aluminum tube do you use exactly? 1.5" O.D. and what I.D. or wall thickness? Thanks in advance.
 
Last edited:
Thanks anyway. I found some. Bad news: it was painted brown. Good news: The price was right (free) and removing the paint gave the tube a "brushed" finish.
 
You can get semi-exact looking parts from Parks but it's up to you if you want to do business with them.
 

Your message may be considered spam for the following reasons:

If you wish to reply despite these issues, check the box below before replying.
Be aware that malicious compliance may result in more severe penalties.
Back
Top