Project Lemondrop...Moebius Flying Sub 1/32 scale

mrchester

Well-Known Member
RPF PREMIUM MEMBER
After building both of Moebius' big Seaviews (and finding them to be most satisfying) I turned my modeling attention to the big Flying Sub that they offered. This time with actual figures to help with the visual scale. This thread will cover not only the build, but lighting (and some tricks I came up with for that) stand, and for me a big first...I actually weathered a model. In my realm, this is earth shattering.
By the way, my wife nicknamed the finished model Lemon Drop (for the candy).
IMG_0642.JPG IMG_1211.JPG
 
Last edited:
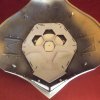
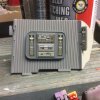
After purchasing the kit from Colonial Photo and Hobby, I wanted to use a display stand that I saw on EBay. It is from a vendor who's handle is Timewarpsafetnet. The stand is acrylic and came with a nice radar graphic with the 'Voyage to the Bottom of the Sea' logo on it. Also included is a nice technical placard with the theoretical stats of Admiral Neslon's latest super creation. The stand is well executed and actually came with gloves to handle the finished product without leaving fingerprints. Well, me and clear items (that are plastic) have an awkward relationship. Also, the idea is to lay the graphic down and set the stand on it. I had to improve on this. Using some large diameter PVC, I turned an upper and lower frame to go around the outside of the base disc. A piece of sheet plastic was mounted into the lower ring to act as a backer and capture the graphic (and protect it from damage). I also opted to paint most of the stand Flat Black, leaving part of the support arm and upper disc clear. The pictures shop Lemon Drop in early white primer, but the scale is good with the stand.
IMG_0756.JPG IMG_0791.JPG IMG_0754.JPG IMG_0789.JPG
 
Last edited:
Check this out... I found an earlier picture of the stand (and Lemon Drop in Etching Primer).
IMG_0750.JPG
 
Last edited:
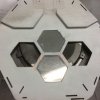
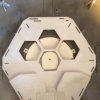
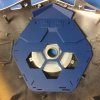
With the stand modified and painted, I set it some place safe and began pondering what I wanted to do with the sub. The first thing I wanted to do was NOT screw up the clear Floor panel. After doing the "mask the hexagon" thing, I had problems with the blue paint that I wanted to use. I contacted Moebius so I can buy a new floor panel. However, I caught them between kit pressings and did not have the option to wait (I wanted to enter this at Modelpalooza 2016). Fortunately the actual hexagons were in tact. So, I opted for a rather extreme solution. I cut out around the hex panels and then filled in the hole in the floor with Marine Epoxy (it has very little shrink factor when it cures).
Sorry, no pictures of this part, but pictures of the replacement holes soon.
 
I had cut out the hexagons as one big piece, then seperated the panels into their individual pieces. After prepping the floor, Ilaid out the pattern and started to recut the holes in the floor. You can see in the picture how I went around the details of the panels when I removed them. I used the 'Drill a bunch of little holes' method for all of this.
IMG_0998.JPG
 
After cleaning up the inserts, I started dressing the holes, first with power tools, then with hand files. Since each one of the inserts were slightly different, I had to number and mark them accordingly. Warning: some of the photos to come will be out of order...but, its worth it.
IMG_0996.JPG IMG_0994.JPG IMG_1003.JPG
 
Now for some truth in advertising, or something like that. The inserts, being clear plastic, did suffer some minor splintering on the edges of the yellow hexagons. The hatch door got molded and copied in clear resin. The plan is to display it opened and to have a crewman actually hold it open. Which also means an internal side of the bottom hatch. But first, some filler photos.
IMG_1001.JPG IMG_1002.JPG
 
I had gotten the center hatch panel wrong so I made a copy. After which, I made a sub-frame from strip plastic. This makes up the hex frame seen when the floor hatch is opened. However, I kept breaking my frame. So, I made a mold and cast it with Alumilite resin. After some dressing, it was painted Tamiya blue but, leaving one side in the resin's tan. I attached it to the new door and gave it a light wash to duplicate the smoked effect ou the studio hatch.
IMG_1066.JPG IMG_1067.JPG IMG_1068.JPG IMG_1069.JPG IMG_1024.JPG
 
There were a bunch of moving parts at this time, but the first things that have to be done before assembly was to finish the floor. Now, with the hatch modification, the lower docking collar's upgrade needs to be addressed. I had finished the floor in Tamiya Blue and gave it several coats of Dullcote. I opened a hole in both docking collars. The holes were made to be about 0.040" smaller than the outer diameter of the escape hatches. I then turned two sets of rings (four pieces that are two outer and two inner rings) that would simulate the hatch seal collars. I used sheet styrene to make a panel to cover the hatch recess (I know... awkward diction. See photos below).
IMG_1005.JPGIMG_1014.JPGIMG_1016.JPGIMG_1079.JPG
 
Now for something different, having to work from the hatch outward. I needed to get the crew situation worked out. I had been sitting on a toy monster that my wife and I found during one of our walks. Compared to the figures provided, it looked like it would be the perfect addition for my interior. However, I needed to get me a figure that was standing. The quality that Moebius put into their figures is top notch and trying to use other figures just didn't look right. So it is time for a little surgery... and the Admiral was the best candidate.

IMG_1087.JPG
 
Last edited:
In modifying the Nelson figure I had to cut off the arms and legs. This wasn't too difficult since Moebius cast their figures from resin. I creatively cut slots in the back of the knees (being careful not to cut all the way through) and heated up the legs with hot water. I straighten out the legs to what looked right for the pose and filled the gap with CA (Kicker made things go quickly). As for the arms, things were a little trickier. I had to pass a drill bit through the closed fists and creatively open the fingers to grasp the hatch panel. I didn't have to do much else to the left arm but I had to cut the forearm and rotate the hand to a horizontal position.
IMG_1085.JPG IMG_1086.JPG
IMG_1088.JPGIMG_1090.JPGIMG_1091.JPG
 
More Flying Sub interior stuff. To finish off Captain Crane and (now ) Crewman Patterson, It was easy to do the clothing. Crane was done with Khaki for his pants and shirt collar, black for his hair ,and a custom mixed tan for face and hands. Patterson got white for his deck shoes, blue for his coveralls, and custom tans and browns for his hair and skin. Both of the flight jackets (with built in life preservers) got glossy black (see screen grab from the 'Werewolf" episode). I has to rough-up the back of Paterson's jacket (since the back was smooth) and remove the Admiral's epaulettes I cheated by using Eyeball decals that I got from the Cult TV Man.
IMG_1108.JPGIMG_1105.JPGIMG_1095.JPG IMG_1533.PNG
 
Last edited:
Oops, I got Ahead of myself, I had to finished the chairs... which was pretty straight forward. Captain Crane would be mounted in the left seat (looking forward) but to make sure Patterson stayed put, I added a wire pin to his foot. That and the line up pins in the hatch that he is holding, he shouldn't come loose. Remember, the interior has to be completely finished when we get around to the outside. I had also cast up some extra hand wheels to go on the inside of the upper and lower docking collars. The pictures are of final setup before what I did in the previous post. Yeah, thats a good picture of a werewolf (what else could you want? They gave you a radioactive volcano in that story, too). Still hoping to incorporate the rubber suit monster.
IMG_1092.JPGIMG_1093.JPGIMG_1094.JPG
 
I did plan to light this bad boy, I was very happy with my experience with both big Seaview models. I acquired a lightiing kit from Voodoo FX and the photo-etch/ decal set from Paragraphx. This leads to the interior wall panels and lighting that floor...properly.
 
I had Blacked then Silvered to back side of the floor (to prevent light leaks). I had painted the three hexagon panels Bauhaus yellow, painting the underside only. Once dried, I finish fitted then mounted them into their holes. I used white glue for this since it dries clear and makes any need to remove them an easier proposition. I also used the white glue to fill the minor gaps that scream "Here I am" when the floor lights were turned on. You can see the pin holes for the hatch and Patterson's foot in the pictures below. Google plug...Flying Sub Interior.
IMG_1102.JPG IMG_1103.JPG IMG_1104.JPG
 
Last edited:
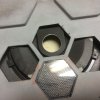
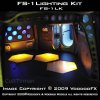
To finish off the floor, I had to work out a pesky issue, lighting the yellow hexagons evenly. The photo showing half lit panels from Voodoo FX didn't work fo me (last picture). I pondered on this for a few weeks ( I was working on other parts of the sub during this time). First thing I did was mill down three areas under the panels to allow some light to get through. However, I could only take off 0.040" ...it helped, but not enough. With some testing, I found that six lights instead of three would work much better. The problem was space. After some surfing, I found a place that sells LED components and some really bright (4mm) cylinder shaped bulbs. I ground down the sides of the three bulbs that would go to the inside of the lower docking collar. These had to be flat enough to fit between the collar part and the flat plate that I added under the hatch panel opening. I placed three untouched bulbs around the outside of the panels. Warning: some photos are from further in the build than I have discussed... Be Ready.
.IMG_1111.JPGIMG_1110.JPGIMG_1112.JPGIMG_1240.JPGIMG_1540.JPG
 
Last edited:
Google plug... Flying Sub, Moebius, Lemon Drop, Flying Sub Interior.
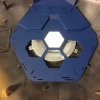
Heres a couple of shots of just the inside lights and one of all six (which is a picture from the future... no TARDIS needed).
IMG_1114.JPG IMG_1115.JPG IMG_1371.JPG IMG_0411.JPG
 
Last edited:
While I was fighting with the floor, I was also getting the wall panels prepped. To break it down, there is the front control console (which features a TV monitor and a pair of radar scanners), identical panels on each side of that. Next on one side, is the reactor wall (with windows that look into the reactor) and on the other is bunk on top of a wardrobe (with three drawers and doors). To the back is the rear wall with a panel and access hatch with a second wall behind it that the hatch door mounts to. Here's a couple of shots from selected episodes... notice the wall over Nelson's shoulder has no detail panel on it (very early in second season).
IMG_1026.JPG IMG_1541.JPG IMG_1027.JPG
 
I had mentioned earlier ParagraphFX decal/photoetched set for this kit. Basically, you open up the panels and file down the remaining faces to receive the appropriate panels.
IMG_1539.JPG
 
I'm afraid I didn't take many pictures of all of the wall panels when I was working the interior out. I was playing it by ear and the Flying Sub is a bit different than the big Seaview kits. With that said, I'll try to talk everyone though it. The interior is basically shades of grey. The front console is Smoke Grey (on the front face), the top bulge is Light Aircraft Grey, and the top of the dash is Flat Black. The first panel(s) to either side is Light Aircraft Grey (wall sections that fold to either side of the dash console), Classic Grey Krylon (wall panels), and Smoke Grey Krylon (console panels). The reactor wall got Classic Grey (wall) and Smoke Grey (reactor window wall and small panels), The rear wall was the same as the reactor wall for color scheme. I will address the wardrobe modifications later.
I added the proper decals to their panels and got incredible results. Warning: there is a future picture involved here.
IMG_1037.JPG IMG_1040.JPG IMG_1038.JPG
 

Your message may be considered spam for the following reasons:

If you wish to reply despite these issues, check the box below before replying.
Be aware that malicious compliance may result in more severe penalties.
Back
Top