You are using an out of date browser. It may not display this or other websites correctly.
You should upgrade or use an alternative browser.
You should upgrade or use an alternative browser.
Project Lemondrop...Moebius Flying Sub 1/32 scale
- Thread starter mrchester
- Start date
To help keep the light leaks down and to focus the lumens to their target, I took a cue from the old style Cathode Ray televisions. For the big panels on the walls to either side of the front windows and the small panels on the reactor wall , I opted for a unique solution for their lighting. For this,I get to use my newly acquired Vacu-form machine. Using balsa wood, I made up blanks that resembled the back of an old style TV. I then formed two big and one small cover fron 0.040" sheet plastic. The inside of these were blacked and silvered, then holes were drilled for the LED bulbs that would mount in. For the two panels on the reactor wall, I made a long cover with two bulbs in it. These were glued over the back of their respective panels.


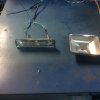
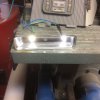
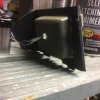


The back wall is a double paneled affair. The front part has the instrument panel and the opening for the bulkhead door (this wall is at an angle inward) and the rear wall that the door actually mounts too. A single LED shines behind the panel and also lights the crawl space (when the door is closed). I have only one picture of the back wall (before I covered the opened on the top).


Thanks a bunch Blade90. I want to address the wardrobe next. The kit part has three doors, but the wardrobe has varied throughout its TV history. I found a page of another build whose interior I took a que from (that is the first picture and is NOT my work). Two of the doors are removed and it is an open closet. The clothes bar was easy to do but the tanks and the wetsuits....not so much (the wetsuits especially). There is also a thin mattress on top of the wardrobe and from what the series showed is that it is Black vinyl. I wanted to put in a light in the open space to go with the light that is shown in the lighting kit. The first attempt for this used strip LEDS.

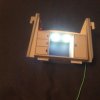
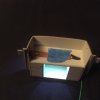


The photoetched kit included some nice goodies like actual recessed handles for the wardrobe and a bracket to place the access ladder on the stowed position (however, they didn't think about small scale slide brackets that mount the ladder to the center ring). I had also noodled out what will be in the open wardrobe...Scuba tanks and briefcases (suitcases). I happened to find two items (in the right scale) on Ebay... talk about timing. One was a scale Frogman kit from Testers and the other was a resin kit of various suitcases.


Last edited:
Gots my tanks and cases. I took the tanks and three of the suitcases and molded them up for copying. I picked the yuck yellow (seen in the show) for the tanks and detailed them with black and silver (and I used wire to simulate breathing tubes).I detailed the suitcases in browns and greys with one briefcase sized being painted in black with silver trim. This case is meant to have something "Special" in it so it got a Navy Anchor added to it. The finished items were placed in a safe place until final assembly. Warning: more pictures from the future ahead. Look for the tanks and cases just under the ladder. The black case is in its final place in the last pictures...Future.


It took a little effort in doing the front console. Having to get all of the lights and gauges lit is a trick because of the lack of free space up front. Fortunately, it is possible. I did cheat when I made up the two radar faces and the central monitor. The decal set had a sheet for these that were plastic film with pictures on them. I opened the console accordingly and glued in the screens I wanted. Standard green screens on both sides and the shot of Seaview as seen if we approach her from the aft left. Using white glue to install the screens, I placed the panels in their holes. For rigidity, I put a few light coats on the back sides of the panels. I had to do some creative carving to get the lights on the top af the console actually be lit (thank goodness for small LEDS). Afraid the aren't many shots of this during construction, but there are a few of those " Pictures From the Future"


Last edited:
Now let me wrap up the interior stuff. The lighting kit sent me two RGB LEDs for the reactor wall (there is supposed to be one). These shift between Red, then Green, then Blue...and with two the color shift is timed slightly off from each other (thus, adding more interest to the reactor). It is about the best that can be done on small scale. The pictures are of the reactor wall on the floor in the body (in yellow and stuck together) running through its paces. Yes..."Pictures from the Future".


Here are a couple of pictures of the forward panels...back side. On the front of the panels each has a vertical box that has a string of lights that needed to be lit. I, of course, didn't fully understand what it was all about until everything was decaled and painted. There are a pair of tabs in the boxes that mount into the two slots on the corner of each panel. To get the boxes to light up completely, the tabs had to be removed. Fortunately, with a sharp knife, Moebius' plastic was easily removed. I got away with two bulbs on each side (or three total per side). The light count is going up fast.... must get power to them somehow. Explanation soon.


The kit has an enclosed walkway that leads from yield flight deck to the rear access hatch. It is a four piece construct that consists of two halves that make up the tube and two hand rails that are mounted inside. I painted the inside Aluminum silver and detailed the textured walkway in Flat black. The hand rails are Banner red. there is a single light for the inside of the passage.


Getting the wiring worked out was a bit tricky since there are about a third more LEDs than the lighting kit offered. I opted not to use the circuit board and wired the resistors directly into each light lead. I used black silicone to paint over the backs of the LEDs and quash any light leaks that came from any seams. I used the smooth handle of a jeweler's file as an applicator ( and didn't screw up any finished surfaces, either...amazing for me). I creatively built a projection box to house the reactor's lights. There is a piece of wavy (translucent) plastic that is placed between the wall and the lights. I covered the whole thing got covered with aluminum foil. I also used the foil to act as reflectors and covers for the backs of some lights.


I had to figure out how to power all of this (including the still to be worked out external lights) and I wanted to power this by batteries. Also, since there ended up being more wire inside than expected, I couldn't comfortably find a place for the batteries (and I couldn't bring myself to cut any holes in the nicely molded hull halves), even though there are four doors on the bottom side. So, I decided to put the batteries and switches in the stand. This means connector jacks in the bottom of the Flying Sub and modification to the stand. This also means some kind of conduit(s) from the base to the Sub. Fortunately, the interior stuff was left in 'Modular' form, which made the modifications go a bit smoother.
I had blacked and silvered the inside of the hulls and finished the portions that were to be seen in Flat Light Aircraft Grey. I also stranded laying on coats of Testors Chrysler Yellow lacquer, and would sand out the color to get a smooth finish. And now some random pictures (party trays make good paint booths. Ignore the blue stripes in the first picture).


I had blacked and silvered the inside of the hulls and finished the portions that were to be seen in Flat Light Aircraft Grey. I also stranded laying on coats of Testors Chrysler Yellow lacquer, and would sand out the color to get a smooth finish. And now some random pictures (party trays make good paint booths. Ignore the blue stripes in the first picture).


Last edited:
To get the power from the base to the Sub, I would run a pair of conduits for the wiring. I used 1/4" square brass tubing for this. These are mounted to the aft inside corners of the central post. A pair of holes were carefully drilled through the exist base for the wires to pass into the soon to be made battery section. Using the small disc of the stand as a guide, the conduits were transferred to the lower hull and a locator pin was set, too.


To make the battery compartment, I simply turned a 7/8" thick piece from the large diameter PVC tube that I made the stand frame from (also, transferring the bolt holes and installing longer screws). After cutting a rectangular hole in the side, I fabricated a battery tray that slides in and out like a drawer. Everything got painted Matte Black. I then mounted the switches inside and drilled holes to accommodate the push rods that are needed to activate the switches.
Since there would be about thirty lights in the finished model, I new that I had to have two batteries for power (I try to make my light up models so that they don't have to be tethered to a wall socket). I would sort out the "Which light goes to which switch" later. I wanted to be able to take Lemondrop off of its stand for transport. I used small quick disconnect (square) sockets for easy connections between the stand and the Sub. After some "Kabookie" theater, I was able to easily set the lower hull onto its stand and have power in the Sub. I had to modify the rear hatch detail because the jacks ended up in the panel line. My door is 1/4" shorter than when I started ( fill and re groove, that is).


Since there would be about thirty lights in the finished model, I new that I had to have two batteries for power (I try to make my light up models so that they don't have to be tethered to a wall socket). I would sort out the "Which light goes to which switch" later. I wanted to be able to take Lemondrop off of its stand for transport. I used small quick disconnect (square) sockets for easy connections between the stand and the Sub. After some "Kabookie" theater, I was able to easily set the lower hull onto its stand and have power in the Sub. I had to modify the rear hatch detail because the jacks ended up in the panel line. My door is 1/4" shorter than when I started ( fill and re groove, that is).


Last edited:
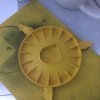
Now to bring several things together. The idea was to paint (both yellow and blue) the two halves of the Sub and then only have to work in the perimeter seam. Since did work pretty well considering that I did finish the model without anything getting inside. In painting the hulls yellow I ran into a pesky issue that I had forgotten about (from the days when I was young and my family had and restored several aircraft..Ragbags), that getting to eager in laying down Laquer can lead to stretch marks. While working the hulls, I did finish test fitting and wiring for the interior. Now some random photos.


Similar threads
- Replies
- 1
- Views
- 236
- Replies
- 14
- Views
- 1,750
- Replies
- 37
- Views
- 3,441

