Volstagg Build (Thor: The Dark World)

NathanLange

New Member
After many years of wanting to have my own Volstagg costume, today i began the long process of creating one for myself. So i decided to make a build thread on my adventure since i feel like there isn't enough Volstagg's out there. Any Feedback in how i can go about making certain aspects will be greatly appreciated.

Ill be making Ray Stevenson's Volstagg from Thor: The Dark World, originally i was going to make his first version but i found the details in the sequel much more enticing.

Reference:
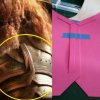
1ae272dda69ba3fc97aee4fa3627f0527c321a5ee3fab0064611d0ba53f88d4c.jpgthor dark world Volstagg costume.jpgkyoungmin-lee-thor-redsteam-3d-chara-volstagg-b.jpg91.jpg

Armour:
After grabbing a ton of reference from both the movie, a Display of the screen used costume and a 3D sculpt turnaround, ive started making a rough template of the armour pieces and how they are put together, this way ive been able to understand the layers involved and how i might go about making it.
Armour Progress.PNG
ive also coloured the overall Base plates that all of the panels will be stuck onto, consisting of a front and back panel, a girth belt with 2 large armour pieces, 3 piece pauldons and armguards.
baseplates.PNG
Due to a small Budget i aim to make a large amount of this armour out of EVA foam mats with the craft foam for the detail edging. I will however be using a couple panels of embossed leather on the shoulders, arm guards, girth belt front and the lower floral detail on front and back panel.
The axe head will also be foam around a wood or PVC handle with a leather wrap. Ive yet to decide on the skirting of the Belt.

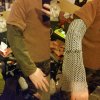
The Chain mail sleeves i feel could be made out of a single long strip of material under a long strip of chain mail that's been spiraled around an under layer,I wont be making the chain from scratch but buying strips of it to assemble for the costume.

Hair:
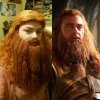
As ive yet to see very convincing long beards for a lower price point for conventions, i want to try and get a Wool beard commissioned as i feel they hold there shape better but still look somewhat convincing.
barbarian-pillager-beard-hat.jpg


I will be adding more to this thread overtime as i make progress working out the rest of the costume.
 

Attachments

  • 1ae272dda69ba3fc97aee4fa3627f0527c321a5ee3fab0064611d0ba53f88d4c.jpg
    1ae272dda69ba3fc97aee4fa3627f0527c321a5ee3fab0064611d0ba53f88d4c.jpg
    46.6 KB · Views: 255
  • thor dark world Volstagg costume.jpg
    thor dark world Volstagg costume.jpg
    125.6 KB · Views: 334
  • kyoungmin-lee-thor-redsteam-3d-chara-volstagg-b.jpg
    kyoungmin-lee-thor-redsteam-3d-chara-volstagg-b.jpg
    226.2 KB · Views: 275
  • 91.jpg
    91.jpg
    205.5 KB · Views: 329
  • Armour Progress.PNG
    Armour Progress.PNG
    678.8 KB · Views: 340
  • baseplates.PNG
    baseplates.PNG
    364.9 KB · Views: 300
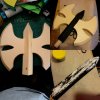
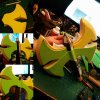
Ive started with the axe head. Needed some experimenting but its getting there. With a core of foam mats glued together im using 2 sheets of thin craft foam for the details on the outside. i first tried using a heat knife to carve in the detail but due to it being a bit to hot it was melting more then i was after.
14902941_10154619082949134_8192209916467650720_o.jpg14918887_10154637507129134_6878046833802977809_o.jpg

My second attempt was to cut out the outside of the engravings separate from the border, then just use the heat knife to add the lines in the center. This seems to be much crisper.
15003274_10154643506799134_5589501947762240590_o.jpg14908253_10154643643664134_5143373699326344288_n.jpg


While at work ive also begun working on the beard. Made from wool, i blended 3 different colors and cut them to length to tie through a mesh grid as a base.
14937470_10154643144629134_4317908131461991098_n.jpg14925664_10154643339499134_4818522899096927842_n.jpg15032813_10154650559994134_6219950368895337878_n.jpg
Styling i will leave till much later but i am happy with the results of how light and poofy the beard has turned out. I am still deciding on how i am going to fasten it to my head, i could either just tie it under the wig i will be buying or possible experiment with spirit gum.
The idea i got for the beard was from this Instructables Tutorial.
http://www.instructables.com/id/How-To-Grow-Your-Own-Epic-Dwarf-Beard-In-One-Eveni/

I have decided i will aslo be making a more casual Volstagg costume to wear to smaller events that i might carry around a big Beer Keg or prop leg of ham.
c.jpgvolstagg_turn_by_phillybee.jpgAsgardians.png
 
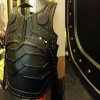
I have begun work on the front chest piece of Volstaggs armour.
17203227_10155044054404134_8336523678784809799_n.jpg
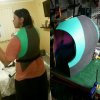
Starting off with a measurement of my chest then scaling up some reference i make a template of the armor that i transfused onto 2mm foam
17191929_10155044020914134_5043467446913522079_o.jpg17201108_10155044136399134_8147432708980908053_n.jpg
Due to the designer staggering the armour i had to closely look at how it was assembled, especially the center. Once it was figured out, i began cutting strips of 10mm and 10.5mm foam for edging.
17201306_10155046208624134_1928519305192157227_n.jpg17202949_10155047082754134_6377968899022751016_n.jpg
I was originally going to keep on the cheaper side and just lay the thin foam onto a thicker backing. But after thinking about how much effort i want to put into this armour, and for it to be long lasting. i decided to make this my first Worbla armor.
17308753_10155052647714134_1470246970019976875_n.jpg17343023_10155053009654134_1732309796877281342_n.jpg
Starting out as flat panels then heat forming it lightly to my desired shape, i covered the base layers, leaving out a few of the details that i will make out of Worbla and apply on in my detail pass.

I have also had a beard and wig come in that i may still use, but they were not red enough, so i am thinking about trying to alter the color a bit before styling it to what i need.
16712047_10154963957684134_8984460485019677141_n.jpg
Along with the wig i acquired a small keg and a large plastic bone, to convert to a big ham leg, that i was thinking of incorporating in my Animated version of Volstagg, as more of a casual lightweight costume for party's and mead drinking.
 
There has been a ton of progress recently starting with the axe.
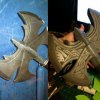
Remade it with a base of Layered foam with Worbla on top, and embossed the designs in with a heat knife.
17361653_10155091250199134_9216239394579992841_n.jpg17424665_10155087726574134_8489730562988223443_n.jpg
17626520_10155094648084134_6891494964389195349_n.jpg17630108_10155096927189134_2173452762142139157_n.jpgCapture.PNG

Next up was the back plate and working more on the front.
To save on time and my insanity picked up a pre-made Chainmaille shirt that ive taken apart to use as the segments of my armour.
I also decided on using a nice looking fabric for the undershirt that wasn't just a plain brown, just to break up the textures a tad.
17952508_10155160742489134_4156535244795103578_n.jpg18121243_10155189869084134_4263605697108491331_o.jpg18194874_10155194685299134_6119858764059975444_n.jpg18157079_10155194685229134_8394165013721055234_n.jpg
18157626_10155198461454134_2755222811379845121_n.jpg18198404_10155204223649134_7345591515292177721_n.jpg18194988_10155207074989134_2530269247621670086_n.jpg

After some trial and error with the wigs, ive decided on using a wig from Braid as a base that im going to style so its has the needed wildness and is long enough to put into a light braid, in conjunction with my Yarn Beard.
17626202_10155106521379134_8803380610137699920_n.jpg
With the shoulders, bracers and a lot of sewing still needed before paint, theirs is a lot to go in the project, but i reckon im making decent progress.
18222031_10155207453539134_551347532512044762_n.jpg
 
With 20 days until my deadline for this costume, i focused on getting all the armour fabrication completed

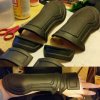
By now i got in the habit of cutting a whole bunch of foam strips for the edging of both the shoulders and arm guards, then just went along with shaping the shoulders with the help of a simple Pauldron tutorial by Punished Props, then sanding down the seams and covering it all with Worbla.
d.PNG18301094_10155225942209134_5143617120388147257_n.jpg
s.PNG18527701_10155261580189134_5213166973022707611_n.jpg

With the lower plate added, i was now able to add the band that crossed many of the panels of armor, and the medallions. To avoid becoming to bored, i took a little break and added eyelets and rings to the sleeves of my undershirt so the chainmaille can sit upon the suede sleeves, yet still be able to be removed for paint or touch ups.
18301700_10155232208444134_7282106753061278669_n.jpgCapture.PNG
Ive begun to coat the front plate in Gesso and a few layers of Modpodge so i can start sanding it smooth. Though i do want to get it very smooth. my main priority is to get the front plate which was mistakenly made with the Rougher Worbla. to blend in with he Finer, black Worbla.

With the arm plates and belt pieces covered, Ive now completed all the major work. now Ive got to fix up the seams with a heat-knife, blend some pieces and add some backings to places where needed. I do aim to add material to all the armour backs once they have been painted. so there a little more comfortable to wear and so the underside is harder to see.
18446539_10155252061954134_5019529533017023699_n.jpg18485303_10155261673824134_4601148373863079221_n.jpg
 
Details time!
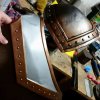
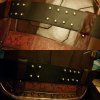
I ordered 200 small upholstery tacks off eBay to use as Rivets on my armour, but sadly i was short about 30 tacks. so for the shoulders i used googly eyes, will replace them for the Version 2 upgrade.
18739634_10155296081104134_4811968114847227979_n.jpg18698443_10155295633204134_8819206726266920889_n.jpg
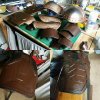
Began painting up the armor, starting with the base browns, taping a ton of the plates for the antique bass to go over the edges. Though kind out of the theme, two of the plates on the back and front belt peice had to be painted silver according to the references.
18765706_10155299407239134_7647984693822970359_n.jpg18813423_10155308720799134_6409498909305563247_n.jpg18881716_10155306343384134_2300151999966613767_n.jpg18767645_10155305154854134_5111762921763180633_n.jpg

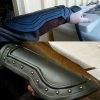
Due to a local crafts store closing down, i managed to get a ton of leather pieces for very cheap, so i was able to cover all the sections i needed with leather, and then proceeded with a lot of edge weathering on the leather and around the rivets. My Technique mostly consisted of painting oil paint into the gaps between the leather and Worbla then using a dry brush to blend it out onto the leather and around the rivets, then wiping a lot of it off.

18623517_10155282723829134_4321352018569839926_o.jpg18767465_10155308788969134_5483285013576456145_n.jpg18891780_10155309292764134_1655241440774630016_o.jpg18814182_10155316524634134_5704284576492054910_n.jpg

With all the painting completed it was time for the smaller touches. I made up some large sheets of pleated material for the first time to use for the shoulder under armor.
Made up the back belt really late at night, only to realise the next day that it was way to high, so i had to edit it a tad. All in all i was pretty happy with how it fitted for a first armor build.

18623299_10155283010249134_911596068980582031_o.jpg18921968_10155322333979134_2813948685987632986_n.jpg18882169_10155325818844134_2172290293711988183_n.jpg18951064_10155319060134134_2857808363905374839_n.jpg

Wore the costume over the weekend at Sydney Supanova. got plenty of photos with other Marvel characters, got mistaken a ton with some LOTR Dwarfs aswell, but i was okay with that since a lot of Volstagg's design is like the dwarfs armor.

19148916_10154422977047251_8383906819229665520_n.jpg19222849_10155360667169134_3817449069467608034_o.jpg19225321_1798107500215645_3493440077674361427_n.jpg19225416_10154422977312251_2367442147552525103_n.jpg19226007_1565815143459956_255056548805178261_n.jpg
I am making a list of things i will be doing over the next few months to improve on this costume dramatically. Some of the major changes include a much better Lace front wig that ill get styled by someone with more skill in that area, Will also be redoing all the straps that keep the costume together so have more adjust-ability and that are more secure since i had my shoulders begin to come away Mid Con.

While at the con i had a great chat with a brilliant Thorin Oakenshield Cosplayer about his work and it really pushed me over the edge of my thoughts of making a Dwarf character from The Hobbit series. Making this costume it was great practice in this style of armor and due to its similarities it had me thinking of the Iron Hills dwarfs, but ill think about which armor to do in the end. I picked up two books from the WETA Workshop booths that had amazing reference for the costumes for later use. I had also entered the Cosplay comp at the end of the day, which to my absolute sunrise, i took the Judges choice award, A definite boost to moral.
19144098_10155363979524134_2965749768069303891_o.jpg19113622_10155360077689134_5085209021029034436_n.jpg

I will take a break from this costume for a while but will return with Version 2 later in the year!
 
SO good to see this in person dude! Loving the indepth breakdown on your processes too. Great having a chat with you before judging too.

Saw the screen used suit in the Marvel Exhibit yesterday, as well as the axe. You nailed the whole thing man!
 
SO good to see this in person dude! Loving the indepth breakdown on your processes too. Great having a chat with you before judging too.

Saw the screen used suit in the Marvel Exhibit yesterday, as well as the axe. You nailed the whole thing man!
Thanks so much. Ive been trying to get people to get some detail shots of Volstagg from that exhibit. No real luck yet. Totally wish i could go see it in person.

Sent from my SM-G900I using Tapatalk
 
Thank you for sharing your creation and building process,Nathan :thumbsup and great to see something different for a change.
The only thing I noticed was the hair/beard color was lighter than in the movie/photos you showed.
 
Thank you for sharing your creation and building process,Nathan :thumbsup and great to see something different for a change.
The only thing I noticed was the hair/beard color was lighter than in the movie/photos you showed.
Yea your definitely right. Im new to wigs and my first attempt was ok. But im getting a better, lace front one in that i want to tint to be a deeper red.

Sent from my SM-G900I using Tapatalk
 
This thread is more than 6 years old.

Your message may be considered spam for the following reasons:

  1. This thread hasn't been active in some time. A new post in this thread might not contribute constructively to this discussion after so long.
If you wish to reply despite these issues, check the box below before replying.
Be aware that malicious compliance may result in more severe penalties.
Back
Top