[WIP] Ant-Man, Civil War Style

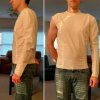
I have tried on the muslin mock-up and sent the modifications back to SMP. Super psyched about the fit so far!

On my front, as I have said in the past, I like to use my builds as a chance for R&D. I wasn't completely satisfied with the way it came out, because it lacked that glint and shine that the helmet from the movie had. So, for most of November, I was researching alternative paint methods for the helmet. Bill Doran of Punished Props built and painted Rey's blaster from The Force Awakens, and I really liked the metallic finish that he was able to get. I invested some time and money in the Alclad paints he used on his piece and tried them out on the test antenna. (I sanded it down to the primer layer first.)

IMG_20161120_153442647_HDR.jpg

As a disclaimer, I only sanded it down to 320 grit, and could have taken more time to get a more thorough paint application, but I was just going for the general look. I really like how it came out, it looks just like brushed metal, but not for this project. It still doesn't have quite the right finish in my opinion. So I decided that Krylon Crystal Clear was going to be the final layer.

That unfortunately did not turn out to be the best choice! Thanks to a month of sitting around and light handling, the surface of the paint had accumulated oil and spots that were invisible to the eye, that is until you sealed them under a layer of Crystal Clear!

IMG_20161204_152729256.jpgIMG_20161204_152754128.jpgIMG_20161204_152815634.jpgIMG_20161204_152843434.jpg

As you can see, the whole thing looks like it is covered in a layer of dirt and grime. For certain parts of it, that works, since I was planning on adding a little weathering anyway. But for the main face plate (nose, cheeks, and forehead areas), and the back of the head, it conflicts with the overall shiny and polished finish I had hoped to achieve. The one piece of good news is the 2 layers of Crystal Clear that I applied a minute apart from one another appear to have given it an extra bit of light reflection, which is what I wanted.

At this point, I am going to paint the details (black and red stuff) and then see how noticeable the imperfections are. If they are still noticeable, I may paint some battle damage over those and sell the piece for what I can (as a battle-worn finished piece), then put that money toward a fresh cast and start over. I hope it does not come to that though.
 
The first coat has been applied! Thank goodness for detail brushes. Working around those small details was a pain. The second coat should even out the color and brush strokes for a nice clean finish.

IMG_20161205_214510340.jpgIMG_20161205_214713777.jpg
 
Detailing work is complete! Everything you see is acrylic paint applied with fine-tip brushes, except for the jet black part of the dome. That is the gloss black base that I originally bought for the test piece a few posts up (#21), and was applied with an airbrush. Now comes the assembly part, and then some weathering!

IMG_20161212_205132809.jpg
 
I needed a way to secure the mask to the helmet dome such that it would stay securely in place, but still allow for easy on-off transitions. I opted for a magnetic purse snap. First, I needed to enlarge the hole present in the cast already, and push through the helmet shell (which is always tough because I feel like I'm ruining the piece). I opted for the mutlipurpose engraving bit and sanding drum bit for the job.

IMG_20161226_111507872.jpg


I needed a way to mount the snap such that it lay flush with the surface of the helmet, but preferably blended well into the interior to minimize the chance of it being knocked loose. I had some Metal Set A4 on hand, an epoxy that would be more than strong enough to hold the snap in place, and binds equally well to metal and plastic. It worked like a charm.

IMG_20161227_224041992.jpgIMG_20161227_224054837.jpg

All that was left to do in terms of assembly was mount the other end of the snap to the roof of the mask, attach the antennas, and attach the lenses, all of which was done with hot glue. I used a hobby knife to score the underside of the antenna and the part of the ear shields that would be hidden, so that the glue had some uneven surfaces to which it could bind, giving it a stronger hold. Behold!

IMG_20161229_193403297.jpg

All that's left to do is some weathering, and then it is on to the rest of the suit!
 
Hey there Vox! Thought you'd like to see the top part of your pattern. I've got it all updated from the fitting and worked up in Swedish tracing paper. Here are pics of the vest, under shirt, sleeve and shoulder pad. I'll be working on the pants next. Cheers!

ant-man-pattern 1.JPGant-man-pattern 2.JPGant-man-pattern 3.JPG
 
Making a full suit is a daunting task, and it is about 4 times as large as any of my previous sewing endeavors. That said, I am optimistic about where this is going.

I started by tracing out all of the patterns that were sent to me onto stock paper, to make them easier to work with while tracing onto fabric.

IMG_20170122_184606887.jpg

Once all of those were cut out, I started working with the test fittings of the undershirt and vest, to ensure that the shape-influencing seams would do their job. So far, it is looking good. Only minor alterations to be made in one or two places.

IMG_20170227_221034419.jpgIMG_20170212_184317_752.jpg

Next up will be the pants, and if a full rendering fits as I hope they will, specific panels will be cut out of the entire costume and construction with the proper fabric will begin.

I wish I had more to show! But unfortunately the muslin-mock-up phase is a lot of repetition with a very bland fabric. More exciting stuff soon!
 
Matched up the fabric swatches, and ordered the right stuff. It should be here in a few days.

IMG_20170320_214802276.jpg

Meanwhile, because the suit is doing a number on my brain, I decided to start on the foam work with which I am much more comfortable. Here's a pic of the rough shape of one of the grieves.

IMG_20170316_214644576_HDR.jpg

And here is some pics of the templating I've doing on some of the other pieces. I have a feeling the backpack will have to be made and cut first to test for fit, then have some alterations made to it. Good thing foam is cheap!

IMG_20170323_075749026_HDR.jpg

To anyone still following this build with any interest: thank you. Without going into personal detail, things behind the scenes on this end have been tough since I started this build 9 months ago. I am still going to see it through to fruition even though it has taken far far longer than I would have liked. "Always forward," "Excelsior," etc. etc. and all that. Thanks for continuing to pop in and see how it is going!
 
The backpack was giving me too much trouble, I can't decide what material to make it out of due to its size and complex shape/curves. I decided to step away from it and work on something else until I come up with a good idea. I moved on to the belt.

1/4" EVA foam. Here is what the pieces looked like flat, just before I applied the hot glue to the valley in the first pic. The contact cement had already been applied. I had to move fast, because I needed to close up the contact cement seams while the hot glue was still warm enough to be malleable.

IMG_20170329_211109475_HDR.jpgIMG_20170329_211116146_HDR.jpg

Then I cut some supports that would double as the visible outside edges.

IMG_20170330_190259.jpg

And these are what they look like once I cut the accent lines in them. One side is flipped over so you can see what the underside looks like.

IMG_20170402_165138999.jpg

I now have all of the fabric I should need to build the suit. Just have to pick a good starting, which will probably be the vest.
 
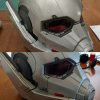
I decided that the helmet was too shiny. It was lacking that natural layer of grime that gets into all the nooks, crevices, and corners of metal objects and is usually impossible to completely remove. So I applied a black wash (watered down black acrylic paint) to all the places where gunk might accumulate, then wiped it away with a paper towel, leaving just enough to really make the details pop. Here is a before and after comparison:

IMG_20170408_125107_137.jpg
 
It has been a while since I had an update! But I figured I would wait until I had some progress to show. The shirt took a lot of trial and error, the sleeves especially!

I started with a work-up of the pattern.

IMG_20170520_094556548.jpg

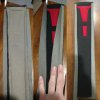
I wanted a little more prominence from the red stripe, so I slightly modified the pattern for a wider red stripe and worked up another sleeve. Below is a layout of the entire process, from right to left.

IMG_20170606_210819_113.jpg

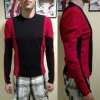
And here's the finished shirt! I split the body of the shirt so that the neck of the shirt would be black but the shirt would still be red visible underneath the rest of the suit. Hems and cuffs still have to be finished and seams need to be trimmed, but the damn thing fits and I am psyched. Finally, on to the rest of the suit! Big thanks to SMP Designs for his help and guidance in getting to this point. I can't recommend him enough to anyone who wants to commission a costume. He knows his ****.

IMG_20170630_203834_924.jpg
 
Last edited by a moderator:
I am now convinced that Marvel hires costume designers that really have a grudge against costume constructors...

Before I sewed the shoulders on, the torso itself had 20 separate panels. TWENTY. And I gotta say, sewing around that gray t-shape in the middle was probably the hardest stitching challenge I've ever faced.

IMG_20170812_090534.jpg

With the shoulders attached, it fits quite well around. Only the gray parts have headliner foam put in right now, and I am testing for fit to see if every panel needs the backing, or just parts of it. The edges need to be finished, but that will be done once the foam necessities are determined.

IMG_20170814_205513039.jpg

Starting work on the pants.


As a personal note to all the makers who may view this: don't get discouraged if something is more difficult than you anticipated, or if your progress isn't what you want it to be. And especially do not compare yourselves to others, in progress or product. If you still like what you are making, and you are learning as you go, then you are on the right path. This project has taken many months more than I originally wanted, and while part of that is because other things in my life have taken priority over my time, the other part is that I am having to learn a ton of stuff in the process. I'm loving it, though.
 
The chest details presented a unique challenge. I knew there was no way I was going to attempt to make them glow, but I still wanted them present.

First, I mounted some theatrical lighting gel to craft foam.

IMG_20170822_202607767.jpg

Then I measured out the area through which I wanted it visible, lock stitched the seam on either side, and then ripped the seam between. I then cut the area strategically, so that the flaps could be cleanly folded back and stitched.

IMG_20170822_202530581.jpg

Then I top stitched the pieces behind the hole.

IMG_20170822_214554439.jpg

Technically, it should be brighter, but it was hard to tell what shade of gel to get. I'm happy with the appearance and the sheen of the gel, though.
 
Slow progress is as slow progress goes.

Let's open things up here with the back pack. Suffice it to say that templating this thing has been a nightmare and, because I have been unable to find someone to whom I can outsource the job, I have done a LOT of trial and error on this.

I elected to build the center piece by stacking foam. First I tried 4 pieces. That wasn't high enough to get the correct arch.

IMG_20171016_203855386.jpg


I cut the same shape six times and glued them together with contact cement. Then cut the arms 3 times each and did the same.

IMG_20171003_204629647.jpgIMG_20171002_185541679.jpg


I messed up on this try, by only cementing the edges of each piece. The result was that some of the layers peeled up while sanding.

IMG_20171019_203751744.jpgIMG_20171019_211713157.jpg


The latest iteration has the correct shape (more or less) without peeling.

IMG_20171106_204939066.jpg

However, to get the clean edges needed for me to know if this will ultimately be a worthwhile method, I need a belt sander and the one at my maker space is currently down for repairs. So the backpack is on pause for now.


I did a test paint of silver leather paint on coaxial cable, to see if it would be a viable choice for the piping/wiring on the suit, and I think it will be. I'm going to keep my eyes and ears open for other options until I'm ready to do that part, but coaxial cable seems like the best thing I have found so far. (Got suggestions? Let me know!)

IMG_20171007_163811492.jpg


On the suit side, I have constructed the pant legs, and just have to connect them to each other, then to the torso. Here's a pic of the patterns, and the finished legs. The actual pants are mostly cordura with spandex used for the inseam and rear regions to allow for a form-fitted garment that also allows for movement.


IMG_20171118_104209.jpgIMG_20171115_180652_349.jpg
 
I did a test paint of silver leather paint on coaxial cable, to see if it would be a viable choice for the piping/wiring on the suit, and I think it will be. I'm going to keep my eyes and ears open for other options until I'm ready to do that part, but coaxial cable seems like the best thing I have found so far. (Got suggestions? Let me know!)

I'm going with the armored telephone cord for the piping above the chest and shoulders. Same cord that I used for the Ant-man helmet/backpack connection.
 
Shin guard and knee pad construction is done except for the elastic that will wrap around the leg to keep the pad secure.

First I patterned everything out and started with a black strip of cordura and a strip of headliner foam with which to back it, since I wanted to give it some body without making it too rigid. Next I patterned the red details off the pattern for the black base. These were constructed more or less like a sew-on patch, and then top stitched into place.

IMG_20171225_110319061.jpg

To finish the edges, I used the same method one might use to finish an edge using bias tape. I cut 4 strips of gray cordura, about the length of the shin guards. Those were top stitched into place, then folded over and the creases were ironed. I wrapped each side around the back, and "top stiched in the ditch" (i.e. right along the crease of where the gray met the black) to secure the back side down.

IMG_20171231_133131_293.jpg

Stitching the gray border on the octagonal knee pads was a totally different beast. You can see the original shapes on the right of the pic below, and what it looked like stitched together on the right. Lots of pivoting and muscling it into place, being careful not to rip the piece nor ruin my machine in the process.

IMG_20180111_214614456.jpg

The knee pad was backed with craft foam for structure, then the gray was wrapped around and hot hot glued down. Stitching it down would have been particularly challenging, and the red would not have blended as well as the black did on the shin guards. So they are a hot mess from the back, but I'm happy with how the front turned out.

IMG_20180113_165301366.jpg

The knee pads attach to the shin guards with one line of stitching at the base of the knee pad.

IMG_20180115_211830.jpg

I'm not worried about finishing the bottom, since that will be hidden in the boot covers.
 
The backpack finally has some shape! Getting 1.5" thick foam to bend and hold shape is not easy, but I'm hoping to coax a little more out of it. It will still need some sort of method of attaching the arms to the shoulders and back piece on the back. I debating between snaps and Velcro. Next step is a TON of Kwik-Seal because the seams on this piece are grrroooossss. I promise some close-up pics of those with the next update.

IMG_20180203_213621429.jpg

I also finished up the shoulder pads! They are Cordura fabric backed with craft foam that was first spray mounted with Super 77, then stitched down at the same time as the border which was folded under and top stitched. The straps connecting them to the vest are just long enough so that I can raise my arms.

IMG_20180203_203148447.jpg
 
This thread is more than 5 years old.

Your message may be considered spam for the following reasons:

  1. This thread hasn't been active in some time. A new post in this thread might not contribute constructively to this discussion after so long.
If you wish to reply despite these issues, check the box below before replying.
Be aware that malicious compliance may result in more severe penalties.
Back
Top