Hey Guys thought id open up a section for people to show off their Obi Crystal chambers. Post any modifications that you have to done.
Thought this would be a good help guide
Thanks

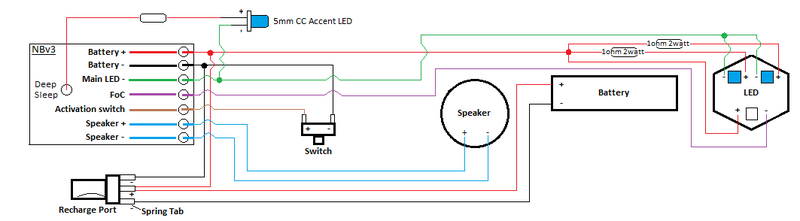
NANO V3
Thought this would be a good help guide
Thanks
NANO V3
Last edited: