brutuswayne
Active Member
Well it's been a couple of months since I've posted on therpf and my first time posting in the DC board! I finished my Cap suit back in early October, and ended up taking a break from sewing to recover. But, while I was resting I played through Arkham Knight and the DLCs and fell in love with Red Hood's design in the story pack! I knew I wouldn't have enough time/money to get the whole done for my next convention in February. But, I thought it'd be a fun project to slowly work on and keep my hands busy.
My plan is to make the jacket and shirt from scratch, and modify a red hoodie to the right fit/length to wear underneath. The helmet, guns and shinguards I'll be buying (got my eye on a couple sellers that I'm just waiting to hear back on time/price about). And I'm going to try and 3D print the thigh panels, ammo clips, belt pieces, and the minor shirt greebles myself using a mix of ninjaflex printable rubber and regular 3D printing filament.
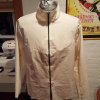
I started working on a pattern for the jacket about a month ago, and last night finally reached a point where I felt like showing some progress. I started using a McCall's pattern for a basic fleece jacket. I made a mockup in the right size using muslin and threw a quick zipper on just to check how it'd sit when zipped. This ended up being VERY loose (not that big a surprise), so I took in the side seams heavily and added the curved seams on the back of Jason's jacket to take it in better. I also hemmed the jacket and the sleeve cuffs to the proper length based on where I wanted it to sit. I thought the collar was too loose around the neck for what's basically a motorcycle jacket, so I redrew that part of the pattern to pull it in closer and changed the length of the collar to match. I also drew a new sleeve pattern from scratch using a sleeve cap drafting guide I found online to make the sleeve sit in better!


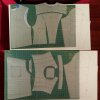
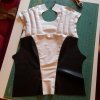
This all resulted in new paper pattern pieces and a second muslin mockup. This time the mockup fit MUCH better and already had some of Red Hood's seamlines established in the construction (the back seams and the yoke). The collar also fit closer just the way I wanted it to instead of awkwardly drooping down. I spent last night drawing out the rest of the designs/construction details on the jacket onto the mockup and got almost all of it where I want it to be. I'll be cleaning it up a bit tonight before I cut it apart to make my final paper patterns.


My plan is to make the jacket and shirt from scratch, and modify a red hoodie to the right fit/length to wear underneath. The helmet, guns and shinguards I'll be buying (got my eye on a couple sellers that I'm just waiting to hear back on time/price about). And I'm going to try and 3D print the thigh panels, ammo clips, belt pieces, and the minor shirt greebles myself using a mix of ninjaflex printable rubber and regular 3D printing filament.
I started working on a pattern for the jacket about a month ago, and last night finally reached a point where I felt like showing some progress. I started using a McCall's pattern for a basic fleece jacket. I made a mockup in the right size using muslin and threw a quick zipper on just to check how it'd sit when zipped. This ended up being VERY loose (not that big a surprise), so I took in the side seams heavily and added the curved seams on the back of Jason's jacket to take it in better. I also hemmed the jacket and the sleeve cuffs to the proper length based on where I wanted it to sit. I thought the collar was too loose around the neck for what's basically a motorcycle jacket, so I redrew that part of the pattern to pull it in closer and changed the length of the collar to match. I also drew a new sleeve pattern from scratch using a sleeve cap drafting guide I found online to make the sleeve sit in better!


This all resulted in new paper pattern pieces and a second muslin mockup. This time the mockup fit MUCH better and already had some of Red Hood's seamlines established in the construction (the back seams and the yoke). The collar also fit closer just the way I wanted it to instead of awkwardly drooping down. I spent last night drawing out the rest of the designs/construction details on the jacket onto the mockup and got almost all of it where I want it to be. I'll be cleaning it up a bit tonight before I cut it apart to make my final paper patterns.


