The Expanse: Props & Found Parts

So much amazing information in the videos that Tested have been posting. I wish they'd said which snowboarding helmet they've used but can't have everything.

There's another from the costume department in case anyone missed that:

 
Last edited by a moderator:
A few screen caps from the props vid. The more I look at the SCAR pump gun, the more I want to build it.

Expanse_tested1.jpgExpanse_tested2.jpgExpanse_tested3.jpgExpanse_tested4.jpgExpanse_tested5.jpgExpanse_tested6.jpgExpanse_tested7.jpgExpanse_tested1.jpgExpanse_tested2.jpgExpanse_tested3.jpgExpanse_tested4.jpgExpanse_tested5.jpgExpanse_tested6.jpgExpanse_tested7.jpg
 
Re: The Expanse: Prop Weapons

Anybody catch the name of the shady club?

The "Tech Noir," ha ha.

That triangle icon on the sign looks familiar, too...


-MJ
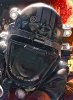
That whole scene was blade runner, pulling the guy over the counter etc, the cop drinks from the same whisky glass Dekard uses too.
 
I am a fan of The Expanse. After watching Adam Savage's interview on the props of Season Two, I was very interested in the design of the new EVA helmets.

Although referred to in the interview as low-altitude helmets, I believe they are actually Chinese manufactured, high-altitude flight helmets. I was able to find these available on eBay which was also cited in the interview as the original source used by The Expanse props department.

There appears to be two sizes readily available. A Size #1 which is listed as Extra-Large and has a 56-60 cm. measure and a Size #2 listed as Large and 52-58 cm. I ordered a #1 helmet and it arrived from Jihan City China to the East Coast of the US just 8 days after placing my order. It arrived via SF Express and UPS Ground. The shipment was even faster than the original delivery estimate which I took as a good sign as the shipping charges are as much as the cost of the helmet.

The package arrived in excellent condition. Perhaps because of the short transit time. The helmet was surrounded by thin slabs of Styrofoam. Perhaps not perfect protection, but it seems to have done the job in this case.

Here are some photos “right out of the box” before I start any cleanup or disassembly.

1HelmetOutsideTop.JPG2HelmetFront.JPG3HelmetLeftSide.JPG4HelmetHeadcoverRetractedFront.JPG5HelmetInsideTop.JPG6FaceshieldOutside.JPG7FaceshieldOutsideBottom.JPG8FaceshieldInside.JPG9FaceshieldInsideBottom.JPG

1HelmetOutsideTop.JPG


2HelmetFront.JPG


3HelmetLeftSide.JPG


4HelmetHeadcoverRetractedFront.JPG


5HelmetInsideTop.JPG


6FaceshieldOutside.JPG


7FaceshieldOutsideBottom.JPG


8FaceshieldInside.JPG


9FaceshieldInsideBottom.JPG
 
Last edited by a moderator:
Expanse(TK-1) Helmet

I have been working on what could have been a one-day “unbuild”. So far I have been able to disassemble the major components without too much difficulty or special tools. My only limitations have been my goals to keep any destructive deconstruction to a minimum and to document the process as much as possible as an aid to others and as a reassembly guide for myself.

Based on my research so far, the helmets which are forecast as the basis for Season 2 are the Chinese TK-1. I found images of a few pages of a Chinese language TK-1 manual which match the elements given in the Tested Interview. I have not yet been able to locate a complete copy of the manual so I do not have the correct terminology to use when discussing this design. However I will try to use consistent terms to aid in the exchange of information.

The helmet has four main components which I will call; visor, dome,faceshield, and headcover.

In use, the headcover is firmly fitted to the wearer's head and provides the foundation to which the other helmet components attach. The headcover has a rigid front which frames the face and a cloth hood which encloses the head down to the neck. The outside of the frame has a two-piece metal front and the inside surfaces are padded. In the rear of the hood there is a full-length zipper to allow the headcover to be easily put on and removed. The hood also has two rows of lacing (like lace-up boots) to allow the hood to be closely fitted to the head. The metal frame is painted white and the hood is made from an olive green synthetic.
HeadcoverFront.JPGHeadcoverRear.JPG

A short electrical cable with connectors on each end passes through a metal grommet in the hood. The original purpose appears to be to connect a microphone. This will not be needed for the replica.

A bracket at the top of the frame provides a hook where the dome is attached. On each side of the frame a cone-pointed post of a two-part quick release fastener provides two more points of attachment for the dome.

The dome is a one-piece metal unit which covers the top of the head from the forehead in the front to the nape of the neck in the back. On the sides it extends down to the bottom of the ears. This piece is roughly a half sphere with protrusions at each ear and three horizontal ridges at the rear. On each side below the ears there is a hinged metal element which covers the cheeks down to the jawline. I will call these elements, flaps. In the normal down position, the flaps curve in toward the neck. The hinges allow the flaps to rotate up approximately 90 degrees out to the side. This widens the bottom to make it easier to don and remove the helmet and the flaps provides a natural handhold to accomplish the actions. Inside there is a simple leather and cord suspension system. The dome and flaps are painted white and there is a red five-pointed star on the front.
DomeBottom.JPGDomeFlapVisor.JPG
In addition to these main elements there are some dome parts which seem to be extraneous to use on The Expanse replica. This includes some small pulleys, a wire rope, clips, ring and webbing.

In use, the headcover is put on and tightened. The dome is hooked at the top front, tilted back over the head, and the posts inserted into the socket portion of the fasteners on the sides of the dome. This securely mates the dome to the headcover.

The visor is a black tinted plastic shield attached to a metal arch which can be placed to shade the wearer's eyes or raised up and out of the way . The white painted arch is attached to each side of the dome at the ear bumps with a ball-bearing retention system. This allow the visor to “click” into several distinct positions from directly in from of the face to directly overhead. From the limited exposure of the Tested interview and released images so far, the visor is not a part of the Season 2 EVA design.
VisorDomeFlap.JPG
The final element is the faceshield. A clear, curved plastic plate is set into a one piece metal frame with a black rubber gasket. On the inside of the faceshield frame there is a hollow gray rubber gasket to provide a seal to the front frame of the headcover. The faceshield attaches to the headcover by hooking over the bracket at the top and and hinged quick release link fastener on the bottom.

The lower front of faceshield contains all of the rubber tubing necessary for oxygen distribution. Some of these elements are retained in the
replica and others are extraneous to the design.
FaceshieldLeft.JPG

HeadcoverFront.JPG


HeadcoverRear.JPG


DomeBottom.JPG


DomeFlapVisor.JPG


VisorDomeFlap.JPG


FaceshieldLeft.JPG
 
Last edited by a moderator:
Expanse(TK-1) Helmet
Visor Removal

The first part of the dis-assembly, the visor, is very simple. The visor is attached by two single-slot nuts, one on each side of the dome. Although there are specialized slotted nut wrenches which make the job of installing and removing this type of nut easy, in my case both nuts were loose enough that I was able to get the nut moving with a regular bladed screwdriver and then complete the job by hand.

It is important to approach the job one side at a time as there are some small ball-bearings which can easily be lost.

Once the nut is removed, you can remove a tabbed washer, a curved spring washer, and a pressure distribution washer made of fiberglass which has a trapezoidal cross section. Although not necessary for this replica, in reassembling the unit the larger diameter side of the pressure washer is placed down against the visor arm and the curved spring washer is placed with the high center side up.

With the nut and washers removed, the arm of the visor arch can be lifted upward and off the threaded, keyed post. Between the visor arm and the dome there are 6 ball bearings which are a part of the discrete visor retention system. The ball-bearings may be stuck in the visor arm or remain in the plate attached to the dome. Although I thought was being especially careful, either I lost one of the ball-bearing during dis-assembly or one was missing before I started (which is doubtful). Some the balls were loose and some were frozen in place. I found that a piece of duct tape was an easy way to remove the the loose balls. The stuck balls are easily loosen by simply rubbing your thumb over the balls until they moved freely.

Once one side is done the helmet can be rotated and the other side processed in the same way. With both arms free the visor dis-assembly is complete. The threaded, key posts still need to be removed but that is addressed as a part of the dome dis-assembly.

VisorDisassembly.JPG

VisorDisassembly.JPG
 
Last edited by a moderator:
Expanse(TK-1) Helmet
Visor Removal

The first part of the dis-assembly, the visor, is very simple. The visor is attached by two single-slot nuts, one on each side of the dome. Although there are specialized slotted nut wrenches which make the job of installing and removing this type of nut easy, in my case both nuts were loose enough that I was able to get the nut moving with a regular bladed screwdriver and then complete the job by hand.

It is important to approach the job one side at a time as there are some small ball-bearings which can easily be lost.

Once the nut is removed, you can remove a tabbed washer, a curved spring washer, and a pressure distribution washer made of fiberglass which has a trapezoidal cross section. Although not necessary for this replica, in reassembling the unit the larger diameter side of the pressure washer is placed down against the visor arm and the curved spring washer is placed with the high center side up.

With the nut and washers removed, the arm of the visor arch can be lifted upward and off the threaded, keyed post. Between the visor arm and the dome there are 6 ball bearings which are a part of the discrete visor retention system. The ball-bearings may be stuck in the visor arm or remain in the plate attached to the dome. Although I thought was being especially careful, either I lost one of the ball-bearing during dis-assembly or one was missing before I started (which is doubtful). Some the balls were loose and some were frozen in place. I found that a piece of duct tape was an easy way to remove the the loose balls. The stuck balls are easily loosen by simply rubbing your thumb over the balls until they moved freely.

Once one side is done the helmet can be rotated and the other side processed in the same way. With both arms free the visor dis-assembly is complete. The threaded, key posts still need to be removed but that is addressed as a part of the dome dis-assembly.

View attachment 706502


Hey guys long time lurker of the rpf finally decided to join because I am working on one these helmets too. Anyone have any ideas that lights they used on the outside of the helmet and what they used to cover them is it something custom?

---
https://www.instagram.com/apocalyptickids/
 
Last edited by a moderator:
Expanse(TK-1) Helmet
Headcover Dis-assembly

Dis-assembly of the headcover involves several steps each of which is easy and straightforward. First the two-piece front metal frame is removed. This is accomplished by removing the two nuts located at the temples of the frame. Like other nuts used in the helmet, these nuts are slotted but are removable without special tools. With the nuts removed the metal pieces can be separated and slip off, exposing a covered inside frame.
HeadcoverDetail.JPG
The inside frame has a metal core. The front of the core is first covered with a cemented-on rubber shell. The rear of the core is padded along the top where it might contact the forehead and along the bottom to protect the chin. The rear of the core and padding is then covered with material the color and texture of chamois. This material is also cemented to the core. The shape of the core, and the slight separation between the rubber-covered front and the chamois-covered back forms a groove around the outside edge of the inside frame. The front edge of the hood fits into this groove.
HeadcoverHoodDetail.JPG
The front of the head cover hood is oval in shape. The edge of this oval is a fabric casing which encloses an elastic cord. The front edge of the hood can be stretched snugly around the inside edge of the core and fitted into the groove. The hood is cemented into the groove and the seam between the rubber-covered front and the hood edge is covered with a two-piece binding strip of synthetic fabric. The fabric binding seems adhered with something similar to rubber cement. However it does not seem this adhesive was brushed on. There is evidence of layout lines on the adhesive as if it was thin sheet of cement which was cut to a template shape and then applied in one piece.

Dis-assembly of the headcover merely reverses this construction process. The fabric binding strips are first rolled and peeled away from the deteriorated adhesive. The hood can then be separated from the core. At this point there is another small part which could easily be overlooked or lost. To strengthen the inside frame, at the center top and bottom there are two welded joining plates. The uneven surfaces of these plates could abrade the hood or coverings. The bottom support in my helmet was covered by a small amber-colored plastic shield. This was also one location (of two) where the two binding strips overlapped. This may be found stuck to either the binding or the inside frame as the binding is removed. If the purpose of the shield was to prevent abrasion I would have expected two – one at the top and the bottom, but like the ball bearing, I am short one. The remnants of the adhesive can then be removed from the individual components. One trick to clean the fabric binding is to roll the adhesive back over itself and away from the fabric. In my case the adhesive stuck to itself and came away with only a little effort and without much mess.
HeadcoverAdhesive.JPGRemovingBindingCement.JPG
Taking the dis-assembly to this point produces the two piece metal frame,two nuts, the inside frame, the hood, small amber shield, and two strips of fabric. For my purposes I did not see any reason going any further to remove either the rubber shell or padded chamois from the core.
HeadcoverDisassembly.JPG

HeadcoverDetail.JPG


HeadcoverHoodDetail.JPG


HeadcoverAdhesive.JPG


RemovingBindingCement.JPG


HeadcoverDisassembly.JPG
 
Last edited by a moderator:
Expanse(TK-1) Helmet
Dome Dis-assembly

There are two elements which must be removed from each side the dome; the threaded visor arm post and the wire rope pulley system.
DomeSide.JPG
The pulley is attached to the ear bump of the dome with a single peened-end bolt. This type of bolt allows some adjustment in the tightening and loosing of the fastener, but the corresponding nut cannot be removed. During installation, after putting on the nut,the end of the bolt is peened, or broaden (like setting a rivet)preventing the nut from being backed off. To remove the nut and bolt the peened-end must be removed by filing or grinding. Once removed,the bolt can no longer perform it original function. If re-installation is required a new bolt would need to be used and peened. Re-installation is not necessary for this replica.

Once the bolt and nut are removed this frees the pulley as well as a thick washer which was used to space the rotating pulley away from the surface of the dome allowing easy movement. With both pulleys disconnected, the entire wire rope assembly is free. The wire rope assembly is not required for this replica and no further dis-assembly of it is required.

The threaded visor arm post is attached to the ear bump of the dome with three rivets. Once the rivets are filed or ground away the visor arm post can be lifted off. The visor post is actually made up of six parts; the post plate which has holes for the ball bearings, a smaller post which is inserted from the back which mates with a slot in the visor arm to limit the range of motion, a thin aluminum wear plate (to provide a backing for the ball bearing holes) and of course the three rivets which are destroyed during the disassemble.
DomeVisorPost.JPG
One caution about the paint on the dome. To protect the painted surface while grinding off the peened end I covered the inside of the flap around the nut with duct tape. This turned out to be unnecessary(this one time) but it did have the advantage of collecting a lot of the metal dust created from the grinding. However, when the tape was removed it also pulled off some of the paint from the flap hinge. The paint on the dome and flap seems to handle the tape well enough but the hinge gave up some of it's paint. When I went to grind the second bolt I first put down a layer of blue painter's tape and then duct tape of top. The result was not quite as bad but the weaker tape also removed some of the hinge paint. I guess there are two lessons here. If you have the skill and steady hand to grind the bolt without a form of adhesive protection you could do well to avoid using it. The tape probably cause more damage than I would have otherwise. Second, if you find you want to remove the paint from the flap hinge, duct tape may be the answer. I did notice the paint around the knuckles of both hinges was very spotty so perhaps that might be useful.

Just as an aside, as I am thinking about what my final helmet will look like one option is “show room new”. I know many builders find the “weathering” and “aging” of props to be some of the most creative and rewarding parts of the builds. Maybe because I am less artistic and creative I have not done much of that type of activity. Also whenever I have seen old tools or old firearms which were still actively used by their owner, the condition of those tools might be worn but they are never dirty or in disrepair. I think if my life“in the Belt” had to depend on my helmet, I would probably take pretty good care of it. I put that idea out there just as a point of discussion as I am interested in what others think about that approach.

Another element which may or may not need attention is the helmet's suspension system. The foundation of the system is an oval wire bail which closely matches the interior of the dome. The bail is held in place by four clips (located at the front, rear, and each side slightly forward of the ear bumps) which are individually riveted to the dome. A single piece of faux leather forms a casing which is slipped onto the bail. On each short edge of the leather there are two punched and grommeted holes. A piece of synthetic cord is laced between the two ends. By tightening or loosening the lacing the fit around of the circumference of the wearer's head can be achieved. The edge away from the casing is scalloped into 10 flaps or fingers which narrow to rounded ends. The end of each finger also has a punched and grommeted hole. A single synthetic cord passes through all of the grommets and is tied off. By tightening this cord the ends of the fingers can be drawn together to curve toward the crown of the wearer's head. The curvature of the fingers and the fit of the suspension system is adjusted by tightening or loosening this cord.
HelmetSuspension.JPG
Until the new “belter” design of the helmet is complete I am leaving the suspension system “as-is”. The existing rivet holes which hold the clips could be useful to attach new elements, such as the standard headlamps which seem to exists on all of the various helmets displayed in the prop shop image.

However the old faux leather of my helmet does retain the odor of long storage, and perhaps mold and mildew (although nothing overly visible or discolored). As a stop gap measure I untied the cords, brushed both sides with an old toothbrush, and cleaned them with isopropyl alcohol. Otherwise the leather is sound.
DomeDisembled.JPG

DomeSide.JPG


DomeVisorPost.JPG


HelmetSuspension.JPG


DomeDisembled.JPG
 
Last edited by a moderator:
Expanse(TK-1) Helmet
Faceshield Dis-assembly

There are three major sub-assemblies which must be removed from the faceshield to get to the basic foundation; the oxygen intake hose,the exhalation vent, and the faceplate heater.
FaceshieldBottom.JPG
The connectors for the faceplate heaters are located on the lower right-hand side of the faceshield. The white plastic cover is held on by two screws. When the cover is removed a set of five machine screws with washers, two other machine screws, and two slotted nuts are exposed. Removing all of these fasteners frees the electrical cable, the mounting bracket and the rheostat. The electrical cable can then be pulled out of the rubber guides which surround the oxygen hose.
FaceshieldHeaterDisassembly.JPG
The exhalation vent is located on the lower left-hand side of the faceshield and is covered by as rubber cap. First the two rubber hoses which connect to the vent are removed. All of the hoses are removed in a similar fashion. First the outer rubber sleeve is rolled back off the hose connection point. This exposes a tightly cinched (not knotted) cord wrapping. This can either be cut off or an end teased out and unwrapped. Once the cord is removed the hose can be pull off the connector.

The longer hose can be pulled out of the oxygen hose guides. When the short hose is removed from the vent, the faceshield connector on the opposite end can be removed by unscrewing the nut from the inside.
FaceshieldVentHoses.JPG
With the hoses removed, the rubber cap of the vent can be rolled back and the vent cap can be unscrewed and freed. Moving to the inside, the vent plug can be pulled out. Then the bulkhead connector can be unscrewed like a wing nut. This frees the plastic air valve and the rubber cap.
FaceShieldVentDisassembly.JPG
The oxygen intake hose can then be removed. Like the smaller hoses,first the sleeve is rolled back. A strip of vinyl tape must be removed to reach the cord wrapping. The wrapping is then unwound and the hose pulled off.
FaceShieldIntakeDisassembly.JPG
The next element is the oxygen intake tube to which the hose was attached. It is not necessary to remove the tube for the replica as it will just need to be reinstalled, but personally I would prefer to remove all of the elements which will be close to my face to clean and sanitize them if possible. On the inside a round dark tinted plastic disk can be removed from the top of the intake gasket. This exposes a one-way rubber valve inside the tube. I have not yet tried to remove the valve. The intake tube gasket also attaches to a hollow gray rubber gasket which goes around the perimeter of the faceshield. In addition to the intake tube, the gasket is attached at four points around the faceplate. These points of attachment are holes in the rear of the gasket which slip over broad-headed studs. The gasket can be easily pulled off each stud.

From the Tested video, the gray gasket has been removed and replaced with a black gasket which appears similar to the gasket on a refrigerator door.

At this point I reached my first roadblock. In my first attempts I cannot remove the bulkhead style slotted nut which holds the oxygen intake tube. This nut is larger than all of the others which have been addressed and has perhaps been torqued to a higher degree. The tube in turn prevent me from removing the hollow gasket. One option since I will not be reusing the gray gasket is to just pull it out from underneath the bulkhead connector, perhaps damaging the gasket. This would then remove some of the pressure on the bulkhead connector perhaps allowing me to unscrew and remove it as well.
FaceshieldGasket.JPG
The final step of dis-assembly is to remove the two rubber guides from the oxygen hose and grind off the two rivets from metal clip which holds the webbing and snap connector.

FaceshieldBottom.JPG


FaceshieldHeaterDisassembly.JPG


FaceshieldVentHoses.JPG


FaceShieldVentDisassembly.JPG


FaceShieldIntakeDisassembly.JPG


FaceshieldGasket.JPG
 
Last edited by a moderator:
Expanse(TK-1) Helmet
Dis-assembly Wrap-up

Before I started this project I wondered if it would be worth the cost to buy a surplus Chinese flight helmet and attempt to modify it. I did not know how difficult the task might be, how long it would take,what special skills or tools might be required, what the options would be to reassemble a new version, and what I would do with the project when I was done.

The last two questions are still somewhat up-in-the-air, but the first three are now known. I think the project has already been worth it to me. I have learned a lot and had some fun taking things apart and reverse engineering how they work and why they were designed the way they were. As far as time goes, it only took a couple of hours and some of those were in basis research so I would not destroy or damage anything unnecessarily. I spent way more time documenting the tasks(and maybe it even takes more time to read my posts) that it actually took to perform the dis-assembly. And far as tools go it was good to find that if I were stuck “in the Belt” I could repair my helmet with little more than a screwdriver, an adjustable wrench, some cord,and a little electrical tape. I hope my notes show just how easy the process is to anyone interested in tackling a similar project.

In review there were a few things I did not include in the first posts and a few things which still need to be done.

With regard to the headdcover for those with a historical interest there was a quality control stamp on the fabric which followed the manufacturing progress and inspections. My particular headcover was completed on December 30, 1988. If I over-dye the headcover this will be lost other than the photos I have taken of it. Also the headcover has a two-piece bulkhead connector the microphone cable passes through. The connectors on both ends are pinned into place. The easiest way to remove the cable will be to just cut off one end or the other. I have not yet done that as I am still looking for the“correct” way to address the problem. Then the bulkhead connector still needs be addressed. Like the one on the faceshield it remains stubborn. Another potential issue with the headcover connector is that one piece has been cement to the fabric. It will probably peel off, but the adhesive may make the connector even more difficult to get to move.

On the dome there were two small straps which screw onto the flap quick-release connectors. Also on the bottom link connector for the faceshield there was a small piece of webbing attached as a pull. I have now taken all three of these elements off. The helmet suspension system is still in place.

What was once the free end of the oxygen hose also has a cord-wrapped and rubber sleeve covered metal push-and-twist-connector. Until I decide the “new look” I have yet to take that apart.
 
Last edited by a moderator:
We have some nice shots of Miller's helmet in the latest episode, which seems to indicate that his helmet & suit are also the ones used for the season 2 poster / promo art:

... Man, that thing's got a lot of stickers on it ...
 

Attachments

  • 170208_B.jpg
    170208_B.jpg
    1.2 MB · Views: 596
  • COMPOSITE1.jpg
    COMPOSITE1.jpg
    1.7 MB · Views: 596
For those still looking for the Black Diamond headlamps for the season 1 style suits, I happened across these loosely similar looking headlamps at Wal-Mart today, certainly much dimmer and much cheaper than (new) Black Diamond lamps.


-MJ
 

Attachments

  • IMG_0732.jpg
    IMG_0732.jpg
    380.9 KB · Views: 249

Your message may be considered spam for the following reasons:

If you wish to reply despite these issues, check the box below before replying.
Be aware that malicious compliance may result in more severe penalties.
Back
Top