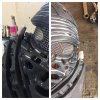
How's everyone getting the mesh attached their helmets? Drawing a blank on this
You are using an out of date browser. It may not display this or other websites correctly.
You should upgrade or use an alternative browser.
You should upgrade or use an alternative browser.
Kylo Ren Black Series Helmet Mod
- Thread starter Jamestan
- Start date
From what I've seen, most people use hot glue. Dab some onto the innards of the helmet, then carefully press the mesh into it.
Propshop has what looks to be a really nice, integrated mesh and lining all sewn in together.
Propshop has what looks to be a really nice, integrated mesh and lining all sewn in together.
Jamestan
Active Member
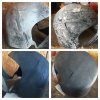
Here's where I'm at:
View attachment 647892
Holes carved out more, can't really tell but I filled in the holes from the speaker with epoxy, and sanded the entire helmet.
lastly got some steel mesh put in that I'll have to paint black later.
brighter pic
View attachment 647893
That's looking good, I suggest you put at least another layer of mesh underneath the visor so that it can cover your eyes enough not to be seen. Stagger the pieces so that the gaps between the mesh is smaller and smaller. Depends on how wide the spaces in between the mesh you got are you might have to do two to three layers. I did two on mine and you cant see my eyes from behind once its painted black. Also I used plumbers epoxy to attach the mesh to the original clear visor that I cut out an eye hole into. Good Luck!
rosskow
Sr Member
I haven't done this part yet, was a bit unsure how, any pointers for your method?
Looks good by the way, needless to say.
Looks good by the way, needless to say.
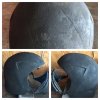
Welded the helmet together with some more sanding. Only modification I did today was raise the mouth/snout piece near the top.
View attachment 648326
Gives it a similar look in profile to the Anovos helmet.
Thanks rosskow.
so what I did was cut a thin peice of cardboard to shape(wider at the bottom with a taper towards the top) for structure. Then I glued it down ontop of the nose, and then used plumbers epoxy to shape. Then went back with bondo just to fill in any imperfections.
youll have that gap like mine, but I'm thinking of using some fabric to cover it just like the chrome face plate holes. Hopefully that's some help, I'm *%¥$ at explaining thing haha
Last edited by a moderator:
Today's update:
i think ink we can all agree sanding suuuuucks!!!

A bunch of back and forth work with the power tools/sandpaper/sponges but after awhile the seam finally started to vanish some...
and this is pretty much where I ended it for the day:

Still needs another round of sanding. Then I'll add the texture while I'm giving the helmet it's final paint. :cheers
i think ink we can all agree sanding suuuuucks!!!

A bunch of back and forth work with the power tools/sandpaper/sponges but after awhile the seam finally started to vanish some...
and this is pretty much where I ended it for the day:

Still needs another round of sanding. Then I'll add the texture while I'm giving the helmet it's final paint. :cheers
Jamestan
Active Member
@Mechanized2400 If you over-fill during the welding phase, then sand w/ 60grit and a variable speed osc sander then sand it to 100 or 120 you barely have to do any texturing. the fuzzies kind of create almost the right amount of texture.
Last edited:
So far so good. I don't think I'm done however. I think I'm going to go back and finish up that seam line a little better and then repaint. And almost forgot the pieces under the jaw are in progress
But for now, this'll do:


Thanks to @Jamestan for such an informative thread and helpful advice. As always, comments welcome. cheers
But for now, this'll do:


Thanks to @Jamestan for such an informative thread and helpful advice. As always, comments welcome.
ConstruX
New Member
This explanation helped a lot! I put together a video here: https://www.facebook.com/ADAMantiumInc/videos/1972715009622721/ based on your description if anyone is looking for a visual on this method. :thumbsup
Thanks for the video. I'm very much a visual person. I've been researching what method to use to fuse the pieces together (epoxy or weld). Unfortunately, I threw out any additional scraps that came with the BS like the head strap.
ForceSensitvAL
Active Member
Very nice. What did you end up using for the seams? I saw a lot of people on youtube using Bondo, but I had a ton of epoxy putty, so I went with that. After a ton of sanding and then a thin coat of resin, I can still see my seams. Turns out the putty is just too smooth. It really stands out beside the texture of the helmet.
Hey ForceSensitvAL thanks.
if you look at the last pics I posted you can still see the seams in certain light. But I used a Bondo like most but did use the putty epoxy fill in the speaker holes in the chrome face part;
just shoved it in through the back of the chrome face's holes and smoothed it out as it protruded out in front.
For or the seams of helmet I went back-n-forth a lot with melting plastic with the solder iron, then, filling any gaps with bondo. Sanding, light primer to see what else was needed and where, then repeated the whole process.
After awhile It was decent enough, and that's what you see in the pics. Also, I used a light textured rattle can for paint which helped disguised the seam
Last edited by a moderator:
ForceSensitvAL
Active Member
Also, I used a light textured rattle can for paint which helped disguised the seam
Thanks for all of the tips. Can you recommend any specific textured paint? Most of the textured stuff I've found mimics rock. Did you one of those leather-like vinyl sprays that flex?
This is the textured Rattle can I used:

It gives a fine texture that isn't like the hammered type look. After that dried I went over with a flat black from Rusto to dull out the texture just a bit. It may not be exactly screen accurate but I like it.
tried to get a pic of the cap to show what this texture looks like:


It gives a fine texture that isn't like the hammered type look. After that dried I went over with a flat black from Rusto to dull out the texture just a bit. It may not be exactly screen accurate but I like it.
tried to get a pic of the cap to show what this texture looks like:


ForceSensitvAL
Active Member
Thanks, Mechanized2400! I am going to give some different sprays a try this weekend. I got one fine texture and one that I think I might be able to use to get a leathery look.Going less for accuracy at this point and more for a unique look that'll look good on display. The lightsaber I'm displaying beside it is already pretty inaccurate and unique itself.
Last edited by a moderator:
Same here, my saber is no where near accurate. And the helmet is so inconsistent throughout the film, also.
I like when each prop is unique to its builder/owner; so I'm excited to see your final piece. Have a fun time with this one, it's worth it in the end cheers
I like when each prop is unique to its builder/owner; so I'm excited to see your final piece. Have a fun time with this one, it's worth it in the end
Similar threads
- Replies
- 3
- Views
- 813
- Replies
- 0
- Views
- 189
- Replies
- 11
- Views
- 863
- Replies
- 7
- Views
- 1,389
- Replies
- 3
- Views
- 487


