Han In Carbonite in Canada - Build thread

Update!!!

Spent the last 3 weeks tryin to figure out the best glue to fix my front Han panel to my wood base.

Good thing I tested it on the extra I had removed from the panel!!

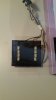
Started with Liquid Nail All Purpose .. After over 24 hours at warm temp, it peeled right off.

You can see the clean stamp left in the glue but nothing stuck to it.
ImageUploadedByTapatalk1450675163.658331.jpg

Brought back the tubes and exchanged for Liquid Nail Heavy Duty .. Peeled off too!!

Same goes with lepage contact glue in gel .. Nothing!!!

Brought back again and this time went for Liquid Nail Polyeurethane - turns out the casting is polyeurethane too so it stuck like ca glue to plastic!!! Very solid!

So finally, tomorrow, I'm doing this! Lots of glue to spread!! Can't wait to finally have it fixed!!!

After that, puttying the edge where the cast meet the frame! Then painting!!

Pics to come soon!
 
Last edited:
Turns out today was present shopping day!! What a chaotic madness at the stores!! Wooah!!

Still had time to clean, wash both sides of my Han! It definitely needed some love! Was dirty as heck!!

Hopefully glue tomorrow for real this time!

ImageUploadedByTapatalk1450767237.911797.jpg ImageUploadedByTapatalk1450767252.961371.jpg ImageUploadedByTapatalk1450767265.478420.jpg
 
Beautiful build!! Can't wait to see the result!


Sent from my iPhone using Tapatalk

Thanks Warpcell! My whole day is dedicated to this! Working on the aluminium backing right now! I'll shoot the primer on my box next, then look for defects and it's gonna receive its metallic coat next! So much work to do!
 
2 weeks of vacation, almost 0 time to work on this .. makes no sense at all!!! Still, last night, I decided I wanted to move forward with my panels. Here's what happened..

First, I instealled the aluminium backing in 3 panels. There was 2 ways of doing this. Either, what I suspect is, the screen used way where there's a big aluminium plate behind the whole panel. Although simpler to do, this gives a big gap between the panel window and the backing due to the small lip seen in the third pic. I really didn't like that and didn't feel like drum sanding all the lips ...

IMG_2839.JPG IMG_2840.JPG IMG_2841.JPG

So I cut all panels individually to fit inside the lips. Much better result and that's what I would suggest to do .. really nice and tight fit on the window edge now.

IMG_2835.JPG IMG_2836.JPG IMG_2837.JPG IMG_2838.JPG

All aluminium backing is first glued with hot glue to hold them in place. Then, JB Weld is used around corners and along the edge to seal the deal. Don't use hot glue to glue them all .. that's what I did first and it doesn't hold properly on the plastic. Epoxy works beautifully and will never fall off.
 
Then it was time for the Hero panels

Hero 1 is almost done, only thing that had to be done was to cut the backing because I realized later that the electronics on it were thicker then the panel! So I put down my panel on a piece of MDF 1/4 then traced what needed to be removed and cut!

IMG_2826.JPG IMG_2827.JPG IMG_2825.JPG IMG_2829.JPG

And final result..

IMG_2830.JPG IMG_2831.JPG

Hero 2 is still not done .. I need to stop casting parts for people and actually taking care of my own build! :) So work has started on this one too.

First, to trim the tab in the main window.. NOTE to self, do this before painting next time!! Will have to repaint that one.

IMG_2832.JPG IMG_2833.JPG

Then, using a 2mm styrene sheet to do the main window backing (no aluminium on Hero 2. Unless you want to paint your aluminium but cutting it would be such a pain, not worth it!! The advantage is that I will glue it on and then repaint the whole panel after! :)

IMG_2834.JPG image2.jpeg image3.jpeg image4.jpeg image7.jpeg

If you got the Bronica waist finder from me, make sure to trim all material under with a dremel .. and drill the holes in the small tabs but be really careful to hold it from the back when you do it, these tabs are quite thin and fragile and you have only one :)

Now I need to figure out how the panels will hold on the box!
 
Last edited:
Yo,

The two screw tabs at the back hold them down to a certain extent, but you just need something to stop the front edges from popping up. Some of the panels have smalls screws there which solve that, but you could use a couple of small magnets. Even one would probably do. It's just to stop the edge lifting up.
 
Yep .. fixing by the tabs is definitely a risk though .. those things won't touch the surface so that would mean absolutely using a nut between the tab and the backing. Definitely safer. I would also use a nut from behind so that they're removable.

As for the top, I do have neodymium magnets around .. so I'll check that solution too when I get there! It's moving forward, just so slowly!
 
So I'm trying to figure out how the Hero panel 2 electronics will hold under .. and while I'm at it, I haven't really figured out a solution for the dotted texture in the acrylic. What did you guys use for this? Anyone has some extra sticker sheet that I could buy off you?
 
I'm currently debating if I should crook the clips placement like the screen used were, or if I should just align them all properly.
I made the first 2 panels straight, now, I'm wondering if I shouldn't properly align the others (lower and higher) based on the ref I got ...

Kurtyboy, I see you did crook them yourself, not that I'm surprised, Mmmm...
 
Last edited:
HAY AL

so i asked warpcell a while back and I think he said he used a transparent film


this is what I've been messing with I found the dot pattern on the internet and down sized it and printed it on transparency film
for overhead projectors
I was thinking of using a face shield with the plastic peeled of of one side
then laying the copy over it
it looks close but....... seems a little off

tell me what you think !


20160113_204908.jpg20160113_193306.jpg20160114_185334.jpg20160114_185309.jpg20160114_185238.jpg

as always comments are always welcome from all !!!
 

Attachments

  • 20160113_205150.jpg
    20160113_205150.jpg
    1.9 MB · Views: 352
Hey Darrell,
It's a very good start but I agree with you, it seems a little off .. check out the panel pattern here: dots are much much closer to each other..

R2 hic-loanstar-7.jpg
 
As a reference, not sure what Bronica replica you have but the inside of the real viewer is 51mm x 40mm. From there, you can calculate the number of dots needed to have the screen props look. I calculated 39 every other rows from the pic above ^^^
 
Panel porn!!!

First, cut a template in styrene that represents the shape of the clips. Use tons of refs to find out placement of each clips on each panels. With a pencil, draw the bolt placement, then pilot hole and bigger hole depending on bolt.

I got Zenix's awesome metal clips and definitely recommend those to anyone building a NIC. If you want accuracy, there's nothing else that can replace this set!

Really happy with how these turned out!

image1.jpeg image2.jpeg image4.jpeg image5.jpeg image6.jpeg image7.jpeg image8.jpeg
 
Last edited:
With stickers but not terribly happy about their accuracy ... More on that later! ;-)

ImageUploadedByTapatalk1453835895.522569.jpg

That one on Hero panel 2 is way too big!!! Actually, about 50% too big and those writings are way off and I will have to do something about that! lol
ImageUploadedByTapatalk1453835909.586365.jpg
 
This thread is more than 5 years old.

Your message may be considered spam for the following reasons:

  1. This thread hasn't been active in some time. A new post in this thread might not contribute constructively to this discussion after so long.
If you wish to reply despite these issues, check the box below before replying.
Be aware that malicious compliance may result in more severe penalties.
Back
Top