Han In Carbonite in Canada - Build thread

Re: Han In Carbonite in Canada - Build and Research thread

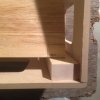
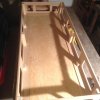
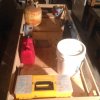
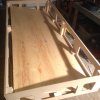
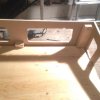
Backing is plywood 3/8" .. I put it under the box drew the outside. Removed 3/4" all around and cut. This gives me a perfect inside with a little padding. Drop the cut sheet into the box, align and draw the shapes to cut out on that side. Cut them all. Drop it back in where it should fit tight now, draw the other side's shapes and cut out again. Drop back in .. perfect fit!
IMG_2339.JPG IMG_2340.JPG IMG_2341.JPG IMG_2342.JPG IMG_2344.JPG

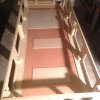
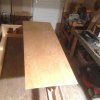
Sheet of 3/16 .. Dropped under the box, drawn from the inside of the frame to the exact shape needed. Cut.
IMG_2343.JPG

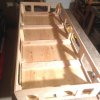
3/16 sheet left in there. Added more padding to be able to glue the plywood. Plywood dropped in the box, glued and screwed all around. Cross beam added to reinforce but not add too much weight.
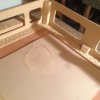
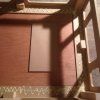
IMG_2347.JPG IMG_2346.JPG IMG_2345.JPG IMG_2349.JPG

Box framing all done .. finally, won't be scared to move this around anymore! :thumbsup
 
Re: Han In Carbonite in Canada - Build and Research thread

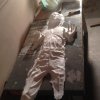
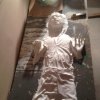
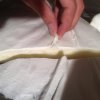
Han all trimmed up. There was a lot of extra expanding foam under there. I need to figure a good way to reattach the parts together.

IMG_2350.JPG IMG_2351.JPG IMG_2352.JPG

Unfortunately, I have some section that are delaminating .. nothing ca glue won`t fix. This is often due to resin that caught humidity or waiting a little too long between layers. It happened to me with 65D a couple times. After that, I cut down my next layer time while the resin was still wet and warm. That fixed the issue.

IMG_2353.JPG IMG_2354.JPG

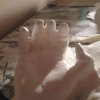
Look!!! It's Aqua Han!!! Those fingers will need some love too ...

IMG_2355.JPG
 
Re: Han In Carbonite in Canada - Build and Research thread

It's a good morning! Just bought a Waist Finder on Ebay. Don't know why nobody snatched it at 69$!!! Will drop this in rubber along with the other original vintage parts I have and offer them along with my panels.

Looks like I'm gonna have to redo a panel mold after all! :)
 
Re: Han In Carbonite in Canada - Build and Research thread

i know i cry and stomp my feet everytime someone posts a HIC build, but i want to do this so bad!! one thing i love about HIC builds it they all seem to be constructed different and i love the creativity on the carbon finishing. yours is coming together great, i am very very jealous!
 
Re: Han In Carbonite in Canada - Build and Research thread

Found some plexi yesterday! Scored and sanded .. I marked where I'm gonna drill my holes but not until I receive my led mountings!

image2.jpeg image1.jpeg image3.jpeg image4.jpeg image5.jpeg

On another note, I have extra of this and I will offer it with my next run of panel/greeblies!
 
Re: Han In Carbonite in Canada - Build and Research thread

Is there anyone with a clean cast that could post high rez pictures of the feet? Top side and bottom? I would like to clean my casts and need good ref!
 
Re: Han In Carbonite in Canada - Build and Research thread

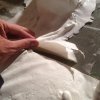
Work on Han has started. I fixed the delamination with super glue and removed all that ugly webbing between the fingers!!! Unfortunately, I can't remove more material since the fingers are not floating like the prop seems to be. But that will do and is much better than what I had before.

Before

IMG_2355.JPG

After

image7.jpeg image8.jpeg image9.jpeg
 
Re: Han In Carbonite in Canada - Build and Research thread

Nice. I will have to try the same thing...
 
Re: Han In Carbonite in Canada - Build and Research thread

Dremel with thin metal sanding bits did it .. still not sure what people do for the joint though .. the resin shell is pretty thin and I don't see myself just bondoing over 2 parts that will bend under pressure because of the foam underneath. I'd need to join back the separation from under! :wacko


I shaved the foam backing until it was flat and flush with the cast. I used CA glue to join the pieces together and filled in the gaps with Bondo. It worked out great and I have had no issues with the cast flexing at all.
 
Re: Han In Carbonite in Canada - Build and Research thread

Foam has been shaved, there was a lot extra under there!

When you say you glued with ca, I assume that 1) you have a kingjawa cast and 2) you glued the foam, not the resin thin layer?

My resin is barely a mm thick so that can't be glued back together. I'm almost tempted to strip the foam and just fiberglass the whole thing from behind!!!
 
Re: Han In Carbonite in Canada - Build and Research thread

More work on the box tonight! I reinforced all sides to make sure that when I'm gonna bondo the seam, it won't crack when the box will be manipulated. Also cut all my panels, and I let both Hero panel 1 & 2 opened for my electronics along with the top one on the other side in case I ever wanted to light it too! All panels have been glued (except the Hero ones for now) and screwed to have a proper bond. Waiting for the glue to dry now.

Plan for the next round:

  • install cross beams from behind for structural strength (those sides are kind of flexible due to their length)
  • bondo the box,
  • install the top padding and finally glue Han over it.
  • bondo over Han's seams and start working on the Carbonite!

IMG_2377.JPG IMG_2378.JPG IMG_2380.JPG IMG_2379.JPG IMG_2381.JPG
 
Re: Han In Carbonite in Canada - Build and Research thread

Are you going to tilt the side panels? Haven't figured a way around that yet
 
Re: Han In Carbonite in Canada - Build and Research thread

Foam has been shaved, there was a lot extra under there!

When you say you glued with ca, I assume that 1) you have a kingjawa cast and 2) you glued the foam, not the resin thin layer?

My resin is barely a mm thick so that can't be glued back together. I'm almost tempted to strip the foam and just fiberglass the whole thing from behind!!!

I glued the resin enough to hold it in place so I could apply the bondo. It seemed to work really well. I just ran a bead of superglue along the seam and stuck the pieces together.
 
Re: Han In Carbonite in Canada - Build and Research thread

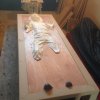
Box finishing work has started!! I glued the mdf 1/4" sheet on top of my plywood them temporarily screwed in to have a nice tight bond. Screws will be removed tomorrow. I'm impressed how a little bit of wood filler actually made a huge difference on the look!! Filler dries in about 20 min and sanded with orbital sander .. Thank god for these!!!

Unfortunately, my MC plugs will not be here for another couple months .. So in the meantime, I'll plug the end of the box with 1/4" mdf and perhaps some tenp greeblies!

ImageUploadedByTapatalk1446949450.521072.jpg ImageUploadedByTapatalk1446949462.118058.jpg ImageUploadedByTapatalk1446949472.850785.jpg ImageUploadedByTapatalk1446949482.351569.jpg ImageUploadedByTapatalk1446949494.367362.jpg ImageUploadedByTapatalk1446949526.934477.jpg
 
Re: Han In Carbonite in Canada - Build and Research thread

Final polish layer will be done in MAPA Gold which is the equivalent of Evercoat Rage GOLD .. best car putty out there. It spreads like butter and sands without all those little bubbles that never seem to end with Bondo.

IMG_2439.JPG IMG_2438.JPG

Also, more parts arrived today and the Bronica will be dropped in rubber and offered along with the other original parts. See my greeblies thread for that. Still waiting on other vintage parts before starting molding.

IMG_2437.JPG IMG_2436.JPG
 
This thread is more than 5 years old.

Your message may be considered spam for the following reasons:

  1. This thread hasn't been active in some time. A new post in this thread might not contribute constructively to this discussion after so long.
If you wish to reply despite these issues, check the box below before replying.
Be aware that malicious compliance may result in more severe penalties.
Back
Top