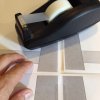
Doctor Strange Costume

JovialJay

New Member
I've decided to work on a comic book version of Doctor Strange's costume for Halloween this year. I was hoping we might have some teases about the Film version, but this is a nice warmup, and I should have a unique version to wear to the opening next November.

I'm finishing up the costume portion but before I get that complete, I wanted to share my progress on the Eye of Agamotto.

I'm not sure if there's a good way to cross post between forums, so I'll leave this link to the page I put over in Prop Replicas.

I'll be adding some costume build photos here with the final pics of the Eye. I know it looks like it's complete, but I was not happy with the paint job on the eyeball, so I've been re-working it.
 
I would never have started on this project, months before Halloween, if I had not needed some help from my Mom. She used to do stage costume work in college and is a talented seamstress, so knowing she was coming to visit, I started prepping my materials list. I mainly needed her help with the cape, and general sewing questions.

We found some really great fabrics at Joann. The cape material is a red-velvety sort of material (red Panne, according to my materials list). Not too heavy, with a little give and flows nicely. The velvet-aspect of it gives it a nice tone as well.

I was trying to decide the best way to do the trim. I have seen other Dr. Strange costumes with a bright yellow trim, with black lines that really looks like the comic images. For me that was very time consuming and prone to error, so what I found was a crinkly gold fabric (gold lamé). It looks pretty shiny in the photos, but it's not too shiny. It has nice crinkle lines in it that give the effect that I think Steve Ditko was trying to evoke in his drawings.

Cape01.jpgCape02.jpg

While I had been dead-set on doing the stitching myself, I was told I did not have the necessary skillz, so I politely allowed my Mom to do the work. Full length red cape, gold trim on the outside edges. Amazing work!
Cape03.jpgCape04.jpg

Adapting the hood was tough. The pattern had a collar element built-in to it, in case you weren't constructing a full hood. We used the collar pattern twice. Once on the cape, and a second time on the hood. I designed the dramatically high collar that Dr. Strange is famous for on butcher paper, and we adapted that as the pattern, adding the collar pattern prtion to the bottom. Figuring the best way to get the collar to 'pop' was hit and miss. I started with a bent coat hanger following the shape of the pattern. Of course, it wouldn't stay up at the top of the collar, so we were debating stitching it in. Luckily I found plastic poster board, which is a thin, flexible plastic sheet. And when it's bent slightly, it will hold a shape. So I cut that a little smaller than the pattern, and we stuffed it inside. Plus we used the coat hanger with two thread loops to hold it in the form. When curled around my neck the plastic holds the shape and the wire keeps the points up.

Cape05.jpg

The decision to make the collar a separate piece was two-fold. I decided that it should be removable for storage and potential washing purposes. The inside of the collar has a line of velcro to attach it to the cape. The seam is nearly invisible due to gold fabric on the cape matching up to a gold swatch on the back of the collar. Other than the decision work, I had little to do with the construction of what is arguably the biggest portion of the costume. I'm sure I'd either still be working on it, or have something that was sub-par if I had ended up making it on my own. So I'm grateful for the help.
 
Great job thus far! I don't have the artistic gene I thought I might have had, but I still enjoy tinkering with my ideas for cosplay. Please keep us posted with your progress as this costume will be huge in the coming months in lieu of the upcoming movie.
 
I wanted to get a sense of how the pieces of the costume would fit together, now that I had my cape, amulet and sash built. The sash was just some fabric that I cut into a long strip and sewed the ends closed, to make a finished look. The tunic is an XXL shirt that I bought, since I couldn't find any tunic style shirt that I really liked. At this point I had not finalized the appliqué design for the tunic. The pants are just pants. I know it looks like he wears tights in the comic books, with little ballet slippers. But seriously bro. I'm wearing this out in public. Pants are fine! I found some gloves on Amazon that looked like they'd work.

CostumeTestModel02.jpgCostumeTestModel03.jpgCostumeTestModel04.jpg

I discovered a couple things from a test fitting (which I'm glad I had time for his year. Last year's costume was worked on at the last minute-ish): the gloves are WAY yellow. Dang, those things are bright! Also the sash, regardless of how I start, never wants to tie on the side. It shifts around as I wrap it, so I have to figure out the best way for that to happen. Also it's a pretty warm costume. I hope Fall cools off by the end of October!

I will trying to darken up the gloves a little, as I'd like them to be closer to the color of the sash. After looking around, I think I will try tea-staining. That seems to be a little better than coffee staining, per reports I've read. If anyone's had any experience with that, I'd appreciate tips.

Next up, I'll provide the saga on my appliqué creation...
 
Spots on gloves, that's a great question and one I've been pondering for a couple weeks. How do I do the spots? What's the best way to figure this out without destroying the gloves? Are they really spots, or more of a fractal pattern? I need to do a little more research in old copies of Dr. Strange, but I think -- first things first. I need to see if my tea treatment will darken the gloves appropriately. Then I'll give a little more thought to spots.

Right now, i'm leaning towards fabric markers, but will need to test on the gloves to make sure it won't bleed too much. Any ideas?
 
If you're still having problems with the sash, you can always cheat it a bit - get it wrapped exactly how you want it and pin it all together, then cut it up the back. Sew the layers together so it all stays put and install velcro (or similar closure). You'll have to make sure you wrap it loosely enough that you can overlap it in the back (both so you'll have somewhere to install the velcro, and so you can get it off after you've pinned it together!), but then the cape will hide the velcro, and you'll always have it wrapped exactly how you want it.

The cape turned out really nice!
 
...you'll always have it wrapped exactly how you want it.

The cape turned out really nice!
That was my original plan, and I thought it would be great since the knot would be 'just so', but i think I'll live with the hassles of getting it ties, since it will never have a seam, in case I go cape-less.
 
Tonight I've got details of the creation of the appliqué for the front of the shirt. I started out with an Illustrator design 1:1 scale, based on some measurements. Discovering the mirroring feature in AI was tantamount to the success of the design, since I only had to build one half of the design and the other side was built automatically and previewed live. No more drawing half, copy and flip! Hooray!

I printed out the design, across multiple sheets of paper, taped it together, cut it out and laid it on the shirt for sizing. It was good on proportions but not long enough, and the arms were too close to the collar. You can see the revised version on-screen below.
Tunic01.jpgTunic03.jpg

Once I figured out how much to re-size it, I printed out a new version, and tested that for size and scale.
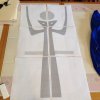
Tunic04.jpgTunic05.jpgTunic06.jpgTunic07.jpg

Since this "pattern" was taped up and made from multiple pieces, I transferred it to butcher paper and made a seamless version.
Tunic08.jpgTunic11.jpg

Learning Moment: Always make sure you know what you're doing! I thought I had the steps down properly for this first appliqué, but I did not. My plan was to adhere the fabric I cut from this pattern it to the shirt with Adhesion Webbing. Unfortunately I forgot to adhere the webbing to to the fabric before cutting out the pattern. Big Mistake! Let's continue...

So I pinned the pattern down and cut it out. You can see the results, where the fabric pulled, was cut jagged or otherwise left unusable.
Tunic15.jpgTunic17.jpgTunic18.jpgTunic19.jpg

That was pretty disheartening as I had only bought enough of this particular fabric for one appliqué. When I returned to Joann Fabric, I could not find the same fabric. I got close, but I really liked my initial investment. Just make sure that you know what you're doing!

So for take 2, I put the webbing on First! Yeah me! This allowed me to lay the pattern on the paper backing, trace it and get much better control.
Tunic20.jpgTunic21.jpg

I used an X-acto to trim out the eyes (new blade) and a new pair of scissors to cut out the pattern. I had learned that my other scissors, from v1 were pretty dull for fabric. I put the now cut-out fabric on my short to gauge the best location to iron it down. Adhesion Webbing says to use a damp cloth, and I had trouble figuring out what that means. I mean, I started with what I thought was damp, but it was not damp enough, as the next day I saw some edges that were not fully adhered. So 24 hours later I used a wet cloth and ironed the beejeezus out of the fabric to make sure there were no loose edges. This blue is a little lighter and not as shiny, but I think it worked out well. And, not too expensive of a mistake
:)

Tunic23.jpgTunic22.jpgTunic24.jpg

My final steps are darkening my gloves (with potentially adding spots) and taking the cheap black wig I bought and Doctoring it [pun intended] to have the white temples, plus getting the hair to sit down a bit. If anyone knows of any good wig threads, please let me know.

Glad everyone's enjoying this build.
 
Looking good!

Sharp scissors are a must - when you get a pair of good fabric scissors, don't use them for anything but fabric. I have pairs stay sharp for years and years by not using them for anything else. Anyone caught attempting to use them for anything else gets the death ray stare.

You might try a few stratigically placed pieces of garment tape or something similar as you are wrapping the sash, and just cover it with the sash as you wrap, just doing that in a few places might help to keep it from sliding/shifting enough to move your knot a lot.

I have seen a few Doctor Strange cosplays that have bright yellow gloves like yours and didn't think they really stood out as not being "right". You might want to get a small amount of yellow spandex from the fabric store to experiment with darkening before you go to town on your pair of gloves.

For the wig, since it's a cheap wig, you could likely doctor (har har) it with some of the colored spray for hair that is available at most big box retailers during Halloween season, which is currently upon us. They generally always have a white color available. You could mask off the areas you want to be colored and then likely remove the tape before it's dried and kind of feather it out a bit by hand if you didn't want a hard line (but maybe that is desirable, haven't checked out much reference). If you upgrade to a nicer wig in the future you would probably want to add white wig wefts to a black wig (check out Arda Wigs to see/learn more about wefts, if I remember correctly they have several tutorial videos on their site).

I'm envious of how fast you are getting this together - it takes me forever no matter the scale/scope of a project. Hope to see more soon. Thanks for posting!
Thanks Rock! I did pick up some of that hair color spray. The wig I got is a "Dracula" wig, so it has some white/grey streaks already, but they're closer to the crown, than the temple. I'll see about covering them with black, and respraying white where I want it. I like the idea of wefts for future use, but am not sure about spending $$$ on a wig at this time.

I've been working on this for about a month, just making good use of my free time :)
 
Is Halloween over already? That went fast!

In the end, the cheap wig I got did not work properly so I used colored hairspray to change up my thinning hair a little. I think I was grateful for that overall, but it did not look as nice.

Anyway, here's the finished product. Got a lot of great compliments while out and about, even if no one knew who I was supposed to be. They will next Halloween, that's for sure!!

I've also included a couple other photos from my work costume party. We had Edna Mode, who admonished my use of Capes, and then Arrow, well, Green Arrow, swung in for bit.

Final01.jpgFinal02.jpgFinal03.jpg

- - - Updated - - -

Oh and one final fun image...thanks for reading!

Final04.jpg
 
Nice work. I like seeing classic Strange costumes as I have a bookcase full of '70s, '80s and '90s Doctor Strange comics. I haven't got any decent build pictures I can post, but I just wanted to share some of the comic book Doctor Strange love with you. Here is the one that I made earlier this year for Sydney Supanova.

20953694_858149584352914_9211126599025466351_n.jpg
 
This thread is more than 6 years old.

Your message may be considered spam for the following reasons:

  1. This thread hasn't been active in some time. A new post in this thread might not contribute constructively to this discussion after so long.
If you wish to reply despite these issues, check the box below before replying.
Be aware that malicious compliance may result in more severe penalties.
Back
Top