Functional Pip-boy 3000 Mk IV from Fallout 4

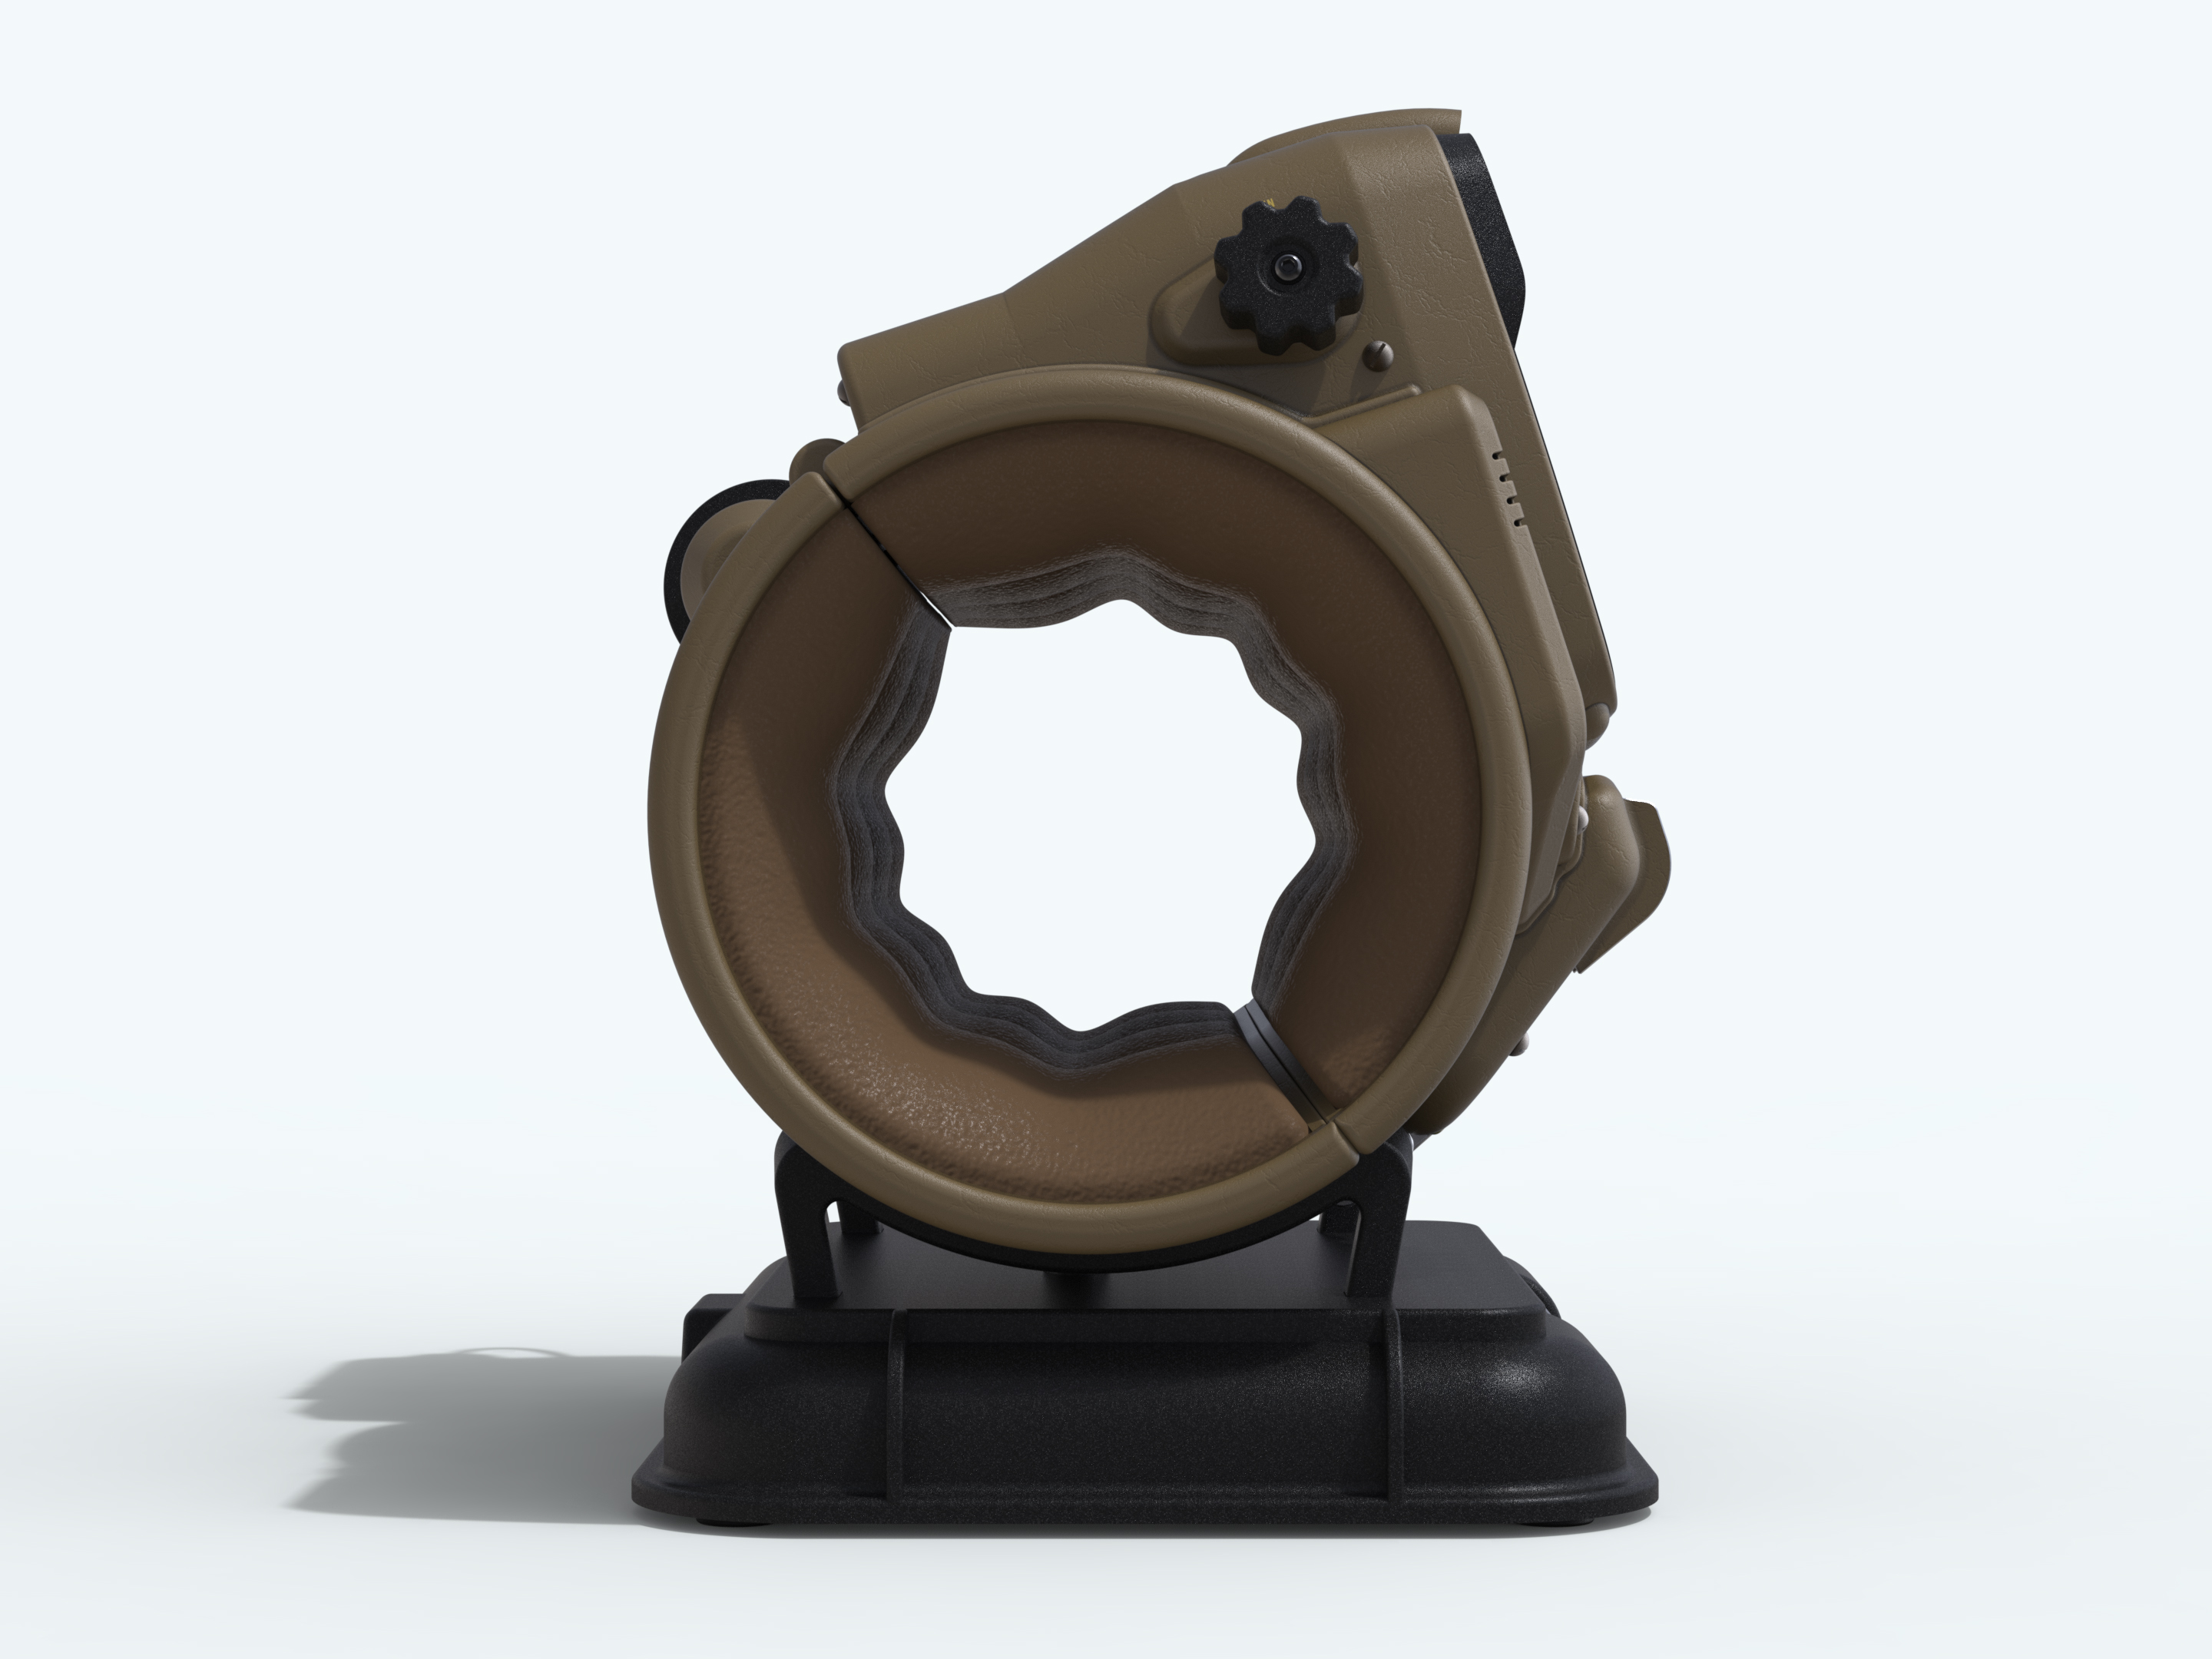
(Click for a 4K version)
29076621907_53bbcfa6bf_c.jpg


Time for another sweet 3D render. I will probably drop a few more of these in the next few days. (I let them run for 8 hours each)

This is as close to perfect as I can get on the design in CAD. All changes now will be pushed either by the electrical design, or by changes from a prototype build.

I have ordered a bunch of electronic parts and development boards. However I plan on finishing the dosimeter first.

I have had an offer from a fan of the project to 3D print all the parts in used/old SLS powder at no cost. This will be a huge help to the project. I will post the name of the company once the parts arrive (No exact time-frame). They will become the prototype parts.

I still have lots of small prototyping to do, such as all the laser-cut parts.

I have to figure out the best method to make the rad guage and radio dial faces. The Rad gauge might be just fine using a high quality print on card stock. But the Radio readout needs to be 100% opaque. For this I plan on painting a piece of diffused acrylic with black paint, and then laser-etching the artwork into the part.

For all the decals, I am going to try using dry erase transfers. (I don't like the outline that is visible around wet-transfer decals.) I also need to try out Rub-n-Buff for the metal areas, or that popular chrome marker that is making the rounds on the RPF.

I am also split between making an aged Pip-Boy like in-game, or a brand-new Pip-Boy as shown in the render above.
 
I have a laser cutter.. if you need access to it for anything. (Small, hobby sized one.. roughly 21x12 work envelope.... should be fine for anything you'd need though)
 
Project Update:

I have several of the development boards I need for the motor controller, but I am waiting on lots of electronics parts and tools.

Small life update:

My work on the Pip-Boy may slow down a bit in the next few months, for a few reasons:

1) I really have to get my home office remodeled before I can do any serious electrical assembly. As of this morning my home office was a desk with my design PC, and a crap pile of half-unpacked boxes. I cleaned out everything and will be painting it soon. I have decided to use Vault-Tec colors with blue and yellow colors.

2) I have to rebuild a lot of my electrical tool and component library. You see when I was twelve: My brother in law, who has since past, sent me all his electronic textbooks, tools, and parts after he had finished technical school. I credit this with being the catalyst for my interest in electronics. So when my Nephew (his son) showed interest in learning electronics a few years ago, I packed up nearly half of my stuff and shipped it to him. To sort of return the favor. Although as far as I know my Nephew hasn't actually dug into that stuff yet. In either case, I no longer have a huge library of discrete components and wires to smash together an electrical prototype. I have to start from scratch, and that is expensive.

3) Costs. As just mentioned above. Building up a library of parts, and tools, as well as a workshop can be expensive. I limit my hobby spending to a fixed cost per month, so for some aspect of the project I just have to save up.

4) The weather is getting nicer here in Texas, and that means I will be back to working on the house again.

5) I hope to get all of the above done before Fallout 76 drops, because then I won't get anything done anyways.

Here is an image of my office design. (Done in SketchUp)

43214955455_5a018b0d09_c.jpg
 
I have seen other Fallout fans and considered myself a Rabid Fallout Fan (i have my own Fallout shrine at home), but you Sir are without a doubt the most Over the Top, Unadulterated Fallout Fan that I have ever come across. I salute you.

And awesome project. I look forward to seeing a finished product.

thomas;)
 
PhoenixVader, Thanks.

I am of course working on the Dosimeter at the point. I am re-learning so much software that I will need for the Pip-Boy. I may split the electronic tasks on the PIp-Boy between a MSP430 and the Raspberry Pi. With the MSP430 handling almost all the peripheral tasks, and the Pi handling a GUI. This way the same base electronics could be used for a lower-cost Pip-boy radio or other project without the screen. (Such as a Radiation King FM Radio)

One development of late is that I have SLS 3D printed parts for the Pip-Boy on the way to me now! They should arrive in a few days.

A fan of the project who also happen to work for a SLS 3D printing shop was kind enough to 3D print all the arts using left-over slightly used powder. This will be a huge boost to the project as 3D printing even prototype parts like this is expensive. With these parts I can test all the moving parts, and do a full assembly without electronics.

He took a photo of the parts next to the Pip-Boy edition. Here you can see that my design is much more game accurate, and just a bit smaller.
I will be sending him a set of hardware in trade so he can assemble the set he printed for himself.

20181015_224619.jpg
 
Last edited by a moderator:
I finally have access to a Prusa i3 (Mk3), and am starting in on my backlog. Most things I'm doing in PETG with a 0.2mm nozzle (I can go down to a 0.05, if needs be, but I think I'll wait and set up an additional machine for the ultra-fine stuff). Always happy to add my name to the hat now, for anything you want prototyped or for final pieces for which that resolution (the layers are thinner than the aperture size, to be clear -- width versus height) is fine.
 
@ Inquisitor Peregrinus, I have a Ultimaker 2 just outside my office with similar specs to the Prusa i3. It printed the parts show on the last page.

For anyone who has never experienced a SLS 3D print, the differences aren't obvious It's not just about layer or nozzle resolution. Every part, no matter the size, comes out with the same resolution and tolerances. The surface has a slightly rough texture, but there is no pimps, strings, or support artifacts left behind. Once lightly sanded and painted, the parts are as smooth and uniform as injection molded plastic. They are also completely solid. Something not even 100% infill can do on a FDM printer. I will do some direct comparison of FDM versus SLS once the parts arrive.
 
Trust me, i know the difference. :D I just couldnt remember if you had a 3D printer, or had had those previous parts printed elsewhere.

Because I prefer PETG over PLA for anything that isn't going to get cleaned up for casting, I'm fine using it for all the knobs and buttons, assuming all those in the .stl section of the CAD archive were locked designs. If I dial down the layer height, the 3D print texture is almost nonexistent, and the same cleanup as with SLS yields an equally smooth surface. I've tried acetone vapor to smooth ABS, but haven't yet seen if it works at all for PETG. If I could have that bare plastic "polished" smooth by that process rather than painting, I'd prefer it.
 
45463220721_b9d2e637b6_c.jpg


Today is super-exciting! All the 3D parts arrived! These were made by a fan over at Ultimate 3D.

They are made from old powder, but that just adds a bit of pitting. It actually looks perfect for aging the parts anyways. Every single part was dimensionally perfect. Everything fit together, with only a hole or two that needed to be drilled.

First off, the Pip-Boy is a LOT of parts! It took me hours to put together a mechanical mock-up using these pieces.

------------------------------------

43646050690_7e1631fa4c_c.jpg


I am missing my nav-switch (forgot to order it) and one of the buttons (Can't find in my project bin). I also need to order and laser-cut all the acrylic parts.

I can tell you that it is already far better than the Pip-Boy edition. I put in a bit of temporary foam and latched it to my arm. It doesn't spin around. You can actually walk around with it on your arm and not feel like it is about to drop to the floor. You can coplay with a PIp-Boy without having to hold your arm perfectly horizontal!
Note: It probably does cut off a bit of blood flow.

For now this image is a teaser, Iater I will be posting more along with a video going over all the moving parts.
 
Wow, have you got it all printer on SLS machine? That must've been quite expensive... but I think it's totally worth it.
PS. loving all the mechanical parts inside!
 
@Popeguy: It typically would be very expensive (>$500) to 3D print all these parts on a SLS machine. The project fan over at Ultimate 3D says they let him use the spent left over powder to do his own projects. FYI for those who may not know: Spent powder is the un-melted powder left behind in the machine after a run of parts. It works, it just doesn't mesh together quite as well as new powder. But I am happy with the results. The Pip-Boy isn't ever meant to look new. The resulting pitting looks very much like rusty corrosion.

@inquisitor Peregrinus: Thanks. I have to say it sitting here on my desk is making me very happy. Over three years into this project now. It was so satisfying to put it together and have all the moving parts work as designed. Now I need to order acrylic, and a few more parts to make the mechanical prototype complete. I also need to get a airbrush setup going.
 
Oh man it just looks so amazing man. How thick was the foam you used? For me, like i have said, the pipboy phone case that bethesda made fit my arm tightly when using the hard foam that came with it. But without it, it is loose. So i'm just hoping this would fit on my arm depending on the type of foam or inner fitting i use. XD always had big arms. Even when i was <190 wrist bands were tight on my wrist. I have thick wrists XD
 
Voltaire Surge: I just threw in a piece of packing foam as a temporary measure. If the Pip-Boy edition was tight on your arm, mine probably won't fit with the foam in place. I did have a coworker with quite thick wrists, and it fit his arm well without the foam. Perhaps with just a shirt it would work for him.

---------------

Small update:

43809085160_50b59f9011_c.jpg


I laser-cut all the rest of the acrylic parts. Soon I will attempt to heat bend the acrylic to make the curved CRT like display. I am hoping to sag-form it using gravity, otherwise I will have to resort to a pressurised forming jig.

---------------

43809087370_7615fe952a_c.jpg


I do have to say that the Fallout shelf is coming along nicely.
 
Last edited by a moderator:
What are the current measurements inside the pipboy now? It really does look amazing. Me and my parents are going to be going on a diet soon so my arm may thin up a bit. I'll measure my arm again just to see if it will fit. i would be devistated to have it not fit XD
 
Voltaire Surge:
The Pip-Boy was designed to optimally fit my own arm with ~6mm or (1/4") of padding all around.

The optimal wrist circumference is 204mm or 8"
The maximum wrist circumference is 242mm or 9 1/2"


The optimal forearm circumference is 270mm or 10 5/8"
The maximum forearm circumference is 314mm to 12 1/4"

I did make the latch adjustable, so you can still clamp it to your arm with a gap between the two halves, so it can size up a few more millimeters if need be. You would want a leather cuff, or some other item, as the Pip-Boy can pinch skin when the two halfs come together.
 
Last edited by a moderator:

Your message may be considered spam for the following reasons:

If you wish to reply despite these issues, check the box below before replying.
Be aware that malicious compliance may result in more severe penalties.
Back
Top