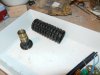
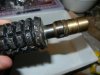
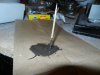
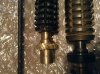
I'm halfway there! I got that grenade today! It's in pretty rough shape, the neck is actually bent slightly, and it's the whole brass piece so I don't think I can correct that. The body, too, has enough corrosion up top that I worry it will just flake off?
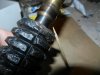
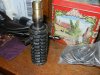
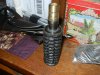
the brass and pineapple portions are in great shape though, even though the rod is like welded to its base. I may drill or tap out the weld (not screws) that holds the pin in place inside (which is also in great shape)
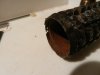
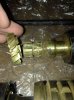
the he inside is covered in a solid rust color, should I be worried about that, will it eat through?
This is is so cool!
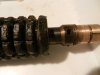
the brass and pineapple portions are in great shape though, even though the rod is like welded to its base. I may drill or tap out the weld (not screws) that holds the pin in place inside (which is also in great shape)
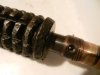
the he inside is covered in a solid rust color, should I be worried about that, will it eat through?
This is is so cool!


") thanks for the kind words, and thanks to Kurtyboy for selling it to me haha
thanks for the kind words, and thanks to Kurtyboy for selling it to me haha