Rey - Star Wars: The Force Awakens Build (open for everyone!)

I am super proud how this turned out. Sure it is not perfect (the goggles are a bit too large) but still, I am happy and proud. Made it all from scratch, except the boots. The goggles were made from craft foam, fabric and the clasps are made from clay.
I did order the gloves and they will arrive this week. Then I need to alter them and paint them.
Hopefully I can also make the backpack and shoulderpad before the release. Would be cool.

http://i209.photobucket.com/albums/bb87/Puck_015/IMG_20151129_164331039.jpg

http://i209.photobucket.com/albums/bb87/Puck_015/IMG_20151129_164134392.jpg

http://i209.photobucket.com/albums/bb87/Puck_015/IMG_20151129_163836654.jpg

One of the best ones yet! Hard to tell from the lighting but it really looks like you nailed all the colors/dyes as well. =)
 
I am super proud how this turned out. Sure it is not perfect (the goggles are a bit too large) but still, I am happy and proud. Made it all from scratch, except the boots. The goggles were made from craft foam, fabric and the clasps are made from clay.
I did order the gloves and they will arrive this week. Then I need to alter them and paint them.
Hopefully I can also make the backpack and shoulderpad before the release. Would be cool.

http://i209.photobucket.com/albums/bb87/Puck_015/IMG_20151129_163836654.jpg
that is an exceptional job, your hard work on it really shows! It all goes together very nicely. What are you doing for the staff?
 
Okay, so after months of quietly stalking this thread, I just wanna jump out of the shadow for a minute and say a big THANK YOU to everyone who has been posting information about this. I am 95% complete (still need to get the correct pouch, gloves, etc) but I couldn't have done any of it without this thread, particularly the staff build which I believe belonged to a member here (but was also posted on instructables where I found it).

I made this for premier night and a local ATL party, so I had a deadline to meet and like I said...couldn't have met it without all the useful info here. So, A GREAT BIG THANK YOU, to everyone who's been contributing to this thread. It's been invaluable to lurkers like me! :D
 
I am super proud how this turned out. Sure it is not perfect (the goggles are a bit too large) but still, I am happy and proud. Made it all from scratch, except the boots. The goggles were made from craft foam, fabric and the clasps are made from clay.
I did order the gloves and they will arrive this week. Then I need to alter them and paint them.
Hopefully I can also make the backpack and shoulderpad before the release. Would be cool.

[url]http://i209.photobucket.com/albums/bb87/Puck_015/IMG_20151129_164331039.jpg[/URL]

[url]http://i209.photobucket.com/albums/bb87/Puck_015/IMG_20151129_164134392.jpg[/URL]

[url]http://i209.photobucket.com/albums/bb87/Puck_015/IMG_20151129_163836654.jpg[/URL]

This looks pretty cool and authentic! Thumbs up!!!!
 
I am building a Rey for my 6 year old. (since she will only fit into it for a year I am not out to make it perfect but I want her to stand out in two weeks)
This is an under $75 budget that most went two the staff and the belt.

I havent used a sewing machine in 20 years since I was in 7th grade Home Ec.

Here are some of the things I have done...

I see a lot of people having problems keeping their wraps up on their arms. I cut the foot off of two socks and then used velcro (Sewing would work better) to attach the wrap (Cotton Bubble Gauze) to the sock. As long as the sock is tight the wrap will never move.

The most important thing to get right in my opinion is the dress wrap. I thought that the Cotton Bubble Gauze that I got for the arms would be a good test for the wrap. I got the wrap white. I went with a full dye for tan and for some reason my mind believes there is some green in there so I added just a bit of green. It turned out just a bit was WAY too much. So I bleached it. After washing the bleach out the color turned out PERFECT. The wrap looks so good right now that I may just use the Bubble Gauze as the final.

For the pants I bought a grey silkessence found here. Color looks much darker than online. I havent decided if I want to die it or not. http://www.joann.com/sew-classic-silky-solid-silkessence/prd7633.html#q=silkessence&start=1

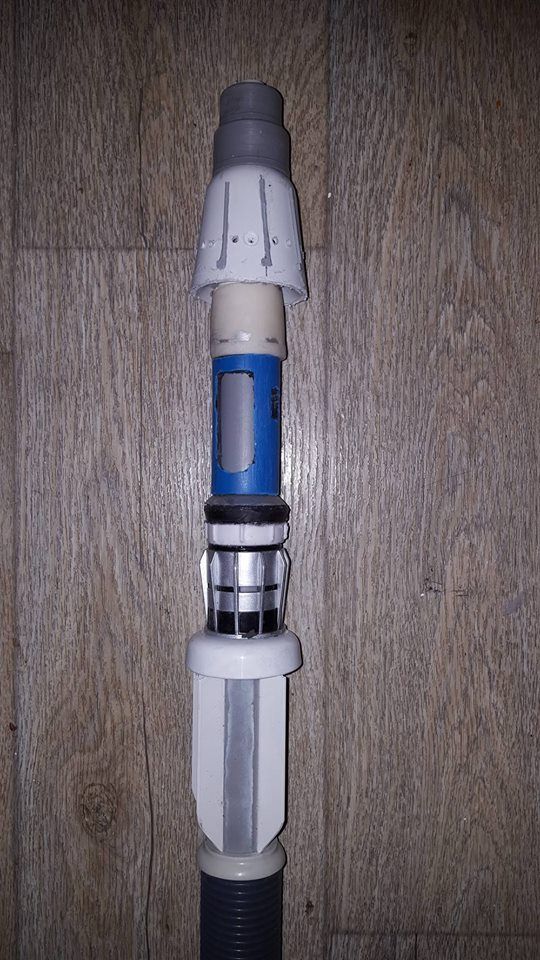
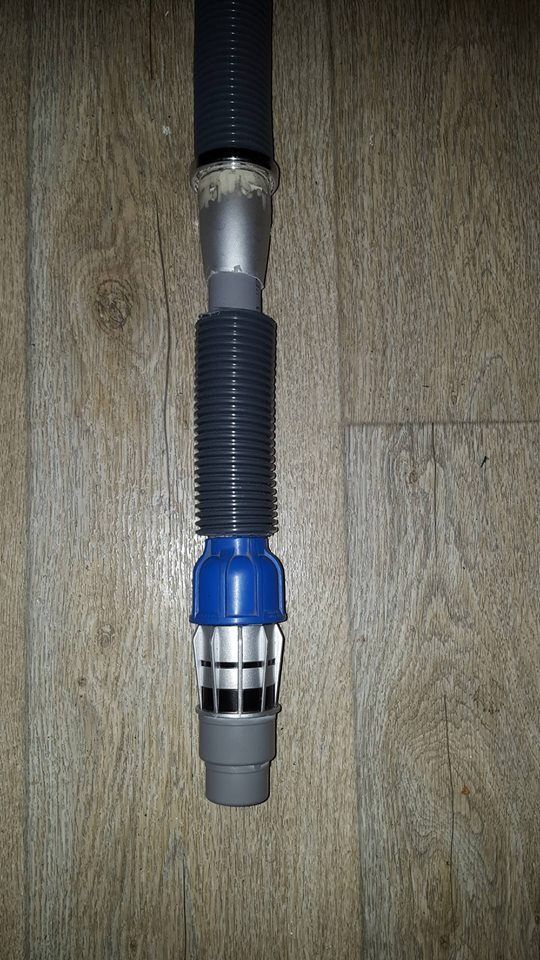
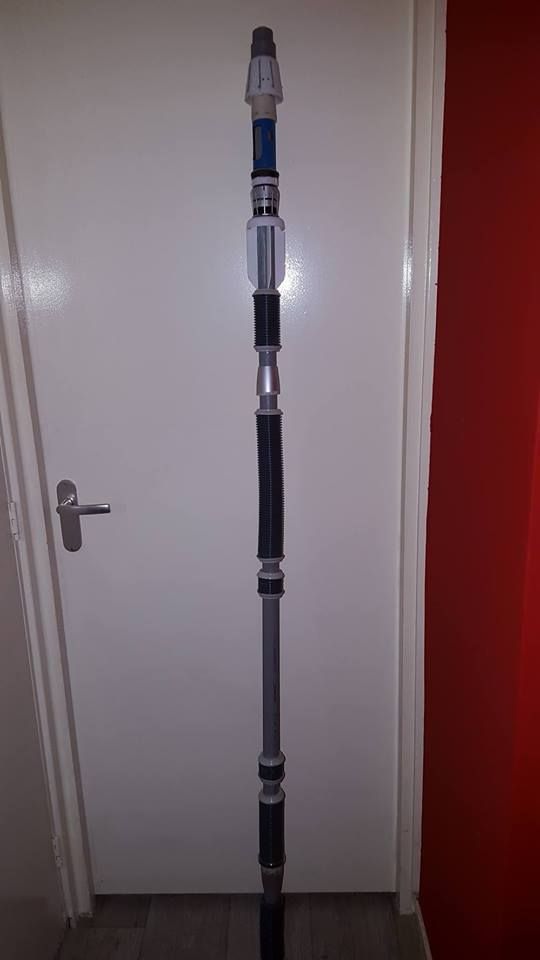
Staff - I bought the crappy costume staff for $20 on amazon. It is pretty awful but what are you going to do on a budget? The good thing is that it is exactly her size and it is light so she wont whine about carrying it. I just added some material to make the handles look better and I added the strap.

Belt - I bought a leather strip that is 2.5 inches wide. Waiting to get that in the mail

Shirt - I have no idea what I want to do for the shirt. I bought what I thought looks best but I dont like it.

Bag - This is what I need the most help with. I think I have to make one from scratch. I feel that bag is very important to making it look good. I guess I will just go to Hobby Lobby and buy some canvas. This is the part that has me the most worried.

Any help on the bag for a pattern would be great.


You guys have been a great help and I just wanted to thank you.
 
Bag - This is what I need the most help with. I think I have to make one from scratch. I feel that bag is very important to making it look good. I guess I will just go to Hobby Lobby and buy some canvas. This is the part that has me the most worried.

Any help on the bag for a pattern would be great.
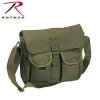
I used this $10 bag, available in olive or khaki color.
http://www.amazon.com/Rothco-O-D-Am...=1448984511&sr=8-4&keywords=rothco+canvas+bag
Removed the pockets and strap and I'm in the process of altering it to have the side flaps and the correct looking hardware. It's still under construction but I will try to put up a pic of it later on. This was the best option I was able to come up with that was readily available and inexpensive, if you don't want to start from scratch.
 
2277_hr2.jpg

rbag1.jpg

rbag2.jpg

....here it is with the width shortened, pockets removed & strap removed. This is the olive one. The strap was used to make belt loops on the back and the extra ring on the side. I also removed most of the black paint on the hardware and cut & flattened the attaching piece to look more like the movie version. I used the pockets to make the side flaps and added weathering to it. Not 100% complete yet, but i'm happy with it for a $10 bag + $3 alice clip.

Thx to everyone here who contributed info and pics about this piece. Could not have done this part without that!
 
Last edited:
View attachment 561264

View attachment 561254

View attachment 561252

....here it is with the width shortened, pockets removed & strap removed. This is the olive one. The strap was used to make belt loops on the back and the extra ring on the side. I also removed most of the black paint on the hardware and cut & flattened the attaching piece to look more like the movie version. I used the pockets to make the side flaps and added some weathering to it. Not 100% complete yet, but i'm happy with it for a $10 bag + $3 alice clip.

Thx to everyone here who contributed info and pics about this piece. Could not have done this part without that!

Did you dye it to make the color change? I ended up getting the earth brown.

I wonder if I will have enough strap on this to use for the staff.

Thanks for the suggestion this was very helpful.
 
no dying was done to it. I think the olive is actually lighter than that stock rothco pic and my weathered version is actually a little darker than it looks in these pics. I did use sand, brown and black paint on it when I weathered it, but not that much.

There seems to be a lot of variation in the color of this bag. Some displays show something that is beige or sandy color but we were going more for the look shown in this pic

http://www.therpf.com/attachment.php?attachmentid=552828&d=1447088157

which seemed more olive to me. We also wanted it to contrast the other colors on the costume a bit.

I was going to say that you could probably use the strap for the staff...especially for a kid's size.
 
Last edited:
Awesome work on the bag! I was wondering what to do for that.

Question on the belt fittings...The buckles on the belt - rectangle shape, silver. But are they rounded rectangles or sharp rectangles? Some of the rings are wire bent to the rectangle shape and have rounded corners. And some are cast to have very pointy corners (like her strap slider). I can't find a clear picture to determine which they are.

thx! Are there any pictures showing that side area where the belt connects? I don't think I have ever seen a pic that showed the hardware and how the belt loops back onto itself.
 
However like I said in my post... I strongly recommend using compression sleeves or something tight and build your wrap around that. It is the biggest flaw I have seen in most of your guys hard work. It is the only way to make it perfect like it is in every scene I have seen in the previews. I can almost guarantee (ok not really) that is exactly what they did to make her sleeves.
 
There is a close up where you can see that there is some sort of band at the top.
It's the pic posted earlier in the thread where we discovered the ribbing on the left sleeve.
 
Sounds good to me. 1"?

trying to decide on the width for the staff attachment d-ring. 1.5"? And satin black or gunmetal? Decisions!! :wacko

I used 3/4" on the belt and have 1" for the staff rings.
Remember that the Enfield sling is 1 3/16" wide so use that as your reference.
 
Thanks everyone for your super nice comments!

Very cool,

What did you use for the light?

I used a LED key chain light. It had te right size and I put some worbla over it to make it easier to paint and to get the detail on it.


A Garrison friend is working on the staff for me. I was so happy he offered to make this.
He scaled the staff to my size, because I am bit taller than Daisy Ridley.


Your message may be considered spam for the following reasons:

If you wish to reply despite these issues, check the box below before replying.
Be aware that malicious compliance may result in more severe penalties.
Back
Top