You are using an out of date browser. It may not display this or other websites correctly.
You should upgrade or use an alternative browser.
You should upgrade or use an alternative browser.
Tom's Skywalker Ranch Saber
- Thread starter thd9791
- Start date
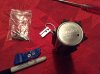
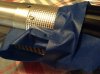
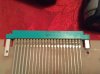
I bugged John from blast-tech/yodas house and he still had some available! Wouldn't give me the source though, which I understand. But with him out of business id sure like to know lolman is it coming along great!! hey where did you find that silver strip?! it looks awesome!
also, using a flat black paint pen...
Attachments
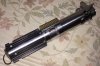
Last bit for today - my drill press...the chuck and motor...pole? Everything shifts when I press it up against something. This isn't a huge deal for larger projects and softer materials...but this was just too small an area. SO I used it to lightly drill through the plastic ( at this point my little jewelery bits were not getting through the brass) so I took a big Ol' wired black and decker hand drill and used the plastic holes as a guide. Also, the bit roughly lined up wth the tracks ridge from my line of sight. I eyeballed so ******* well.
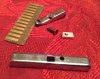
I tooled all the screws down to have smaller heads, forced them in and out and in again to release tension on the material. I do this with guitar strings all the time")
the addition of screws did push out some apoxie sculpt to the side, but I ground it down and painted over it with my flat black paint marker. Looks excellent now! And nice and dinged up for weathering.
I tooled all the screws down to have smaller heads, forced them in and out and in again to release tension on the material. I do this with guitar strings all the time
the addition of screws did push out some apoxie sculpt to the side, but I ground it down and painted over it with my flat black paint marker. Looks excellent now! And nice and dinged up for weathering.
Attachments
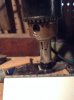

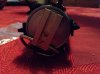
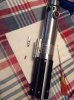
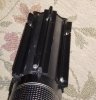
The Kobold is in! We drilled twice for each hole....a pilot hole and then the right size for it to just slide through. I actually insisted we do the first one, set the kobold up and mark hole # 2. Good thing we did, it lined up perfectly.
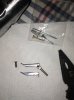
with the spring and grip screws already in there we instead ran the washer and but down some wire, held the nut with a magnetized skinny screwdriver, and my dad pushed the screws in. After that, I held everything with both hands and twisted everything together. Also, spinning the nut with the screwdriver I was using to hold it down helps move things along. Finally they're in, tight and they look magnificent!
with the spring and grip screws already in there we instead ran the washer and but down some wire, held the nut with a magnetized skinny screwdriver, and my dad pushed the screws in. After that, I held everything with both hands and twisted everything together. Also, spinning the nut with the screwdriver I was using to hold it down helps move things along. Finally they're in, tight and they look magnificent!
Attachments
I looks like the Kobold will come next. @James_Kenobi_1138 was the clamp screw put in at an angle? Parallel with the lever, or straight down and somehow sticking up or embedded in the lever?
I'll look for some reference photos.
matty matt
Sr Member
Lookin' good!
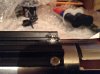
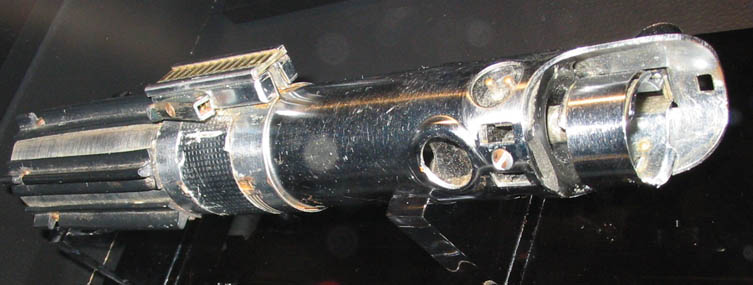
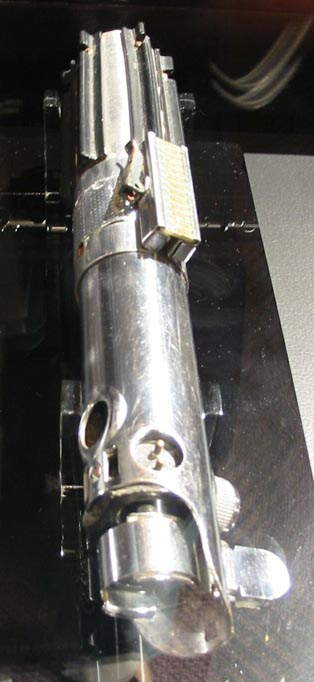
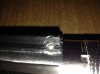
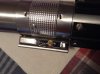
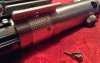
Here is a pic of the screen used saber. The lever screw is countersunk almost flat with the lever.
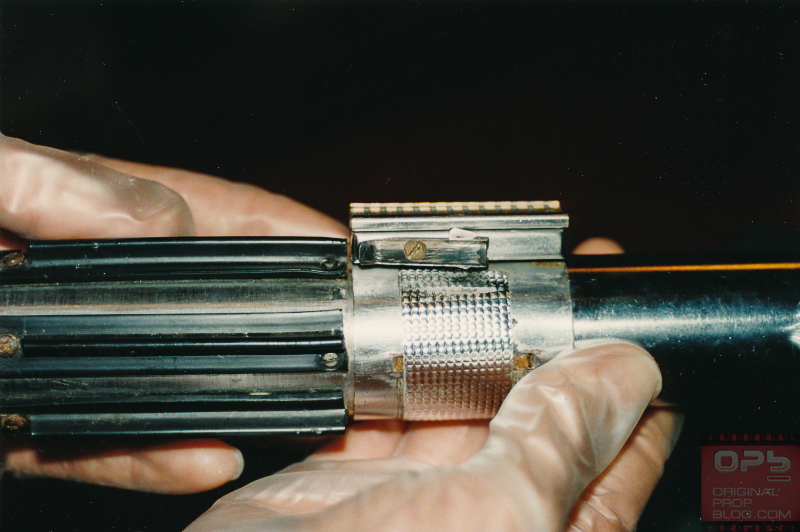
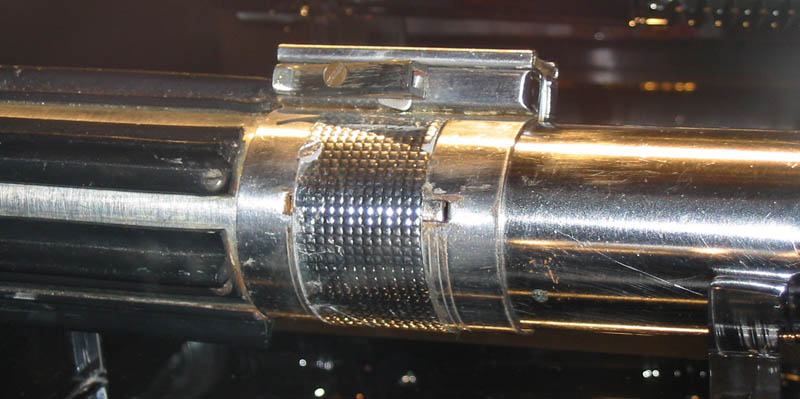
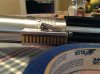
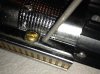
From @d3po2u 's thread - see that notch or nick on the ridge of the T track above the screw? This apparently is what happens when you use a hand drill, have to press down to get through the brass, and finally fall through. The chuck of the drill hits the ridge of the track and makes this dent. Exact same thing happened on mine!
Also, see the gouge in the side of the ridge behind the screw. That happens too haha
Also, see the gouge in the side of the ridge behind the screw. That happens too haha
Attachments
Last edited:
I KNEW it! Those angled shots are what did it for me, thank you! I have some diamond bits that might be able to remove enough material to countersink it. Hand drill it is!
I've been collecting reference images of lightsabers for 10+ years so I've usually got a few (hundred) good photos of every saber.
I've been collecting reference images of lightsabers for 10+ years so I've usually got a few (hundred) good photos of every saber.
ohhhhh would you consider drop boxing them to me?
I usually just post them in Threads as needed, most are ones I got here on the RPF over time.
Happy Friday the 13th! This saber is basically finished. Not sure where I left off - but I decided not to drill through both the lever and the clamp at once. To get the right angle I believe the floor effects people put the lever flat on a surface (with the angled part hanging off the edge, and drilled straight through. Romans levers have a circle underneath in the right place. It's in the recess of the lever, underneath, at the very end of the "trench" so to say. I think the circle is a result of production as its not on the original levers.
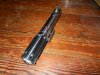
I took a conical grinding stone and spun it around to bevel out the rim of the hole i drilled - so I countersink the screw. It worked! It sticks about a mm out - I drilled a little crooked so I didn't wat to get too close to the edge of the lever.
at this point I taped/superglued the lever to the clamp and used the lever's hole to drill the right angle into the clamp. Both holes I drilled slightly smaller, so I filed them out and the screws tapped themselves. Since I used the square washer the lever sits a bit higher, but I think it looks great! (This is the Roman lever that I broke, I bent th broken hinge back together and superglued it for support) and this is the result!
Attachments
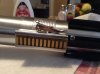
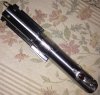
ask and Ye shall receive! Here are some comparison shots and a couple straight off the floor :lol
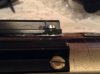
it would appear they also drilled a little too close to the side of the lever - except in the other direction. They went all out and beveled the hole right to the edge so the lever-screw was completely flush. Also, my screws appear to be 3 mm and theirs are a TINY 2 mm. I have a feeling they found the larger screws first, and just cut the ridge out and put them in the bottom. Then they found smaller screws and used those at the tops - as well as on Darth Vader's hero saber.
It would also appear I drilled my hole a little higher than the original. I'm glad I put it where I did - there was less to drill through and that "trench" made it easier to drill
Attachments
Last edited:
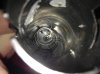
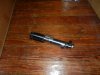
I did some repairs to the repairs today! To complete an Amazon order I picked up a countersinking bit. A big cylinder with a sharp cone tip. I unscrewed the lever and brass screw and countersunk the screw in twenty seconds!
Trouble was, after this, there wasn't much holding the screw on there, no nut inside the sidebar, and very little metal inside the lever....
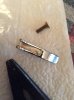
so I happened to find a 90% match ESB board that I'm going to save unless something big comes up and I can swap for it..the plug to that board was held on with these screws and a metal bracket...the same threading as these brass screws! I cut a chunk off and stuck it inside the graflex sidebar, tilted, to accept the lever screw.
it was hard screwing the lever on, leaving it loose and screwing the clamp screw tight, only to force the lever over the head of that screw and back into place...my square washer ended up crooked just like the real prop.
Trouble was, after this, there wasn't much holding the screw on there, no nut inside the sidebar, and very little metal inside the lever....
so I happened to find a 90% match ESB board that I'm going to save unless something big comes up and I can swap for it..the plug to that board was held on with these screws and a metal bracket...the same threading as these brass screws! I cut a chunk off and stuck it inside the graflex sidebar, tilted, to accept the lever screw.
it was hard screwing the lever on, leaving it loose and screwing the clamp screw tight, only to force the lever over the head of that screw and back into place...my square washer ended up crooked just like the real prop.
Attachments
Last edited:
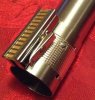
I found a thrift store that organizes its hardware, and there’s a lot. I got a few sample bags and one had tiny cheese head screws. You know what that means!
i had to squish some putty in there too, since my earlier screws were too big, and add some E6000 as the superglue had all but disappeared by now.
I like the improvement!
i had to squish some putty in there too, since my earlier screws were too big, and add some E6000 as the superglue had all but disappeared by now.
I like the improvement!
Attachments
Similar threads
- Replies
- 6
- Views
- 598