Yeah, you just leave them long until the end and then you cut them to length.
You are using an out of date browser. It may not display this or other websites correctly.
You should upgrade or use an alternative browser.
You should upgrade or use an alternative browser.
Show your custom Lightsabers!
- Thread starter GreenCircleCube
- Start date
-
- Tags
- custom highrepublic lightsaber
Medic713
New Member
I'm still totally confused. The tiny bits on the very top, that fold in to hold card/bubble action in place. If you leave them both long are you cutting once, then the other? How are you cutting? I've never been able to cut a clean line on sheet metal with hand tools.
Tan Djarka
Sr Member
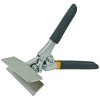
I cut the piece to the length using the template, bent the angles using a pair of sheet metal pliers, then used a sink tube as a guide to bend the curve. I never thought about cutting the excess off at the end, that makes way more sense though lol. Side note, wear gloves. Those edges get sharp.
View attachment 628578
I use one of these too (now). Initially I was using a pair of needle nose pliers with a long straight edge for the bends. I found that leaving the last bends (the ones that hold the card/bubbles) for last was the best way to go. I'd actually have the bars in place, place the clamp on the tube, and bend the last bit around the card, or a similarly shaped item. That way the card fits perfectly because the clamp was tailored to it. By now I've probably made a couple dozen with varying levels of success.
...If you leave them both long are you cutting once, then the other? How are you cutting? I've never been able to cut a clean line on sheet metal with hand tools.
Pretty much just snip them off with either some tin snips/shears or using a dremel cut-off wheel (the diamond stuff cuts through metal like butter) and then you could file the edges to not only be straight but dull the sharp edges.
i think you're all witches and should be burned at the stake for your sorcery that confuses and scares me
Well don't go in the costumes thread then because it's full of witches! :lol
Last edited:
Scott D
Sr Member
A few posts back, I mentioned my Vader style Heiland custom that I was working on...and here it is.
I see this one being Vader's ceremonial Lightsaber that he would wear along with his best armor when he's ordered to attend The Emperor's black tie social events.
Something just a little bit fancier.


I see this one being Vader's ceremonial Lightsaber that he would wear along with his best armor when he's ordered to attend The Emperor's black tie social events.
Something just a little bit fancier.
Last edited by a moderator:
The textured grips are a really nice touch on both yours and Seth's.
Another one for the history books, Scott.:thumbsup
Another one for the history books, Scott.:thumbsup
Scott D
Sr Member
Thank, guys.. It's my usual simple style. I liked Darth Saber's idea of using the Heiland clamp rings and this was a chance to do it.
I feel lazy for using pop rivets instead of button head allen head screws on the grips. The look is still good, though.
My BuschSaber™ project is starting to come together. Pics soon.
I feel lazy for using pop rivets instead of button head allen head screws on the grips. The look is still good, though.
My BuschSaber™ project is starting to come together. Pics soon.
Last edited by a moderator:
Thank, guys.. It's my usual simple style. I liked Darth Saber's idea of using the Heiland clamp rings and this was a chance to do it.
I feel lazy for using pop rivets instead of button head allen head screws on the grips. The look is still good, though.
My BuschSaber™ project is starting to come together. Pics soon.
This has probably been asked a million times, and I'm lazy so here's another, but what do you use for your grips, and where can I find it for a set?
Thanks!
Last edited by a moderator:
Scott D
Sr Member
This has probably been asked a million times, and I'm lazy so here's another, but what do you use for your grips, and where can I find it for a set?
Thanks!
Only about a dozen times.
They are u-shaped pieces of stainless steel and they were originally used in some old Ingersoll Rand air compressor. It's the part that a reed valve rode in and it was called a "valve channel."
A bag of new and used ones were given to me over ten years ago. I've just about used them all up.
They come in different widths, but almost all of mine are just a hair under 1/2" which is close to the width of OT era t-tracks.
They can be found on Ebay, but you'll need to ask the seller what width they are and the lengths of the pieces in the valve kits. Multiple kits might have to be purchased to have enough for the length you need.
Persolo
New Member
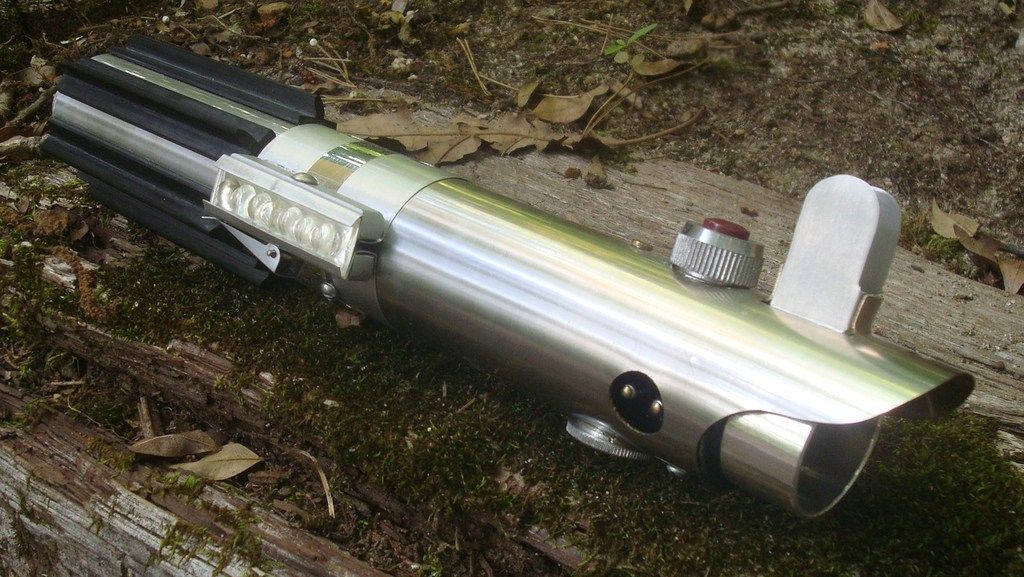
Attempting my first of three sabers, one of which is a graflite. Reading up a LOT on what others have done, but the problem seems to be in finding how to do a pommel for it. The Graflite stands out...the other two sabers in this pic are others I found more than ten years ago and figured one for a Yoda saber (before Clones came out).
The Graflite has already been stripped down and the red activate button has been flipped up, per advice from a thread.

Also stripped the piece at the top for parts...and to see if anything interesting could come of it. Assuming I can find some of hte pieces cheap, this will be a fun project. Given that the Graflite is beat to hell a bit, I figure on painting the whole thing with Duracolor Mirage..I figure that as a neat way to make it stand out. Anyway, any advice is appreciated and I'll post when I get further along. Thanks!
The Graflite has already been stripped down and the red activate button has been flipped up, per advice from a thread.

Also stripped the piece at the top for parts...and to see if anything interesting could come of it. Assuming I can find some of hte pieces cheap, this will be a fun project. Given that the Graflite is beat to hell a bit, I figure on painting the whole thing with Duracolor Mirage..I figure that as a neat way to make it stand out. Anyway, any advice is appreciated and I'll post when I get further along. Thanks!
Scott D
Sr Member
OK, here's the BuschSaber.™
This Busch 3 cell and the Heiland Synchronar custom from a few posts back were part of a lot of Camera flashes and accessories found on Ebay.
There was a complete/correct 3 cell Graflex and an incomplete Graflex upper (incorrect red button and sync cord bezel instead of the glass eye) and I scored it all for just a little over $240.00 shipped.

Needless to say I considered the Busch, Heiland and Abbey "free" in the deal. I wanted to go a step further and challenge myself to build up the Busch and Heiland using only parts/hardware that were already in my greeblie stash...keeping them as low-budget as possible.
The Busch ended up looking "sporty," like my PeakSabers.™ The clamp and upper rail came from the Abbey flash, the D-ring was from the Custom Saber Shop and the circuit board was chopped out of a larger board that I've had for over 10 years. Using a green circuit board would usually be a big no-no for me, but I loved the pattern on this one.
The eight Scott D style stainless steel grips are 4-1/2" long and bead-blasted.
I ended up cheating and had to purchase two 1/4-20 allen head bolts to attach the D-rings to the endcaps.
Figuring in the cost of my leftover greeblies/hardware already purchased and in my stash*, there's $45.50 invested in these two sabers. Not spectacular, but it was still a fun little challenge.
* Shroud $20.00
Circuit board $10.00
Two D-Rings $2.50
Textured chrome tape $4.00(?)
Misc. hardware $9.00


Next to the Vader-Style Heiland custom.

This Busch 3 cell and the Heiland Synchronar custom from a few posts back were part of a lot of Camera flashes and accessories found on Ebay.
There was a complete/correct 3 cell Graflex and an incomplete Graflex upper (incorrect red button and sync cord bezel instead of the glass eye) and I scored it all for just a little over $240.00 shipped.
Needless to say I considered the Busch, Heiland and Abbey "free" in the deal. I wanted to go a step further and challenge myself to build up the Busch and Heiland using only parts/hardware that were already in my greeblie stash...keeping them as low-budget as possible.
The Busch ended up looking "sporty," like my PeakSabers.™ The clamp and upper rail came from the Abbey flash, the D-ring was from the Custom Saber Shop and the circuit board was chopped out of a larger board that I've had for over 10 years. Using a green circuit board would usually be a big no-no for me, but I loved the pattern on this one.
The eight Scott D style stainless steel grips are 4-1/2" long and bead-blasted.
I ended up cheating and had to purchase two 1/4-20 allen head bolts to attach the D-rings to the endcaps.
Figuring in the cost of my leftover greeblies/hardware already purchased and in my stash*, there's $45.50 invested in these two sabers. Not spectacular, but it was still a fun little challenge.
* Shroud $20.00
Circuit board $10.00
Two D-Rings $2.50
Textured chrome tape $4.00(?)
Misc. hardware $9.00
Next to the Vader-Style Heiland custom.
Last edited by a moderator:
doctorDWwho
Sr Member
I love them!! The green circuit board the right amount of interest and variation to the all silver handle
$240? Did the entire RPF membership take a week off of eBay or something?! Those look pretty cool!
I keep racking my brain trying to figure out something else to use as grips on these flashes, but I haven't found anything super cool beyond the standard vertical strip of some kind.
I keep racking my brain trying to figure out something else to use as grips on these flashes, but I haven't found anything super cool beyond the standard vertical strip of some kind.
Similar threads
- Replies
- 20
- Views
- 1,202
- Replies
- 0
- Views
- 442


