1:1 Wall-e Build

welshwarrior123

Well-Known Member
Hello,
Havent posted on here in a good while. So im in my final year of University where im doing a model making and special effects course. And for my final project I have chosen to build a 1:1 scale Wall-e. Ive been over to the Wall-e's builders club and gathered some of the plans. Looking at the plans, I felt he was a little to big. My Friend Gooses2 is on here building a 1:1 M.O, and comparing it to him I decided to scale the plans down 25%.

So being that its part of a Degree, there is a lot of book work needed as well as research. So I first went and built up a cardboard maquette, this was to show my tutors on the course the scale, as well as for me to get an idea of how big he actually will be.


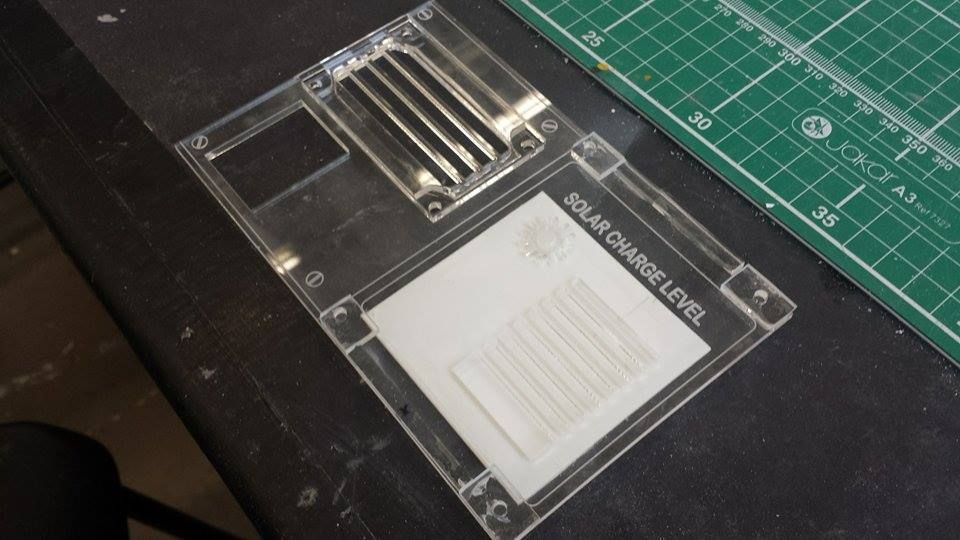
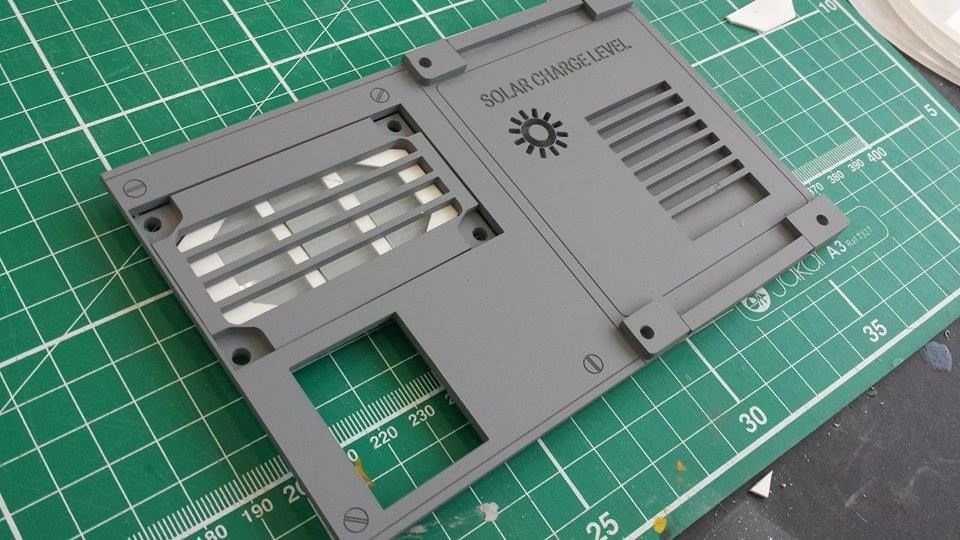
From the maquette I realised I had scaled the head wrong. So that was then tweaked. I then went and did some test pieces for both his eyes and his solar charge panel. The panel was laser cut using 3mm clear acrylic, cut in a way so that it could be stacked to get the desired effect. Big thanks to gooses2 for helping me with the scaling :)


I scratch-built the backing behind the vent section out of styrene, then gave the piece a hit of primer.


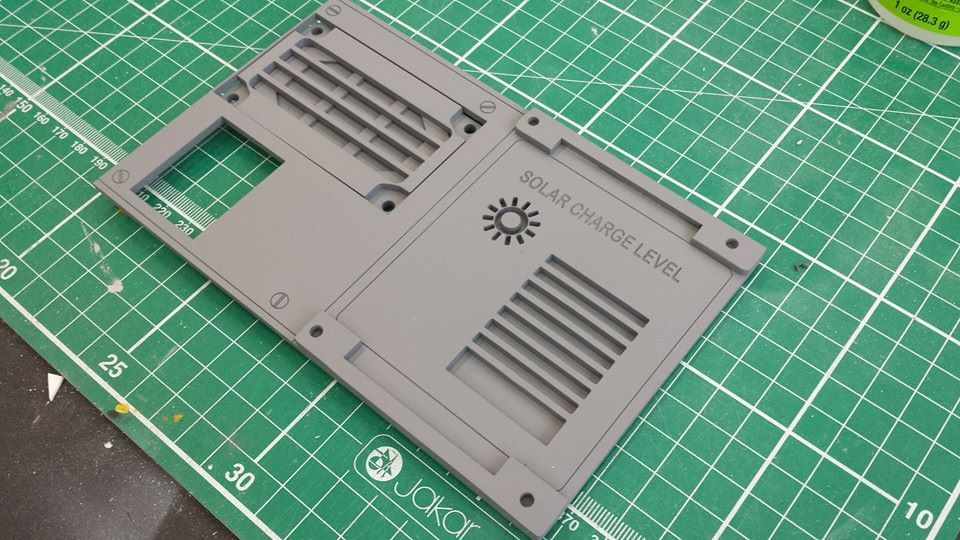
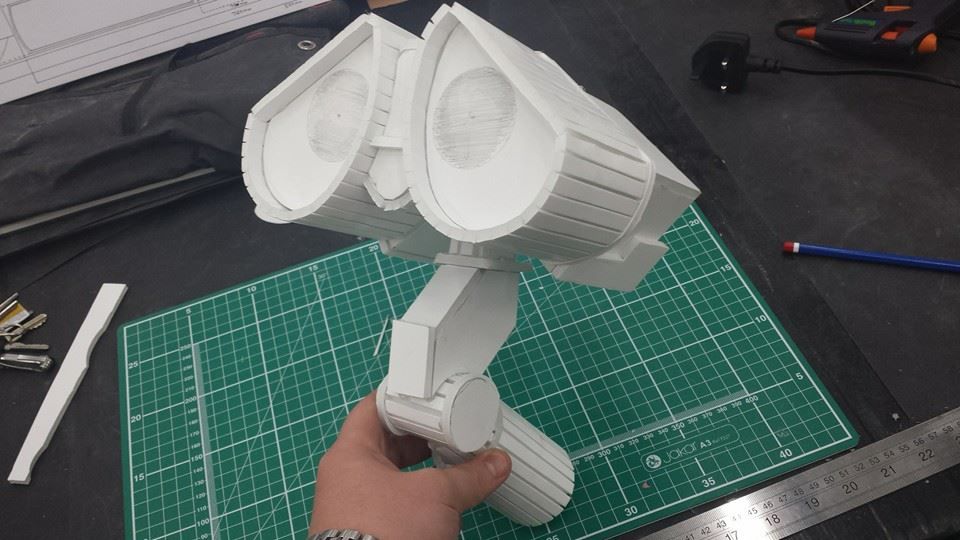
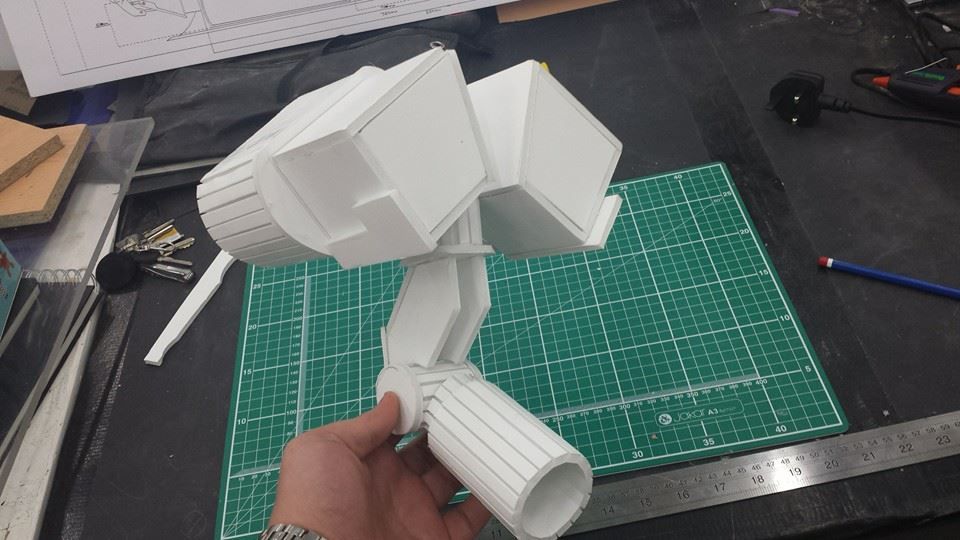
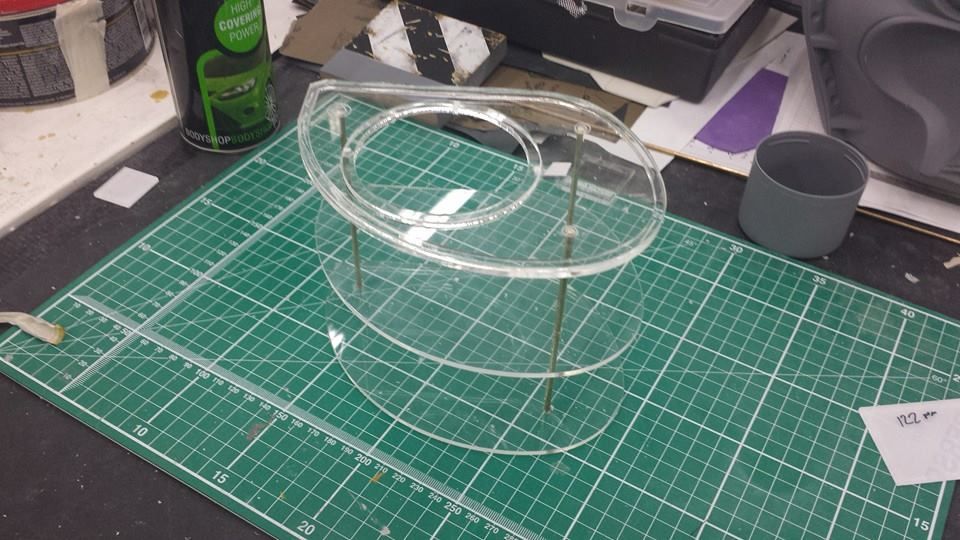
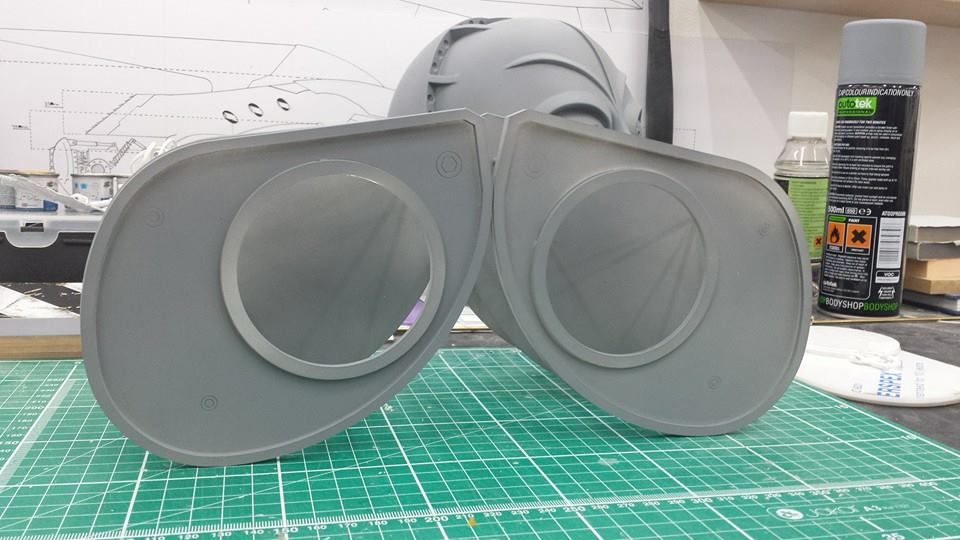
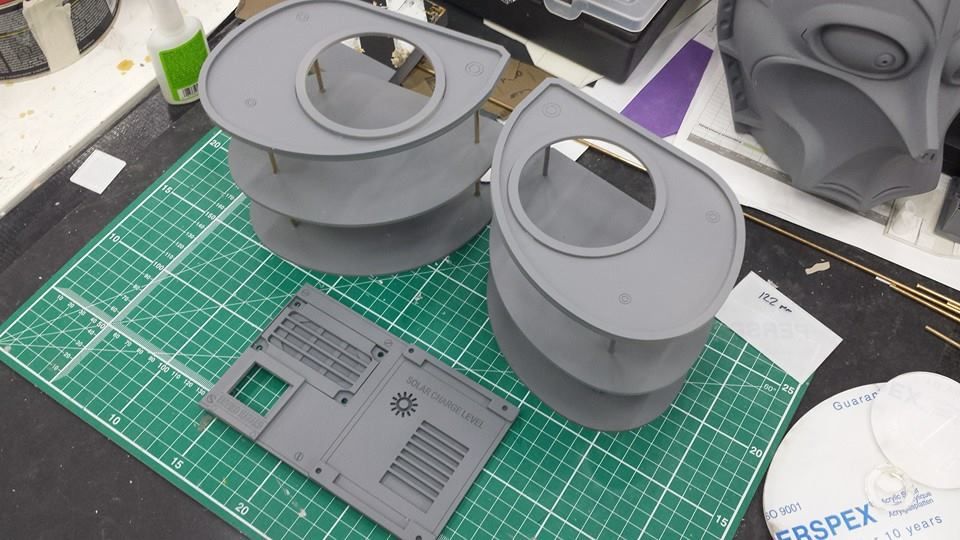
I didnt get the scaling right on the button which came out to big, this though is just a test piece with the main piece getting done in January. The intention will be to add lights to the back so the slats will need to be clear. The eyes were done in the same way. I cut out three sections, the first with the eye hole cut out. These were then attached together using brass rods. The idea will then be to wrap 1mm abs around the frames to give me the eye shape.


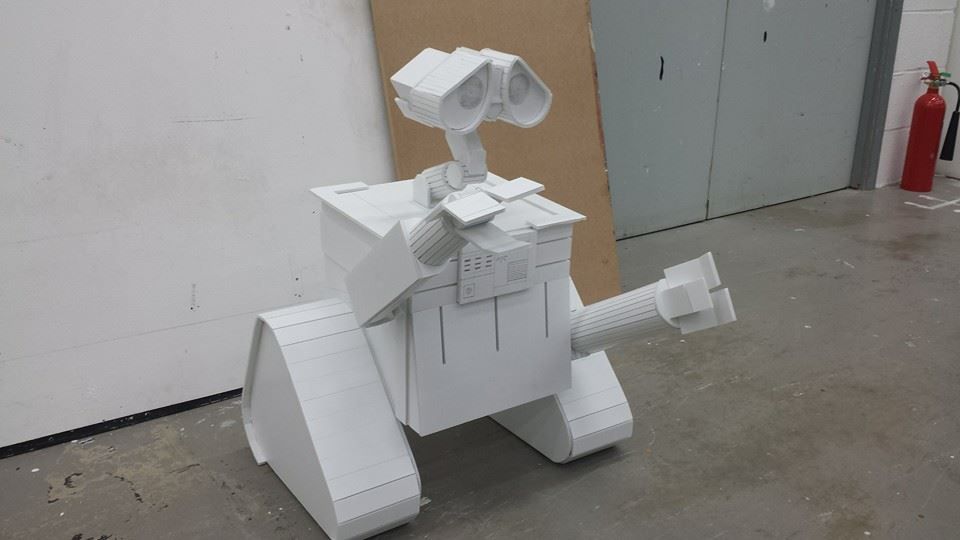
Here they are with the primer along with the solar panel.


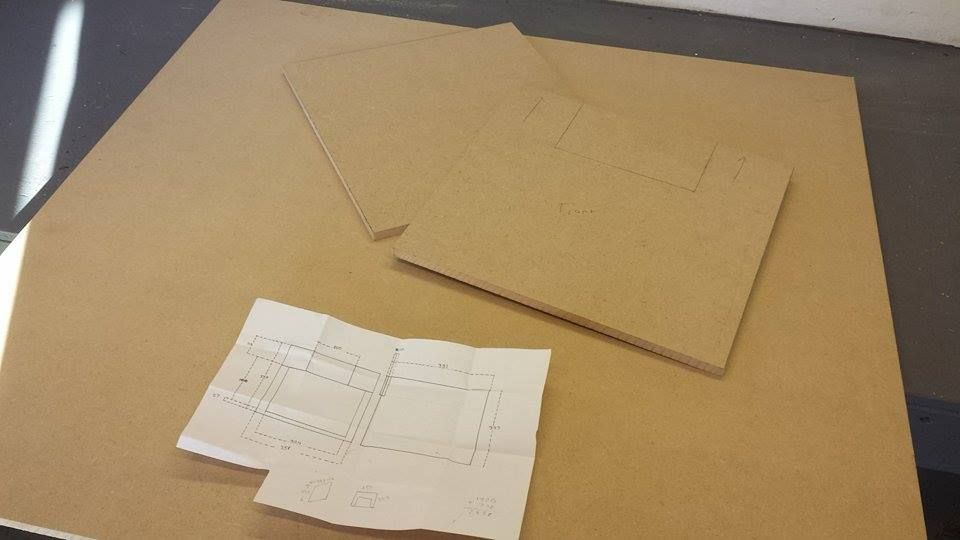
Next came the body. The idea is to make the main shape out of MDF. Skim the piece with ABS to give me a smooth base, then to add all the external detailing and panelling with acrylic, chemi wood etc...

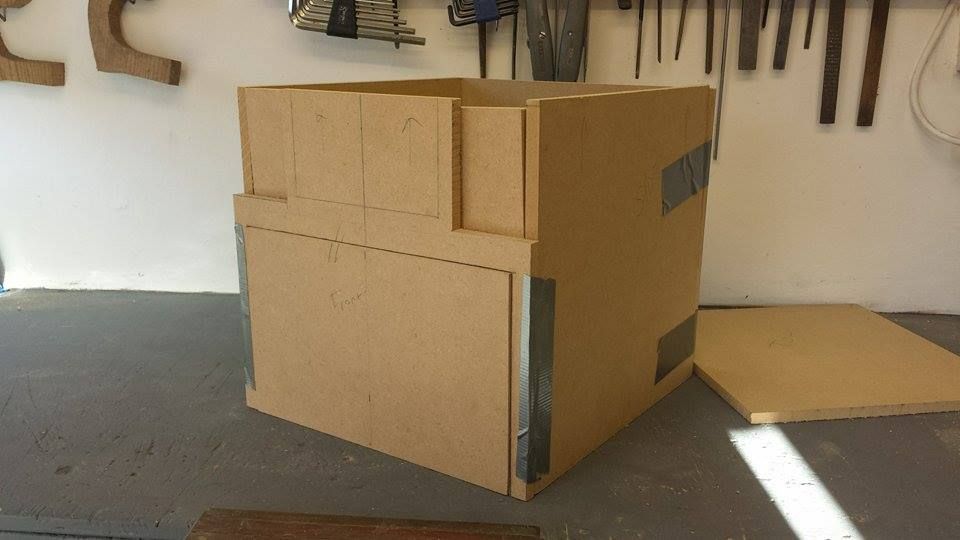
So the box is 14mm MDF. With my plans scaled down, I measured up and cut out the pieces.


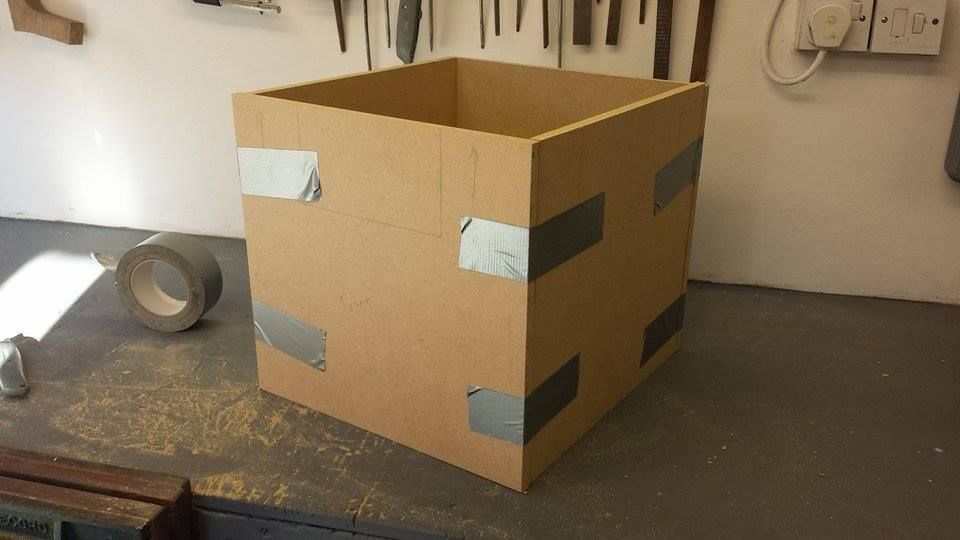
Then a quick test fit to make sure it fits,


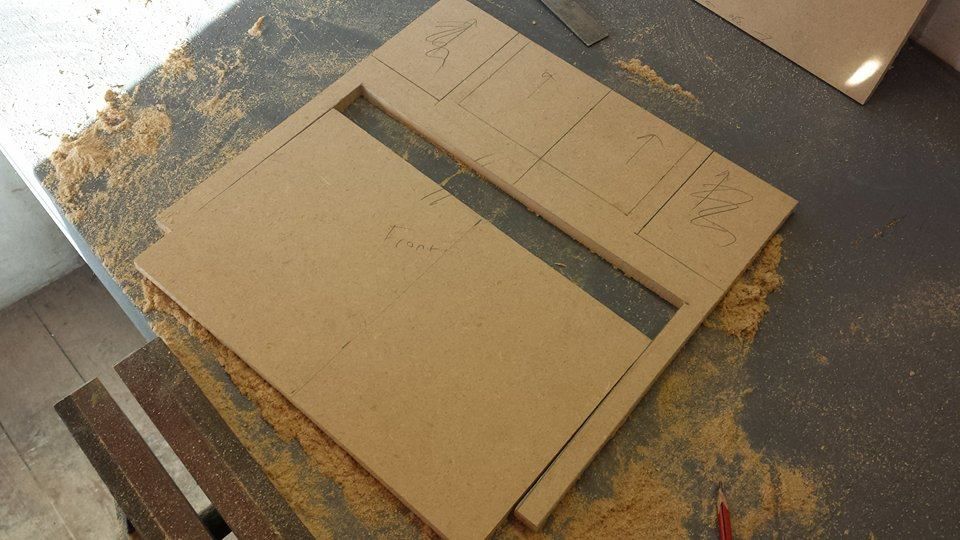
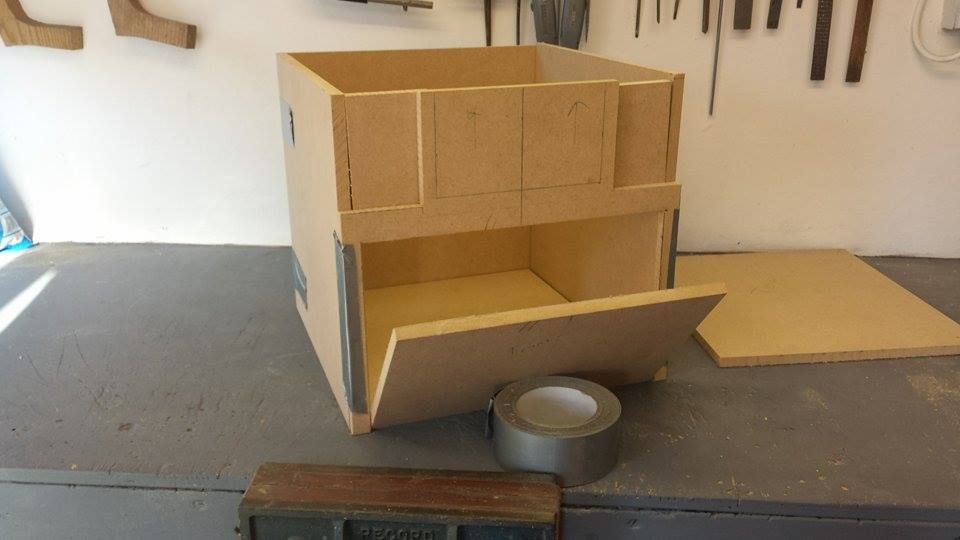
Next was the door section. I cut out the piece using a hacksaw, as well as the top sections which will act as the indents where his hands go when he goes in his box mode. I then taped it all together to get a basic idea of how its all looking.


Thats as far as I have gotten at the moment. I should be back on the body tomorrow, hopefully getting the door attached and getting the arm tracks cut out.

Welsh
 
Thanks guys, as soon as i get this box done I can begin working on more laser cut pieces as well as all the details. Building what will hopefully be a pretty accurate Wall-e.

So yesterday and today was all spent on the body. With all the parts cut, I needed to add the run section where his arm sits. From the Blueprints I got from the Wall-e builders club, I couldnt find what the measurements of it was, So I just worked it out from a screen shot. I first marked out the sections, and using a combination of Drills, hacksaws and a mouse sander, got them cut out.


I then filled the corners to give me a sharp egde. Next came the task of assembling the thing. For this I picked up some small brackets, as well as stupidly strong glue and activator. Together, they should give a strong bond and hold the box together.


I then went and sanded down all the surfaces and joins, making them flush with a mouse sander.


Next came the task of attatching the door. After going through all the types of hinges in our workshop. I ended up going out and buying some small cabinet hinges, that were a nightmare to fit and get the door aligned with the frame. But I got there in the end, I also added 2 magnetic clasps that holds the door shut. Apologies for the mess in the background in these, took these pictures as soon as I was done :)


So the door will be used to attach his arms and head, and to remove them for transport. So I wasnt interested in keeping the inside accurate, just practical. The wall-e will also be a fully static piece, with his arms and head being posable, so no worries for electric's or motors etc. The next thing now will to be skim this in ABS to give me a smooth base to build off.

Welsh
 
Wow, what a great build! Hope you consider offering kits!

I like the idea of scaling it down. What are the official dimensions - especially the box - of Wall-E? I ask because builds that were supposed life-size seem disproportionately large. And I realize the people on the ship were all chubby but I'd argue they were not anatomically proportionately correct either.
 
Thank you very much guys. I will want to see how the project comes out before I look into the odd kit, although my intention is to mould the arms and all the wheels for the project, so I would only have to mould the body and head.

As far as scale, he is 25% smaller than most 1:1 wall-e's, Looking into it I though some seemed a little oversized. With the scaling, the box measures in at W-358, L-381 and H-337mm. Thats just the basic box though, he still needs all the added details and parts which will bump the size up more. But I think he will be a nice size once complete, and comparing it to my friends 1:1 M.O, they seem to match what is seen on screen. Although Wall-e's size does change throughout the film.

I should have more to show next week.
 
This is looks perfect so far! Scaling pieces correctly is so easily overlooked, and with a character like this can easily break the character, but you're definitely on top of it lol. Can't wait to see more! Subscribing to this thread for sure
 
Thank you sir, and speaking of scale. Today I managed to get the main body into my workshop, where I was finally able to see if I had got the scale of the box right compared to the solar charge panel. This of course is only tapped on, as a lot of detail needs to be added to the box;


Also purchased the ABS today, ready to start skimming the MDF with. Should be ready to start come Monday, where the build will really kick off.

Welsh
 
Looking great, it will be interesting to see your scale with one of the referenced items from the film, like the Rubik's Cube.
 
I do plan on displaying him at our degree show holding a Rubiks cube. Looking into it though you can get them in different sizes, so I do not think that would be an issue. Having him hold a VHS cassette might though, that's if any are still around lol.

I will be starting this up fully Monday. I need to angle off the front section for the solar display, and then I will start the task of skimming the box....that should be fun. So should have more updates soon.
 
hi!!
Good work
.. i am trying to get the plans from the builders club, but it seems it is not working ( instead from me...) can you help me??? do you have them in some place i can download??
thanks for your help..
 
I got all my plans from the Yahoo builders group, you need to request membership. There should be a link on the page, once you have done that you have full access to all types of files.

So Ive been back working full time on wall-e the last two days. My first task was his neck, I cut out the section that is recessed, and then skimmed the edges with ABS plastic. I then laser cut the inner detail parts in acrylic that fit into the area, these were then primered to see how it all looks together. I need to give it a sand and fill some edges but im pleased with the outcome.


I then went and skimmed the top section with ABS, sanding the edges smooth to match both the box as well as the neck hole. This gave me a flush, smooth surface to attach all the panelling. This was all laser cut in 3mm acrylic, with the front sections being two pieces stacked to give a raise look. Still need to add more but the top is getting there.


Also laser cut his buttons, as well as a new solar panel piece, with all the bit correctly scaled, including the hazard button.


The rest of the week now will be spent working on the frame and raised sections that go around the top. Nothing is stuck down yet, so still a lot of tinkering to do. But im hoping to have the top done by the weekend, ready to start the sides next week.
 
He is such a great design, only hope I can do him justice.

Well I spent a bit more time today on the top. So with the laser cut pieces all done, I needed to "frame" them to create that panel look that he has. So using some chemi wood, I cut the material into strips, and placed them around the acrylic pieces.


Once I knew they were the correct size, I sanded them down to match the thickness of the previously cut acrylic.


I then filled in some of the gaps, and glued the pieces down. Hitting it with a coat of primer showed up some areas that need some attention, but nothing major. I also added some aluminium rod to the front sections that house his solar panels. From the film he has a lip of some kind there, but i think the rounded shape looks nice. Also none of the inner pieces or the large sections are glued down, so ignore any symmetry issues with the gaps.


Couple of more bits to add. I took the neck section out to work inside the space. The outer frame section that runs along the top will be next on the list of things to do, then I will move onto skimming the sides with ABS and going from there. Hope you guys like the progress,

Welsh
 
Thank you :)

So I got some more work done on Wall-e, mainly neatening up areas and gluing pieces down. It dosent look like much but you always find that with things that take a long time to do. So I got the top sections all smooth and glued in (and just noticed a bit that needs to be sanded on the photos :/). I also finished up the neck section and got that mounted to the body as well.


But the big thing is his right side. My idea was to skim the box using ABS to give me a really smooth and workable surface, and the sides were the parts I was most worried about. But all day friday, after some pretty precise measurement taking, I got the one side all skimmed and primered.


I still need to do the sections inside the arm frame, but im really happy this has actually worked. I will now work on getting the other side skimmed as well as the front. Ive already started work on the lower sections of his sides;


These will be sanded down and angled off to create that beveled type of look he has on his lower sides.
More to come next week,

Welsh
 
This thread is more than 6 years old.

Your message may be considered spam for the following reasons:

  1. This thread hasn't been active in some time. A new post in this thread might not contribute constructively to this discussion after so long.
If you wish to reply despite these issues, check the box below before replying.
Be aware that malicious compliance may result in more severe penalties.
Back
Top