Tom's Tunisia Saber

thd9791

Master Member
RPF PREMIUM MEMBER
rare_star_wars_photos_18_thumb.jpgStar-Wars-A-New-Hope-Obi-wan-Kenobi-s-Lightsaber-2.jpg

I wanted to start a new thread for this. Given the limited tools I have, and money, scratchbuilding this saber was a fool's dream. ( I'd need a bit of luck, a bit more talent and such) So I did end up going the replica part route.

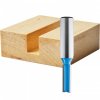
Today I finished the transistors. It took a couple days, some new grinding bits, a router bit, and some balls. The inside of a transistor or amplifier is incredibly dense - regular drill bits bounce right off. I used the blue tile/concrete grinding bits to start. Once I got most of a cone drilled, I started with a straight router bit with two flutes, which did some decent damage. I thus resorted to a tiny cylindrical diamond cutter as well, going back and forth between the three until a little puff of smoke told me I'd hit the last of the transistor's guts around the rim.
$_35.JPG90462-01-1000.jpgdtdb.jpg

MotorolaMD.jpgIMG_0782.JPGIMG_0787.JPG

Look at the third pic above. The area I drilled out isn't as deep as the outside of the transistor. I had already hit metal, this is what I mean by the component having a thicker top. <This is wrong, I later found out that was the plate/chip inside and I COULD drill further>
It was hard finding the right screw. I used DC amplifiers I think, which have a lower clearance. The socket heads were too high and i couldn't find another slotted brass of this kind. So, I found another soft metal lamp screw.

IMG_0796.JPGIMG_0803.JPG


I took a dark brown/brass lamp screw (the ones with the flat smooth tops and tiny cuts along the rim) and ground it down to fit. This took a surprisingly long time. I stuck it in a drill press and pressed an orange grinding wheel to it with my hand (I broke all the pink ones). I soon found that a nice long solid metal file worked better. It was also safer, as you can see, the grinding wheel was a bit too close. I only got nicked a couple times.

IMG_0804.JPG

I flattened/thinned the top and filed the sides until it slid in.

IMG_0807.JPGIMG_0805.JPG


Then I cleaned the two with alcohol, put a drop of Loctite epoxy in the transistor and set the screw in to dry. Keep an eye on yours when you do this, they tend to tip sideways and dry crooked. Thankfully, the first dried only slightly crooked and the second I caught while the glue was gummy and I corrected it.

IMG_0810.JPGIMG_0809.JPG


Set in Roman's beautiful washers and spacer

IMG_0813.JPG

I have a weathered grenade coming from him soon. Maybe I'll upgrade my booster from the resin one I have...

$_35.JPG


90462-01-1000.jpg


dtdb.jpg


IMG_0782.JPG


IMG_0787.JPG


IMG_0796.JPG


IMG_0803.JPG


IMG_0804.JPG


IMG_0805.JPG


IMG_0807.JPG


IMG_0809.JPG


IMG_0810.JPG


IMG_0813.JPG


rare_star_wars_photos_18_thumb.jpg


Star-Wars-A-New-Hope-Obi-wan-Kenobi-s-Lightsaber-2.jpg


MotorolaMD.jpg
 
Last edited by a moderator:
Major progress today. thank you Roman!!!!!!!! Will update tomorrow -

1) I was weak before. After getting a ton of new Amplifiers I had the balls to keep drilling. There's a metal plate inside the unit about halfway. Once that's gone there's plenty of room for those screws. I just have to machine the rim and they slide right in....except without the innards, you can easily squash the metal shell. Gentle hands.

2) I found two flat rubber washers of corresponding diameters that fit in both ends of a booster. *Mine was sliding a bit beneath the solid spacer.* I also added 1 metal and 1 plastic washer to the back in order to to increase length so my modern handwheel would sit with that 1/8 inch gap.

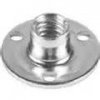
3) I filed out the star shaped hole in the handwheel and jammed a T nut in the space. It was too thick for the cap to go back on (and the T nut could still rotate) so I cut the tabs off the cap, epoxied it to the T nut, and then the nut to the handwheel itself. Now it's all one unit that screws on the back of the saber.

th.jpg

4) I used Tamiya paint I had leftover from a John Long phaser build to blend the yellow painted tips of my threaded rod with the saber. The rod we marked with tape after stacking all the parts on. Then we put more tape on the other side of the "cut" to get a clean line....hack sawed away!
 
Last edited:
I'd like to thank Roman Gomez and that guy who thinks I collect calculators on eBay....

i finally got this beautiful yellowish weathered grenade and black weathered booster from roman. I was lost for words when I opened the box, I'm glad I got steel parts, it makes this all the more incredible.

And so so it goes - cutting down the threaded rod, situating spacers and screwing everything together. (Oh and newer exactra 20s are a bitch. The bubble strip is small enough it's a toss up between sanding the sides and pinching and sanding thin. Even though I thought I wouldnt...i DID sand it thin. Part of me wishes I got one of the big thick bubble strips but I'm happy with this one! Pledge helps buff out scratches by the way! It has wax in it and I scratched up my strip trying to prepare it.)

here it is! My holy grail saber!
image.jpgimage.jpgimage.jpg

image.jpgimage.jpgimage.jpg
image.jpgimage.jpgimage.jpgimage.jpgimage.jpgimage.jpg
 
Freakin' fantastic ... well done Tom ... great find on those bubbles ... not to many sabers have the 'all round' variation ... enjoy :)

Chaim
 
Lookin good... The Grenade was a romans?
Yep! I feel bad, he got swamped at work but he finally started catching up.

I don't know if it's his design or the way the original grenade is, but there's a little metal peg at the end of the windvane threads to stop it, freaking genius..

Here are some official beauty shots with my nice "advanced" Nikon compact...
DSCN2935.JPGDSCN2936.JPGDSCN2938.JPGDSCN2940.JPGDSCN2941.JPG

- - - Updated - - -

:) I'm very happy myself, thank you!

Also, maybe it's because there's a rubber washer as part of the bottom, but the sink knob never seems to stop turning
 
Cool. Yep there's a pin in the original grenade...

Final looks great... I like the weathering on the grenade.
 
Ugh... scratch that... my original grenade no longer has a pin.

I was trying to get the neck from the body and *ping* it came off... I scoured the floor for an hour... somehow it is gone.

Enjoy you pin, mine is becoming a distant memory.
 
^ Oh no you didn't ... how many times have I told you leave that grenade alone :facepalm ... okay just remove that ugly peach paint job and put your all real parts together ... perhaps a special metal detector can track that pin in your sweater, carpet or under a cabinet even?

Chaim
 
you could also make one out of JB weld? Just blob some on and dremel it to shape? It's just a stopper for the threads...So sorry on the amputation!
The yellow-ish weathering makes this feel more real. Less "gun" colored and more ....don't know, but more used


Anyone, let me know if you want 90% accurate transistors, I have a ton..
 
^ Oh no you didn't ... how many times have I told you leave that grenade alone :facepalm ... okay just remove that ugly peach paint job and put your all real parts together ... perhaps a special metal detector can track that pin in your sweater, carpet or under a cabinet even?

Chaim

Ha ha... I actually thought "Chaim would kill me"... but as Lando would say "It's not my fault!"

I was just trying to take the neck off, ironically, so I didn't break anything.

Trust me... not the best moment. The thing is so tiny though, even if I DO find it, I don't think it's reattachable. I'm pretty sure the original has a hole drill, then a piece inserted and soldered in place.

my only solace is that the thing is smaller than a pencil lead, so you can't even tell it's not there. and the windvane still stops in pretty much the same place without it.

Still... that will bug me forever.:angry

Oh... and I should mention, I only got about half the crap off it so far, and it ALREADY looks much MUCH more like Star Wars and less badly painted WW2 relic.
 
Last edited:
Thanks Chris! That emitter...I picked it up from KurtyBoy a long time ago...the idea is that it was possibly a Serafino or something, made just after the Balance pipe was discovered. BobaDebt weathered the heck out of it so it adds a nice touch.

I've decided to try and remove the compartments and rig up hooks or shelves inside the Graflex's case so I can store like...six or seven sabers in there.
 
Oops, accidentally picked up some of these!

They feel like one piece, but the insides are metal (suggesting an earlier version)
They are also smaller than the Millenia hand wheels and much more substantial feeling.

The inner hole is too small, what do folks recommend?

Also, how on earth can I get these shiny and not horrid yellow? I've heard of like..something mylar that you can just press on but wouldn't that create fins at the edges of the cubes, being a convex shape?

DSCN3226.jpgDSCN3227.jpgDSCN3233.jpgDSCN3235.jpgDSCN3239.jpg
 
OK. So, those are the correct size and shape handwheels for the prop. Much more accurate then the modern milenial handwheels. What you want to do is disassemble them handwheels and then have the yellow part vaccume metalized.
 
This thread is more than 8 years old.

Your message may be considered spam for the following reasons:

  1. This thread hasn't been active in some time. A new post in this thread might not contribute constructively to this discussion after so long.
If you wish to reply despite these issues, check the box below before replying.
Be aware that malicious compliance may result in more severe penalties.
Back
Top