Darth Vader (Rubies Lid Mod, Scratch build)

omel

Sr Member
Hi guys, been a while since my scratch built vader, finally got around to starting my Vader 2.0 (ROTJ), hope this will be acceptable enough for the local 501st, will try to post most of the steps i take..here goes...


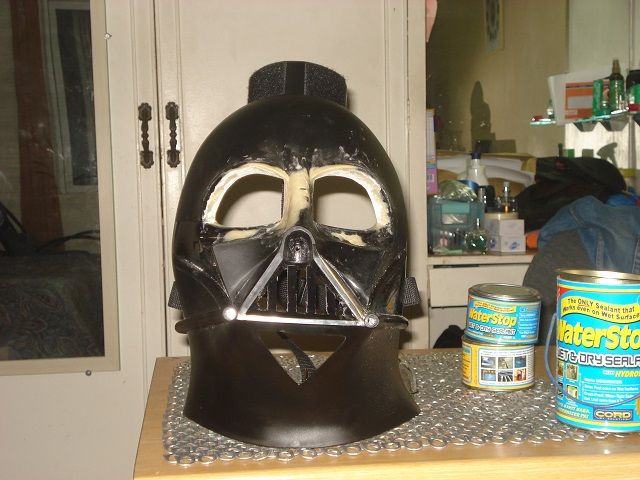
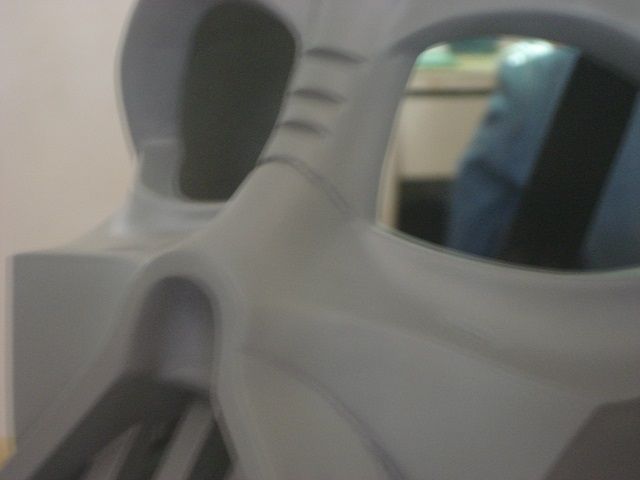
started by removing the lenses..


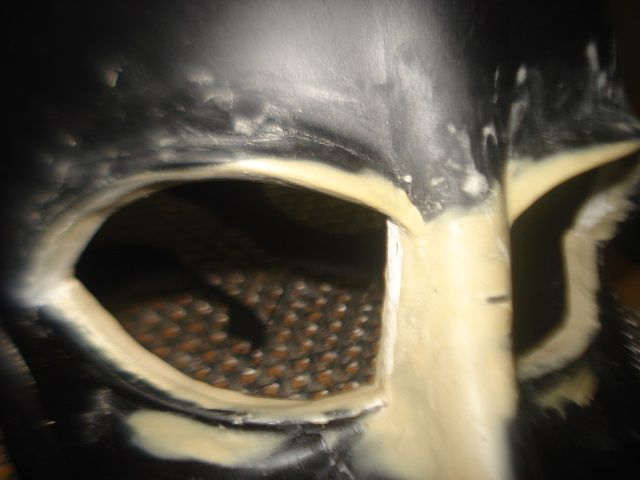
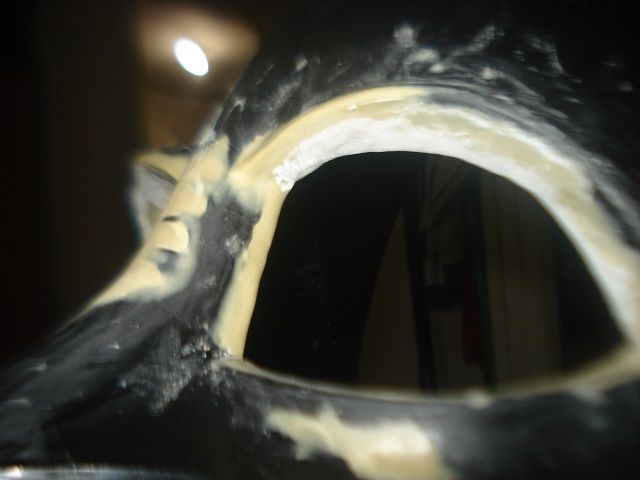
did the eyelids (frown), the nose bridge and the nose...


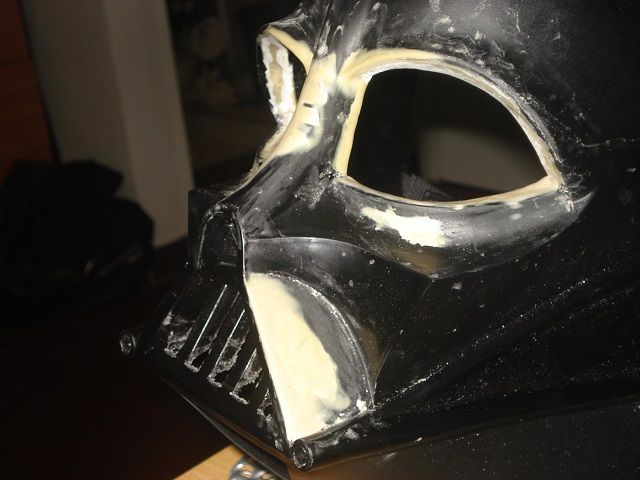
lengthened and squared of the vents and thickened the left of the vent///


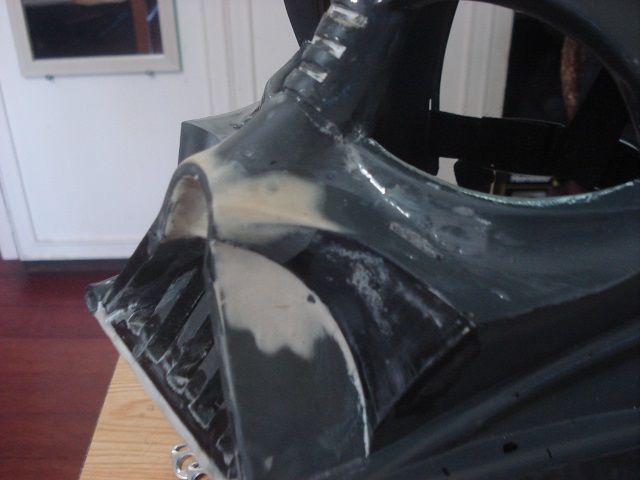
raised the left cheek ( by the nose)


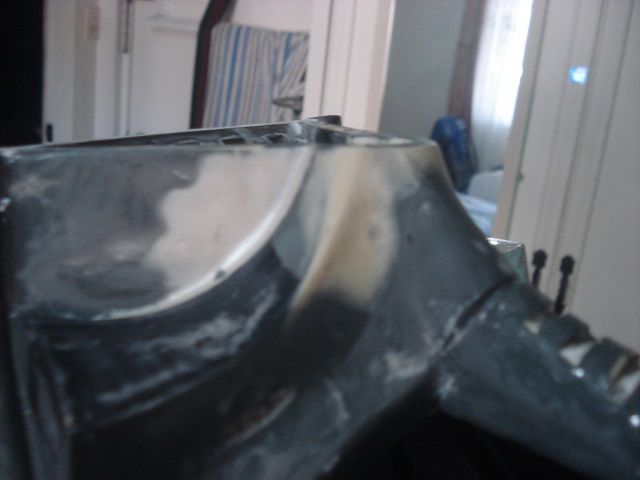
thickened the lower lip...


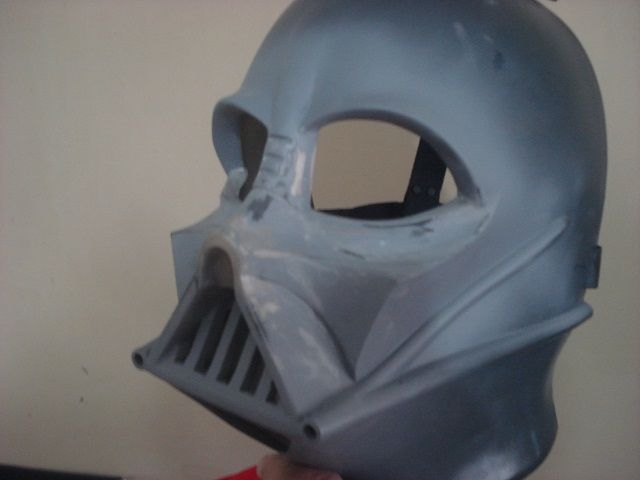
Gray primer helps show where refinement is needed...


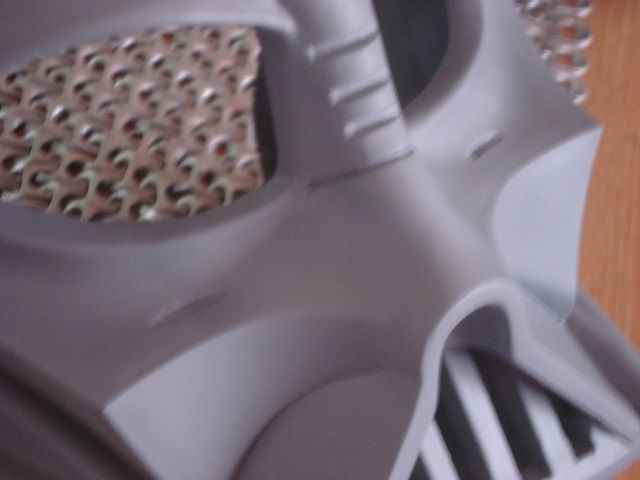
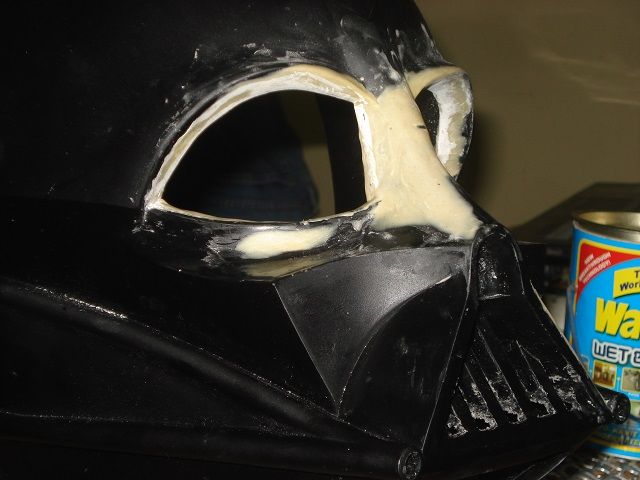
bridge and nose job looking good, needs more sanding...


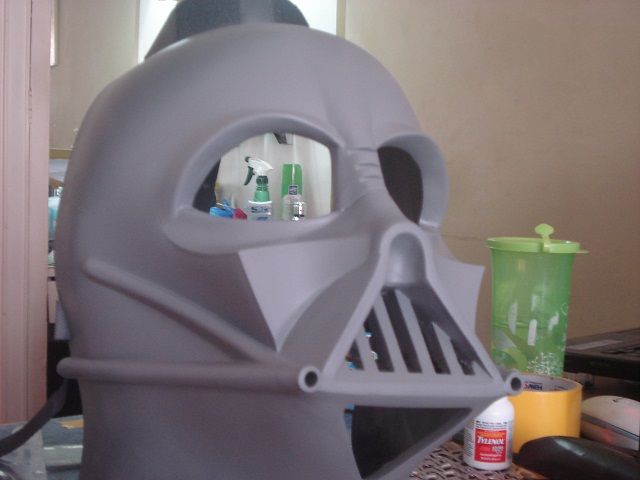
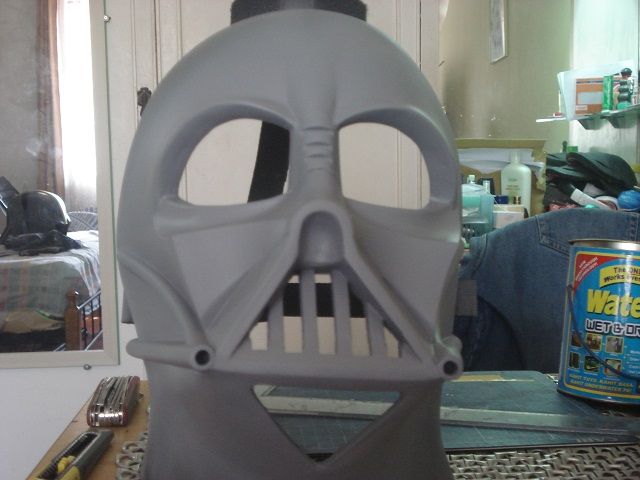
heres where its currently at..
contemplating if i should fix the sunken cheeks...

comments and suggestions are highly welcomed...


more pics to follow..
 
Last edited:
Re: My Rubies Vader mod

That's looking mighty fine sofar ... keep it up :)

Chaim

Thanks! currently working on the eyelids and nose bridge again. want to get it as close to screen used as the Rubies will allow, started on the dome as well. ;)
 
Re: Vader (rubies Mod)

working on the lid..


used 1 inch duct tape as guide for midstrip...dremeled away excess material to try to get sharper lines on the dome. will put waterstop epoxy clay to fill it in later and sand to correct shape...


found cheapo sunglasses for the lenses...


some screws as start of the tusks...


test paint using dark grey for highlights to see if it can work...will wait for paint to cure then will do another test paint using gunmetal...

comments on paint choice highly appreciated.

thanks
 
Last edited:
Re: Vader (Rubies Mod)

seeing some new threads for Rubies mod, motivation to pick up where i left off. so it can be presentable when the Force Awakens. ;)
 
Re: Vader (Rubies Mod)

Indeed ... how time flies when you're having fun ... looking forward to your next step ... just be certain that any additional paint can be applied on the previous layer and also mind the temperature in the room ... if it drops significantly while the paint is curing sometimes cracks might appear and you can start over ... don't ask me how I know :wacko

Chaim
 
Re: Vader (Rubies Mod)

Hi Chaim !thanks for the concern...but no worries with regard to temperature drops...here in the Philippines we enjoy a tropical climate year round. its either hot and dry during summer or wet /humid during the monsoon season. have significantly done some more work since the last time i posted the test paint photo, but work on a Vader is never done...lol


- Rommel
 
Re: Vader (Rubies Mod)

I like the dark grey compared to a more prop accurate silver but it should have metallic flake in it. A gunmetal paint would look more accurate.
 
Re: Vader (Rubies Mod)

Thanks, the material is such a pain to work with, so much patience is required ;), the rear portion of my dome needs lots more work. so took a break before patience ran out. but i'm back on it because the Force is about to awaken. lol
 
Last edited:
Re: Vader (Rubies Mod)

some work done on the armor...primer on to check areas for improvement...


that is still the old illustration board duct tape armor...just added craftfoam and airdry clay to raise the ridges...
 
Re: Vader (Rubies Lid Mod, Scratch build)

I love Rubie's mods. I guess because I thought from the start what an awesome set it was for such a good price. Great out of the box or limitless modding.

No it's not as accurate as a $4,000 Vader but it was about $600 originally.

Awesome work.


Can you post a pic of your Vader helmet straight on but standing back about 8 feet and zoom in????

This seems to be the only way to get a good pic of a Vader or Stormy helmet.


Thanks

Tom
 
Re: Vader (Rubies Lid Mod, Scratch build)

Thanks Tom!

Will take straight on photos of the Lid from the suggested distance once i've updated / re-done the paint job ( having a hard time sourcing the Gun Metal paint here),

Meanwhile, here are additional photos of the armor with base paint of metallic ash gray instead of silver:


will let it cure for a day or two then sand down visible flaws then spray it again and after some more curing will hit it with the black.

- Rommel
 
Last edited:
Re: Vader (Rubies Lid Mod, Scratch build)

Hi all,

some photos on latest development...


black portions painted...

now repainting the Gunmetal on the mask ...

comments and suggestions highly welcomed!

Thanks!
 
Re: Vader (Rubies Lid Mod, Scratch build)

crappy celphone pic... but here is what it looks now repainted with my take on Gunmetal Grey...will take better pics soonest. shot from about 6 ft.

 
Re: Vader (Rubies Lid Mod, Scratch build)

Thanks, its actually Metallic Olive Gray something then lightly misted over with Metallic Ash Gray...Gunmetal Gray is not available ( well in spray cans anyway) and can only be had by having it mixed in Paint centers, (my old air compressor and spray have been busted years ago), but the color i achieved looks acceptable after the finishing coat of clear gloss lacquer. ;)
 
Re: Vader (Rubies Lid Mod, Scratch build)

some clearer pics with the armour... comments/suggestions highly welcomed. ;)


This thread is more than 5 years old.

Your message may be considered spam for the following reasons:

  1. This thread hasn't been active in some time. A new post in this thread might not contribute constructively to this discussion after so long.
If you wish to reply despite these issues, check the box below before replying.
Be aware that malicious compliance may result in more severe penalties.
Back
Top