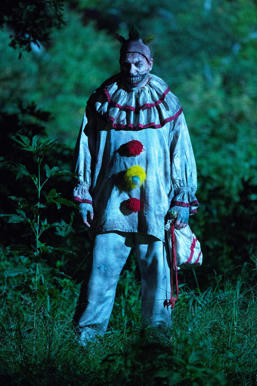
Soooo, in case you haven't noticed, Halloween is right around the corner. As usual, I'm too busy to do much for myself costume-wise, but this year the girlfriend committed us to a party so I've gotta throw something together. I haven't been a huge fan of the last couple of seasons of American Horror Story, but I do dig on Twisty the Clown A LOT. He's got a good creepy clown vibe, so I thought I'd give him a shot. I don't have a lot of time to put towards this, but he doesn't look tough at all so what the heck.
Anyways, here's what Twisty looks like for those who have not seen the show:
So the most challenging part of his costume to me is his face-mask... It's a pretty simple piece with elastic straps holding it on him, but it also has a bit of depth with the lips, teeth, and such. I started the mask this morning by modeling up a simple face covering, templating it in Pepakura, and then building that in thin (2mm) craft foam. I also pulled out some leftover Best-step 6mm foam I had to start working out an overlay for the mask's cheek details:
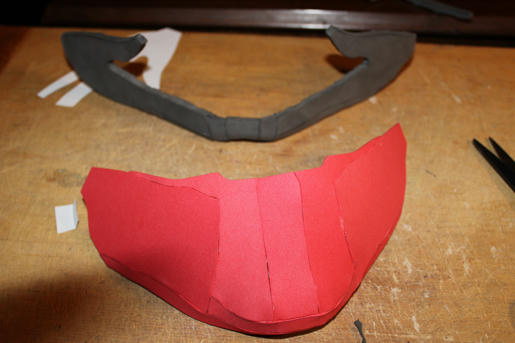
I rough-cut the cheek details out of the 6mm foam using my Pepakura template as a guide, rounding the sharp edges off with the dremel:
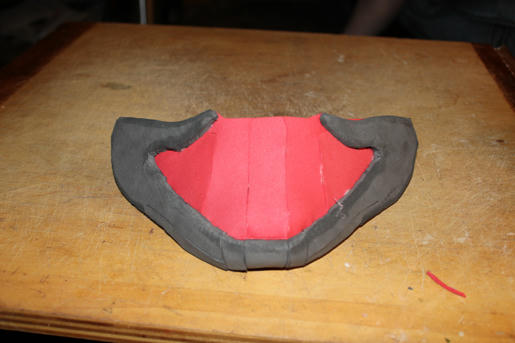
Once that was all hot-glued, I set about with the details work. Using a screenshot as a rough reference, I first drew in the teeth on the faceplate. I then cut each corresponding tooth from 6mm foam, dremelled it into shape, and hot-glued it in. I also built up the upper- and lower-lip details with more 6mm...
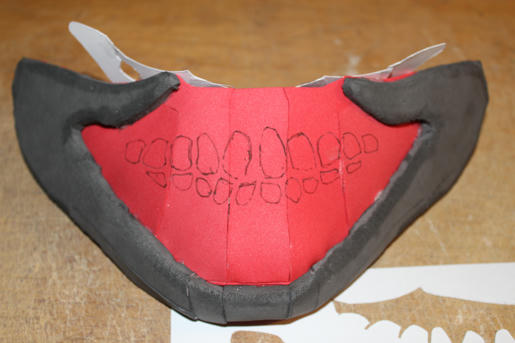
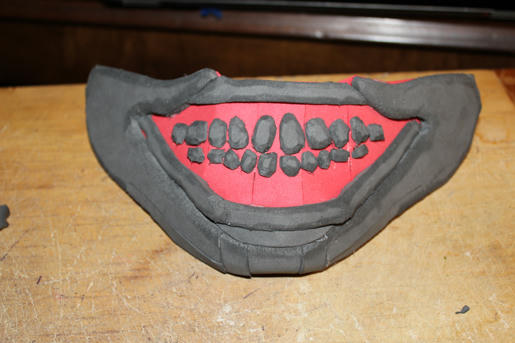
After chugging through that stuff, I had to pull all of this together to look decent and get rid of the floating-tooth look. I was hit-and-miss with my pics this morning, but I cut and glued in some gums out of 2mm craft foam to match up to the teeth, and then filled the gap between with hot glue to simulate a real mouth. After some extra filling with craft foam and glue, I laid on a couple of coats of pva glue to seal.
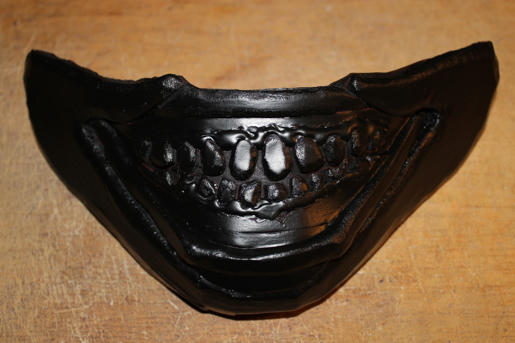
At this point, I had to let this dry up, so I ran to Walmart to get some fabric and such for the rest of the costume. A couple of heavy coats of Plastidip when I got back finally got it looking the way I wanted it to:
MEANWHILE AT WALMART,
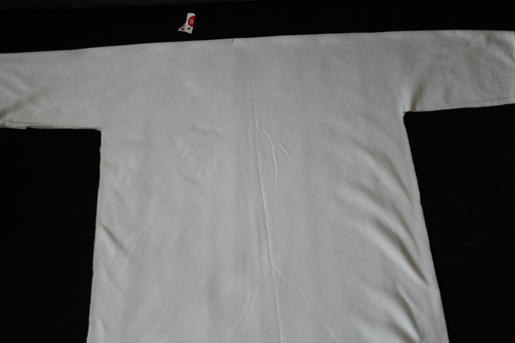
I scored some thin white fleece for $2/yard, 1" red ribboning, and that no-sew tape for lame-asses who don't have a convenient sewing machine. I'm not going crazy on durability on the material, and it's all getting weathered to hell, so this stuff seemed like a great buy (and all of it for under $15). When I got back, I worked out really simple shirt and pant patterns, and snipped them out of my fleece...
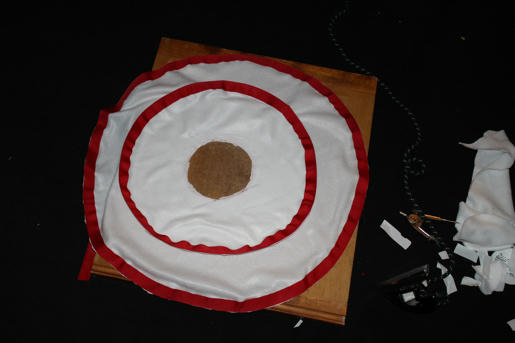
All of the seams were then joined with the heat-n-bond tape, surprisingly durable to me. I also cut out the collar pieces from felt, and glued on my red ribbon trim to match his costume.
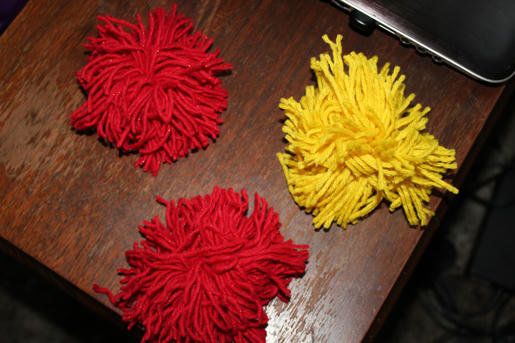
Next up, the pon pons on the front of his suit. He's got a couple of red ones and a yellow one (with white added), so I whipped these up after raiding the girlfriend's yarn bag:
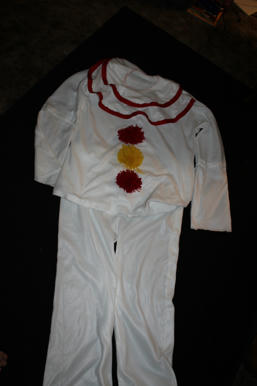
I added a little fabric reinforcement to the top for the pon pons, and stitched them on as well. Here's the body of the costume so far:
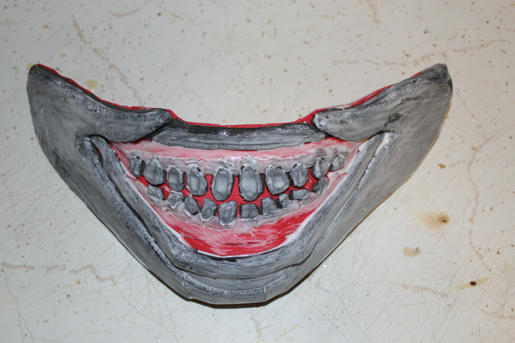
I'm hoping to get the elastic added for the collars and the pants tonight, and then these parts are just about done save for weathering. Still have the scalp/bald cap, the gloves, and the shoes to work out (and of course his bag of toys), but not bad for a few hours of work. I wrapped up this evening with some teeth painting on the mask:

Well, it's not perfect, but it'll get the job done.") Thanks for looking!
Thanks for looking!
Anyways, here's what Twisty looks like for those who have not seen the show:

So the most challenging part of his costume to me is his face-mask... It's a pretty simple piece with elastic straps holding it on him, but it also has a bit of depth with the lips, teeth, and such. I started the mask this morning by modeling up a simple face covering, templating it in Pepakura, and then building that in thin (2mm) craft foam. I also pulled out some leftover Best-step 6mm foam I had to start working out an overlay for the mask's cheek details:

I rough-cut the cheek details out of the 6mm foam using my Pepakura template as a guide, rounding the sharp edges off with the dremel:

Once that was all hot-glued, I set about with the details work. Using a screenshot as a rough reference, I first drew in the teeth on the faceplate. I then cut each corresponding tooth from 6mm foam, dremelled it into shape, and hot-glued it in. I also built up the upper- and lower-lip details with more 6mm...


After chugging through that stuff, I had to pull all of this together to look decent and get rid of the floating-tooth look. I was hit-and-miss with my pics this morning, but I cut and glued in some gums out of 2mm craft foam to match up to the teeth, and then filled the gap between with hot glue to simulate a real mouth. After some extra filling with craft foam and glue, I laid on a couple of coats of pva glue to seal.

At this point, I had to let this dry up, so I ran to Walmart to get some fabric and such for the rest of the costume. A couple of heavy coats of Plastidip when I got back finally got it looking the way I wanted it to:

MEANWHILE AT WALMART,
I scored some thin white fleece for $2/yard, 1" red ribboning, and that no-sew tape for lame-asses who don't have a convenient sewing machine. I'm not going crazy on durability on the material, and it's all getting weathered to hell, so this stuff seemed like a great buy (and all of it for under $15). When I got back, I worked out really simple shirt and pant patterns, and snipped them out of my fleece...

All of the seams were then joined with the heat-n-bond tape, surprisingly durable to me. I also cut out the collar pieces from felt, and glued on my red ribbon trim to match his costume.

Next up, the pon pons on the front of his suit. He's got a couple of red ones and a yellow one (with white added), so I whipped these up after raiding the girlfriend's yarn bag:

I added a little fabric reinforcement to the top for the pon pons, and stitched them on as well. Here's the body of the costume so far:

I'm hoping to get the elastic added for the collars and the pants tonight, and then these parts are just about done save for weathering. Still have the scalp/bald cap, the gloves, and the shoes to work out (and of course his bag of toys), but not bad for a few hours of work. I wrapped up this evening with some teeth painting on the mask:

Well, it's not perfect, but it'll get the job done.
Thanks for looking!


