You are using an out of date browser. It may not display this or other websites correctly.
You should upgrade or use an alternative browser.
You should upgrade or use an alternative browser.
Phaser 1 Kit Buildup plus MM P2 Restoration
- Thread starter asalaw
- Start date
asalaw
Sr Member
Not really. It's only very thinly attached. Some of it comes off with just your fingernails. It's under the parts that need to be held up, but not attached to anything sideways. Its sole purpose is to keep the overhanging parts of the model from collapsing before the plastic cools. So it's like a column on a building. That massive-looking wall-o-crap you see on the sides was holding up the P1 cradle runners during the print because they stick out like a ledge.
I actually got most of the side stuff off with my fingers. The stuff under the phaser is beefier, so I'm going to have to use pliers to yank it off. A couple of stubborn areas I may need to dremel, using very low speed and a very small burr bit. But those will be very small areas that I can't reach any other way.
And since this is a low-res print, I would normally sand it and use a little filler on the surface to hide the print lines, but since this is just a prototype for checking scale and such, I'm not gonna bother.
asalaw
Sr Member
Car's fixed and happy, except I have to go back for an alignment tomorrow.
Went back to my LHS for a little more paint -- I'm definitely sticking within Vallejo, Testors MM Acrylics, and Tamiya. Great paints, not stinky, and they clean up with water. Figured out how I'm gonna create my own accurate diamond plate for the P1, very cheaply (relatively). I'm gonna keep that under my hat for now, because a lady doesn't flash her boobs on the first date. (That's a completely irrelevant metaphor, but I used it because the image went through my mind just now. And again, just now. And one more time, just then.)
No modeling tonight, cuz I'm pooped again. It happens. Had to be at the garage at 9 am today, OD'd on coffee, and the hallucinations only stopped a minute ago. Damn, no more boobs.
And speaking of paint, here's your moment of sober reflection.

Also done in acrylic.
Went back to my LHS for a little more paint -- I'm definitely sticking within Vallejo, Testors MM Acrylics, and Tamiya. Great paints, not stinky, and they clean up with water. Figured out how I'm gonna create my own accurate diamond plate for the P1, very cheaply (relatively). I'm gonna keep that under my hat for now, because a lady doesn't flash her boobs on the first date. (That's a completely irrelevant metaphor, but I used it because the image went through my mind just now. And again, just now. And one more time, just then.)
No modeling tonight, cuz I'm pooped again. It happens. Had to be at the garage at 9 am today, OD'd on coffee, and the hallucinations only stopped a minute ago. Damn, no more boobs.
And speaking of paint, here's your moment of sober reflection.

Also done in acrylic.
robn1
Master Member
...Went back to my LHS...
What shop do you go to? There's so few around here anymore.
asalaw
Sr Member
What shop do you go to? There's so few around here anymore.
Hobby Works in Fairfax. They're pretty decent, but it seems like they're always understocked on paints. Probably because they have good prices, and like you said, not many LHSs around here. I used to love Granddad's in Springfield, but he retired.
I'd love to check out a Hobby Lobby, but they're way out in West ***** Leesburg. I'd have to rent a helicopter or something.
Last edited by a moderator:
robn1
Master Member
I loved Grandad's, I practically lived there. He went to WV. There were two Hobbytowns close to me that both closed while I was in NC a few years ago.
Hobby Lobby is coming to Woodbridge later this year, just a couple miles from me And there's Piper Hobby in Chantilly, nice shop that hasn't been taken over by RC.
So have you busted that P2 print out of it's cage yet?
Hobby Lobby is coming to Woodbridge later this year, just a couple miles from me
So have you busted that P2 print out of it's cage yet?
asalaw
Sr Member
Glad to hear about HL in Woodbridge -- pretty sure that's closer than Leesburg. Plus no tolls.
I'll be busting out the P2 probably tomorrow some time. I've already learned something important without even having done it yet -- those top ribs by the 10-turn knob need to be printed separately in a different plastic. The PLA from the makerbot (and at shapeways) doesn't cut it for details that small, at least not in 0.2mm layers. The Extreme Detail Frosted Plastic at Shapeways is $2.99/cubic centimeter, but it's a very tiny part, and that stuff can definitely handle that level of detail.
Also, to print the whole phaser at super-high res just to get those tiny bits sharp-looking is a huge waste, and makes for incredibly long prints. At 0.1mm layers on the makerbot, the left shell alone could take over 10 hours. So the main shells can be done at low res for a fast print (since they're easy to smooth out with putty or sanding), and then the tiny bits can be done in something like that Extreme stuff, at super high res, to get nice sharp detail.
asalaw
Sr Member
Got the phaser out of the scaffolding, but it needs some cleanup. Turns out just ripping that stuff out with a needlenose is the way to go.
Also got my paint chips laser cut, and I painted a bunch of them tonight with numerous color combos, including the shadow gray and the Zynolyte.
One great thing about the Testors, Vallejo, and Tamiya acrylics is they're self-leveling. You can't tell I used a brush, so if an airbrush ain't your thing, no need to worry. These paints were made to brush on smoothly and leave no strokes. Lots of pix tomorrow, but bed now.
asalaw
Sr Member
Hey guys -- sorry I've been so long in posting, but I've had a busy couple of days. Also, I start a 3-week gig tomorrow, so it'll be that long before I post again (unless I can get some modeling in on the weekends).
So, I got the P2 completely liberated from the support material, but I haven't done any sanding at all, so some of the surfaces look just awful. Also, it's only a .2mm print, and in PLA I can go down as far as .1mm resolution, which would look way better coming off the printer.
However, it got the job done -- I was able to take measurements and compare it to my Wand and my GJ photos, and I know what I have to fix before I go any further:
The good news is all of the walls are plenty thick enough for Shapeways.
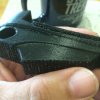
Here's what it looks like ripping the support material out with my needlenose:
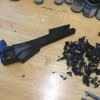
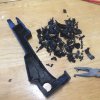
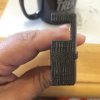
And here's what it looks like now:
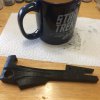
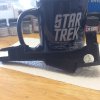
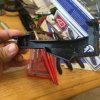
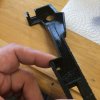
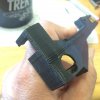
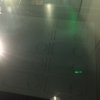
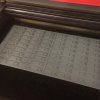
Also, I've been messing around with paint chips! Here they are coming off the laser cutter:
And here I am in plastic jail afterwards:

This place'll never hold me! I'm über strong!
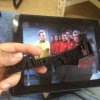
Also I'm just kinda holding this up for camera.
And here are my comparisons. Reportedly, The Wand Company did an incredibly close color match to the GJ hero, so I'm taking that to mean I can use the Wand phaser as a color reference. In a nutshell, neither the Zynolyte gray nor the Krylon shadow gray match the P1 and P2, respectively. And as I've noted before, the old colors on my Darrell Hyde phaser here and the new ones on the paint chips don't match at all. I think they're great colors, but they're not really close to the Wand at all.
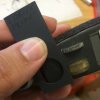
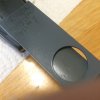
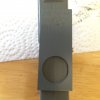
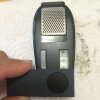
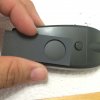
Here's a comparison between the old Zynolyte and the Wand:
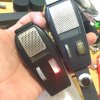
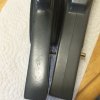
And here's the Zynolyte primer and Tamiya XF-63, German Gray, compared to the Wand P1. The Tamiya is tonally very close, and may only need a drop or two of black to match right up.
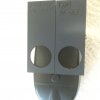
And finally, here's all my paint chips so far. Make sure you look at these full size -- except for the shadow gray and the Zynolyte chips, each and every one of them is brush-painted, yet none of them show any brush strokes at all.

Of course, I've got lots of paint sampling to go yet. There are a few more Tamiya and Model Master colors I want to sample, and maybe also some Vallejo ones. But I may just settle on one brand in the end, since their military colors are all fairly close to each other. We'll see how it goes.
So, I got the P2 completely liberated from the support material, but I haven't done any sanding at all, so some of the surfaces look just awful. Also, it's only a .2mm print, and in PLA I can go down as far as .1mm resolution, which would look way better coming off the printer.
However, it got the job done -- I was able to take measurements and compare it to my Wand and my GJ photos, and I know what I have to fix before I go any further:
- The side ribs need to be a hair wider top to bottom;
- The front window needs to be just a hair lower on the bottom;
- The trigger box needs to be recessed and rounded a bit more.
The good news is all of the walls are plenty thick enough for Shapeways.
Here's what it looks like ripping the support material out with my needlenose:


And here's what it looks like now:


Also, I've been messing around with paint chips! Here they are coming off the laser cutter:


And here I am in plastic jail afterwards:

This place'll never hold me! I'm über strong!
Also I'm just kinda holding this up for camera.
And here are my comparisons. Reportedly, The Wand Company did an incredibly close color match to the GJ hero, so I'm taking that to mean I can use the Wand phaser as a color reference. In a nutshell, neither the Zynolyte gray nor the Krylon shadow gray match the P1 and P2, respectively. And as I've noted before, the old colors on my Darrell Hyde phaser here and the new ones on the paint chips don't match at all. I think they're great colors, but they're not really close to the Wand at all.


Here's a comparison between the old Zynolyte and the Wand:


And here's the Zynolyte primer and Tamiya XF-63, German Gray, compared to the Wand P1. The Tamiya is tonally very close, and may only need a drop or two of black to match right up.

And finally, here's all my paint chips so far. Make sure you look at these full size -- except for the shadow gray and the Zynolyte chips, each and every one of them is brush-painted, yet none of them show any brush strokes at all.

Of course, I've got lots of paint sampling to go yet. There are a few more Tamiya and Model Master colors I want to sample, and maybe also some Vallejo ones. But I may just settle on one brand in the end, since their military colors are all fairly close to each other. We'll see how it goes.
Last edited:
asalaw
Sr Member
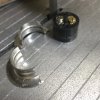
Just one more thing, a little sidebar. I've been sitting on this female Hubbell with the flange for like two years, and I finally got around to cutting the flange off. I definitely recommend carefully cutting it off with a bandsaw. Yes, you'll cut slightly into the plug, but it's not very much, and it's kind of unavoidable. One of the cut-ins will be lost when you sand/grind the plug down for the pistol, and the other one will be right as rain with a spot of putty.
Also, cut where the screw holes are. It's just faster.
Also, cut where the screw holes are. It's just faster.

robn1
Master Member
I've been sitting on this female Hubbell with the flange for like two years...
Ouch! That should be a lot less painful without the flange :eek
Sean
Sr Member
The paint fascinates me. it's been a long while but I can not remember a time using a brush that I didn't end up with brush strokes. but I have dealt with one of the paints that your refering to with an air brush and the coverage was amazing also. and luckily I have a band saw. thanks for all the cool info man. look forward to the next post...:thumbsup
- - - Updated - - -
:lol good one...lol
- - - Updated - - -
Ouch! That should be a lot less painful without the flange :eek
:lol good one...lol
asalaw
Sr Member
Ouch! That should be a lot less painful without the flange :eek
Yes, but nowhere near as much fun.
The paint fascinates me. it's been a long while but I can not remember a time using a brush that I didn't end up with brush strokes. but I have dealt with one of the paints that your refering to with an air brush and the coverage was amazing also. and luckily I have a band saw. thanks for all the cool info man. look forward to the next post...:thumbsup
Yeah, they all cover really well. I've been emphasizing brushing them on because I've seen so many people in various threads here and elsewhere who post that they don't own an airbrush. If you do, definitely use it. If you don't, self-leveling paints are the way to go.
Your model looks great. But I would removed the side ridges from it. That way, people can print the model, sand it smooth, and then add the side ridges on afterwards with a bit of styrene. With the ridges in place as is, it will be hard to get the print nice and smooth and still keep those details crisp.
My .02
Dan
My .02
Dan
asalaw
Sr Member
Hmmm...Your model looks great. But I would removed the side ridges from it. That way, people can print the model, sand it smooth, and then add the side ridges on afterwards with a bit of styrene. With the ridges in place as is, it will be hard to get the print nice and smooth and still keep those details crisp.
My .02
Dan
That's a not-too-shabby idea! I'd thought of it a couple of weeks ago, but only if the detail didn't print up well (I would have done it separately at higher resolution). I hadn't thought of the advantages in the assembly! Not only do you have a point, Dan, but you'll be even more righter when I size up those ribs -- because it would cut the space between the ribs and the cradle by half. So even harder to sand around.
And another advantage -- people with their own printers can use a lower resolution on the main body so it prints faster, then sand it down afterwards. Cool beans!
Consider it done.
Off to finish Agents of SHIELD. Had a nasty insulin reaction on the way home from work because I forgot to eat this afternoon, and now I'm freezing my ass off and pretty wrecked. So season finale, then bed.
EDIT --
Finished Agents of SHIELD. Poor, poor
Last edited:
asalaw
Sr Member
Yup! Gig dead. No pulse at all. I blame the terrorists. 
Catching up on chores, then back to el phaserino...
Also rewatching BSG for the first time in a couple of years, and I'd forgotten how superbly written and acted it was. What a show, what a cast.

Gonna have my own battlestar one day.
Right after I pick up this stupid Gringo replicant.

So...

Previously on Blenderstar Phaseractica...
The overall shape is very nice, but the actual construction is massively heavy.

So I like Twinkies. What's your point?
So it's becoming quite difficult to work with. Because this model actually taught me how to model in Blender. Imagine starting to build a robot, but you have no idea how hex wrenches work...

You'd be depressed too if they left off your nuts.
So I have to "retopo" it, short for retopologize. Here's a short timelapse video that illustrates the concept. It goes by very fast, but it's enough to give you the idea -- basically, I'm tracing a new model over the old one, to make a nice clean mesh that wasn't possible the first time around.
It's usually done to make the model render and animate well, without hogging resources or nasty visual artifacts. It's not strictly necessary for 3D printing, unless you're doing this on a 2012 Mac Mini with only 8GB of memory.

Just a couple more hours and it'll be finished rotating!
So there you go -- that's going to be much of my weekend, unless the cylons attack and I run out of survival rations.


Catching up on chores, then back to el phaserino...
Also rewatching BSG for the first time in a couple of years, and I'd forgotten how superbly written and acted it was. What a show, what a cast.

Gonna have my own battlestar one day.
Right after I pick up this stupid Gringo replicant.
So...

Previously on Blenderstar Phaseractica...
The overall shape is very nice, but the actual construction is massively heavy.

So I like Twinkies. What's your point?
So it's becoming quite difficult to work with. Because this model actually taught me how to model in Blender. Imagine starting to build a robot, but you have no idea how hex wrenches work...

You'd be depressed too if they left off your nuts.
So I have to "retopo" it, short for retopologize. Here's a short timelapse video that illustrates the concept. It goes by very fast, but it's enough to give you the idea -- basically, I'm tracing a new model over the old one, to make a nice clean mesh that wasn't possible the first time around.
It's usually done to make the model render and animate well, without hogging resources or nasty visual artifacts. It's not strictly necessary for 3D printing, unless you're doing this on a 2012 Mac Mini with only 8GB of memory.

Just a couple more hours and it'll be finished rotating!
So there you go -- that's going to be much of my weekend, unless the cylons attack and I run out of survival rations.

Last edited by a moderator:
Replicator1701
Well-Known Member
Here's a dumb question. Why cant you print a p2 halve laying on its side this way all the rib details would be facing up and most of the support scaffolding would be on the inside?
asalaw
Sr Member
That's actually a really good question, and I had to learn the answer the hard way. It has to do with the way 3D printing works, the different ways to orient the model for better results, and the cost of printing the entire thing in something like the Extreme Detail Plastic at Shapeways as opposed to just the parts that need that level of detail. If money were no object, I would just do the shells as one piece in that plastic. But that would cost a fortune.Here's a dumb question. Why cant you print a p2 halve laying on its side this way all the rib details would be facing up and most of the support scaffolding would be on the inside?
3D printing on the Makerbot works by first slicing the model like a salami in software, and then depositing each slice as a layer of molten plastic. The thinner the slices, the better the resolution of the model, but the more it costs in printing time. The Makerbot Replicator 2 can make the slices as thin as 0.1mm (or maybe even 0.05mm, but I'm not sure), but that would take about 16 hours to print one shell, so 32 hours to print both shells of just the pistol. So since this was just a test to see how good my accuracy was and get a sense of how much work is involved to clean it up, I printed it in standard res, which is 0.2mm. That results in a very ugly print, but it comes out relatively fast (3.5 hours).
So back to your question:
In order to create the best print that requires the least cleanup on a curvy object like a phaser, orientation is everything. If I oriented the pistol with the inside down, then the outside curves would be parallel to the slices, and that results in big-ass gaps in what should be a smooth curve. Think of slicing a banana sideways. At 0.2mm resolution, here's what that looks like:

Very ugly banding. As you can see, that would be extremely challenging to make smooth and even, especially for beginners.
You get much cleaner results if your curves run perpendicular to the slices, like this, also at 0.2mm resolution:
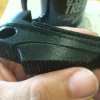
To do that, the optimum way to orient this particular model in the printer is like this:

Unfortunately, the P2 is exactly 0.4" too long to fit inside the Makerbot's print box in this orientation, and again, since this was just a test, I decided to do the next best thing, which was to orient it like this:
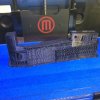
This is not the optimum orientation for this shape at any resolution, precisely because it not only requires a huge amount of external support, but it also creates banding in the cradle. Even at very high resolution, this orientation still creates more work than it's worth.
So there are a number of options to make this model more printable in PLA or ABS, the two most common and accessible materials for 3D printing.
- Leave things as they are and just go with a higher resolution. This is a nonstarter for me for numerous reasons.
- Cut the model into two parts so it fits into a 6" print box in its optimum orientation. Not bad, but it still makes it hard to sand in between the ribs and the cradle. Even at 0.05mm resolution, there will still be some sanding, and I really want to make it easy.
- Break the pistol into two parts, and break off the fine-detail parts like the side and top ribs so they can be printed separately. This seems like the best way. It allows you to print the main shells in their optimum orientation, yet a lower resolution to save time and filament; you could then print the ribs at really high res in a more expensive material like the Extreme Detail stuff at Shapeways without breaking the bank.
- For those who can afford it, it's easy enough to create a set of one-piece shells for printing in higher-resolution materials on Shapeways. Right now, though, I'm limited in resources because I have a lot of cosplay-related projects going, so my cash and time have to go very far. That means I have to do this the most efficient way possible, which happens to be better for cash-strapped propaholics.
There's an important caveat, though. The maximum print size is 11" at Shapeways for PLA, but I'm not sure which way they orient it -- and their highest resolution in PLA is only 0.2mm. So that means that even on Shapeways, if you use PLA, the main shells will require sanding and maybe some putty. Again, that argues for printing those ribs separately in a better material.
My objective here is to make the "base model" as cheap and easy as possible for people to make while maintaining the highest possible accuracy. If you can afford to print in higher res with better materials and get a much cleaner print, there's nothing stopping you.
Once I've gotten it to where I'm happy enough with it to release it -- and that's not far off -- I'm not only going to post the shells for free download, but I'm also going to open-source the Blender files in various formats so that anyone with 3D experience can make improvements, which I fervently hope will broaden access to making our own replicas.
Last edited:
Similar threads
- Replies
- 11
- Views
- 1,240

