Phaser 1 Kit Buildup plus MM P2 Restoration

Here it is:

Screenshot 2016-05-04 15.53.30.png

Two pages, since I appended the actual patent drawing by Harvey Hubbell, Jr. How's that for trivia? :p

And here's the link for the PDF version on Google Drive.

Screenshot 2016-05-04 15.53.30.png
 
Last edited by a moderator:
I can use the guid. if I ever get started on mine. thanks man. if I may. whats that moter looking thingy on the right? :thumbsup


never mind. got a closer look. its the plug...:lol:p
 
I can use the guid. if I ever get started on mine. thanks man. if I may. whats that moter looking thingy on the right? :thumbsup


never mind. got a closer look. its the plug...:lol:p
Hard to believe that patent was filed in 1925! The venerable Hubbell twist-lock plug is 91 years old.
 
WOOHOO!

I've crossed the Rubicon, mofos!!

The pistol is now two real halves, the front window frame is in, and the side holes are cut on the left side.

Also, I'm printing this out as we speak at the shop, for a dimensional check. Barring mishaps, I'll have two prototype shells in about five hours for pickup tomorrow.

Next session, likely tomorrow, I'll be making the two halves the proper width (0.6" and 0.4", respectively), and cutting the remaining holes for the P1 catch, trigger, 10-turn knob, and nozzle. All those holes live on the centerline, so I have to get the widths done before I cut them.

So the hero pistol shells are perilously close to being finished. After that, I'll poop out the new P1, maybe retopologize the geometry to reduce the polygon count (the pistol is really slowing down Blender now), and send it up to Shapeways, Thingiverse, etc. There's a few other places I want to check out as well.

Just two pics tonight, cuz that's all that's really needed.

Screenshot 2016-05-06 23.06.01.pngScreenshot 2016-05-06 23.06.38.png
 
Last edited:
He's going to apologize to his tool for retooling...:lol

If I had a dime for every time I had to apologize to my tool... :p

He should apologize, polygonnit.

Actually, my tool enjoyed it this time. :p

Some methods of modeling end up creating very dense meshes that slow down your computer more and more as you work. These shells are definitely doing that.

Retopology is when you trace a new model on top of the old one, except the new one ends up with lots fewer polygons in a cleaner arrangement. So the new one is much easier to work with and render, since it doesn't hog resources like the original. It's done for animation and gaming mostly, where models have to be as efficient as possible to work well.

But in my case, I just need these models not to bring my Mac Mini to its knees every time I try to rotate them.

Shapeways has a polygon limit, but I don't think these models are going to hit it just yet. It's possible, though, since exporting the model into a printer-friendly format turns every square polygon into two triangles, so you instantly double (or more) the number of polys you started with. So far this hasn't been a problem.

There's a plug-in for Blender that does this automagically, but it's $70. But I've been watching videos again. The instructional ones. For Blender. Not the other kind that I would never, ever look at with private browsing turned on. Or off. I'm talking myself into a hole here. That came out wrong. :p
 
:lol Well. at 52. my tool is the one doing the apologizing... dammed Tool! :lol
51 1/2. I totally get it, sad to say. :p

Overnight print failed, so I'm going back tomorrow early and babysitting the whole print because it's a preventable failure. Meanwhile, I have chores and shopping, and possibly a wee bit more modeling tonight. :)
 
Last edited:
Crap! sorry to hear the print failed...good luck with this one.:thumbsup
Thanks. That's happening tomorrow. Gotta catch up on stuff today.

Just learned about yet another brilliant tool in Blender. This software just blows my mind more and more. It has a "grease pencil" that you can use to draw in 3D space -- a 3D line drawing, in other words -- and turn that into a model. So you can sketch, sculpt, clean up, and finalize your model without ever leaving Blender. Just head-pummelling. OW! Hey, that was just a figure of speech! :p

Sitting down to some more modeling right now, and I may actually finish today! Then I'm going to retopologize the P1 to fix whatever's wrong with it, and Bob's your uncle. (Not mine, though. I don't care what Bob and my mom told me when I was 7.) :p
 
:lol that's the thing with me and those types of programs. as soon as I bring them up. there are so many tools and controls. I feel like I'm looking at the controls for the most advanced fighter jet that just rolled off the line...:p
 
... I feel like I'm looking at the controls for the most advanced fighter jet that just rolled off the line...:p

Yeah, me too. So you have to start with really basic stuff, and eat the elephant one bite at a time. That's true for everything that's overwhelming, be it software or cleaning up the house... :)
 
Okay, quitting modeling for tonight -- pooped again. Ran out impulsively today to grab some acrylic hobby paints, since I've suddenly been seized by the obsession to match paints. I've been going back and forth between modeling and coats of paint, but my butt just hurts too much to sit here any longer. Netflix has caught up to Doomsday Machine, so after I post this, I'm going to watch that. :)

So here's tonight's progress: I got the pistol halves to 60/40 (roughly), and they look good. I also created the ribs that go by the back knob. If you're used to seeing them round, spoiler alert -- they're really not. I got them as close as I could to the pictures below, given that the GJ is covered with thick paint, and those ribs are partly broken. So here's tonight's work:

Screenshot 2016-05-09 21.04.21.pngScreenshot 2016-05-09 21.04.53.pngScreenshot 2016-05-09 21.05.41.pngScreenshot 2016-05-09 21.06.21.pngScreenshot 2016-05-09 22.20.07.pngScreenshot 2016-05-09 22.20.22.pngScreenshot 2016-05-09 22.20.33.pngScreenshot 2016-05-09 22.21.06.pngScreenshot 2016-05-09 22.21.32.png

And here's the detail photos I went from:

P2 Knob 01.jpegP2 Knob 02.jpg
 
Paint test went well last night -- I'm playing with some 50-50 mixes of water-based acrylics, Tamiya, Vallejo, and Testors Acryl. Got close with a mix of Testors Model Master Acryl 4750 and Vallejo 868, Euro Gray 1 and Dark Sea Green, respectively. Got some Vallejo Russian Green on its way to me now.

2016-05-10 12.25.08.jpg

That's my Darrell Hyde on top and Wand below. The big greenish mess in the middle of the plastic is where I spilled paint. :p

On my way to pick up some pills for my little furry poodums, then off to the shop to (hopefully) print at least part of a phaser.

IMG_0337.jpg
Call me poodums one more time and this leg
ends up in the litterbox.


:p
 
Last edited:
At the shop -- print's going well so far, because I'm constantly checking it to make sure the filament spool isn't getting stuck. Printer reports 63% finished, so keep your fingers crossed. Just printing the left side today, which by itself is a 3h, 40m print. Definitely feeling more confident now about this thing getting done! :)

Also about to laser cut entirely too many paint chips from a 12" x 12" styrene sheet or two. I'm taking a tip from the TPZ Midgrade Examination thread, and cutting them with a round hole you can just lay on top of the piece you're checking to make comparisons really easy. I think the thread says DuPont Spectramaster chips are like that. So I'm just gonna paint the chips, note the color on them when they dry, and go to town. Assuming I can get someone to pay. This town's incredibly frakking expensive. :p

Pix tonight.

EDIT -- No joy on the laser cutting tonight -- can't get one till 9:30pm, and my mom's already freaking out that I'm not home yet. Car repairs tomorrow, then maybe tomorrow night I'll come back to make my chips (unless after paying for the repairs, I have to spend the night in the red-light district. Maybe several nights.). :p
 
Last edited by a moderator:
Cool beans. a little lost on the paint chip thing. sounds kinda like your laser cutting plastic washers to paint and view test paint? not you my friend. it's me. easily stumped...:lol:p
 
Cool beans. a little lost on the paint chip thing. sounds kinda like your laser cutting plastic washers to paint and view test paint? not you my friend. it's me. easily stumped...:lol:p
Hehehe... Yeah, that's exactly it. They're rectangles about 2" X 1", with a hole on the right so you can see through it for easier comparison. The hole is off to the right to make room for labeling with a sharpie. Like a luggage tag with a bigger hole.
 
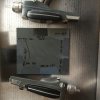
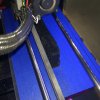
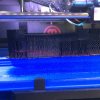
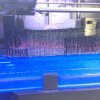
Here's some shots of today's print. I'd have more by now, but my mom insisted that today was Mother's Day, so I went with it. Sometimes it's like living in a Fellini film, or a Seth MacFarlane cartoon. The ones with Peter fighting a giant chicken. Anyway, there went my night in an orgy of pizza, pastry, and tulips. She's 91, so this may happen again tomorrow. :p

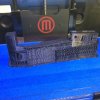
Anyhoo, here's the first succesful print of the pistol. It's the left half, and as you can see, I haven't removed the support material yet (AKA "scaffolding," AKA "tiny welfare crutches for lazy-ass plastic props that won't get a job because Bernie Sanders"). :p

Enjoy. :)

2016-05-10 19.27.31.jpg2016-05-10 19.34.24.jpg2016-05-10 19.50.53.jpg2016-05-10 19.55.47.jpg
 
This thread is more than 5 years old.

Your message may be considered spam for the following reasons:

  1. This thread hasn't been active in some time. A new post in this thread might not contribute constructively to this discussion after so long.
If you wish to reply despite these issues, check the box below before replying.
Be aware that malicious compliance may result in more severe penalties.
Back
Top