Urdnot Wrex Build

CafeUlg

Member
My next build after making Grunt is going to be Wrex (maybe I secretly wanted to make Wrex all along?)

I've been hoovering up build information from both thevitavink and booksandcorsets Wrex builds, but I'm building mine from a pepakura base like I did with Grunt

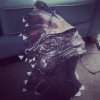
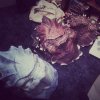
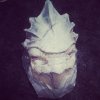
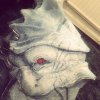
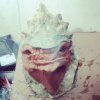
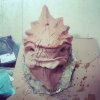
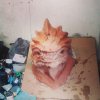
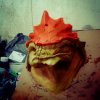
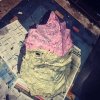
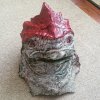
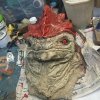
I've made three Wrex heads from pepakura so far and have finally made one that looks ok and not incredibly derpy
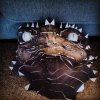
IMG_20140617_203518.jpgVersion 1 super derpy
IMG_20140712_011423.jpgVersion 2 slightly derpy
10683961_329352150557863_15881495_n.jpg
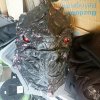
10643984_1379803075643064_116891345_n.jpgVersion 3, no cut corners this time
10632077_554729951295633_255351864_n.jpgHe's been coloured blue because for some reason my printer isn't liking red at the moment, it was either pink or blue

Here's a link to my terrible unfold if anyone want to have a go building him :)

https://www.4shared.com/file/5uRICPKlba/Wrex-Head-unfold-by-cafe-ulg.html

I'm going to strengthen the paper up with paper mache instead of fiberglass and resin this time because paper mache is free and my budget is a little smaller this time

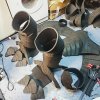
foam-unfold.jpg I've made a bit of a start of the foam unfold for the armour too

I'd also love to have a go with making a movable jaw this time

20140630_125529.jpg

I'm basing my ideas for this on things like the animatronic alien mask on youtube
and similar non radio animatronics (I wish I could completely figure out how the pulley system works on that alien mask, but I'd be happy with just a direct jaw wire system without the lip curl)

Onto paper macheing over the next couple of days :)
 
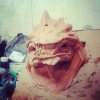
Quick update, thanks to my partners awesome knowledge of paper mache (it's been twenty years since I've used it XD) and her great idea of backing problem areas with masking tape he's definitely looking much more like a character. I'm going to hit up the front with some cheap resin then apply a layer of clay and get the details and hopefully the symmetry sorted out :)

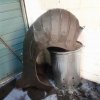
IMG_20140928_210638.jpgIMG_20140928_210815.jpgIMG_20141003_104557.jpg
 
10615378_1505846436332306_6290237348552547686_n.jpg10486138_10154799465540043_6967998061794425732_n.jpg

Slowly making progress on this, I've got all the armour patterns printed off too which I'm going to cut out over the next couple of days or so
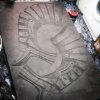
Getting there? XD
 
10616211_1514317742151842_3728609900008238300_n.jpg
Evened out the crest and scraped back the right eyebrow so that both eyes are looking forward now. I've got to sculpt the back of the neck I just got to hope I don't run out of clay again (I'm trying to be all Principal Skinner on this build, 'I'm on a tight budget here' XD)

1455867_1513852435531706_1136012474770127680_n.jpg

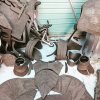
Cut and glued out 84 pages of armour pattern, ready to transferred to EVA foam once my workshop is cleared of insulation foam XD
 
Pretty much finished the sculpt now, I'm probably going to mould it with silicone due to all the undercuts on his head crest

10686802_1525040591079557_6448540657010784970_n.jpg

I probably attempt to skin flexible foam into the silicone mould, I didn't think it was possible but if there's a tutorial for it on the brick in the yard I'll give it go XD

https://www.youtube.com/watch?v=xIRbHncayTU

Did a quick colour mock up of what the sculpt might look like when it's finished.

wrex colour mockup.jpg

It's so weird it looks like a drawing someone else has done not something I've made XD
 
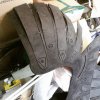
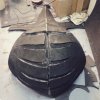
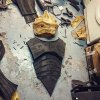
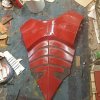
Finally finished routering out the main body of my Wrex armour, I'm going to sand out the imperfections then I might even cut it out (shock horror)

10980707_1552314788352137_1490860128997497628_n.jpg

I'm planning on getting as much detail as I can into the foam as I can while it's still flat, flat pack armour making if you will XD
 
Been a while since my last update (damn you work XD)

Took the pod apart to achieve the raised spine pieces

1453299_1555381548045461_7212638741545065696_n.jpg

Stuck it together roughly

10455054_1568800736703542_454285701758975806_n.jpg

Started blocking out the legs, chest and arms

10690122_1590952781155004_1925024959428880354_n.jpg

11333470_1848769462014331_90718354_n.jpg

Made a worbla under skull

11393235_1593960357520913_3542635318521200700_n.jpg

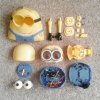
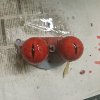
Got a Despicable Me Minion toy really cheap second hand and harvested it for it's eye mechanisms, I'm still trying to figure out how I'm going to insert them but I lucked out I think these eyes are the perfect size :)

10923443_1585355881714694_1146504458862956795_n.jpg
 
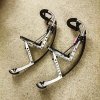
Bought some jump stilts (on the cheap, £30 for very second hand)

11267230_1430970253890070_15414595_n.jpg

Decided after they arrived that I preferred life over death and took the stilts apart to use the leg brace section

11429962_10155646111510043_7855855095822257793_n.jpg

Bolted on some cheap comfy memory foam slippers

10426092_1598468543736761_5075040787989341229_n.jpg

A mock up of how the digitigrade-esque legs are going to look, I'm pretty pleased with how they've turned out considering this isn't what had planned originally

I've tried these on and I can actually walk quite well in them, which is a first for my recent batch of costumes

11385127_552653248205970_126491829_n.jpg

Sprayed the minion eyes with red primer then painted in the detail with some red acrylic then finished them with a bit of high gloss varnish.

Going to try and get the main parts constructed this weekend (got a weekend off yay)
 
So near and yet so far...

11698397_10155734488950043_617519984649244660_n.jpg
11253221_1610989672484648_2722080651367058481_n.jpg

For the paint job I went for one coat of filler primer, one coat of red primer and a coat of gloss red on top. Then I went in with a big brush and stippled in a load of texture with two different shades of red

11737927_1612130005703948_6901959777243051483_n.jpg

Using a cheap radio operators backpack frame from eBay and some wizardry ideas from my family to make this thing easier to wear. My dad welded the brackets to the steel frame and provided me with the pipe clips and my brother ground down the edges of the bolts so they would sit correctly. This thing is now finally wearable


11737850_1612452962338319_7692519805608149420_n.jpg11140060_1612452985671650_6732362026073692111_n.jpg

Got to de-mould the head next that's the next major thing *fingers crossed*
 
Re: Urdnot Wrex Build [COMPLETE]

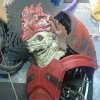
Right one year later and my Wrex costume is finally finished

Lots of problems and set back on this build but it's all a learning process I suppose

As I couldn't run latex into a silicone mould and for some reason I could never get enough material into the giant mould (even expanding foam) due to not being able to afford enough to back-fill the whole thing.

img_54ae68c3ede92.jpg

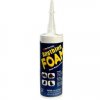
So I ended up using Anything Foam from plastidip, which after some experiments I discovered will cure in a silicone mould leaving a thick latex/foam skin that is tough but flexible :)

I probably shouldn't have used a silicone mould in the first place, but I know that for next time now :)

Which left me with this, not much to work with but with the very generous help of Ascension Props sending me his Krogan pepakura for foam unfold I was able to put a EVA foam skull under this and glue it down with contact cement.

13100765_1715016558748625_3830413073109297856_n.jpg
13312897_1726865900897024_6222397834885551687_n.jpg

From this base I build up layers of a paint latex mix


13494870_1733065483610399_9131478779841334043_n.jpg13529230_1734432996806981_839556225038227660_n.jpg13528800_1734807716769509_4938007118369258093_n.jpg

Then with my partners help we figured out a way of attaching the head to the armour using cheap plumbing parts

13567323_1738542499729364_3183620109915924902_n.jpg

I had to borrow an estate car to get him there but I was able to wear him over two days at Amecon 2016
13920581_1750289808554633_42571643634118995_n.jpg13920302_175716472847708_2406010607506262487_o.jpg13738319_1133942149962415_6764071597861664938_o.jpg13907204_1750692338514380_8647468445301023873_n.jpg14124438_1251878804825385_47304663406947274_o.jpg

tumblr_obwszh9xKM1rrnzw3o1_500.gif

-Notes for next time-

I think I'm going to make any large costumes like this in the future out of soft foam with maybe a covering of Plastidip Anything Foam to make it easier to transport and (hopefully) wear
 
This thread is more than 7 years old.

Your message may be considered spam for the following reasons:

  1. This thread hasn't been active in some time. A new post in this thread might not contribute constructively to this discussion after so long.
If you wish to reply despite these issues, check the box below before replying.
Be aware that malicious compliance may result in more severe penalties.
Back
Top