Build: Greedo Killer: "Accurized" Denix


Thanks, Matt. High praise as always!

So I've made some good progress, but before I get into that I have a question for anyone that's made a GK ...

I decided to do a dry-fitting to ensure that I'm confident in re-assembling the Denix ... I've had it broken down completely for over a year now and don't want to give it any unintentional weathering trying to cobble it together for the first time once everything is blued and painted. Once it was assembled, I realized that I have a clearance issue with the scope and the sight. The sliding sight's knurling is right up on the scope's knurling, to the point where I had to force it a bit just to have it resting flat in place:


Is this normal? I'm pretty confident that the mount is where it should be ... does this mean that my Weaver rings are the wrong height? I'm pretty sure I've read every Greedo Killer build on the RPF and haven't heard about this clearance issue. Any advice would be greatly appreciated!

Now for the fun stuff. We finally got one of those 70 degree days I was talking about, and I had a few hours before work so I buffed the scope with some steel wool and hit it with a few coats of satin black. Couldn't think of a better method so I used the old coat hanger. I'll have to touch up the area at the bottom where it was resting on the hanger ...


I'm pretty happy with how it turned out. Way too pristine though! Needs weathering. I'm going to weather everything once all of the components are done. I'd like to see the blaster in a somewhat pristine state first, at least for a few good photos.


Also found some time to paint the scope mount. A few imperfections, but it's going to be weathered soon, so ...


The more I look at the counter job I did on those scope mount disks the more I notice how sloppy they are. I might look into replacing them at some point if I can find another set or get my hands on a lathe.

After letting the walnut stain soak in, I rubbed the grips down with some Tru-oil and waited for them to dry. I then buffed them with some steel wool and repeated the process a few times. I intentionally went a bit overboard with the steel wool while doing this in an attempt to give them a more weathered feel. I like that they are a bit more worn and have a nice shine on them now, but they are a bit darker than I would have preferred. I don't think they're necessarily inaccurate, but I was aiming for that slightly more blonde looking finish I've seen others pull off, and am beginning to wonder if I didn't dilute the Walnut stain enough, or if I really even needed it in the first place. The Tru-Oil definitely darkened them up a good amount on its own, but I'm OK with them. They look miles better than the Denix grips and feel great:


Lastly, I tackled the trigger. I hadn't made up my mind if I was gonna attempt this or not, but recently moved in with my girlfriend, who is also an artist/hoarder and has a ton of tools, including a dremel. Sorry the image is upside down ... I tried everything:


Definitely should have forked out the money for a dremel sooner, as it made quick work of the trigger. Once that was through I said what the heck and went back and even further sharpened up some of the edges on the frame, and further tidied up the trigger guard area:


The end is in sight now, pretty sure I'll be wrapping this thing up soon as it's getting closer and my excitement is building to have it done. I'm already thinking about the next project ... can hardly stop myself from checking Scott's interest thread for a machined Mauser replica every hour ... if you haven't caught wind of that effort yet, check it out!!! More interest means increased likelihood that these things will get made, and this GK is going to get lonely sitting on my shelf all by itself!

http://www.therpf.com/showthread.php?t=272875

Stay tuned!
 
Last edited:
5 slotted sunken bolts are the same kind (but different lengths), and obvisiously 2 are smaller.

His countersinks are a little bit to deep, just a tad - top of the bolts should be more or less flat with the surrounding surface.
A little bit like this:

Commission009.jpg
 
wonderful detailing! This is going to look nothing like a Denix

are all the countersink bits the same shape?

Thanks for the kind words! As Lichtbringer said, all three of the spacers are do-able with a bit like the one I posted above, but I hadn't bought that until after I had already attempted to counter them with a large drill bit. It would be a piece of cake with the proper bit, I should have waited.

His countersinks are a little bit to deep, just a tad - top of the bolts should be more or less flat with the surrounding surface.

Agreed, they are way too deep. I thought about flipping them over and trying again but didn't want to blow out the centers. It's driving me crazy!
 
Last edited:
So I've had a little free time lately to FINALLY experiment with bluing the Denix. After trying a few different approaches, I ended up going with Super Blue. Aluminum Black worked great as well (with the proper treatment) but was a little too black for my taste, as I'm trying to mimic the more greyish/blue finish of an MGC.

I put a lot of effort into surface prep beforehand ... re-sanding every surface of each piece with 800 grit paper, then rinsing with cold water, then rubbing down with alcohol (all while wearing gloves to avoid getting my oils on the metal) then directly into the oven for 10 minutes at 300 degrees. I found that when I took the time and went through all of these steps before using either product, I was able to get a very consistent finish, so long as I could submerge the piece fully all at once. I started to run out of super blue when I finally got to the upper, and used a brush to cover the parts that weren't submerged, and it shows. You can see some of the defining drip lines from where it had time to sit before more super blue hit. So It seems that that's the trick, getting the whole piece covered all at once. I'm tempted to re-do the upper, but I've already covered the whole Mauser with a few coats of Renaissance Wax, and I already stripped all of that off of the lower once to re-do the finish, and know how much of a PITA it is. Plus, I'm out of super blue, so ... voila!

36953885131_02e0d9ab39_o.jpg


36826751180_43f52c79e5_k.jpg


I also strapped on the grips. I had to grind the excess bolt down a bit but they feel great! Just have some finishing touches to make, like filing down Tom's firing pin to my liking, attaching the lenses in the scope, and weathering it! That's still my old inaccurate 12-fin anodized grill ... It's just on there with some double sided tape for now, as I'll be purchasing one of Field Marshall's accurate 11-fins once those become a reality! Here's a shot of it all assembled as is. Fresh off the assembly line!

37052429872_67daf24a3a_k.jpg


I'll likely be finishing this up today/this week, so stay tuned for another update and reveal of my next OT build!
 
Last edited:
I've gotten around to some of the finishing touches on the Greedo Killer, and weathered it. This thing is practically done, just needs that new 11-fin grill from Field Marshall, once they're available!

I further re-shaped the hammer with the dremel, and started from scratch with the knurling with a small file. Not perfect, but I'm happy with it. I also hit the knurling with some aluminum black and left it in the recesses ...


I tried my hand at weathering the scope mount. I used a small flat head screwdriver to gouge/scratch the paint followed by 0000 steel wool. Also some 800 grit sandpaper on the high spots. I roughly tried to replicate the marks shown in the post-production photo ...


37095162525_c597ec24b5_o.jpg


Weathered the scope as well. This one is currently for sale in the junkyard, if you're interested (https://www.therpf.com/showthread.php?t=281326)

36906557746_4e0e32f2d8_o.jpg


36906556956_774d35c2d9_o.jpg


36953492241_4e45514f16_o.jpg


And here's a wide shot with the weathering. Just needs that grill!

 
Last edited:
MB. I'm really impressed how you stuck with the GK over a long period of time. I think I would lose interest after a while.
So, can I ask what you did to accommodate the lack of space between the scope and the denix? Did you simply add spacers between the mount and the denix to create some clearance?

Thanks, El Toro! Yes, it was definitely a long haul but I got to really savor the building process. I definitely did get tired of it at times though, and would put it down for sometimes 6 months or more on end, but there was always some new more accurate run, or another inspiring Denix accurization thread on here that would get me back into it. In fact, I just sold the replica Compac pictured above and purchased a new replica from Field Marshall, that just came in the mail yesterday. I'll post more about that soon (hopefully tonight).

To answer your question though, I did not use spacers between the mount and Mauser body. The knurling on the side of the sliding sight was already very unattractive (full of casting lines) and stuck out a bit too far, so I just shaved it down with the dremel enough for the scope to clear, and re-did the knurling with a file. I'm at the office right now but can post a picture of that later as well. Thanks for following!
 
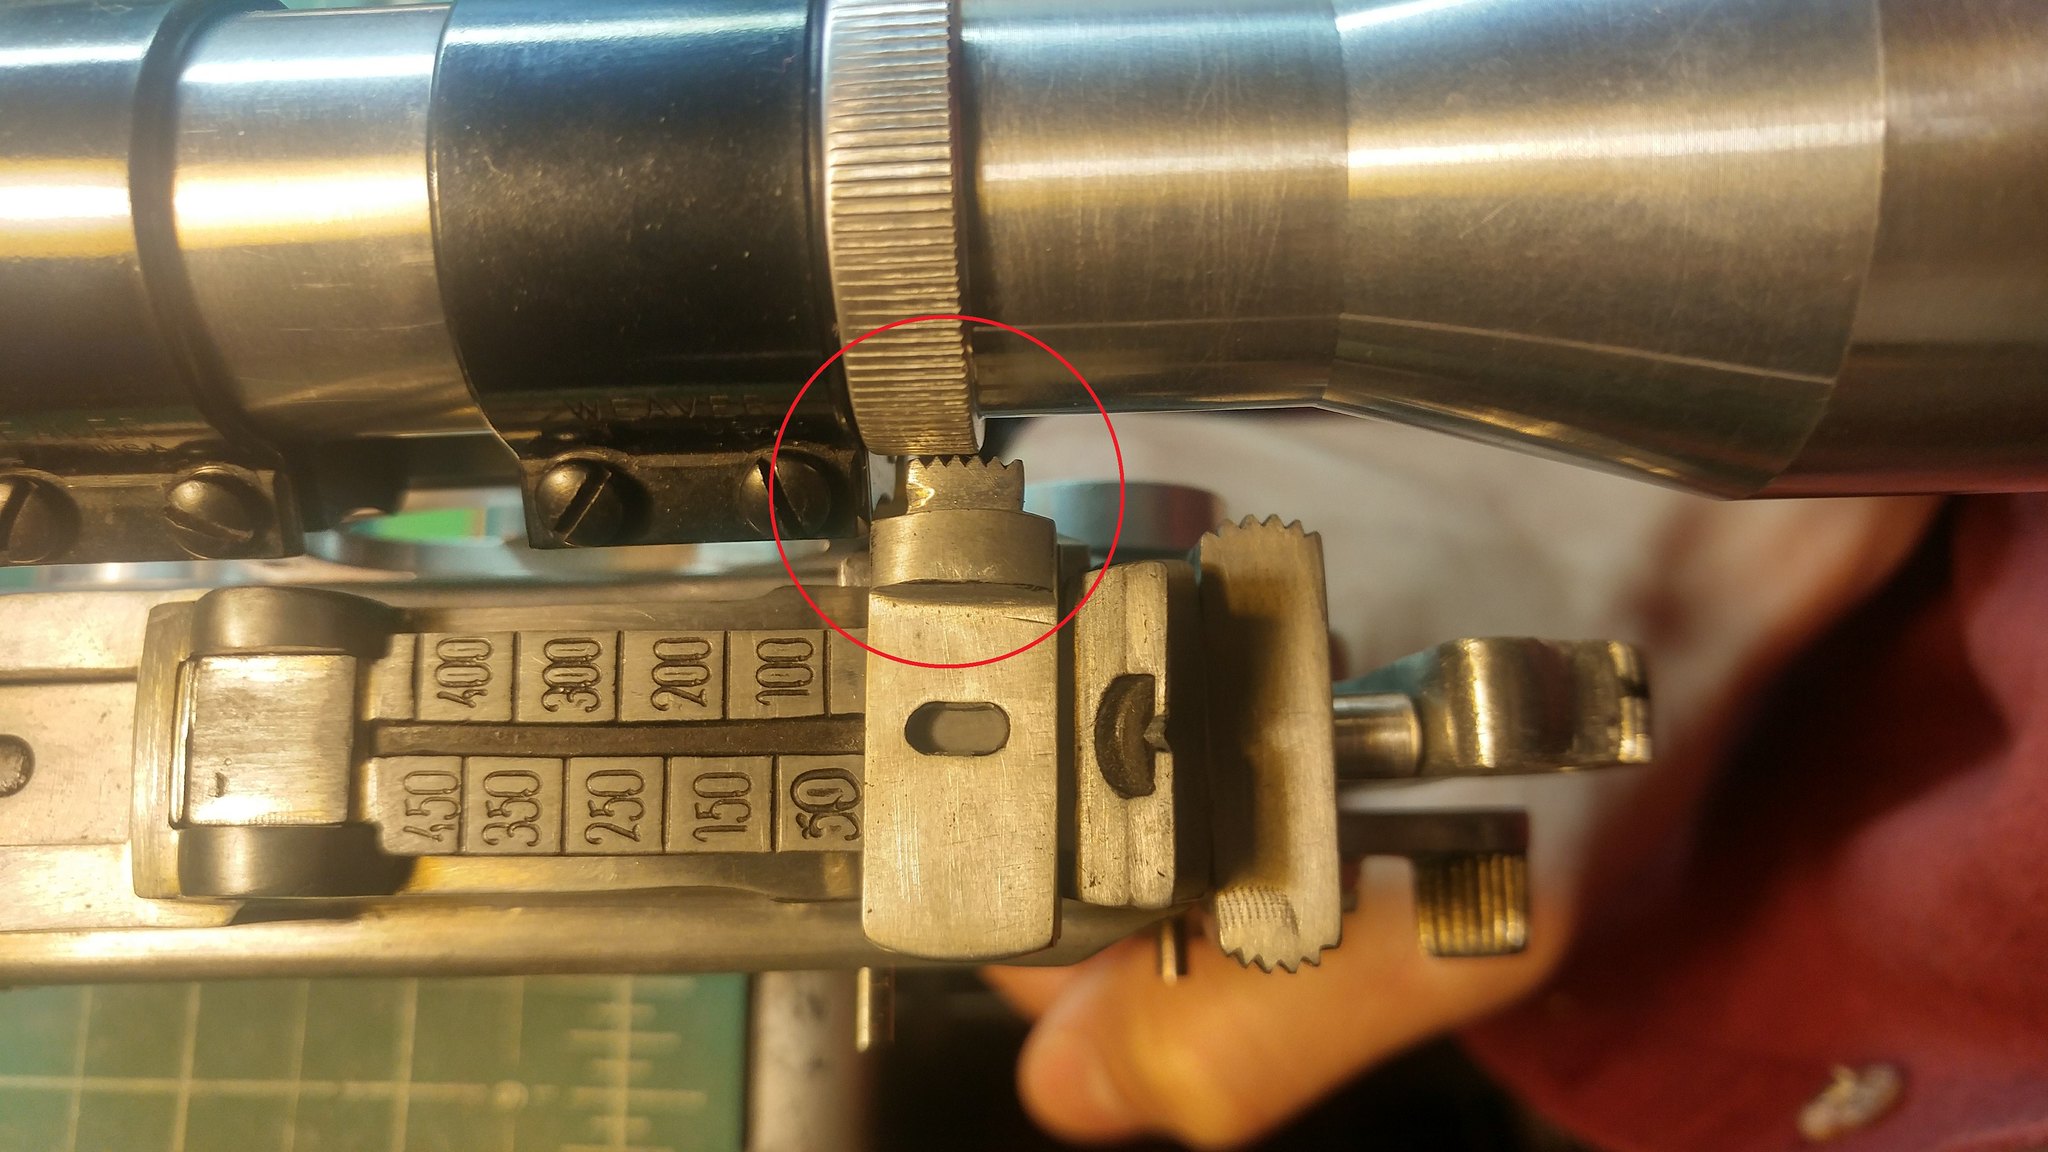
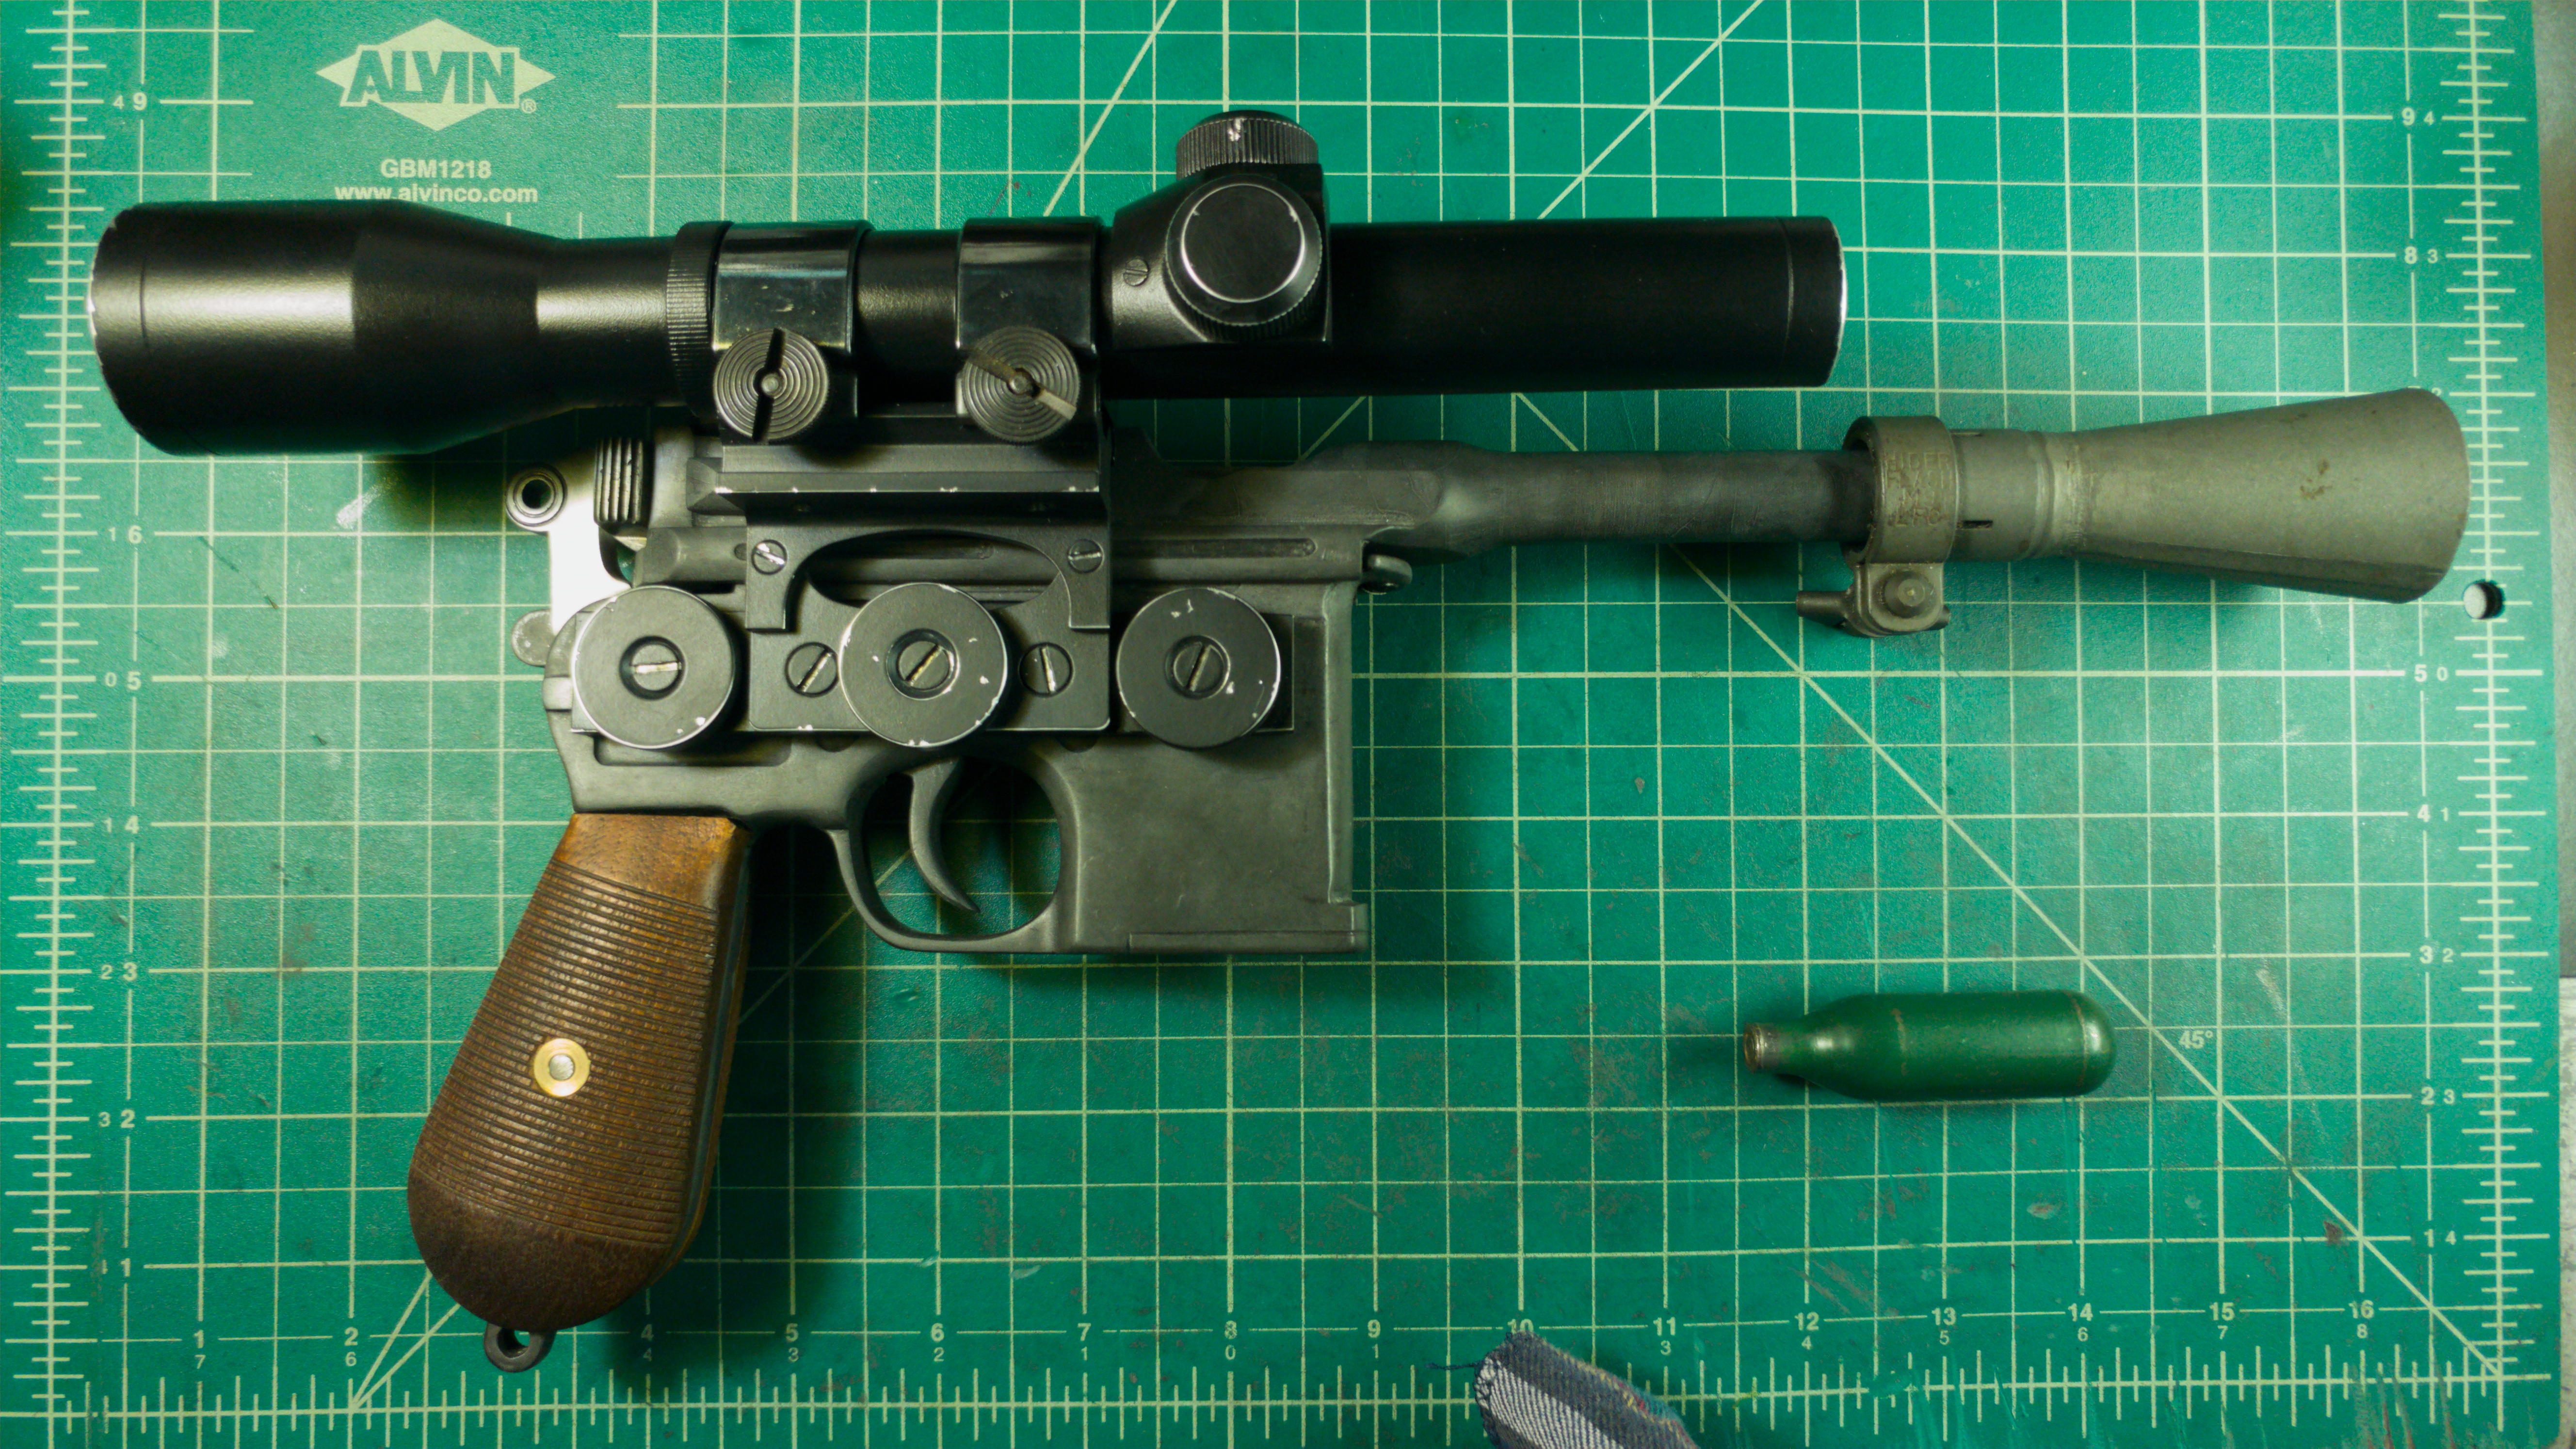
So I recently decided to sell my Solo's Hold Greedo Killer Scope and purchase one of Field Marshall's new replicas. Both are great replicas and have their strengths, but the main feature that sold me on Field Marshall's was that it includes the step up in diameter for the front bell (circled below in red) which to me is one of the defining features of this scope:

EDIT: Field Marshall has since tweaked the design of his scope replica, so some of these build details don't hold true anymore. I've made note below when this is the case ...


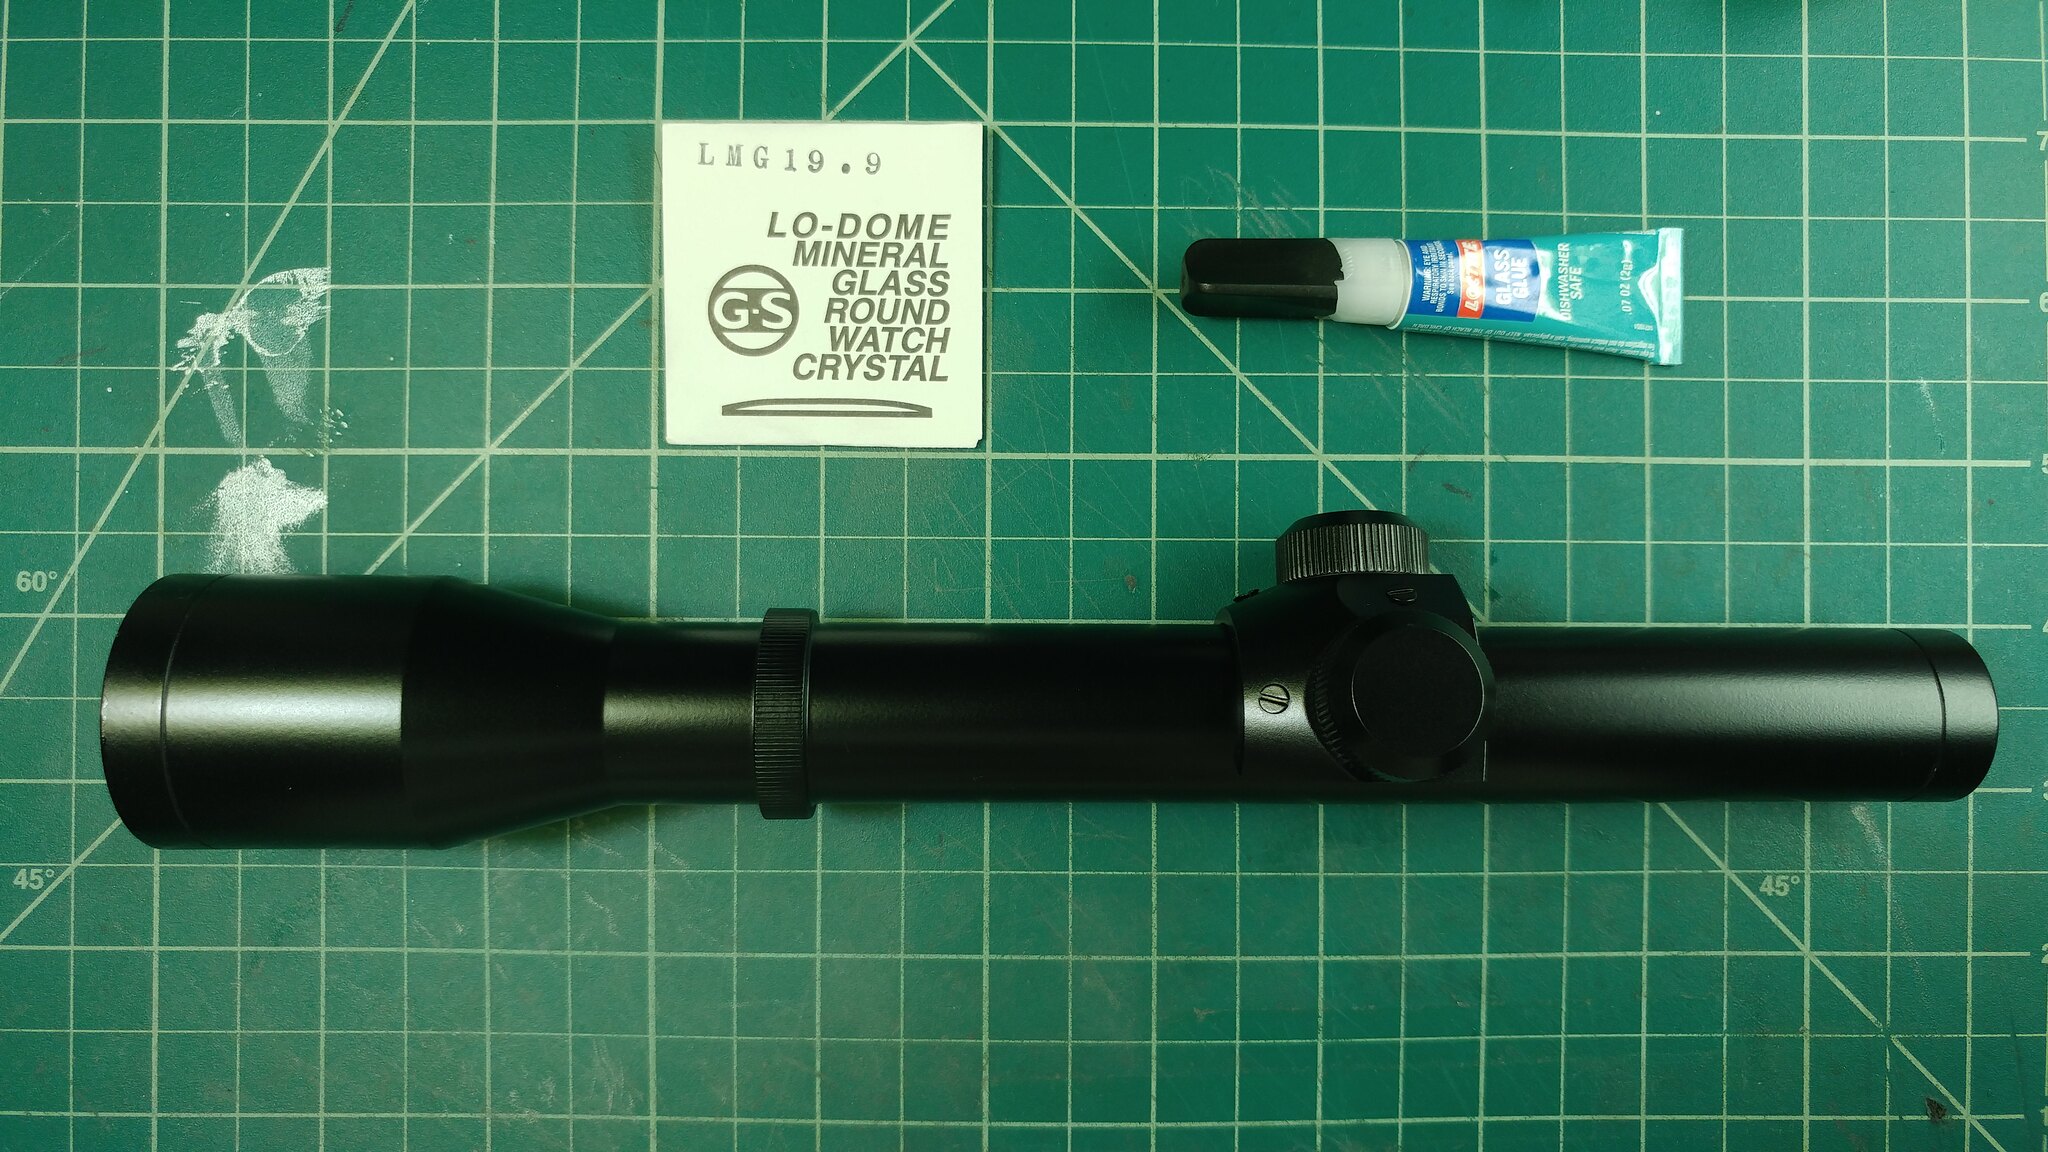
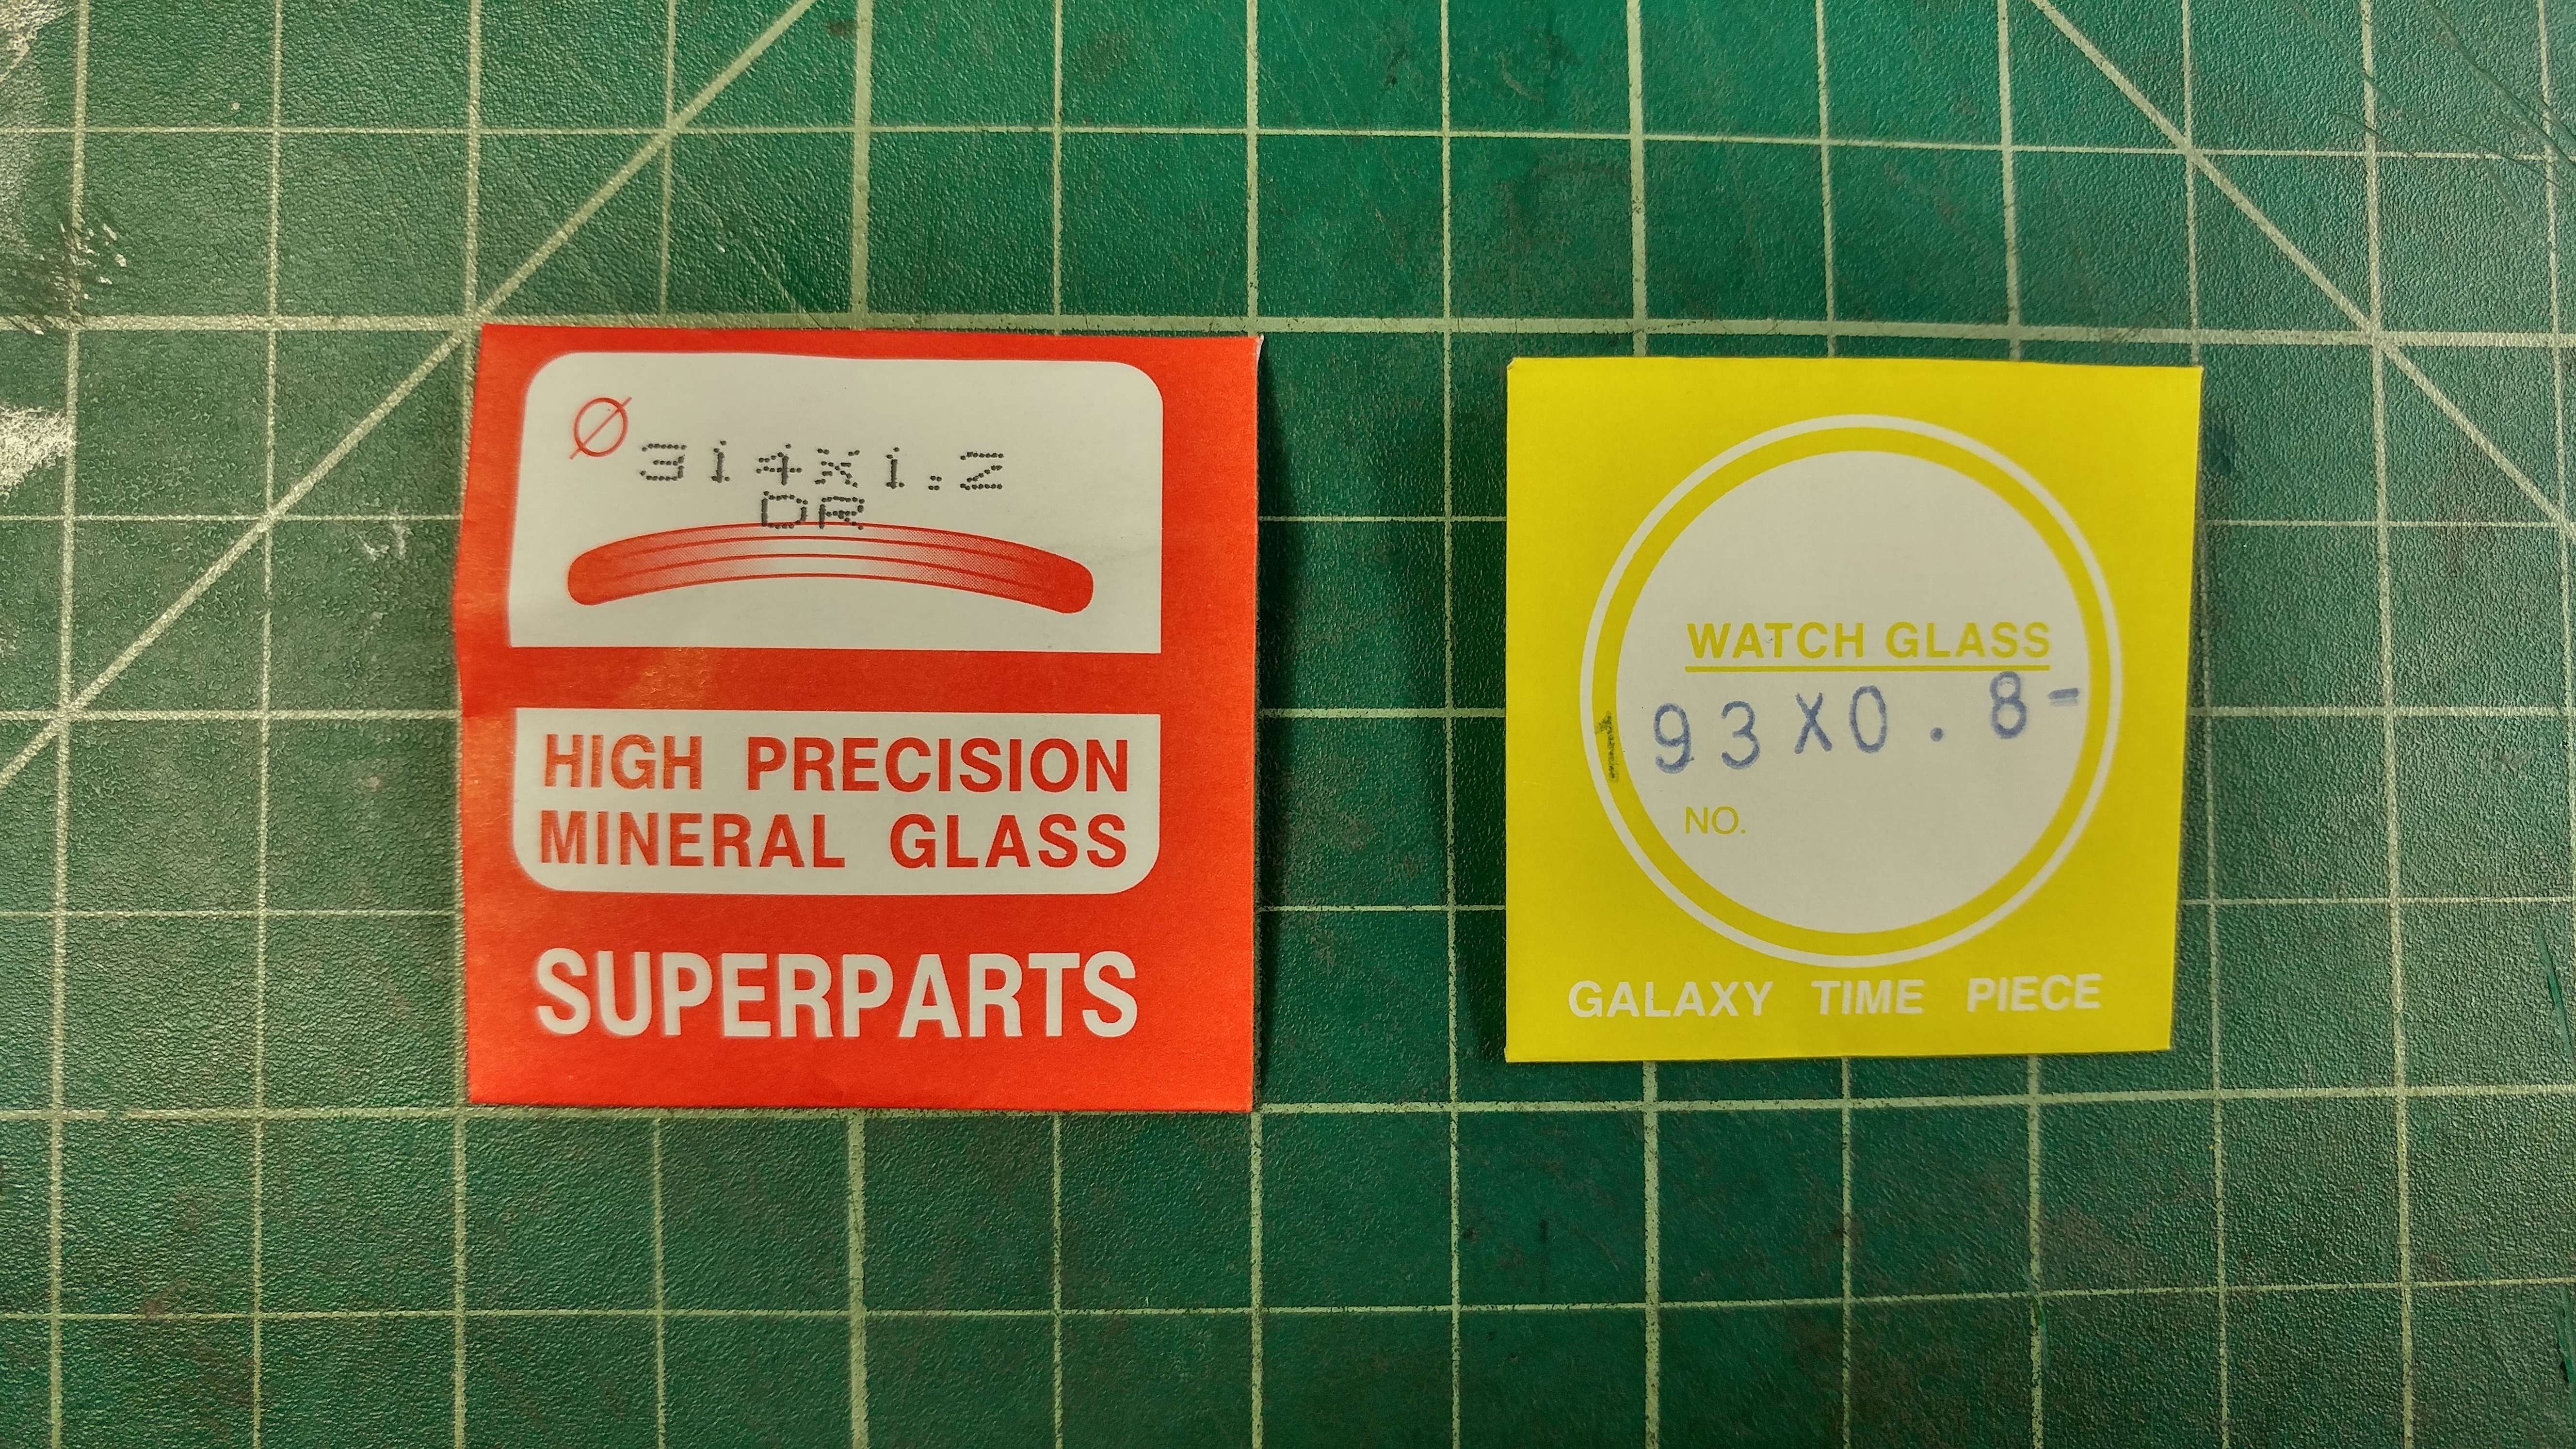
FM's replica comes with flat acrylic lenses. After some searching, I was able to find domed glass watch crystals on eBay that fit both ends perfectly:


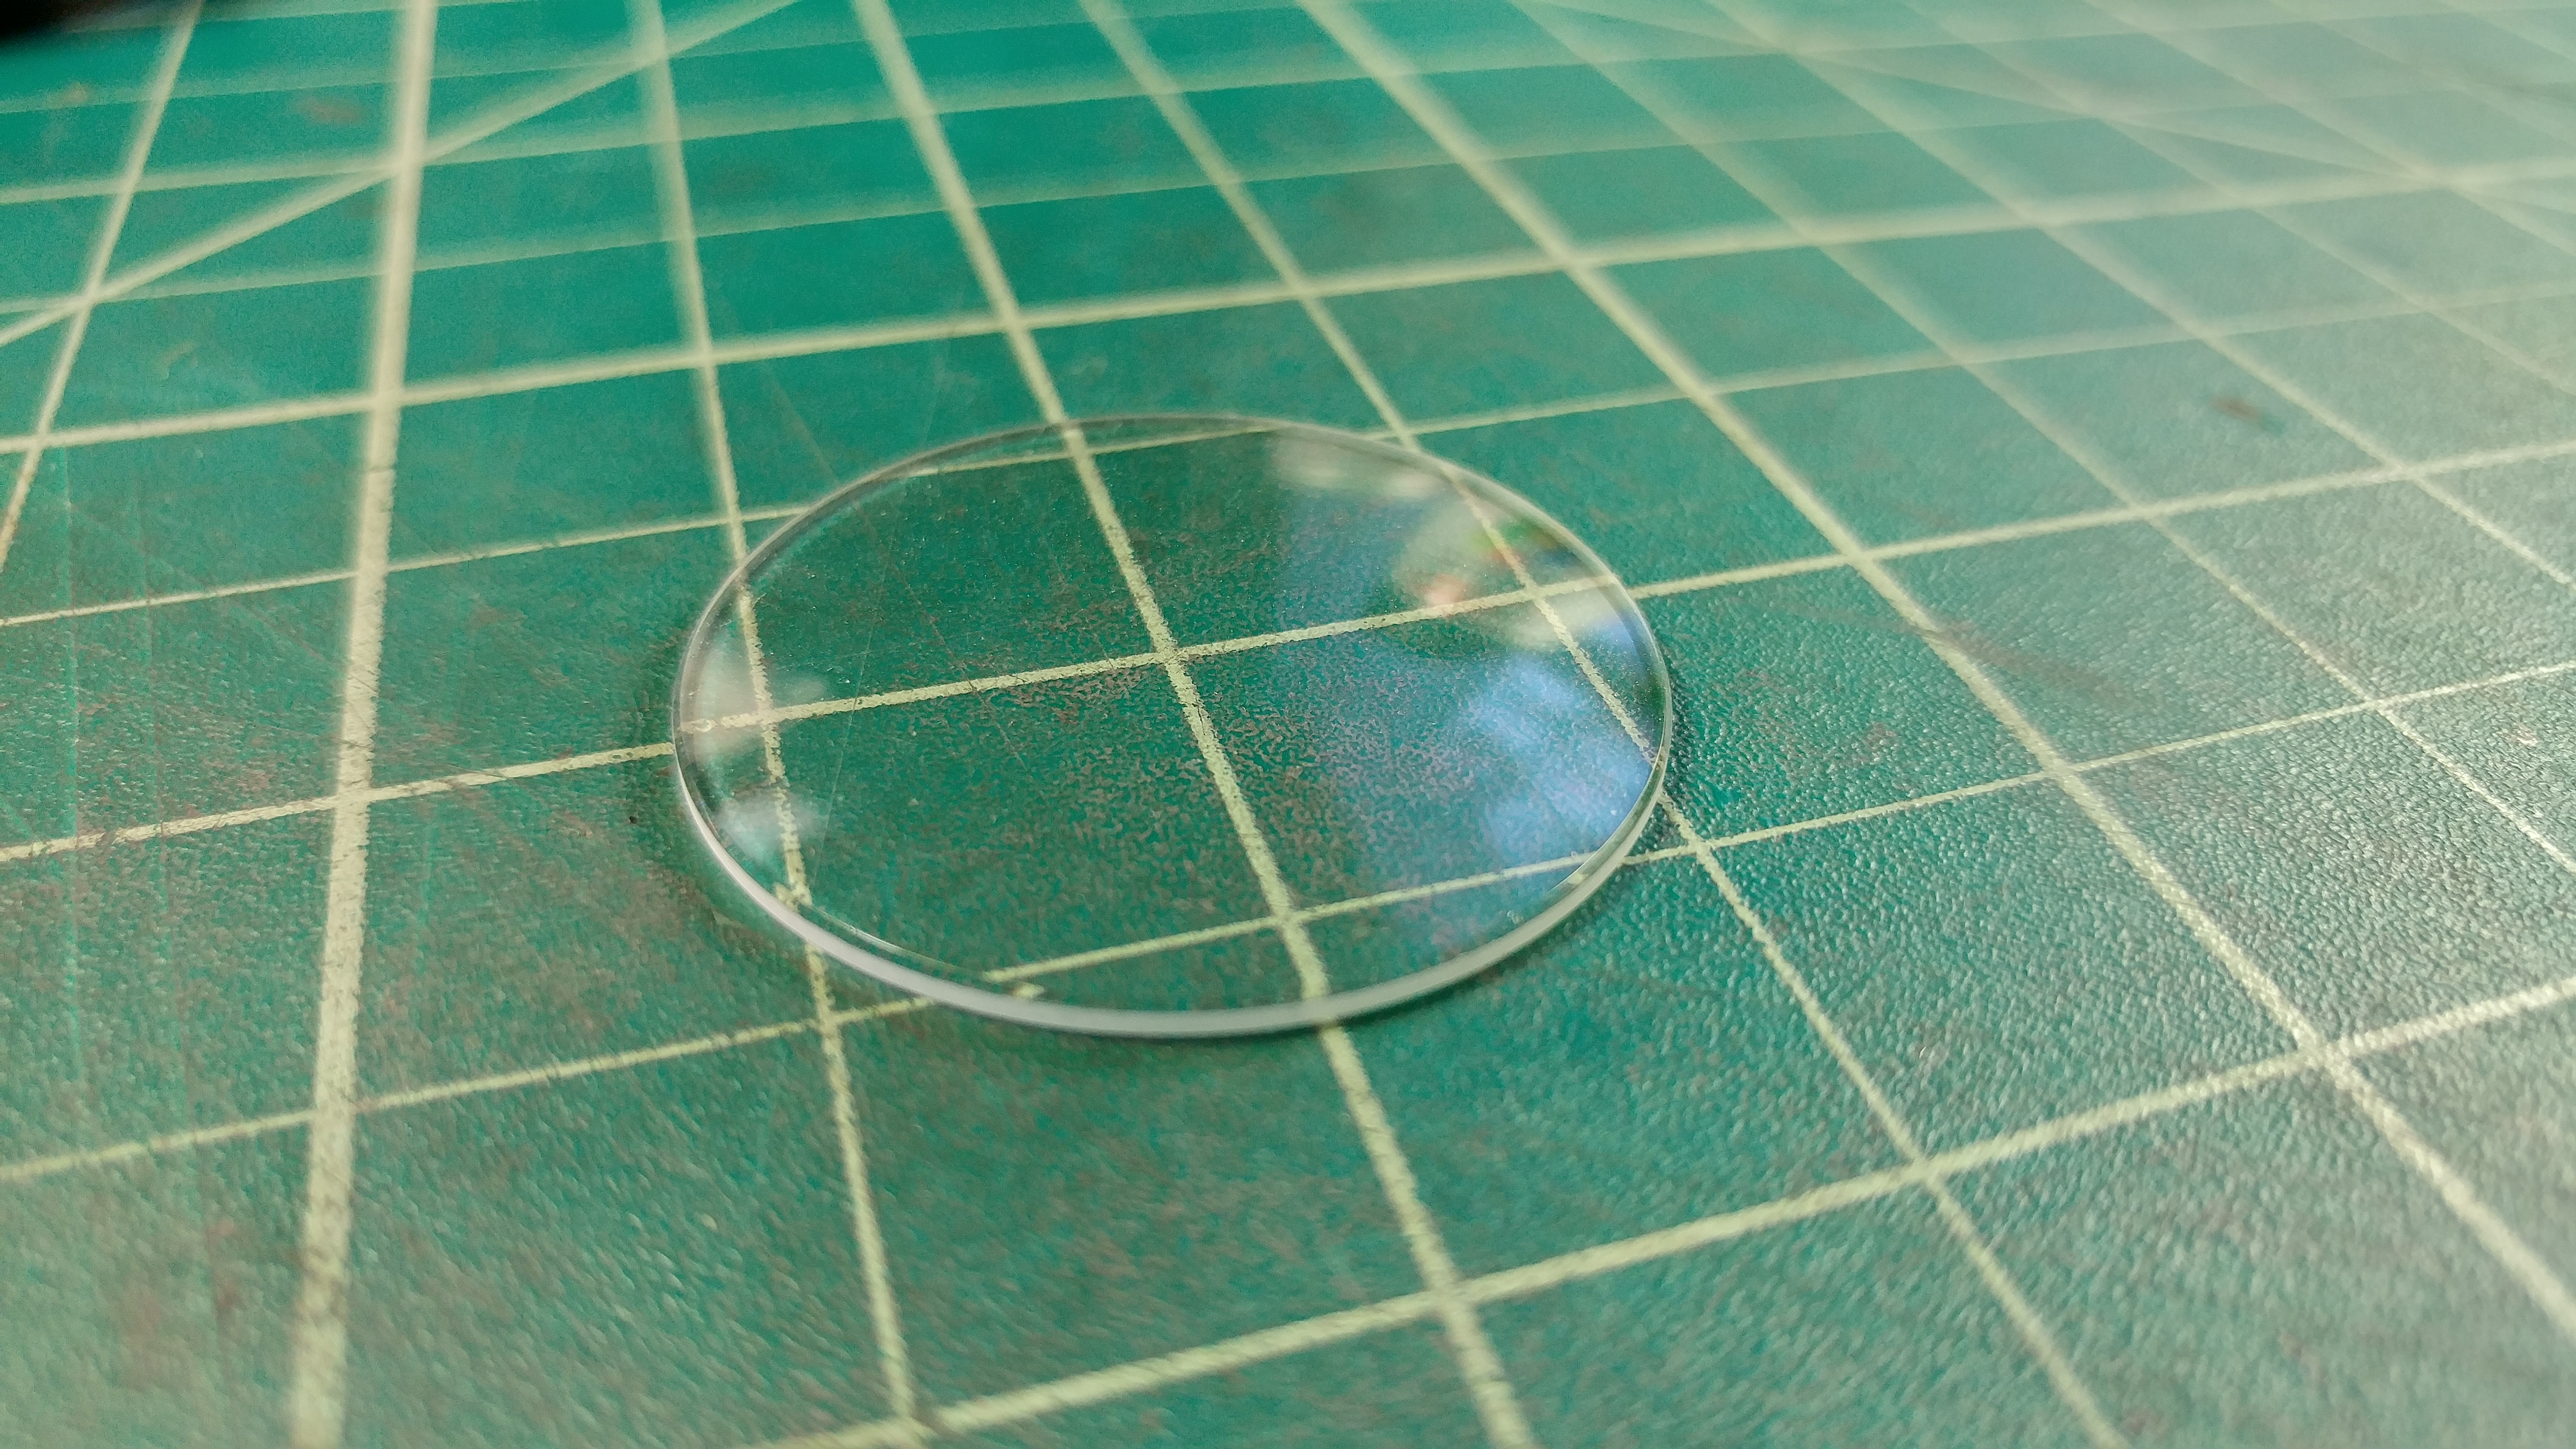
EDIT: Field Marshall has since tweaked his design and these lenses wouldn't fit the new one, so don't buy them! I've also realized that if you go with a thicker "single dome" watch crystal you can get a magnifying effect. It won't focus, but the blurred effect adds to the illusion of a working scope.

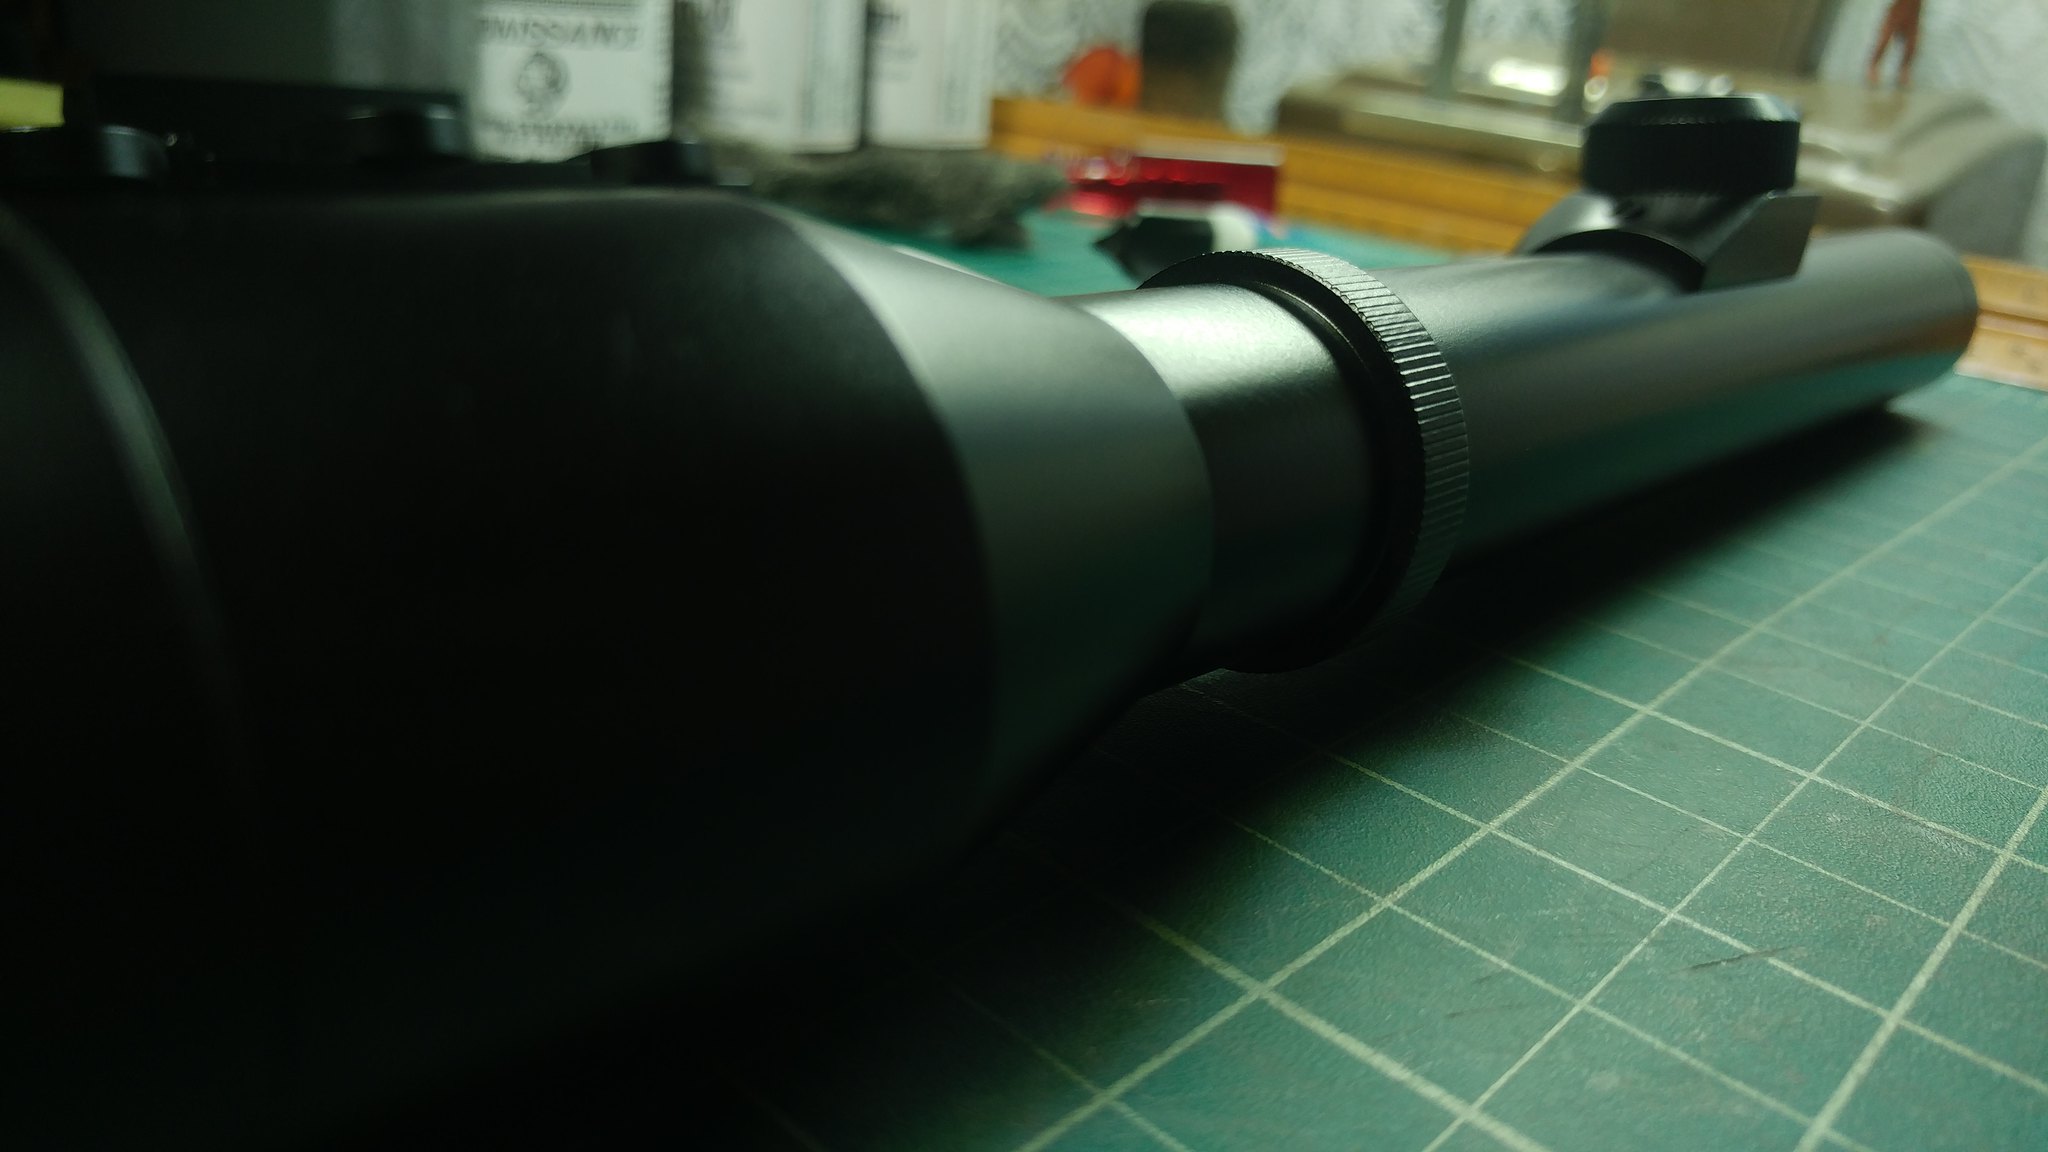
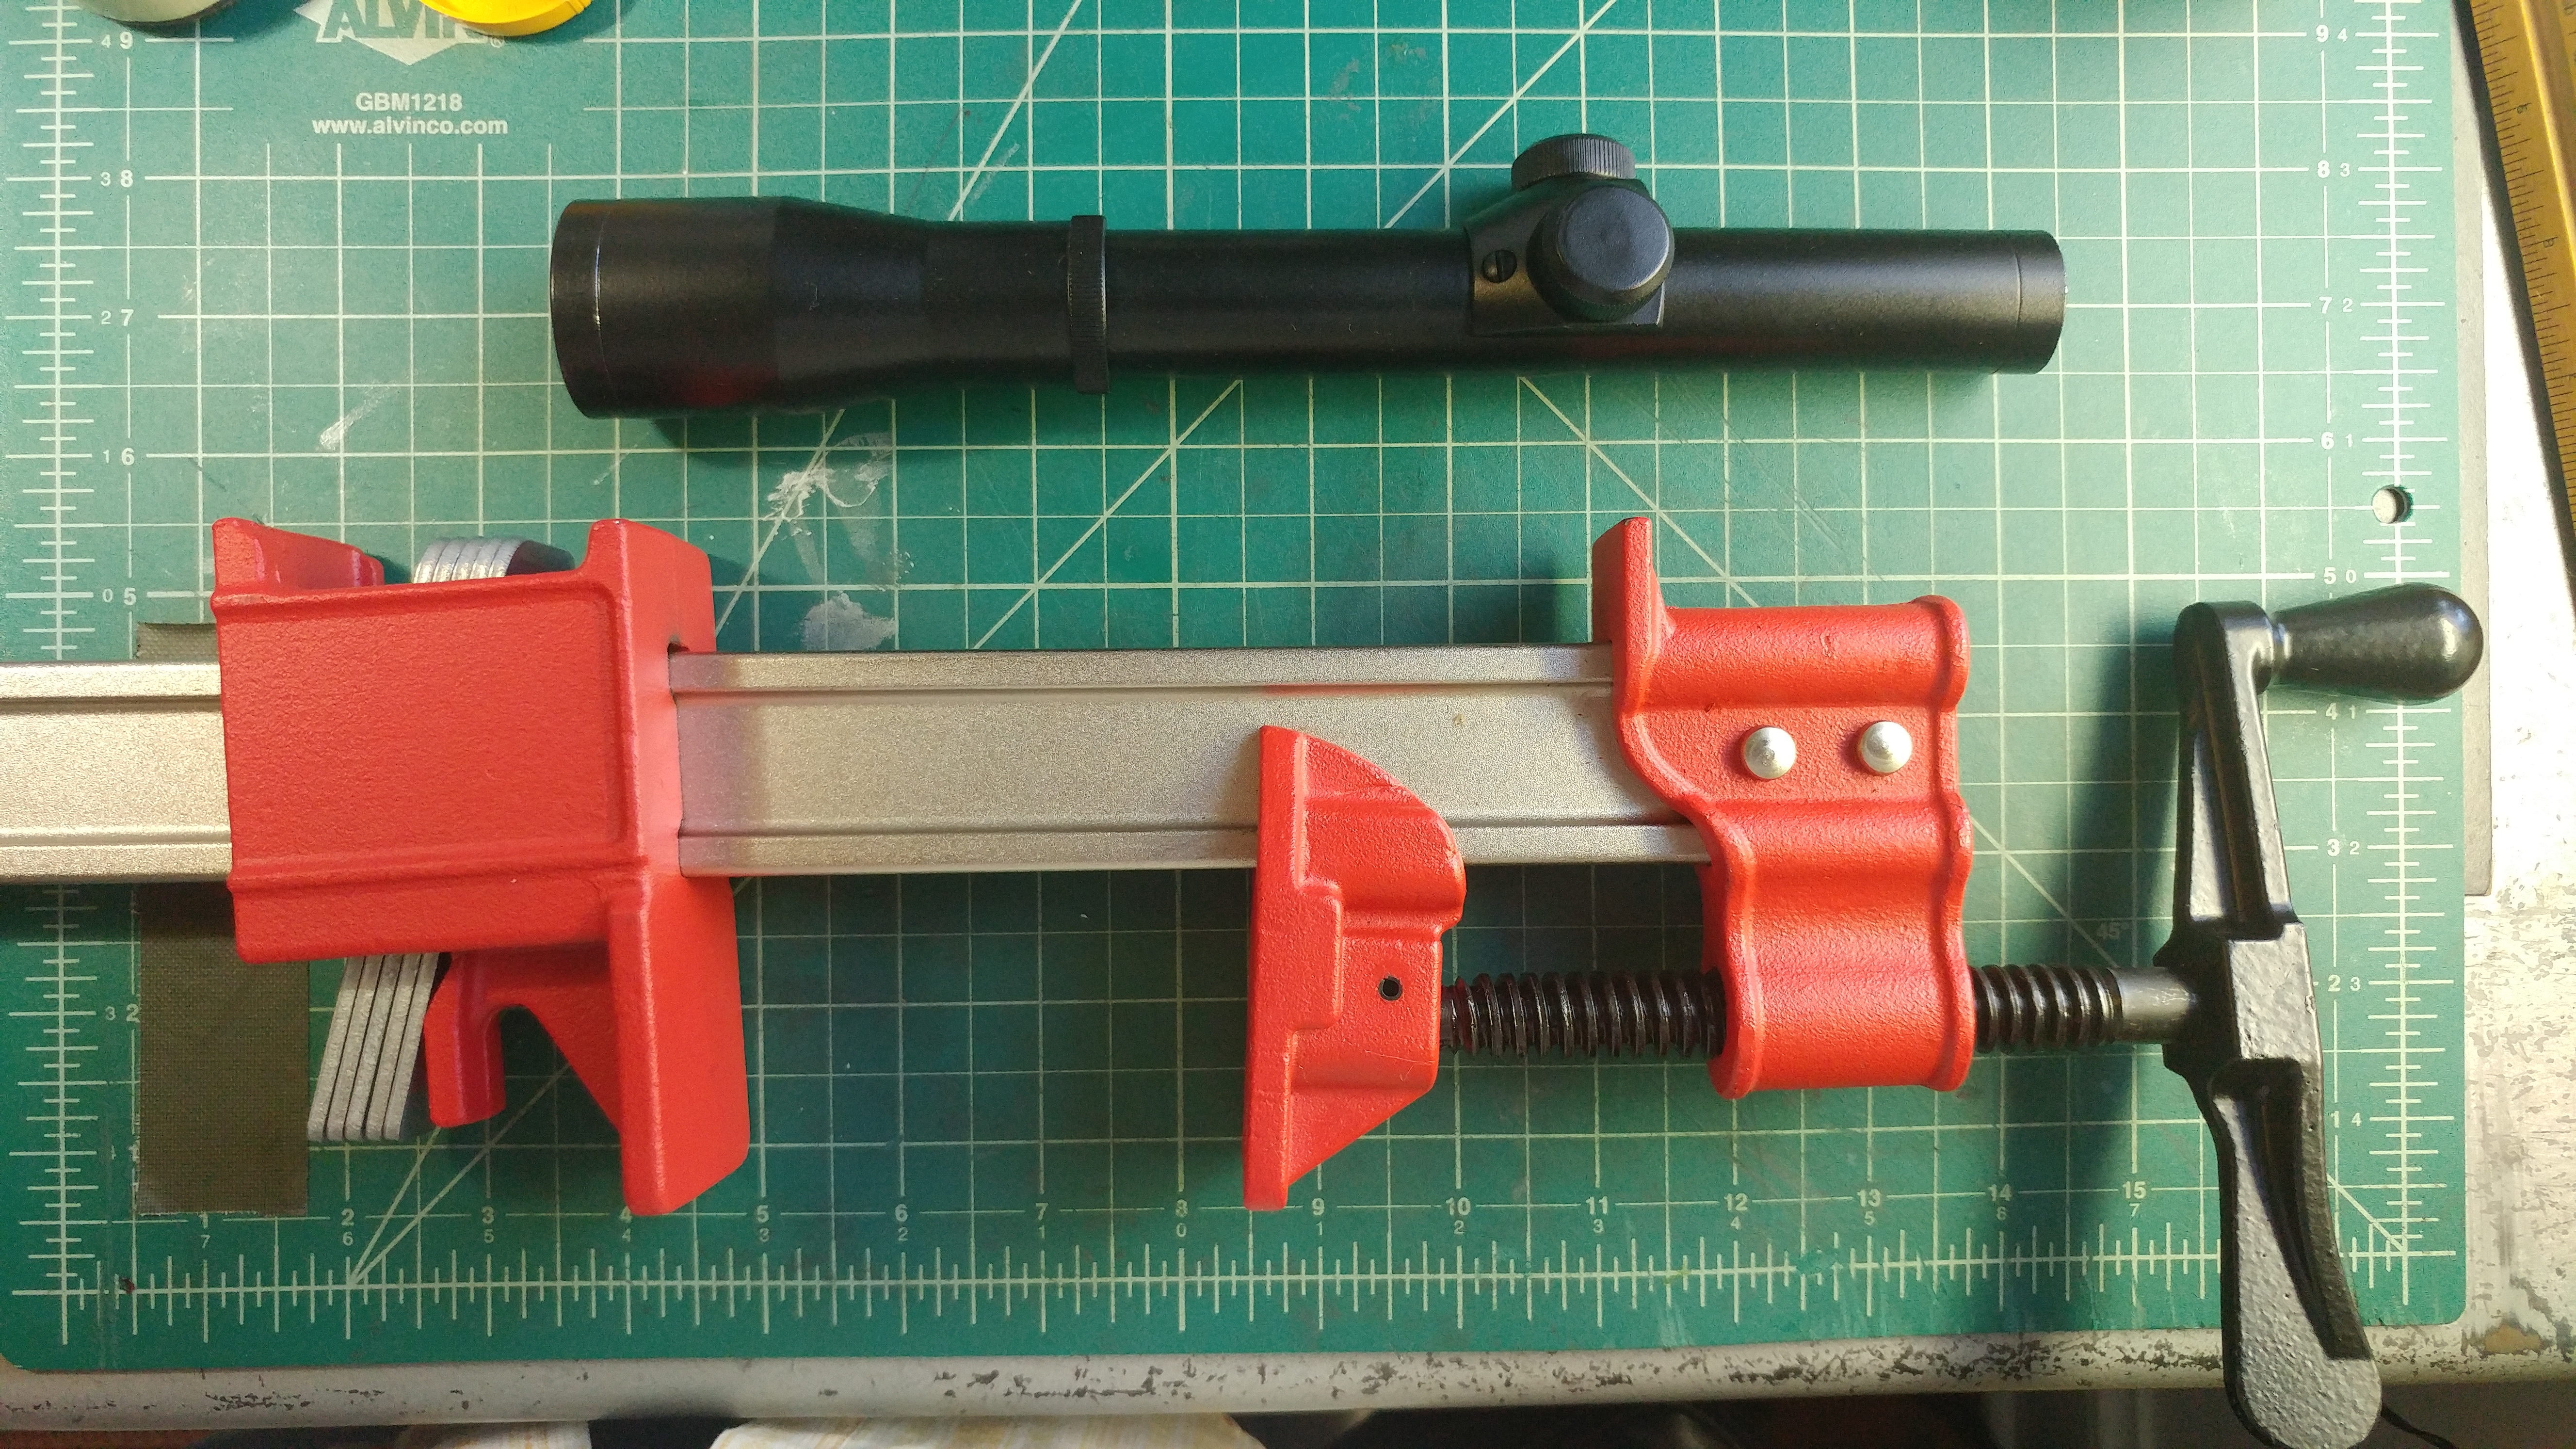
Unfortunately, I forgot to take pictures of the replica while it was in pieces, but this scope comes in six pieces (not including the lenses), as opposed to four like Solo's Hold's. The windage box assembles just like Solo's Hold's replica, with both knobs threading directly through the box and into the body of the scope. FM's replica has two additional machined pieces that hold the lenses in place, and are then affixed to the ends of the scope. FM's method makes for a bit more difficult of an assembly, but the end result looks really nice.

Each of these retaining pieces have machined steps on the inside that hold their lens in place, but they are made so that the lenses needs to be inserted from the back. This means that you have to put some thought into the order in which you assemble/paint the pieces of this scope ... the lenses have to be affixed to these retainer pieces (I used a few dabs of epoxy) before the retainers are attached to the scope. That being said, if you want to be able to run a wire through the main body of the scope to help hold it while you paint it, you have to do that before you affix the end pieces. So, here is the method that I went with:

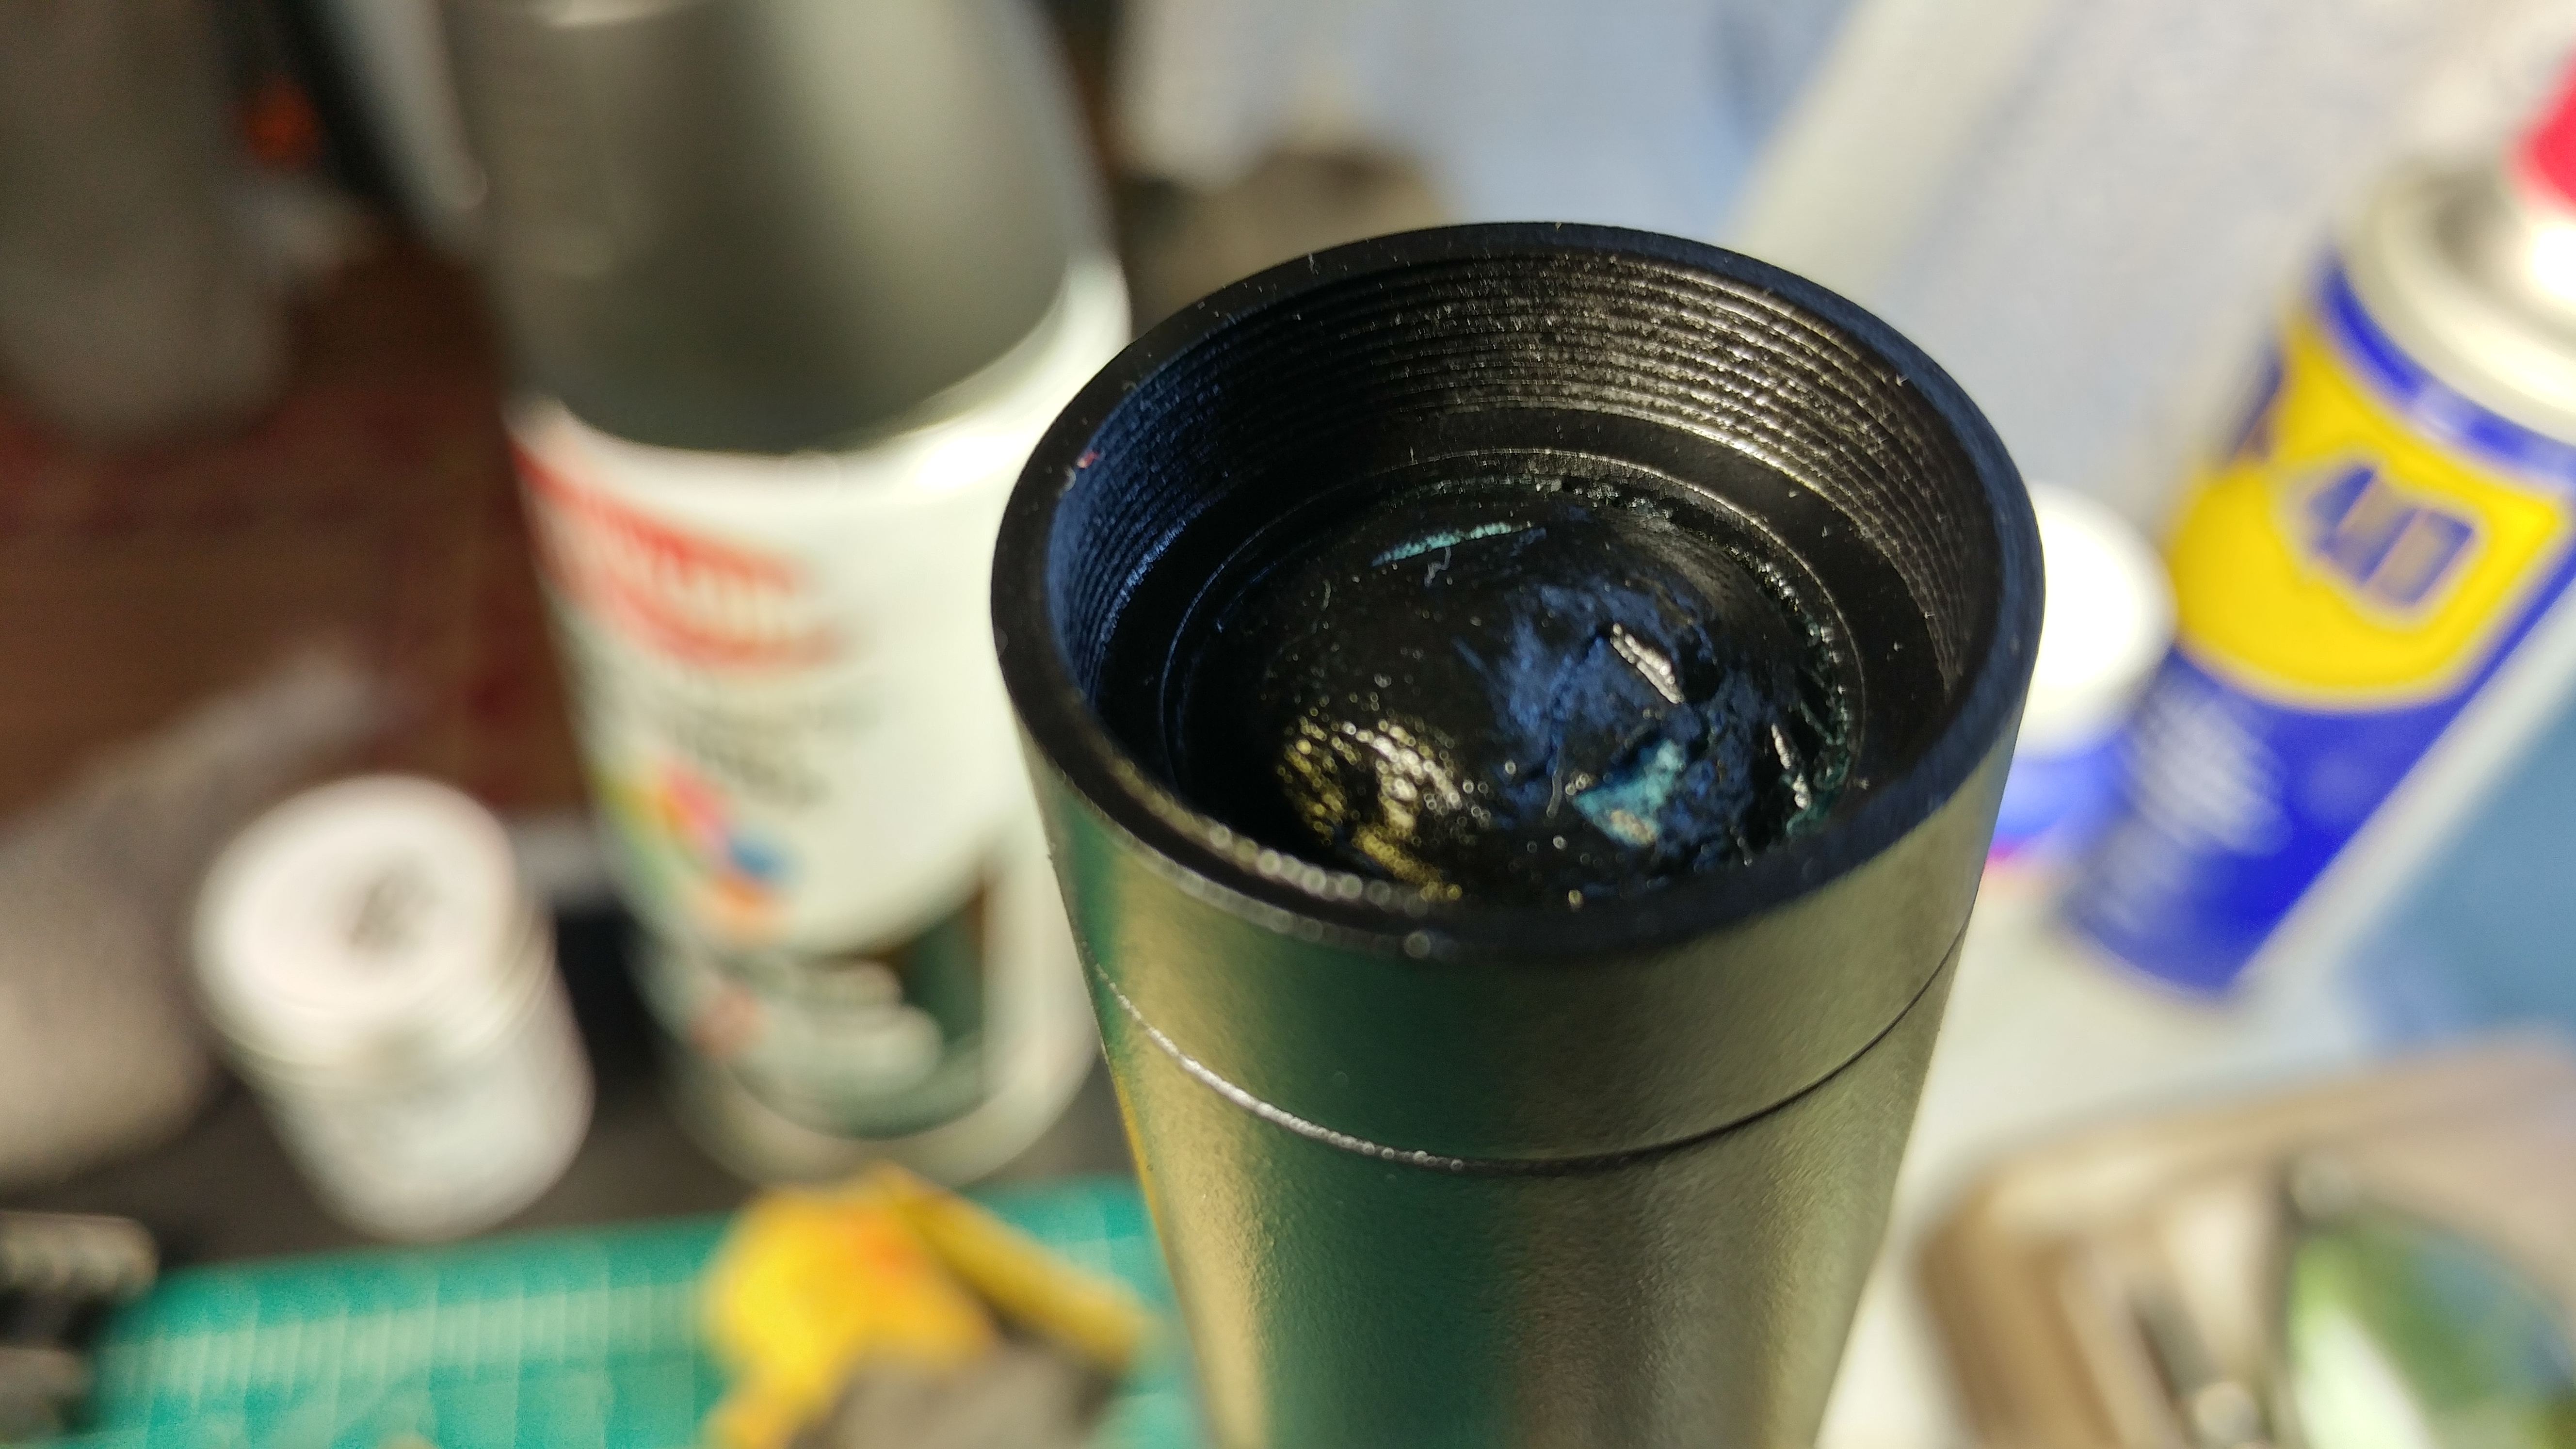
First, I strung a wire through the inside of just the scope body, and hit that with a few coats of Krylon satin black. I was careful not to spray any paint into the inside of the smaller end of the scope yet, as I didn't want to gum up the threads that are there for inserting the smaller lens retainer later. I did, however spray some paint into the inside of the larger end, as I didn't want this to appear silver when looking through the scope.

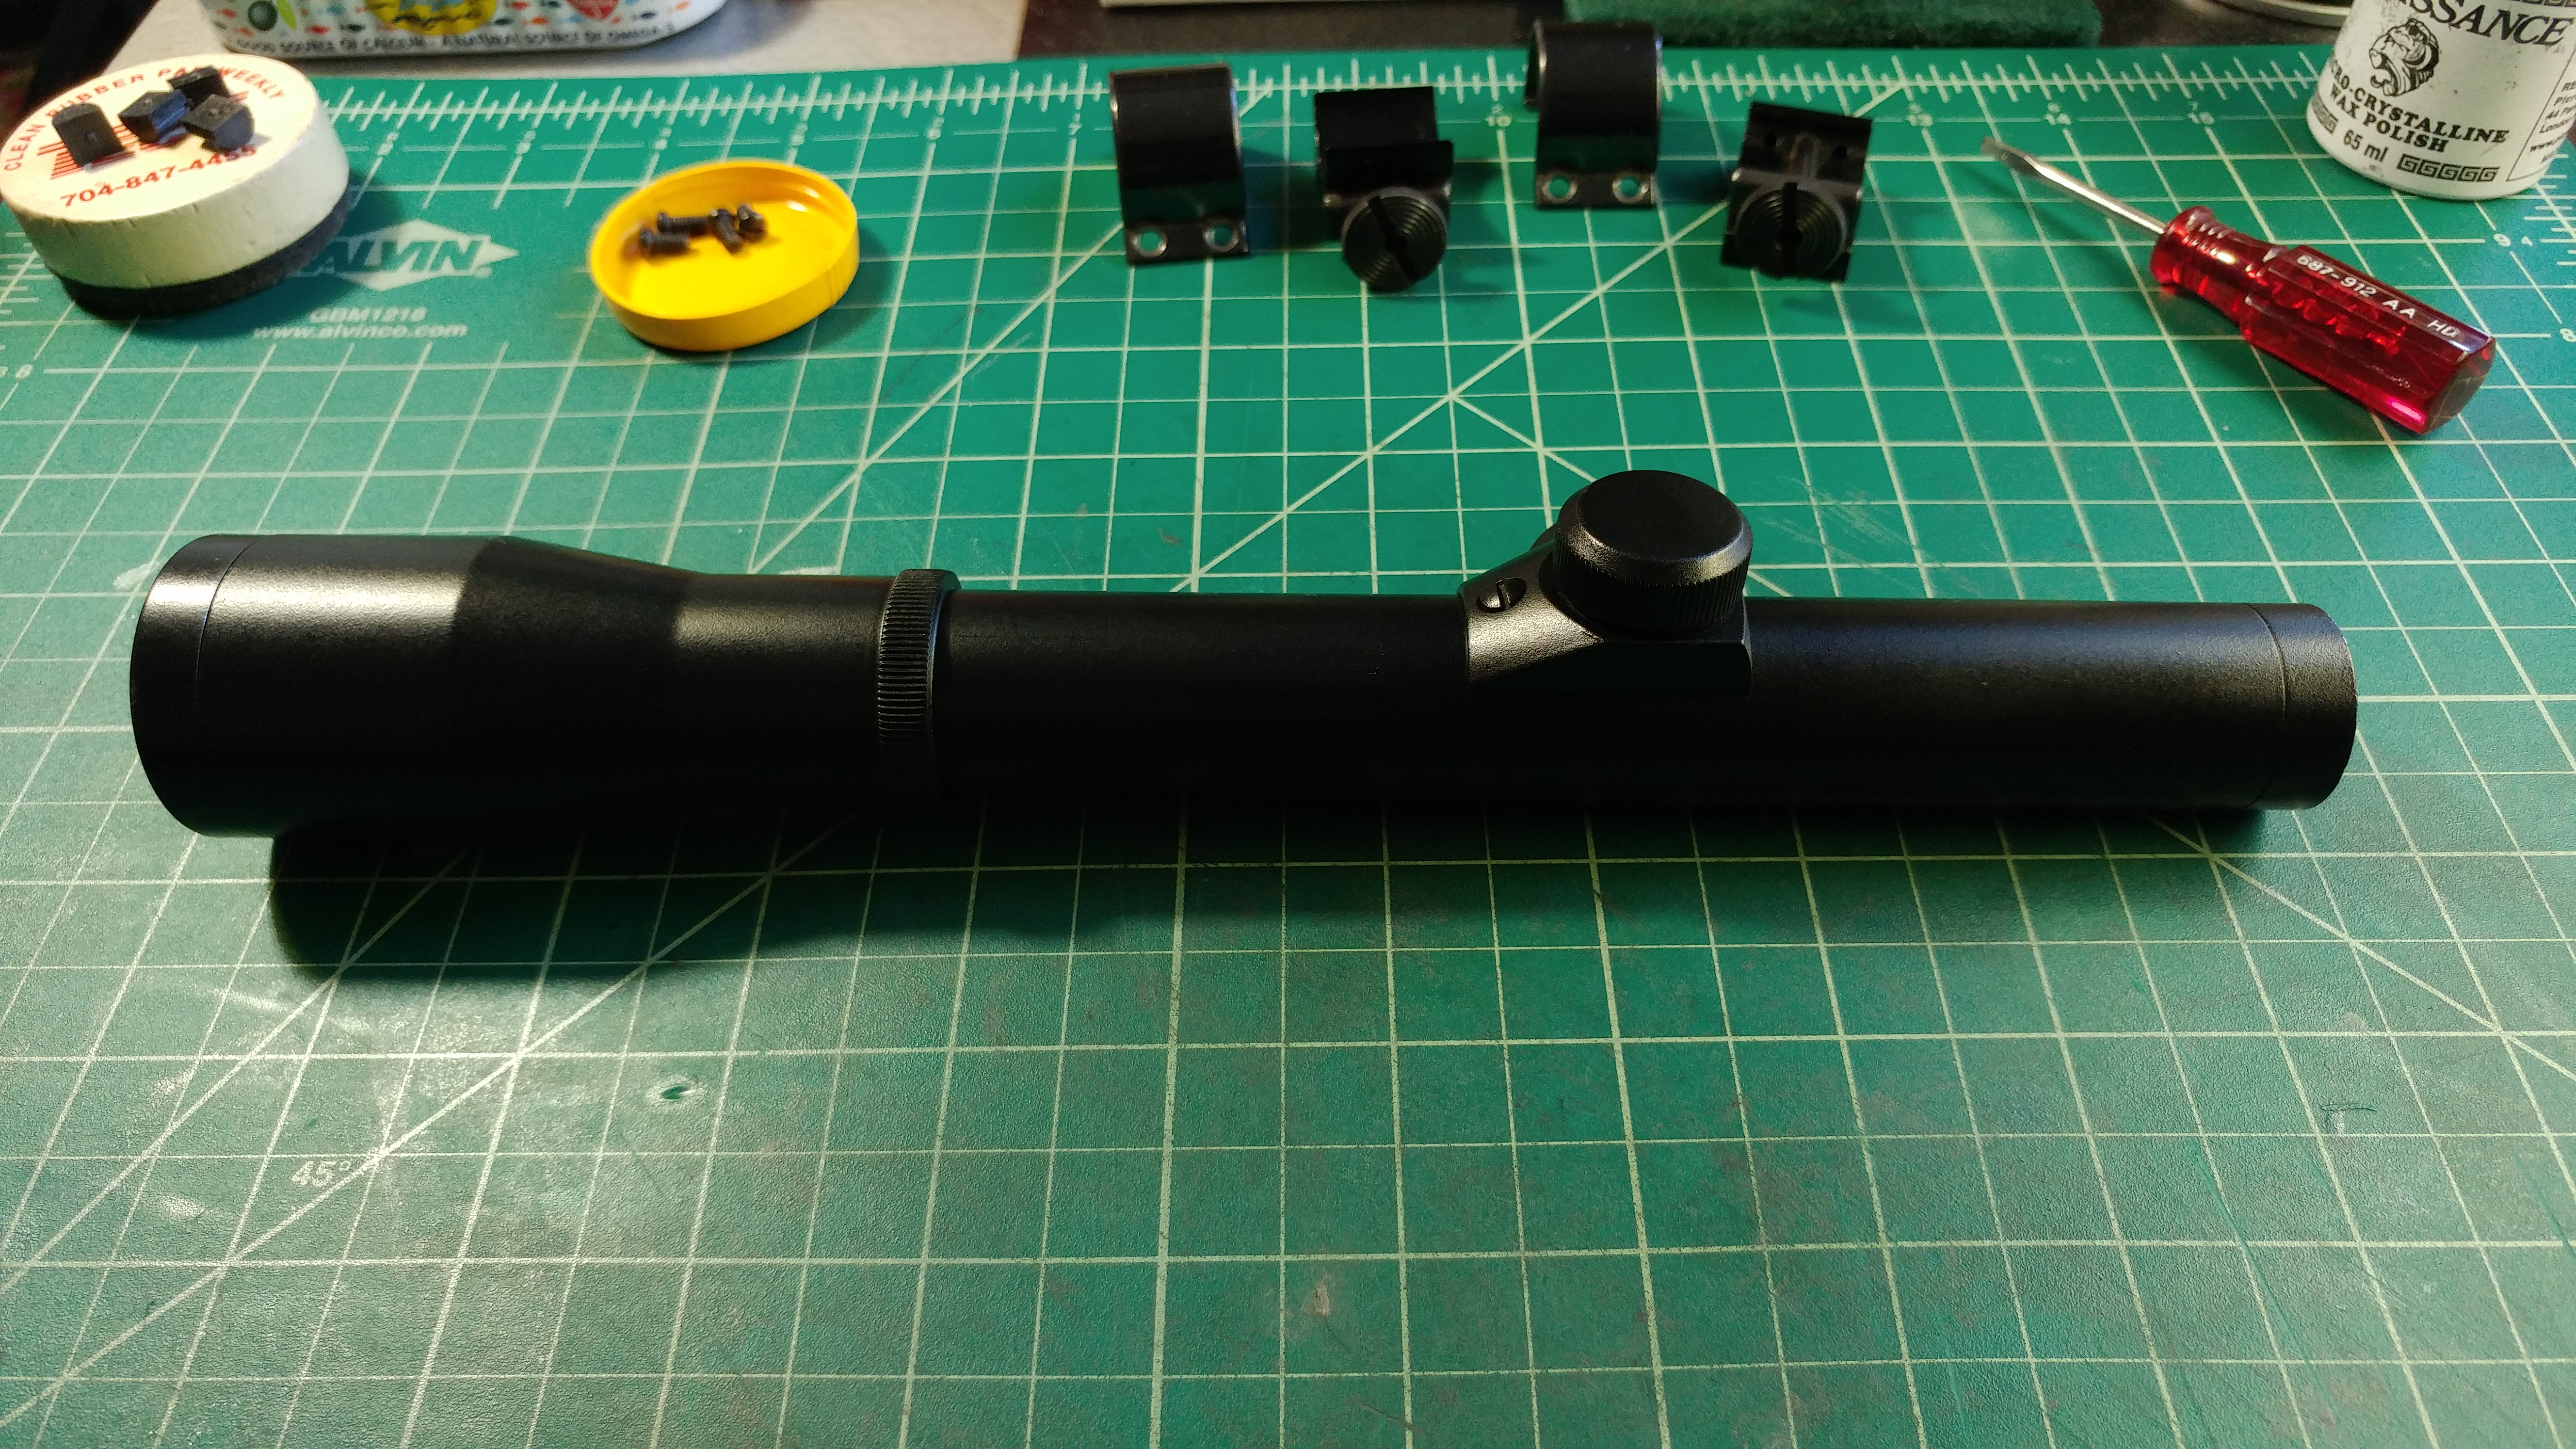
I then glued the smaller lens into its retainer, and masked the outside of that glass lens with putty (the blue kind that is used for hanging posters). I used a small flat screwdriver to press it snugly into all crevices, being careful to cover all glass, but leave all metal exposed. I then threaded that retainer piece into the smaller end of the scope. To look most accurate, this piece needs to be threaded all the way in, until the retainer is recessed into the tube about a half an inch or so. This was tough, because as it sank deeper into the tube, I didn't have anything to grip onto to twist the piece. The putty actually helps here, as it provides some grip. *Be careful not to push too hard on the lens while doing this, or you can break the epoxy and pop it back out of place! You do have to apply some pressure, however, to help thread the piece. I used a straightened coat hanger with a Q-Tip taped to one end to apply upward pressure on the lens from inside the tube while pushing down and twisting, to be able to better manage the amount of pressure. It's tricky. Once it was as deep as it would go, I hit the whole piece with another coat of satin black. I used the coat hanger/Q-Tip rig to hold the tube for this painting session. End result:


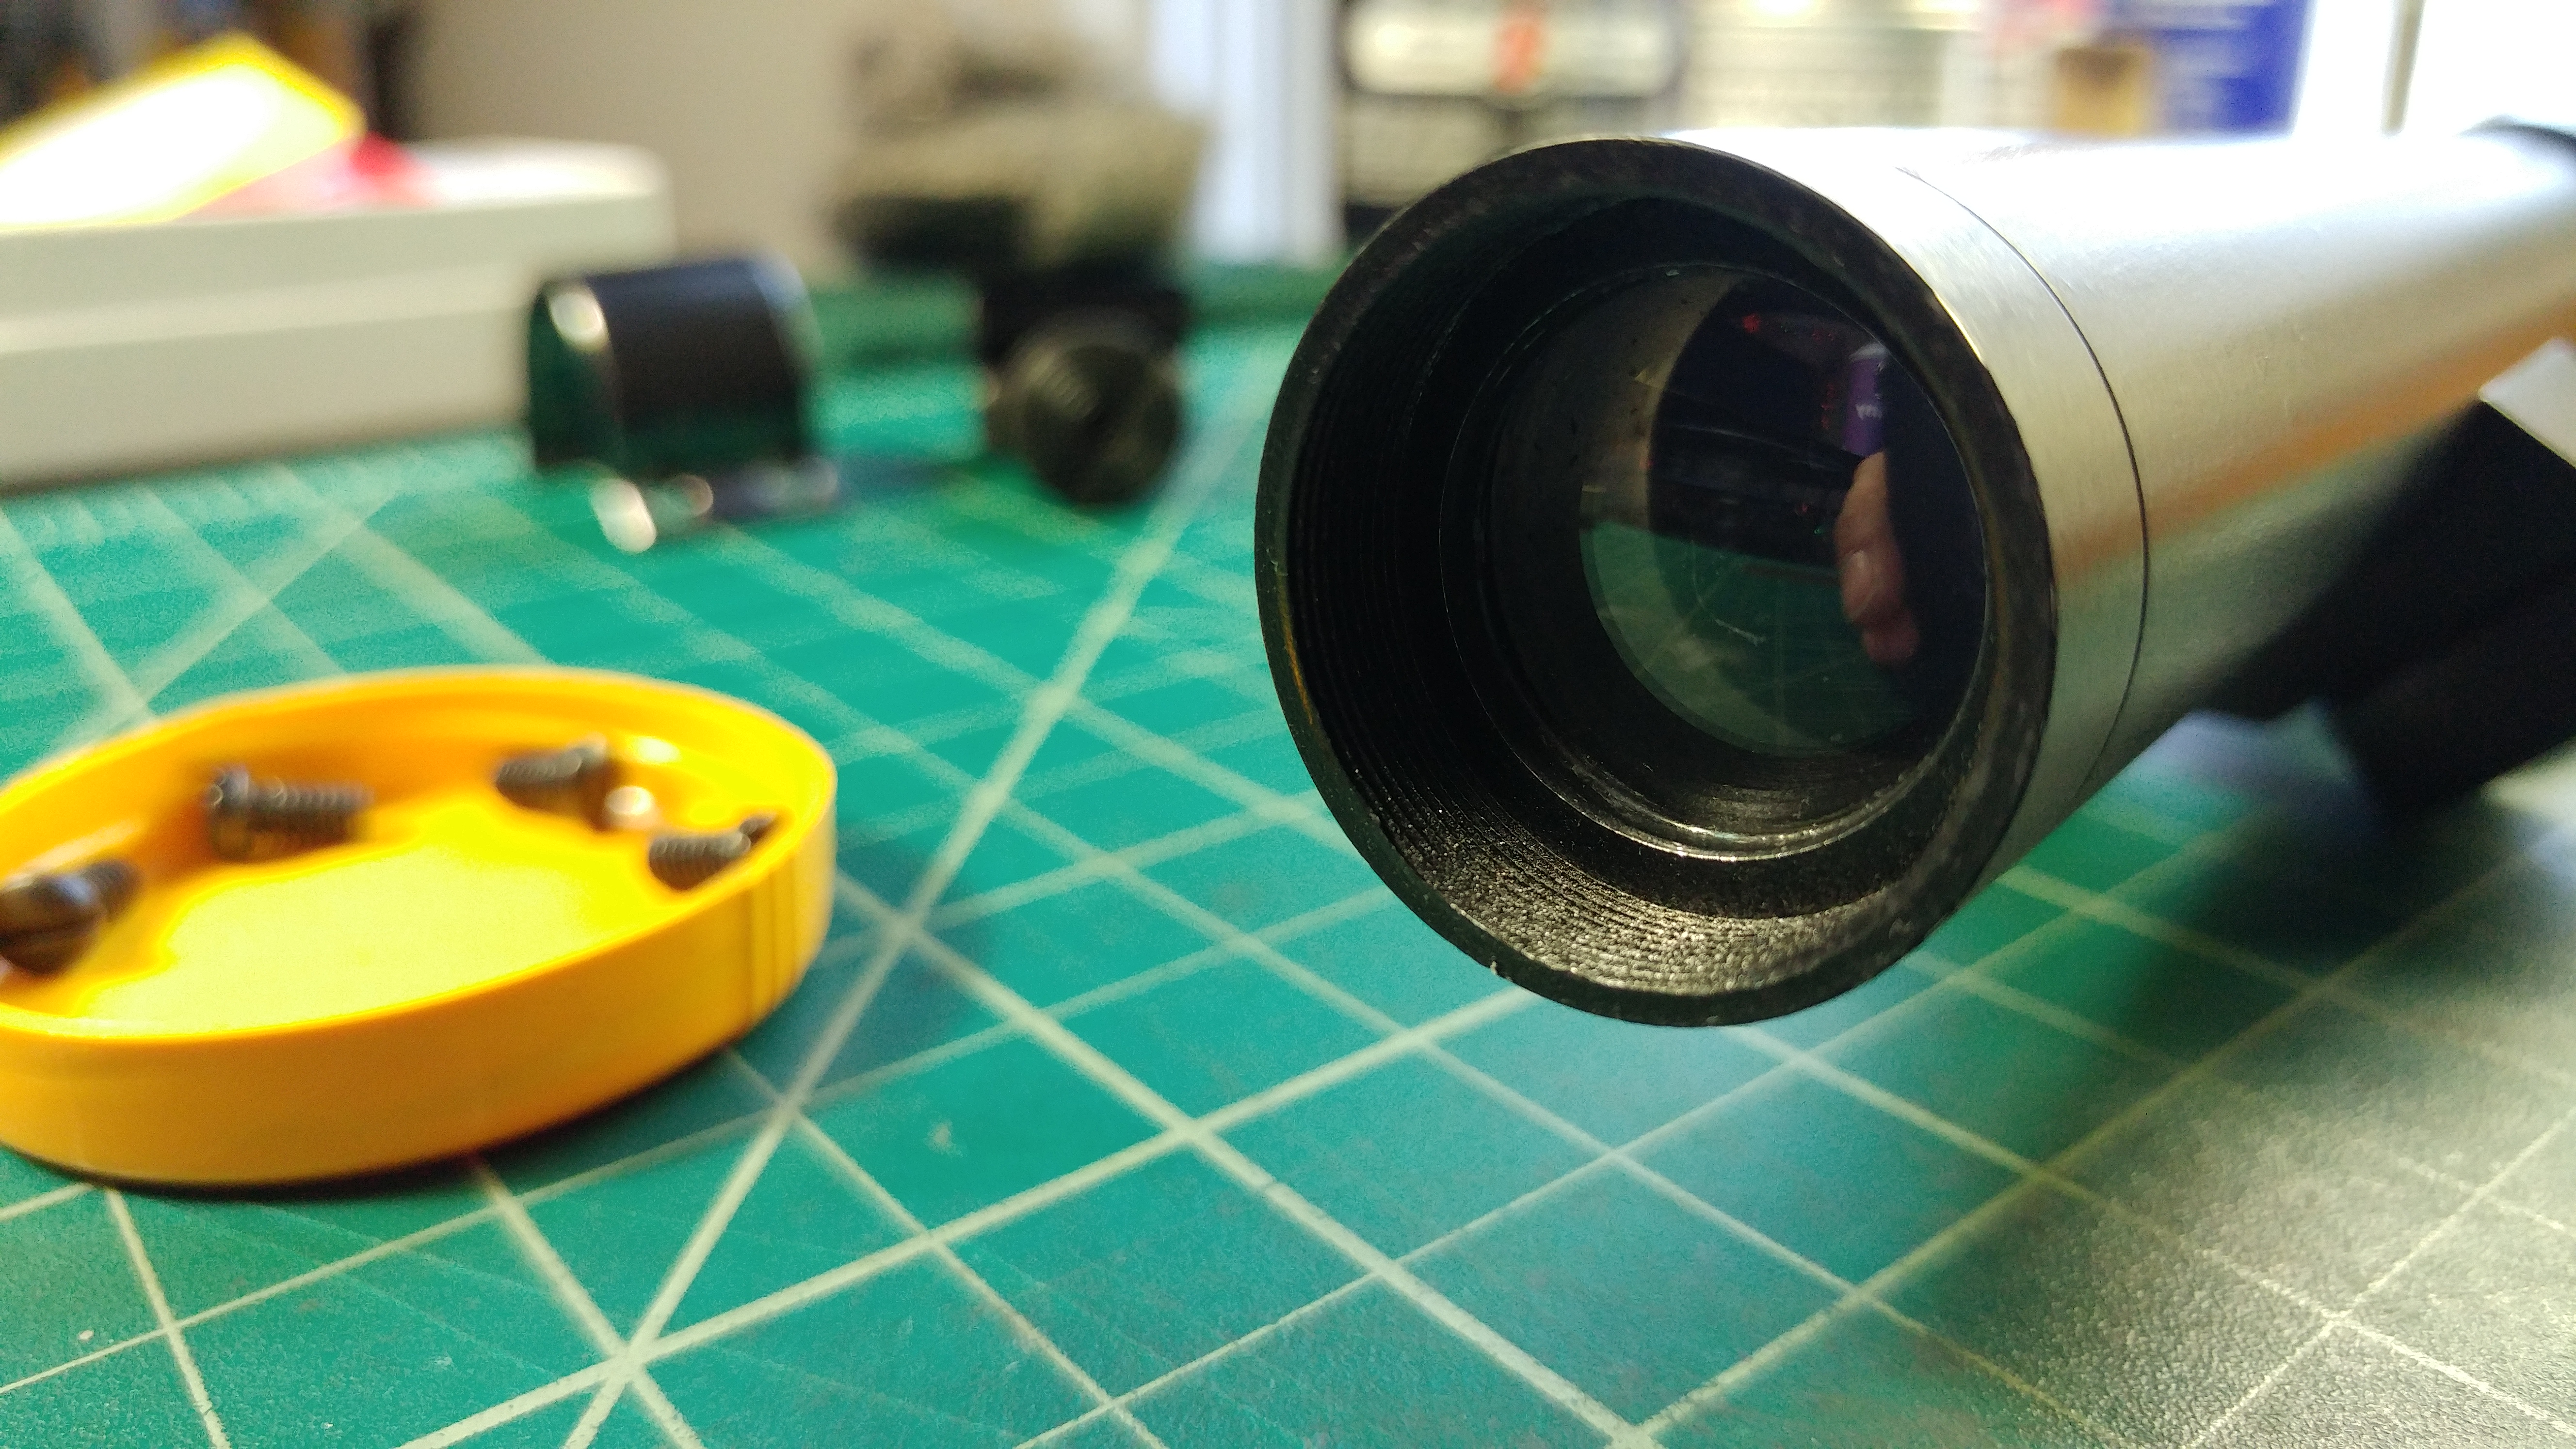
Removing the putty was a bit of a PITA, but a Q-tip with some alcohol helped to remove the little bit of residue that was left:


EDIT: Field Marshall has since tweaked his design and the smaller front element is no longer threaded, doing away with the need for masking the lens. It now works just like the larger bell.

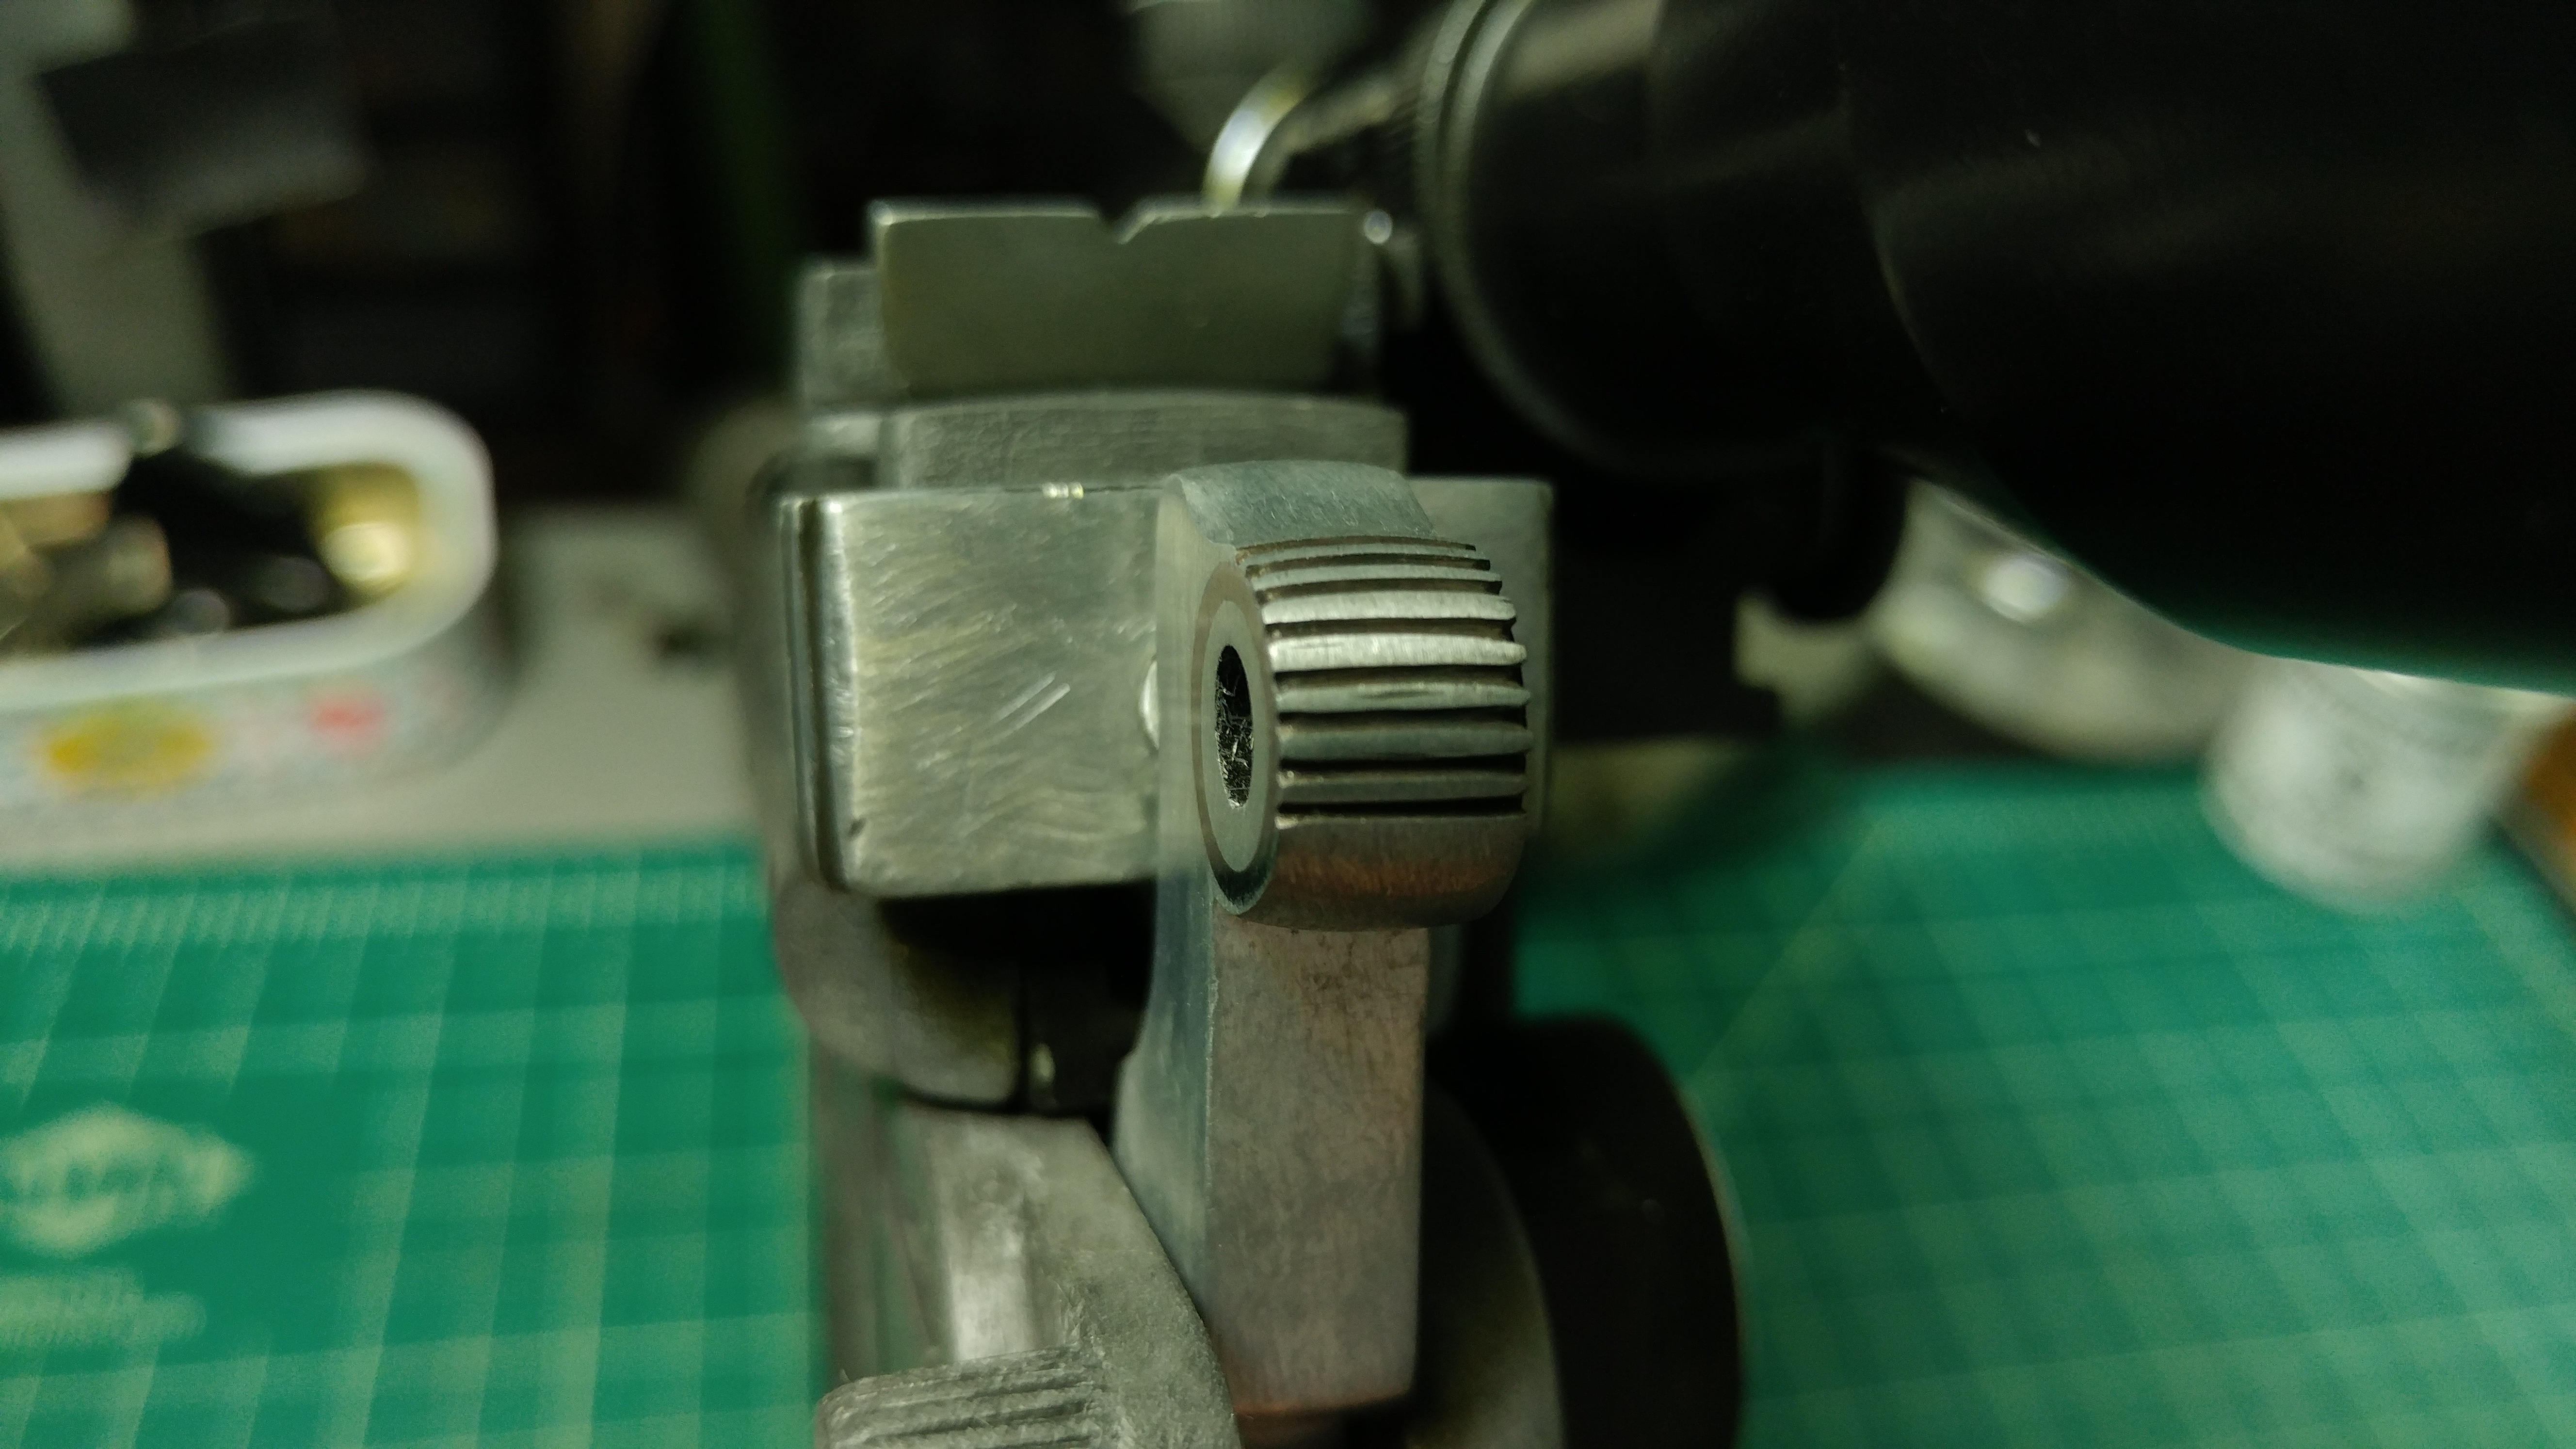
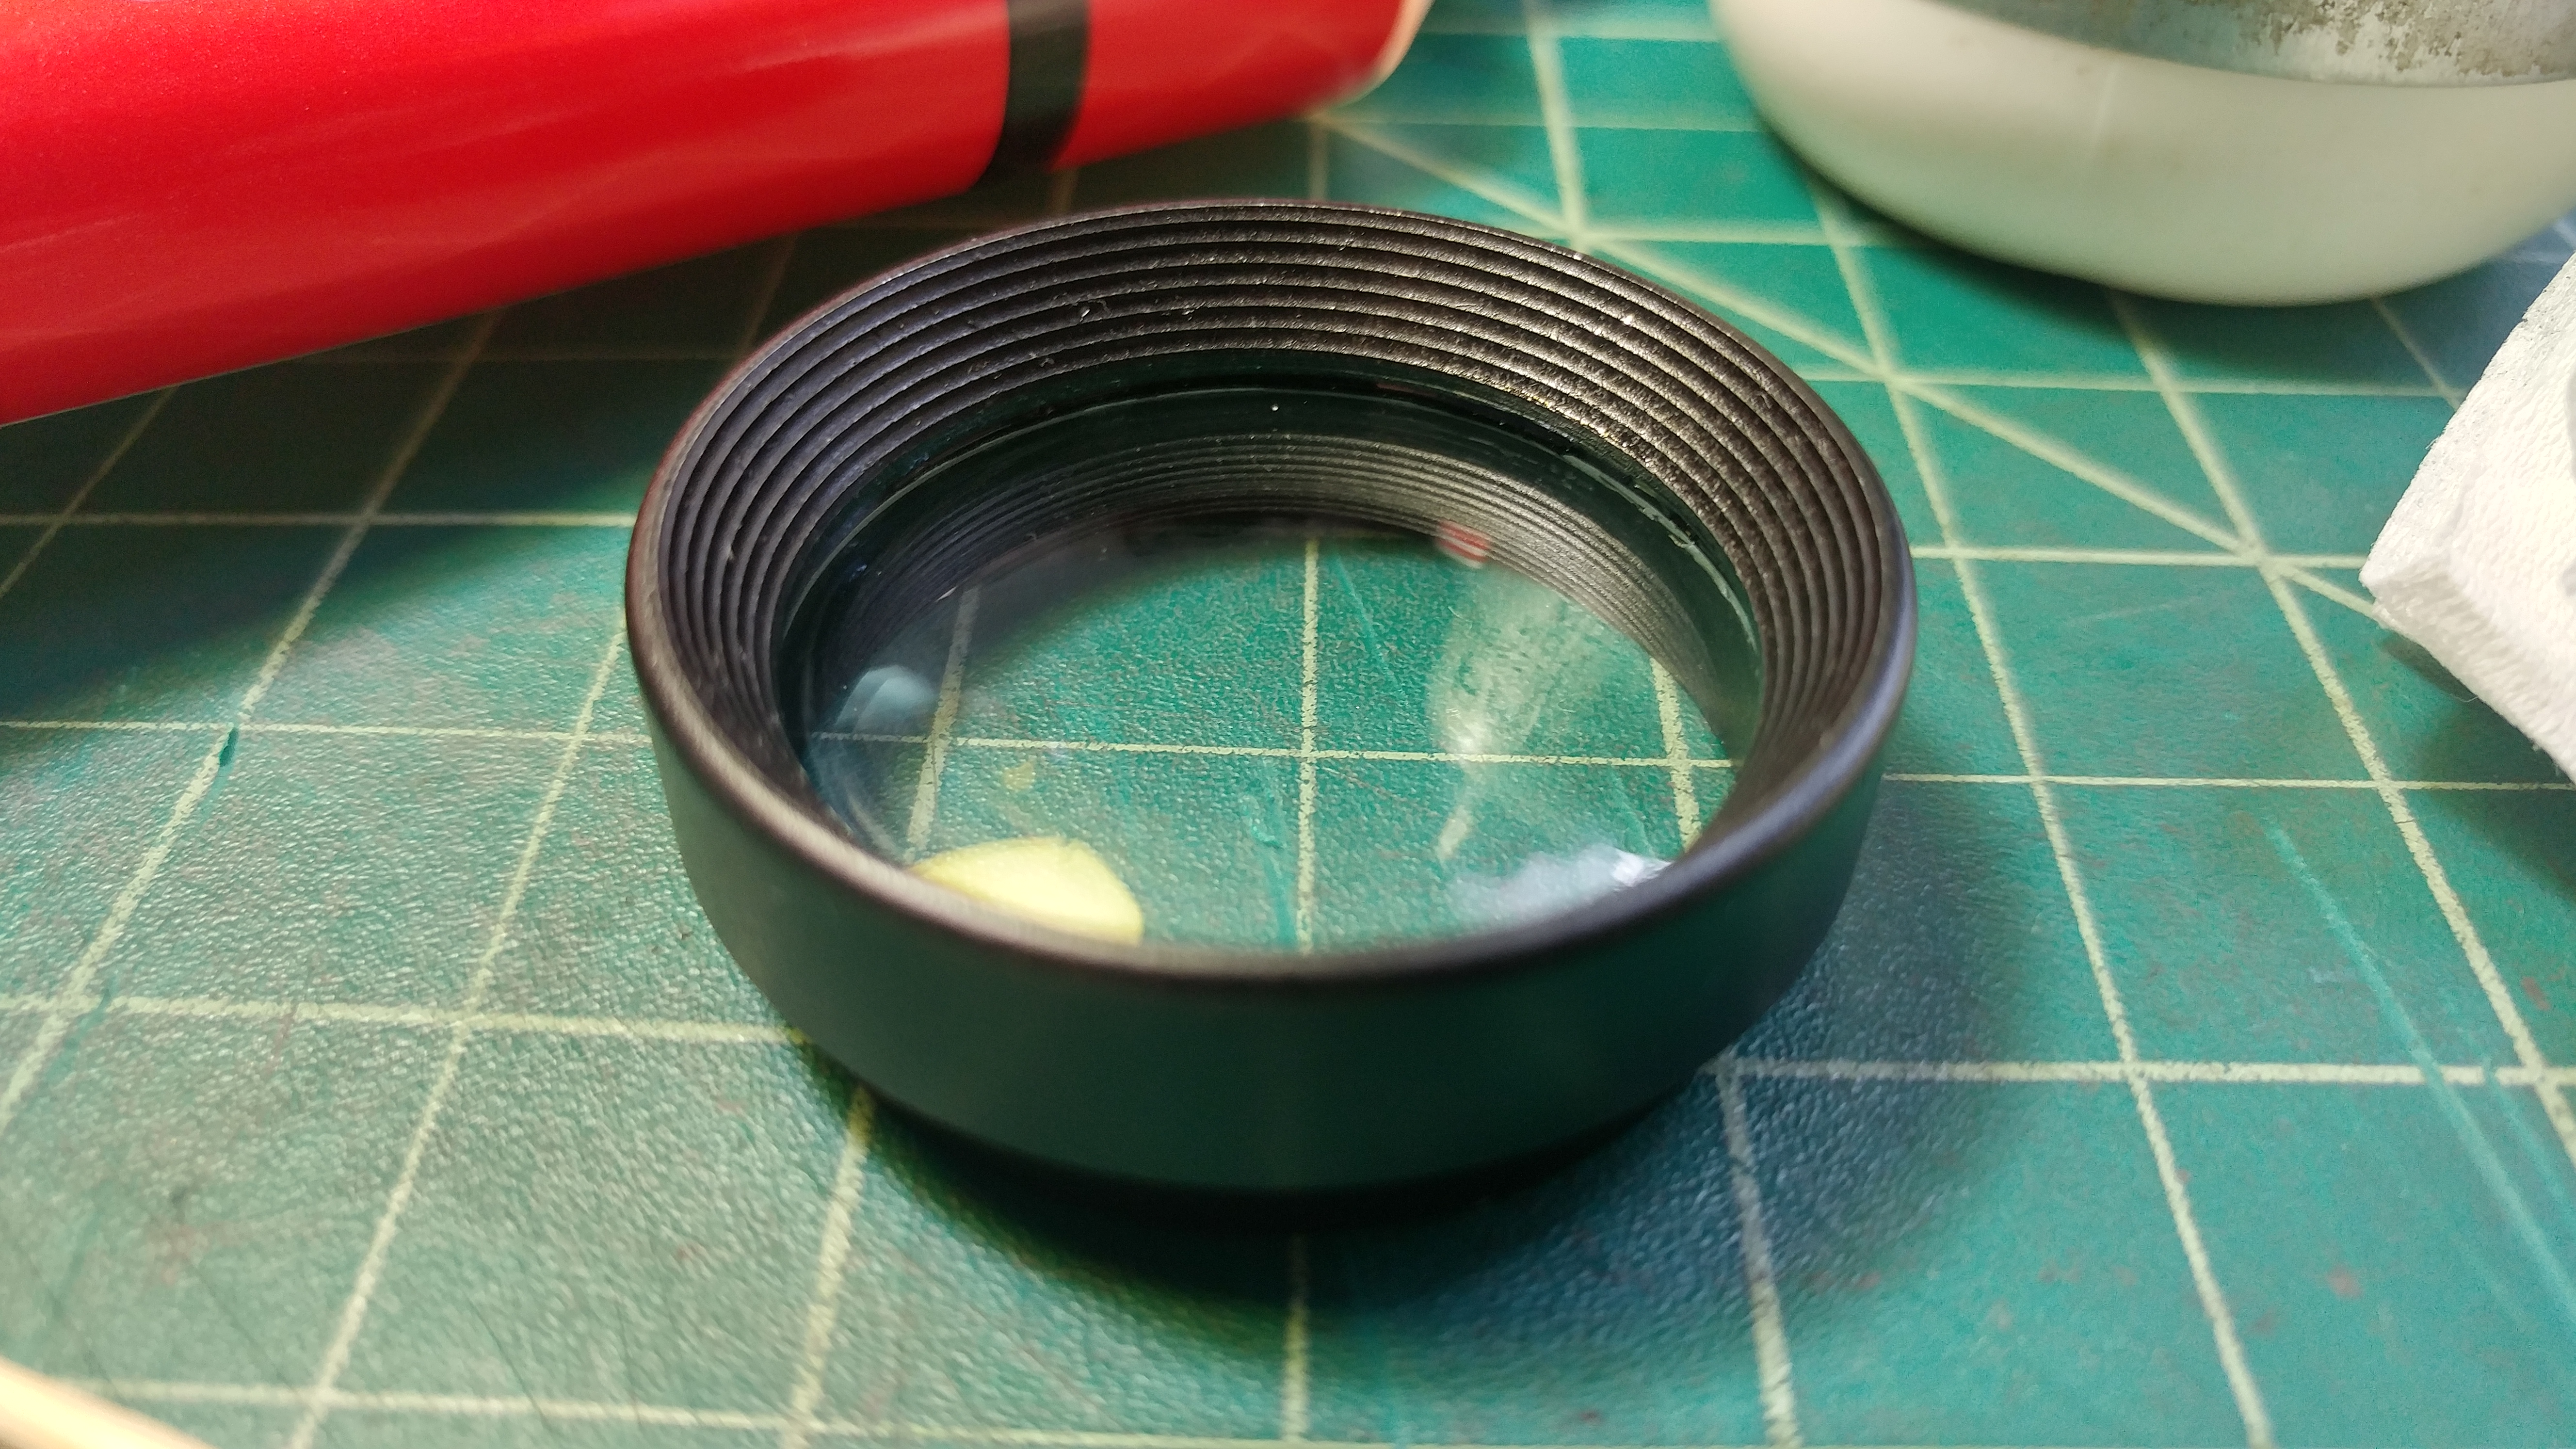
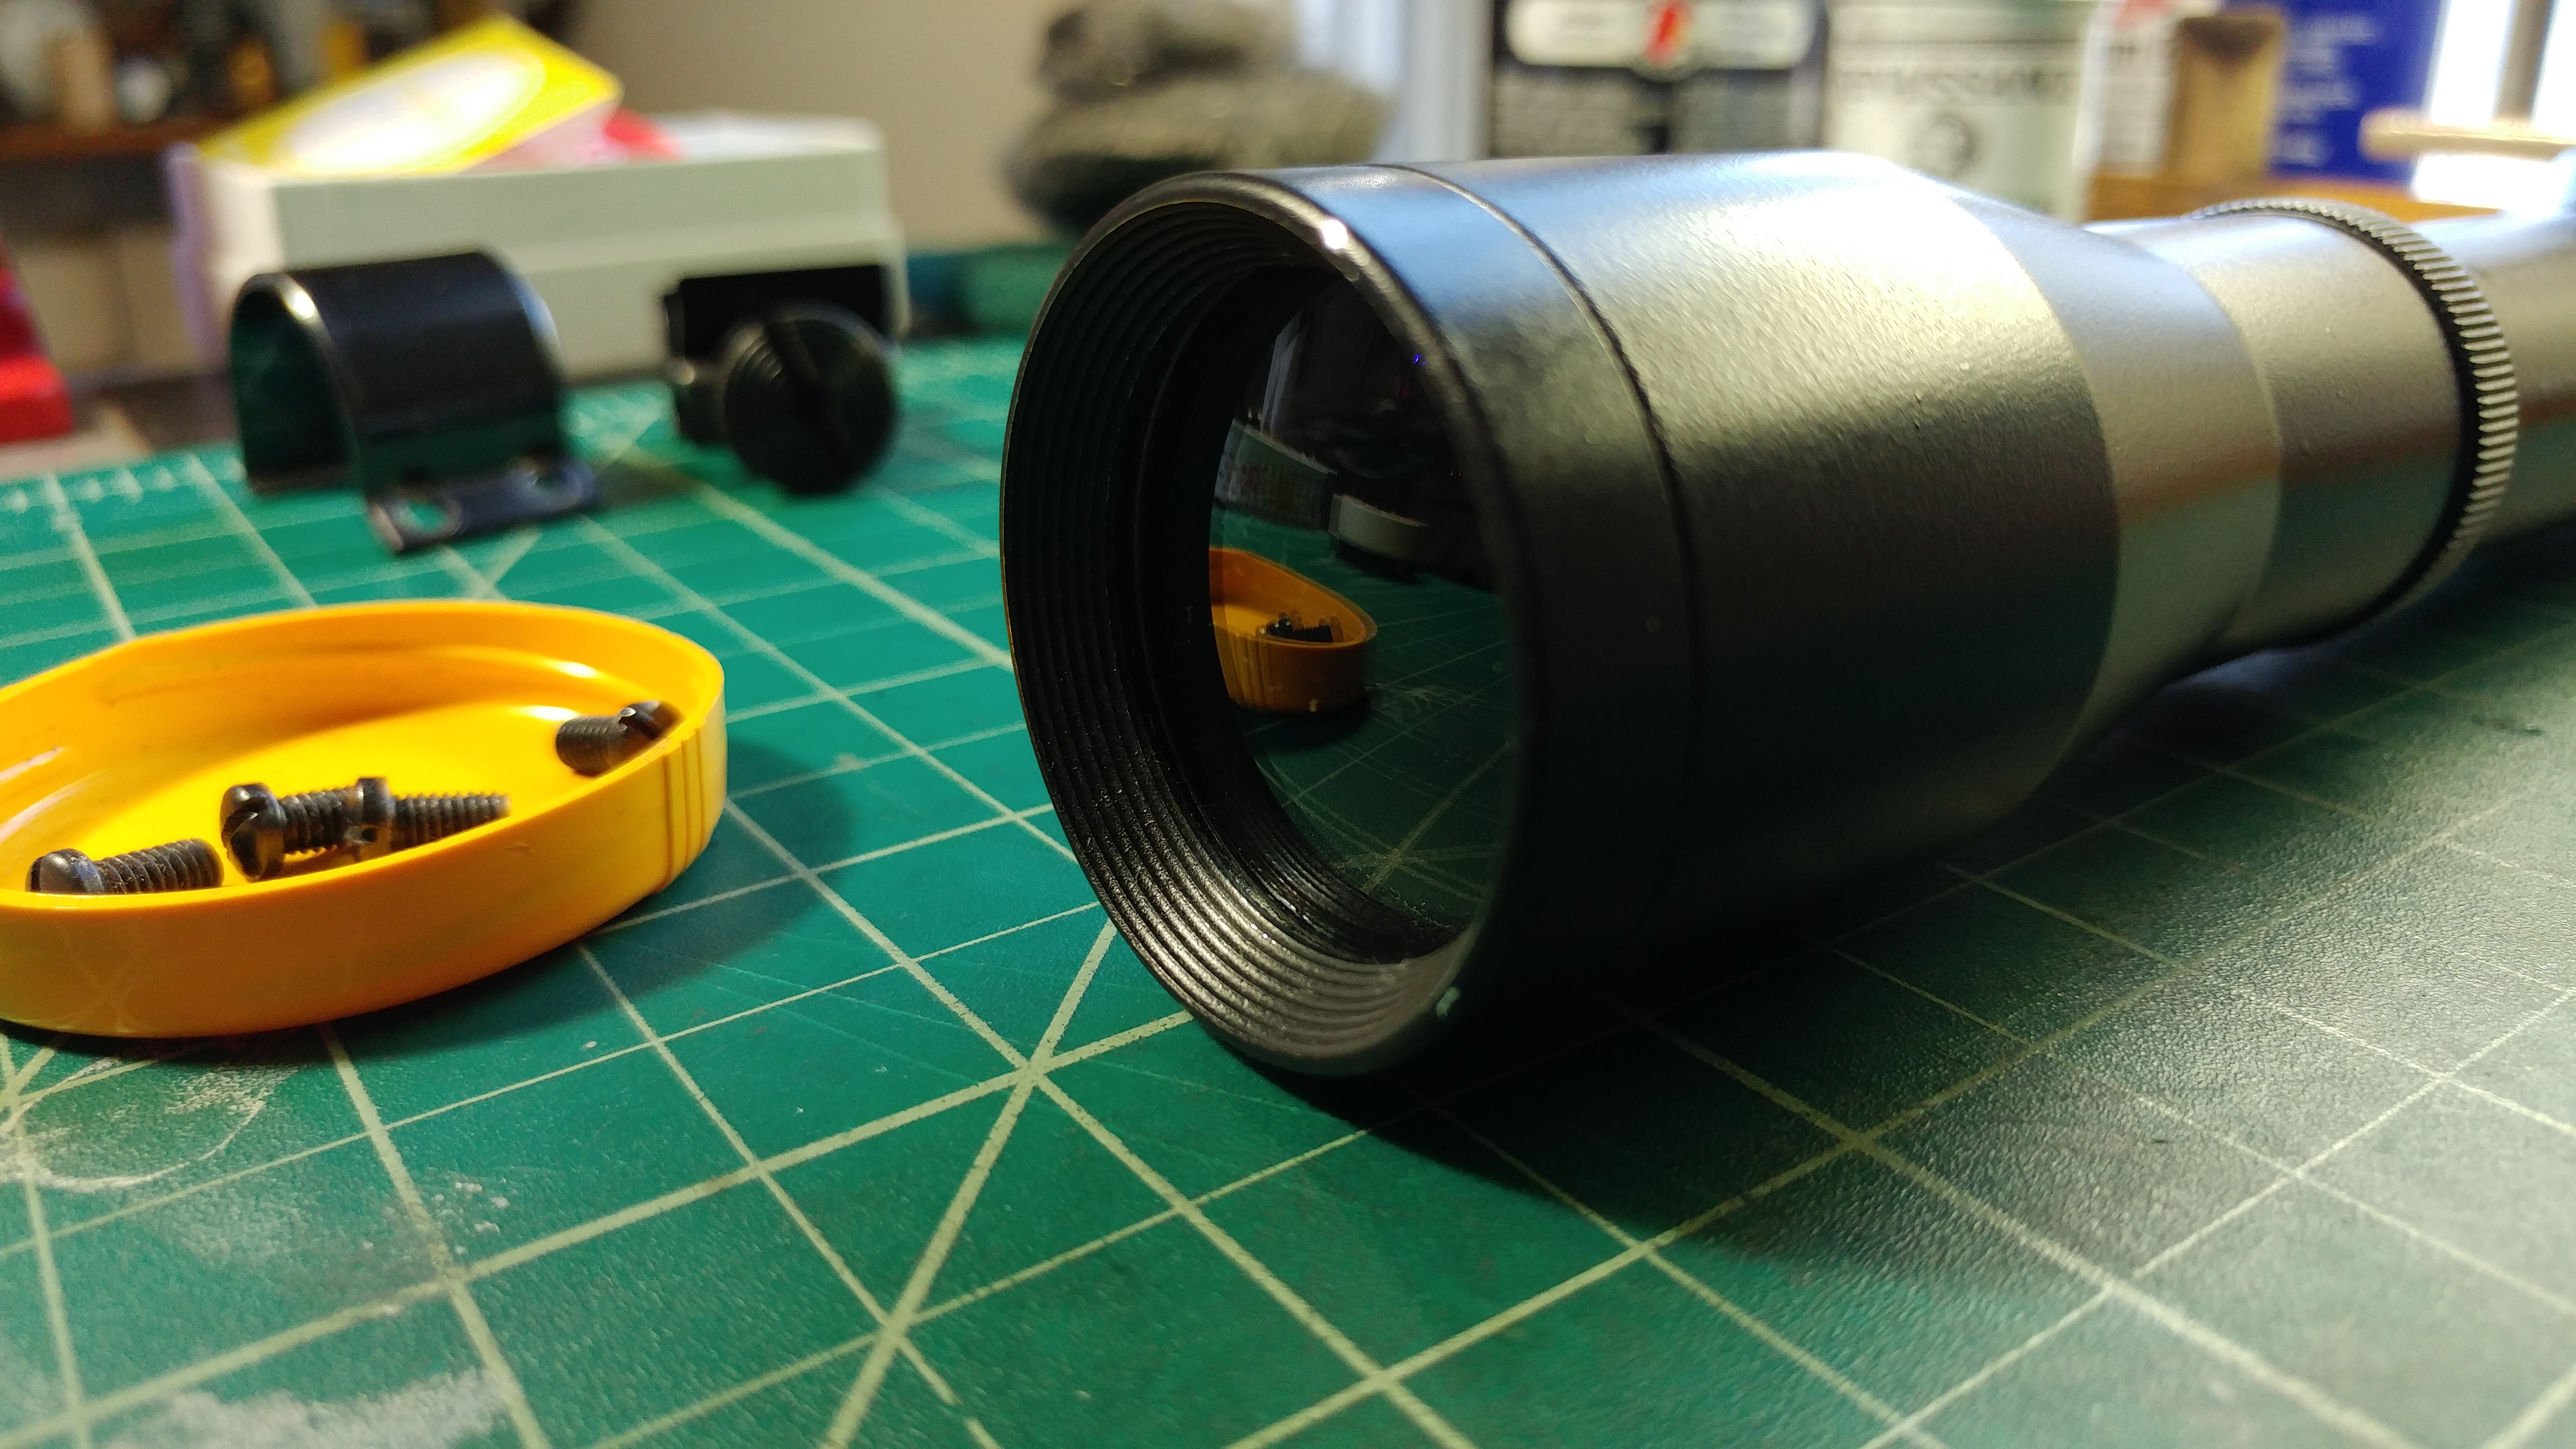
The larger front bell on FM's replica also comes as a separate piece, but this piece isn't threaded, and has to be pressure fit (I'll come back to this in a bit). The machined step in this piece also demands that the lens be pushed in from the back, so this one was also tricky. First, I painted this retainer piece on its own (all surfaces). Once dry, I epoxied in the larger lens:


Once that dried, I attempted to press fit the piece into the scope with just my hands and a rubber mallet. After many attempts, I only managed to get the piece in there about halfway, crooked and stuck. I went to the hardware store and for $40 I got a heavy duty bar clamp that made very fast work of the job:


Edit: Field Marshall has since tweaked his design and the lens elements have a smaller outer diameter, so they no longer need to be pressure fit. They simply drop right in, allowing you to affix them with epoxy etc.

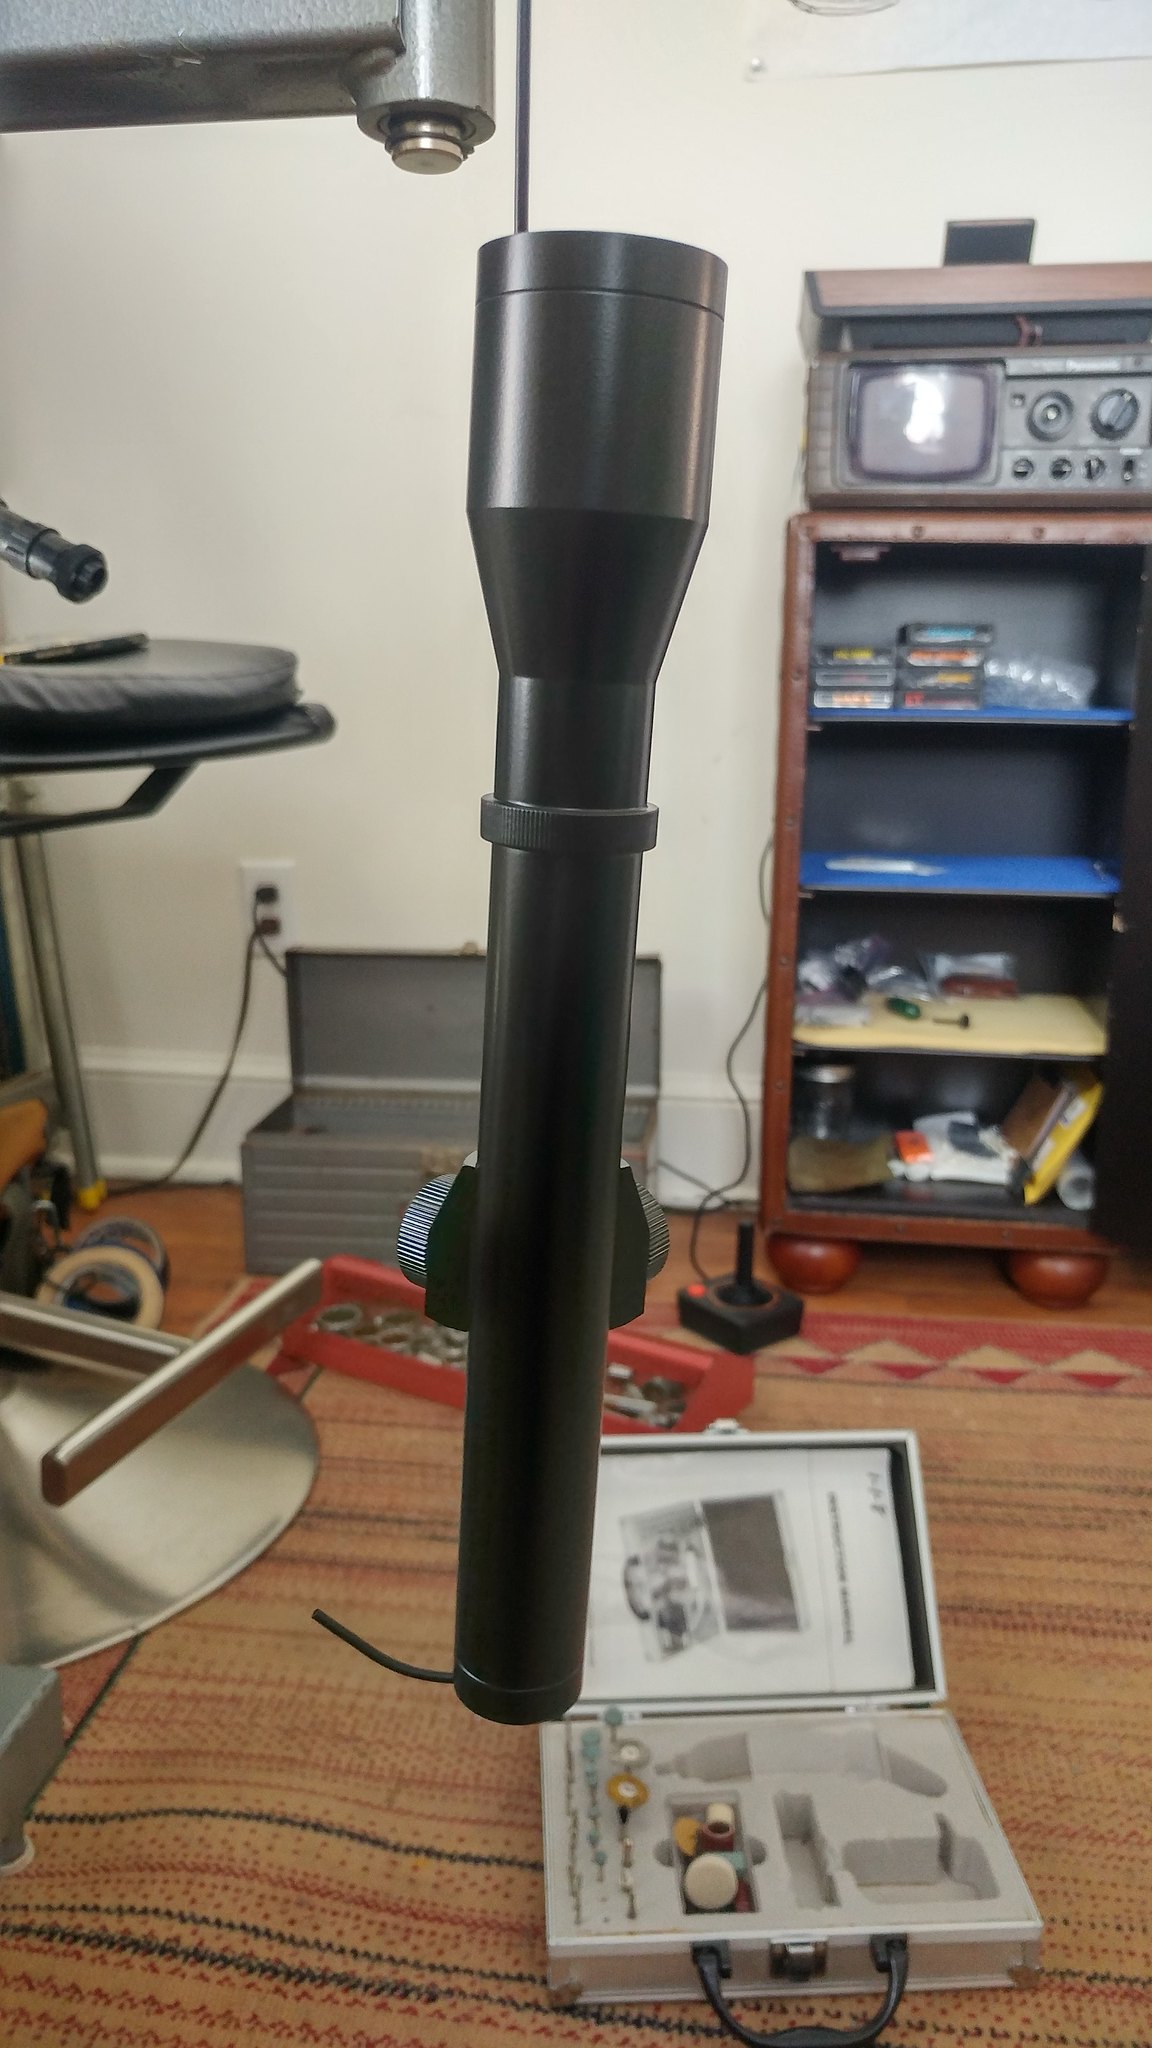
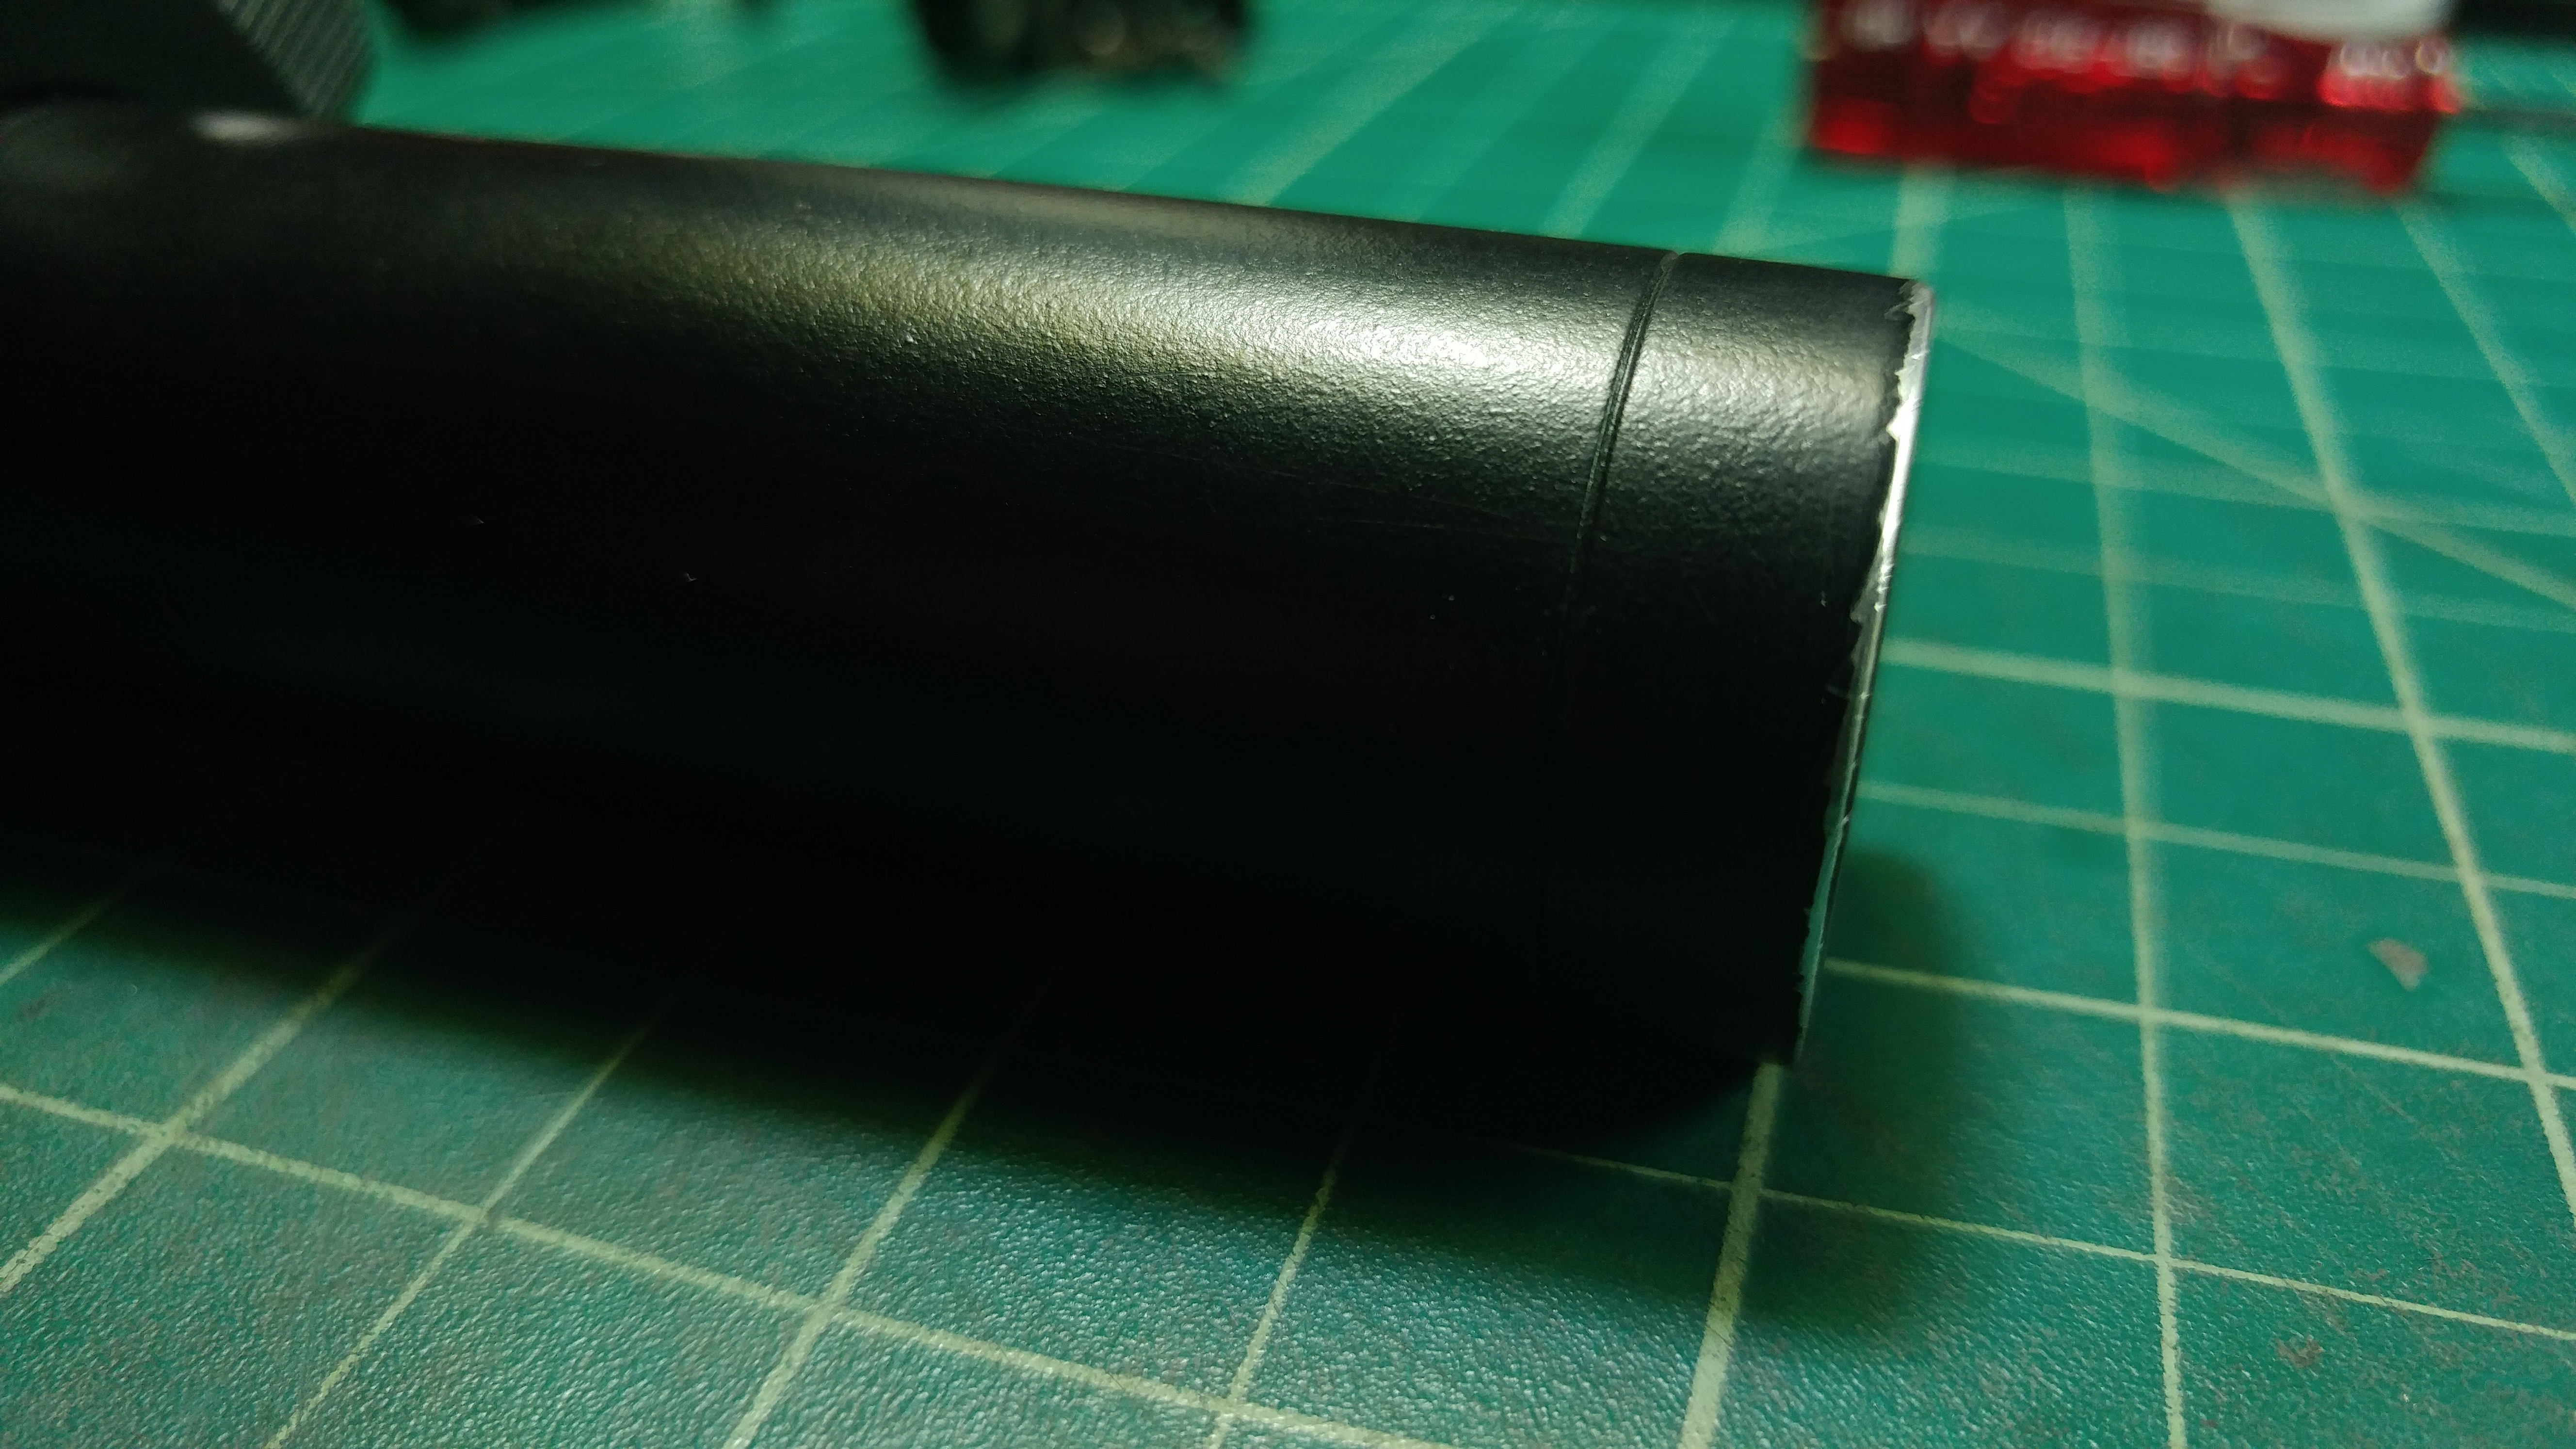
I was a bit worried that being two separate pieces, the seam may not look accurate once fit, but I think it looks pretty spot on!


In all my man-handling of the scope while attempting to hammer in the front bell, I definitely put some scuffs on it. I think I'll hit it with one more coat (doing some masking of course) before weathering it. I'll report back with photos once I've weathered the scope. From there, this thing is on the shelf until Field Marshall's new 11-fin grill comes out in 2018! That being said ... Here's a teaser for my next real-parts build!


Build thread here:

Build: Luke Macrobinoculars (ANH Hero)
 
Last edited:

Your message may be considered spam for the following reasons:

If you wish to reply despite these issues, check the box below before replying.
Be aware that malicious compliance may result in more severe penalties.
Back
Top