CW "Arrow" Emerald Archer build thread

lukester

Active Member
CW 'Arrow' Emerald Archer build thread
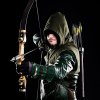
11012788_10153044494691668_4917767618894486905_n.jpg

Vigilante Props

I'm Luke. A active Vigilante based in North Texas and I run Vigilante Props.

Started working on Arrow cosplay in December 2013. I've been tracking and documenting my progress here.

Check me out on Facebook.


Updated: July 2015

amell_barrowman photo op.jpg amell_ramsey photo op.JPG

Here are some NEW photos from Dallas Comic-Con: Fan Days 2015.

Click Here for a Full Album.


P1070597.JPG


Prop Index:
1. Season 1 - Bow
2. Season 1 - Forearm Quiver
3. Season 1-3 Vigilante Quiver
4. Resin Arrow heads

5. Season 3 - The Arrow 2.0 - Cisco Upgrades
6. Season 1-3 Leather Vigilante Quiver


Previously:

I started on this costume in January 2014 for the Sci-Fi Expo. I wanted to work on the costume mainly because I love Arrow and its so awesome, but also because I planned on meeting Stephen Amell. I didn't really know what I was getting myself into at the time, and didn't get to finish many of the upgrades I wanted to make to the costume. Most of us have been there I'm sure. Working on things the night before the convention.

Arrow v1 - Sci-Fi Expo 2014

IMG_6865.JPG meandstephen.JPG

I had a blast at Sci-Fi Expo. Got a lot of great feedback about the costume, even though I felt like I hadn't finished it yet. And I got to meet Stephen Amell! (Mission accomplished). I also met a bunch of great people that weekend who turned me onto The RPF, and really got me inspired to put more work into my cosplay.

Arrow v2 - Dallas Comic-Con 2014

IMG_8726.JPG redcarpet1.jpgredcarpet2.jpg

Manu Bennett was there so I was able to get this pic. He is so AWESOME in his photo op sessions. He enjoys it and has fun. Really nice guy.

arrowvsslade.JPG


Arrow 2.5 - Dallas Comic-Con: Fan Days 2014.

1956978_10100331771091894_4981873288837889597_o.jpg fcJCmLw.jpg


Click here for the whole album.


More cosplay and props at Vigilante Props


IMG_8726.JPG


redcarpet1.jpg


IMG_6865.JPG


meandstephen.JPG


redcarpet2.jpg


arrowvsslade.JPG


1956978_10100331771091894_4981873288837889597_o.jpg


fcJCmLw.jpg


amell_barrowman photo op.jpg


P1070597.JPG


10974281_10100409931722364_5928604285916111274_o.jpg


amell_ramsey photo op.JPG


10994926_10100409932176454_9167584349585071258_o.jpg


11012788_10153044494691668_4917767618894486905_n.jpg
 
Last edited by a moderator:
Season One Bow:

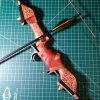
I prefer to call it the "Island Bow". Not going into a lot of detail on this, its been covered extensively in other threads.


gpvJQHc.jpgyltLwo6.jpg 8U32v49.jpg9gVDTst.jpglqimqJZ.jpg


Forearm Quiver:


Here's my first quick attempt at the arm quiver. I used the one that came with my CosplaySky suit, and turned it into more of a Season 2 look. Anyways, I ran out of time to work on it before the Sci Fi Expo. It served its purpose. I wanted to remake the quiver, with real rubber arrow locks like in Season 1. I started with a fore arm guard similar to this one.


I then cut pieces of cardboard, black vinyl (included with the original arm quiver) and some polyester scrap fabric I picked up at Johann's. Mostly used hot glue to combine the different layers. My arm quiver is approx 7 " long. Then I added the nylon straps and piece of Velcro along the top.


The rubber arrow locking pieces I picked up somewhat randomly. I bought a cheap practice bow and it came with one 5 arrow lock. Then I purchased a cheap quiver and used the arrow lock from that. This is the one I used, Amazon.com: Bohning Sentry 3 Arrow Quiver, Black: Sports & Outdoors . Bohning also sells just the rubber arrow lock piece. Its not screen accurate but its close and cheap.

1/4 inch wooden rods work well, and fit the arrow locks. Painted the wooden arrows black/metallic silver. Then painted my Arrow vanes a lighter more yellowish green. Attached 2.25 inch Vanes/fletching to the wooden rods. The arrow vanes I used were these Amazon.com: Bohning 2.25-Inch Shield Cut X-Vanes (36-Pack), Neon Green: Sports & Outdoors.

Then I used hot glue to attach the rubber locks to the nylon straps on the quiver. And added a few fabricated "arrow-heads".


Here's the finished quiver:

gear.jpg
 
Last edited:
Season 1-3 Vigilante Quiver

theundertakingbackquiver.JPGtheundertakingbackquiver2.JPG

Quiver 1.0


Here's my first attempt at making the quiver. Not very precise or very accurate but it served its purpose. Its 2 layers of cardboard, with several layers of duct tape. Then a black fabric I picked up, which is definitely not the screen accurate Cordura. Then a green vinyl I found at Johann's for the trim around the top. The strap I re-purposed from the original that was sent with my Cosplay Sky suit.

IMG_7133.JPG0fXL3nV.jpg IMG_7520fix.jpg


Quiver 2.0

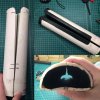
Here is something I am particularly proud of. I spent about 2 months getting this new quiver just right. It has a hard PVC shell, then several additional layers of fabric and foam. I used the screen accurate 1000 Denier Black Cordura for the outer layers. Then I used a 1.25 inch leather belt painted midnight green for the trim around the top. The strap was also custom and done by me. Cheap fabric remnant I painted brown, then used a sewing machine to sew it on the 1.5 inch Nylon strap.

Tools used cutting and shaping the PVC. Pretty standard. You definitely want reinforced cutting disks for your dremel. The cheap cutting disks that are included will break.

IBv1ebG.jpg

You start with this.

S6sjVNV.jpg

- 3' Schedule 40 PVC pipe. Originally 24' cut to 18'.

- Shape with Heat gun. Note* Shaping with the heat gun is painfully slow. I tried but eventually found a better way. Here's my method.
- Stick the PVC pipe in the oven on 350 for 5 min. I flipped the pipe and did another 5 min to get the entire pipe flexible. Note * One thing that's nice about using this method is that when you heat the pipe in the oven, it gets flexible and it starts returning to its original shape. So you can correct a mistake in shaping the quiver if you need to.

V2lWTLI.jpg QrwA5jj.jpg eMzprFg.jpg CeUvNgL.jpgtALwwrZ.jpg

- Mark your cut lines. Cut the quiver in half.
- Spray paint both halfs of the quiver. *Optional it doesn't show

OncsnC5.jpg9eKWm1r.jpg

- Line the inside of the quiver with Cordura, I used a green fabric I had, again this won't show so its optional. I also used Black Cordura on the inside of several other Quivers.
- Adhesive Spray is my preference for the fabric. Spray the back of the Cordura and let it sit for a minute, then attach.
- Attach the two halves of the Quiver. I used hot glue, other types of adhesive would work well too of course, but hot glue does the trick.

0k07yFm.jpg

- Here is where I attached the Nylon strap to the Quiver shell.
- 4' from the bottom, 2' from the top. Hot glued the hell out of that strap. Leaving an inch or two at either end.
- Next I used simple craft foam as the outer jacket for the Quiver. I made small cuts so the strap feeds through on top and bottom.

ypZedbI.jpg ZqJkwvp.jpg

- This part I don't have documented well in pictures. I'll explain a bit.
- After I have the foam measured and cut, it needs to be a tight fit around the PVC shell, glue the cordura to one side of the foam.
- You'll want a few inches of extra fabric so you can fold it around the sides and the top and bottom.
- Once you have the Cordura glued to the foam you attach the Outer Cordura jacket to the shell.
- You can use your preference in adhesives. I used adhesive spray and a few touches of hot glue in problem areas.

So this is the quiver with the outer jacket attached.

pOrbsUA.jpg

- Now create a smaller foam jacket that will fit around the bottom of the quiver and cover up the hot glue showing.

I don't have any more pictures of my process unfortunately. I was in a hurry and didn't document. As you can see I added another layer of painted vinyl around the inside of the of the quiver and at the top. I also used a 1.25 inch leather belt around the top for my trim. Painted with the acrylic leather paint. Midnite green.

Dk1cUFc.jpgYsLIrRh.jpgIMG_0743.JPG IMG_0774.JPG


Here's the completed Quiver w/ real carbon arrow shafts. Custom fletching. Thanks to Emerald Archers.

IMG_1041.JPG

IMG_7133.JPG


IMG_7520fix.jpg


IMG_0743.JPG


IMG_0774.JPG


IMG_1041.JPG


OncsnC5.jpg


9eKWm1r.jpg


0k07yFm.jpg


YsLIrRh.jpg


IBv1ebG.jpg


V2lWTLI.jpg


QrwA5jj.jpg


S6sjVNV.jpg


0fXL3nV.jpg


eMzprFg.jpg


CeUvNgL.jpg


tALwwrZ.jpg


ypZedbI.jpg


ZqJkwvp.jpg


pOrbsUA.jpg


Dk1cUFc.jpg


theundertakingbackquiver2.JPG


theundertakingbackquiver.JPG
 
Last edited by a moderator:
Update:

Completed several items since my last post. Been working these the past 2-3 months.

Season One Bow:

I prefer to call it the "Island Bow". Not going into a lot of detail on this, its been covered extensively in other threads.


View attachment 394241View attachment 394242 View attachment 394243

View attachment 394249


Quiver 1.0

Here's my first attempt at making the quiver. Not very precise or very accurate but it served its purpose. Its 2 layers of cardboard, with several layers of duct tape. Then a black fabric I picked up, which definitely not the screen accurate Cordura. Then a green vinyl I found at Johann's for the trim around the top. The strap I re-purposed from the original that was sent with my Cosplay Sky suit.

View attachment 394163 View attachment 394164 View attachment 394166


Quiver 2.0

Here is something I am particularly proud of. I spent about 2 months getting this new quiver just right. It has a hard PVC shell, then several additional layers of fabric and foam. I used the screen accurate 1000 Denier Black Cordura for the outer layers. Then I used a 1.25 inch leather belt painted midnight green for the trim around the top. The strap was also custom and done by me. Cheap fabric remnant I painted brown, then used a sewing machine to sew it on the 1.5 inch Nylon strap.

View attachment 394260 View attachment 394261 View attachment 394262View attachment 394263View attachment 394195 View attachment 394198 View attachment 394210


Here's the completed Quiver w/ real carbon arrow shafts. Custom fletching. Thanks to Emerald Archers.

View attachment 394221

More to come...
Hey man your quiver looks great I was wondering where did you find out it was cordura I've been searching the definitive thread but found nothing about the quiver would love more of w breakdown to exactly how you made it
 
Hey man your quiver looks great I was wondering where did you find out it was cordura I've been searching the definitive thread but found nothing about the quiver would love more of w breakdown to exactly how you made it

I plan to add more of a breakdown for some of the items, and I still have a few props that I haven't posted yet. What types of things are you interested in specifically on the Quiver, materials or the process? I can give specifics if you want. Might take me awhile to make time for it though.
 
I plan to add more of a breakdown for some of the items, and I still have a few props that I haven't posted yet. What types of things are you interested in specifically on the Quiver, materials or the process? I can give specifics if you want. Might take me awhile to make time for it though.
more the build process your pics went from pvc tube to aswome quiver I want to see the inbetween lol
 
more the build process your pics went from pvc tube to aswome quiver I want to see the inbetween lol


Updated previous posts with more process pictures and explanation.

I'll continue to add more and update when I feel like it. Unfortunately that's almost all the WIP pics I have of the Quiver 2.0.
 
Update:

Been awhile since I updated and I've completed so many items. I'll post a few here and sort them out later.

Arrow Suit 2.0

Newer version of the CosplaySky Arrow suit. Re-colored by me. Custom hood by me. Love that drape.

vigilante.JPG 10861076_10100409931278254_1914433825012055163_o.jpg

Quiver 3.0

Another version of my Quiver. This will be the final one. I custom made the strap with the snap and velcro closure system for accuracy and mobility.

P1070704.JPG quiver_1.jpg

Trick Arrow's:

Fixed these up for Dallas Comic-Con: Fan Days 2015. This is the free model available online. I had it printed, then I finished with the paint and color markers. In decending order these would be: Surveillance arrow or flash-bang arrow, explosive arrow, and incendiary.

IMG_3556.JPG10959938_10100409932425954_8134657155841740985_o.jpg


Season 2: Forearm Quiver

This was a rush build I finished in 4 hours the night before the convention. Pleased with the results, I plan to revisit this and get a cleaner version.

10980723_10153003880496668_5551995494949670213_n.jpg

More on the way... I can't wait to get start on the Arrow 2.0 Suit upgrades.
 
Making a Silicone mold of the Zwickey Archery Eskimo broadhead and resin casting

I've been needing to do this for a long time, but honestly I had no idea how to start. So I spent some time researching and watching instructional videos, and got a molding and casting start kit.


11084299_10153125364876668_5954138308021343386_n.jpg

All the materials used were supplied in the starter kit I bought from http://www.brickintheyard.com/ . Great company, I received a personal phone call regarding a shipping issue, and their youtube channel supplied me with all the knowledge I needed to complete my first mold/cast project.

First step was to create the silicone mold.


IMG_0895.JPG

I chose to use the cylinder tubing method for this mold as opposed to the block method. This seemed more practical, and used less Silicone. Next I had to cut the original arrow head out.


VBAzJ4n.jpgQAvPV50.jpg

Here you can also see how I had the arrow head mounted on the foam board. Hot glued down with clay around the base. That gave the mold a perfect funnel at the top.

wjZXbcS.jpg

First cast didn't come out quite right, but the second cast was a success. Actually turned out pretty good! The only negative thing I would mention is that the EasyFlo 60 resin I'm using is flexible and I'm not sure if its tough enough for such a small piece.

KpMCCNR.jpg6ysoIZA.jpg

The silicone really captured an impressive level of detail from the broad-head.

11084299_10153125364876668_5954138308021343386_n.jpg


IMG_0895.JPG


VBAzJ4n.jpg


QAvPV50.jpg


wjZXbcS.jpg


KpMCCNR.jpg


6ysoIZA.jpg
 
Last edited by a moderator:
Arrow 2.0 (Cisco Upgrades)

Finished these first 2.0 pieces up over the last month.

oZT9G9s.jpg


Kn3exZP.jpg

HOOwkfH.jpg EpYTPTG.jpg FRkwP60.jpg

oZT9G9s.jpg


Kn3exZP.jpg


HOOwkfH.jpg


EpYTPTG.jpg


FRkwP60.jpg
 
Last edited by a moderator:
Update:

Completed several items since my last post. Been working these the past 2-3 months.

Quiver 1.0

Here's my first attempt at making the quiver. Not very precise or very accurate but it served its purpose. Its 2 layers of cardboard, with several layers of duct tape. Then a black fabric I picked up, which is definitely not the screen accurate Cordura. Then a green vinyl I found at Johann's for the trim around the top. The strap I re-purposed from the original that was sent with my Cosplay Sky suit.

View attachment 394163View attachment 403073 View attachment 394166


Quiver 2.0

Here is something I am particularly proud of. I spent about 2 months getting this new quiver just right. It has a hard PVC shell, then several additional layers of fabric and foam. I used the screen accurate 1000 Denier Black Cordura for the outer layers. Then I used a 1.25 inch leather belt painted midnight green for the trim around the top. The strap was also custom and done by me. Cheap fabric remnant I painted brown, then used a sewing machine to sew it on the 1.5 inch Nylon strap.

Tools used cutting and shaping the PVC. Pretty standard. You definitely want reinforced cutting disks for your dremel. The cheap cutting disks that are included will break.

View attachment 403051

You start with this.

View attachment 403071

- 3' Schedule 40 PVC pipe. Originally 24' cut to 18'.

- Shape with Heat gun. Note* Shaping with the heat gun is painfully slow. I tried but eventually found a better way. Here's my method.
- Stick the PVC pipe in the oven on 350 for 5 min. I flipped the pipe and did another 5 min to get the entire pipe flexible. Note * One thing that's nice about using this method is that when you heat the pipe in the oven, it gets flexible and it starts returning to its original shape. So you can correct a mistake in shaping the quiver if you need to.

View attachment 403059 View attachment 403060 View attachment 403074 View attachment 403075View attachment 403076

- Mark your cut lines. Cut the quiver in half.
- Spray paint both halfs of the quiver. *Optional it doesn't show

View attachment 394260View attachment 394261

- Line the inside of the quiver with Cordura, I used a green fabric I had, again this won't show so its optional. I also used Black Cordura on the inside of several other Quivers.
- Adhesive Spray is my preference for the fabric. Spray the back of the Cordura and let it sit for a minute, then attach.
- Attach the two halves of the Quiver. I used hot glue, other types of adhesive would work well too of course, but hot glue does the trick.

View attachment 394262

- Here is where I attached the Nylon strap to the Quiver shell.
- 4' from the bottom, 2' from the top. Hot glued the hell out of that strap. Leaving an inch or two at either end.
- Next I used simple craft foam as the outer jacket for the Quiver. I made small cuts so the strap feeds through on top and bottom.

View attachment 403077 View attachment 403078

- This part I don't have documented well in pictures. I'll explain a bit.
- After I have the foam measured and cut, it needs to be a tight fit around the PVC shell, glue the cordura to one side of the foam.
- You'll want a few inches of extra fabric so you can fold it around the sides and the top and bottom.
- Once you have the Cordura glued to the foam you attach the Outer Cordura jacket to the shell.
- You can use your preference in adhesives. I used adhesive spray and a few touches of hot glue in problem areas.

So this is the quiver with the outer jacket attached.

View attachment 403079

- Now create a smaller foam jacket that will fit around the bottom of the quiver and cover up the hot glue showing.

I don't have any more pictures of my process unfortunately. I was in a hurry and didn't document. As you can see I added another layer of painted vinyl around the inside of the of the quiver and at the top. I also used a 1.25 inch leather belt around the top for my trim. Painted with the acrylic leather paint. Midnite green.

View attachment 403089View attachment 394263View attachment 394195 View attachment 394198


Here's the completed Quiver w/ real carbon arrow shafts. Custom fletching. Thanks to Emerald Archers.

View attachment 394221

More to come...

Your quiver looks great! So just to verify, the length of the quiver is 18" long?
 
The only thing I'm mostly confused by is how to apply the strap. I think I'm overthinking it, but I know it's a three point harness style, I just didn't know how to attach it to the quiver.
 
A long overdue update.

Leather Vigilante Quiver

I completed a leather version of the Season 1-3 Quiver. It's based on my original PVC designs. I removed all the previous material and started over.

The Leather I used is a now discontinued Minelli Forest Green side from a local Tandy's Leather store.

Leather1.jpg Leather2.jpg

The inside is covered in Black Cordura. The outer trip is lined with a single piece of leather that is glued down on both sides. As with all my leather projects I used Barge cement to glue pieces together.

14212675_1794268820793972_3275844840555105081_n.jpg

Then I created the outer Cordura jacket, and top piece of leather.

IMG_8014copy.jpg IMG_8013copy.jpg

Here is the finished Quiver with the straps and bandolier!

IMG_8688.JPG
IMG_8689copy.jpg

Check out more of props and cosplays at Vigilante Props.

IMG_8014copy.jpg


IMG_8688.JPG


IMG_8689copy.jpg


14212675_1794268820793972_3275844840555105081_n.jpg


Leather1.jpg


Leather2.jpg


IMG_8013copy.jpg
 
Last edited by a moderator:
The only thing I'm mostly confused by is how to apply the strap. I think I'm overthinking it, but I know it's a three point harness style, I just didn't know how to attach it to the quiver.

You are probably overthinking it.

You can use hot glue to adhere the nylon strap to each other (or your favorite adhesive), you could also sew the two pieces together, you could use a rivet, or a Chicago screw to attach the pieces. Lots of options there. I used hot glue on several of my Quivers. Worked great.

Using glue and some hand stitching is preferable as it adds a lot of strength and confidence in the strap not breaking.
 
This thread is more than 6 years old.

Your message may be considered spam for the following reasons:

  1. This thread hasn't been active in some time. A new post in this thread might not contribute constructively to this discussion after so long.
If you wish to reply despite these issues, check the box below before replying.
Be aware that malicious compliance may result in more severe penalties.
Back
Top