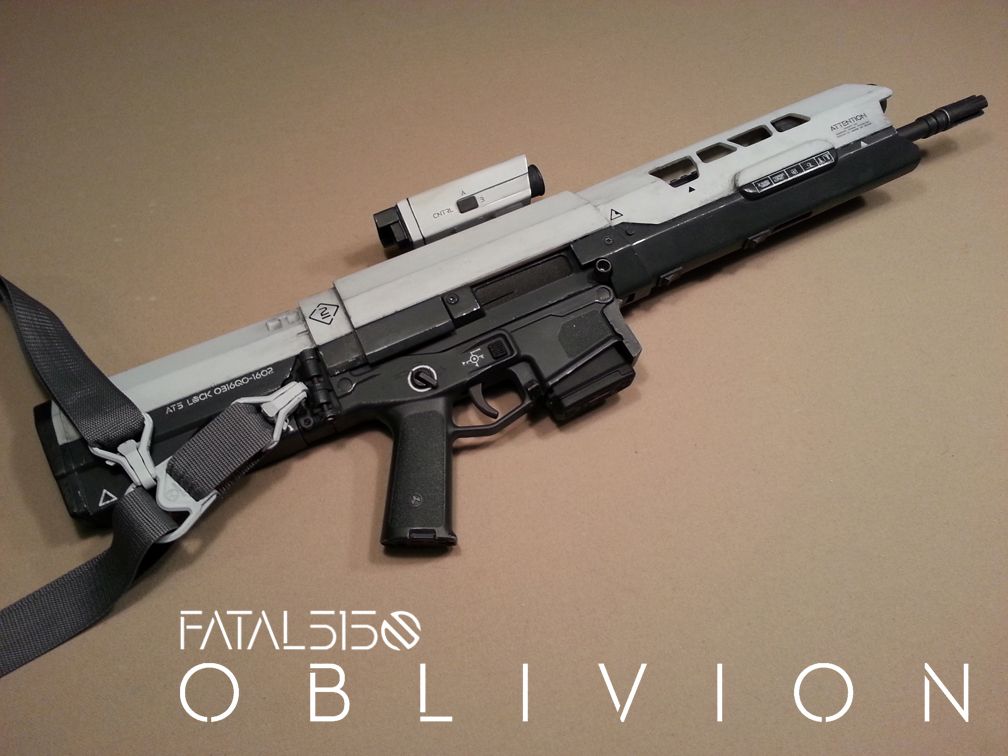
After an incredibly positive response to my Oblivion pistol build thread I decided to do the same for the rifle build.

This amazing piece of prop replica magic comes from skilled RPF member wondersquid, who through many trials and tribulations has created what is now the crown jewel of my collection! I believe the run is now closed, but you can see his process here: http://www.therpf.com/f13/oblivion-movie-rifle-taking-final-payments-181871/
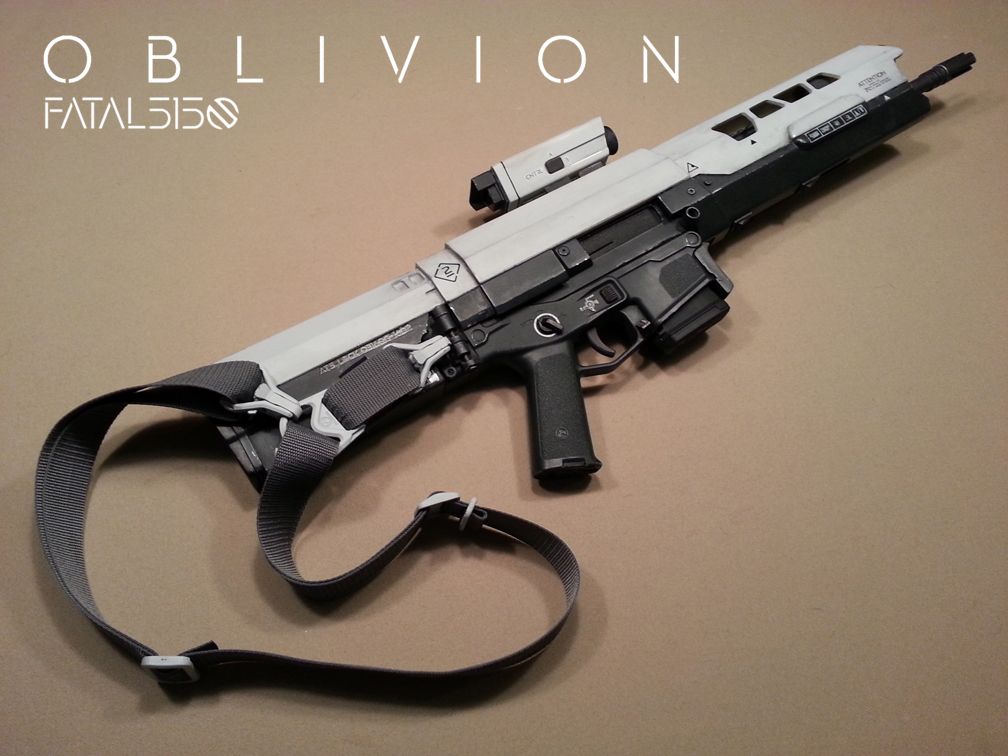
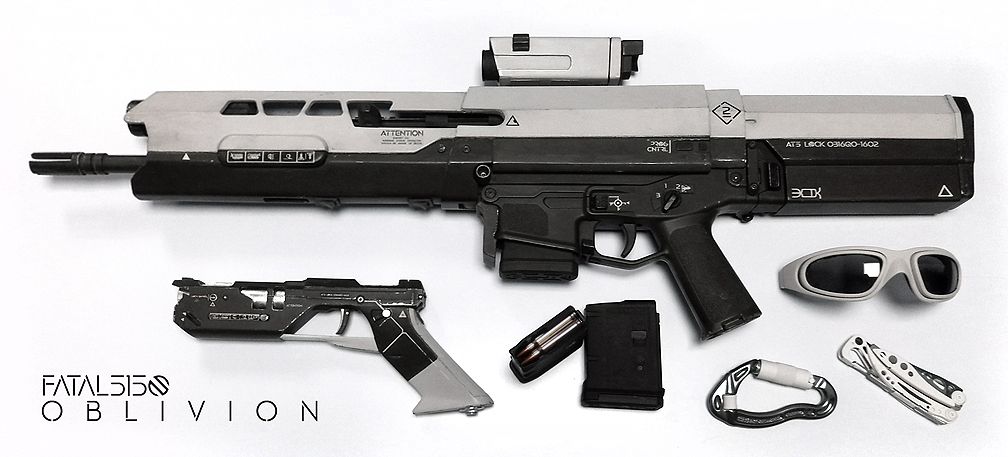
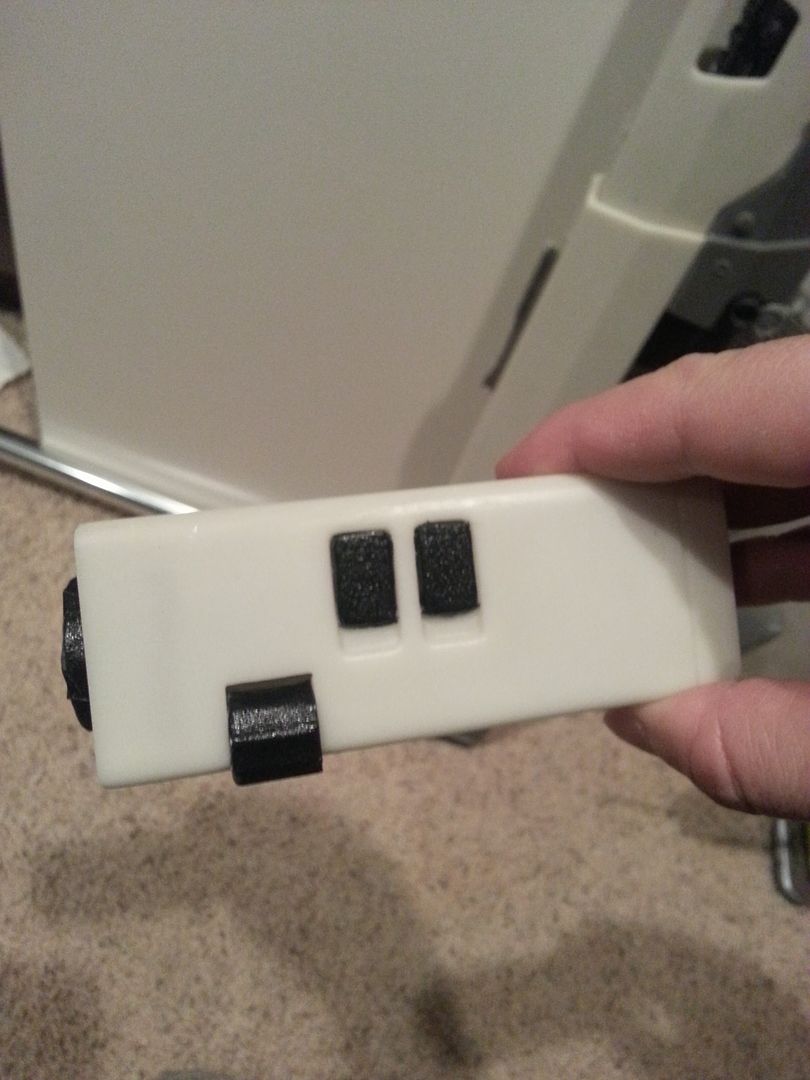
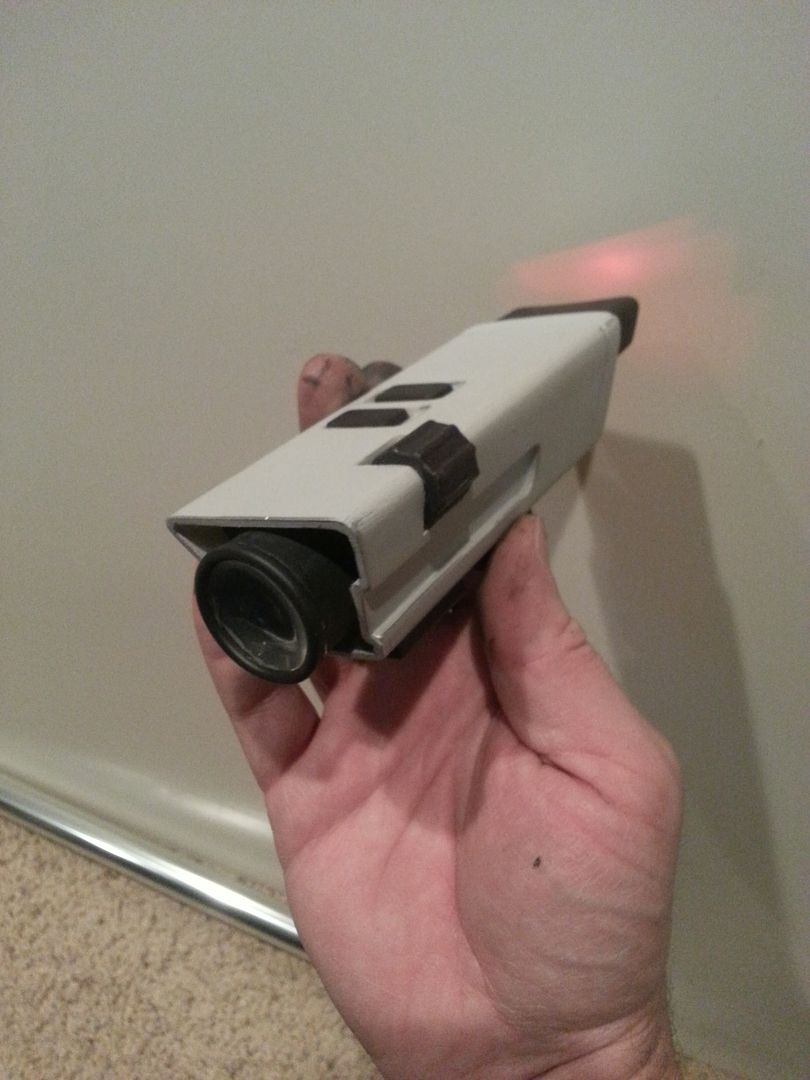
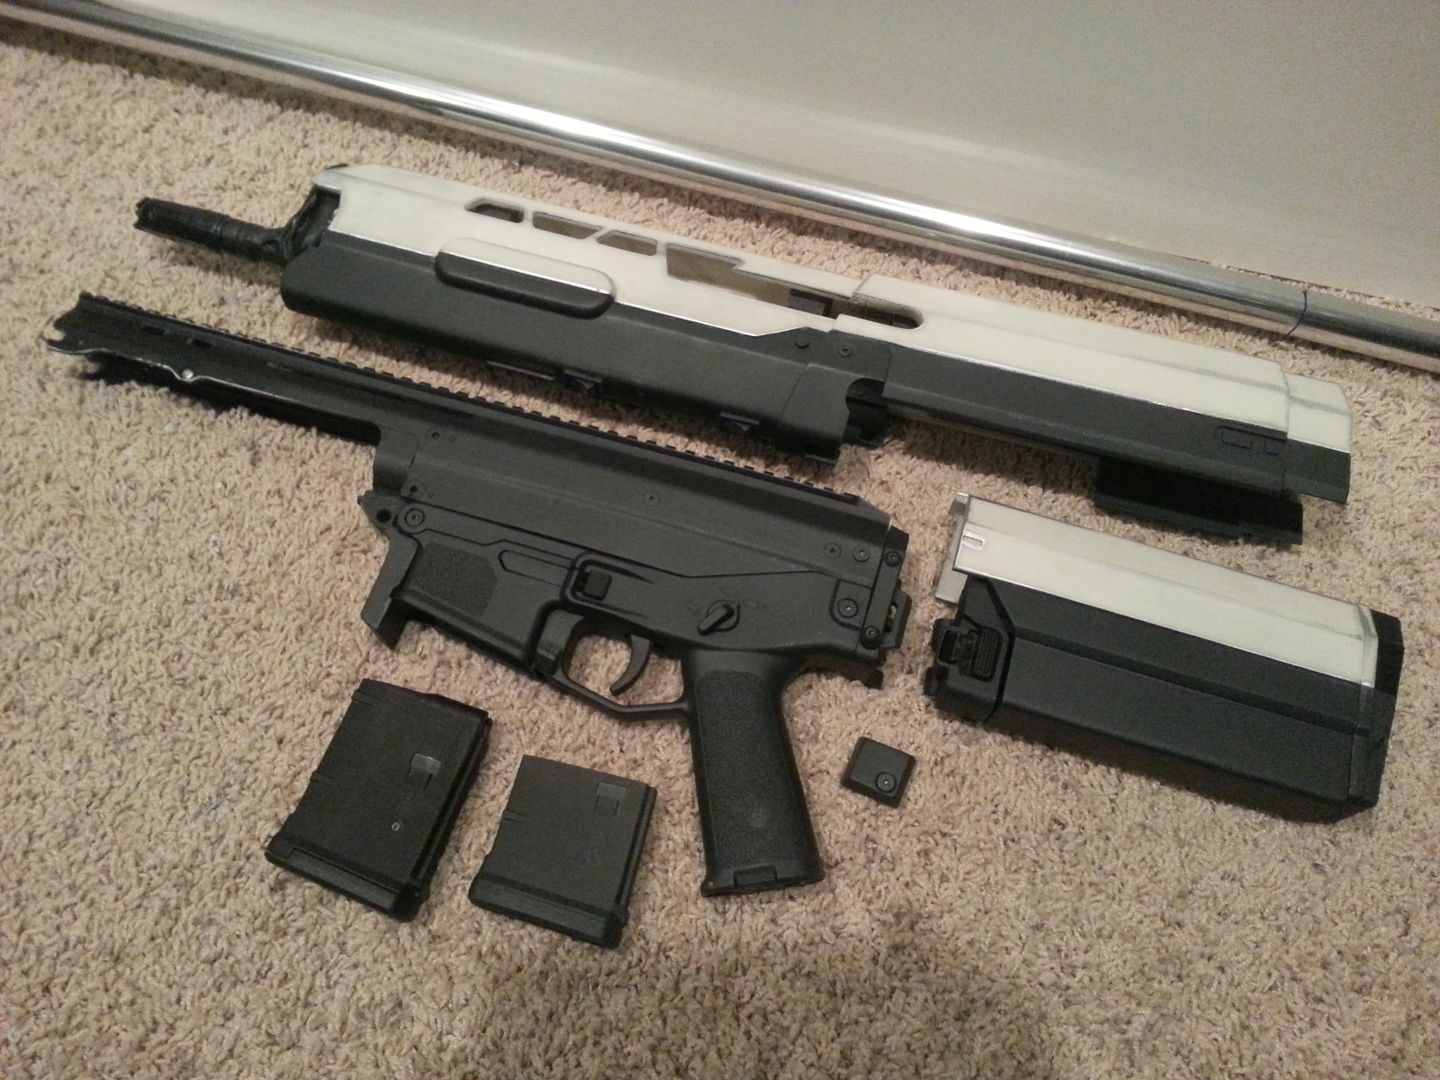
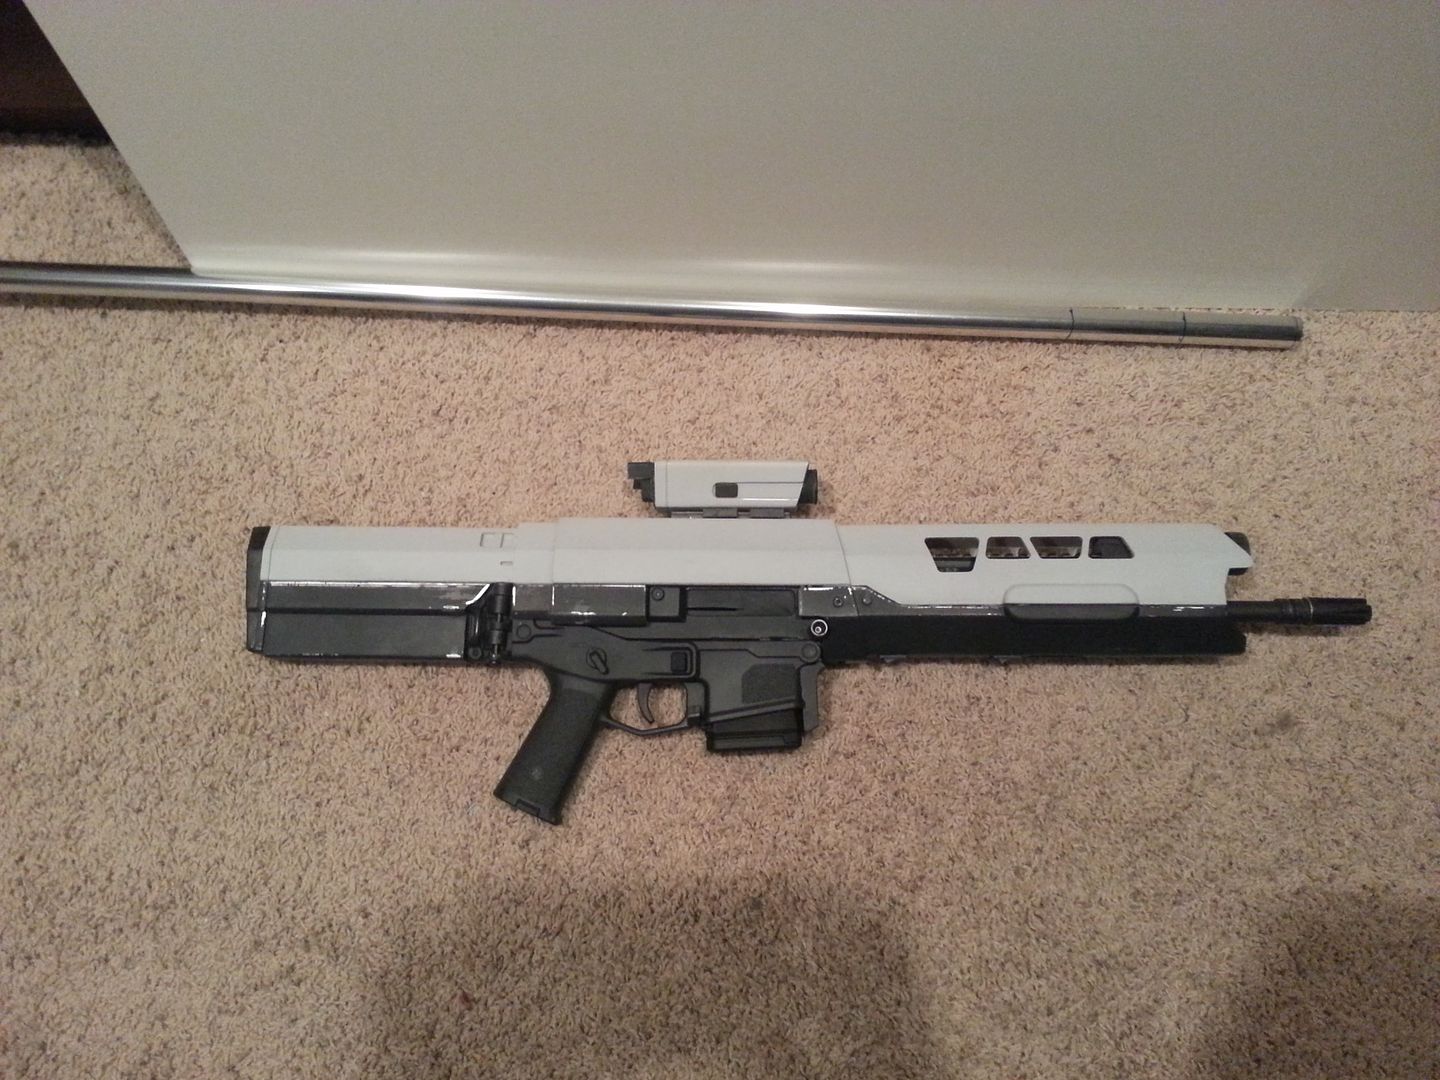
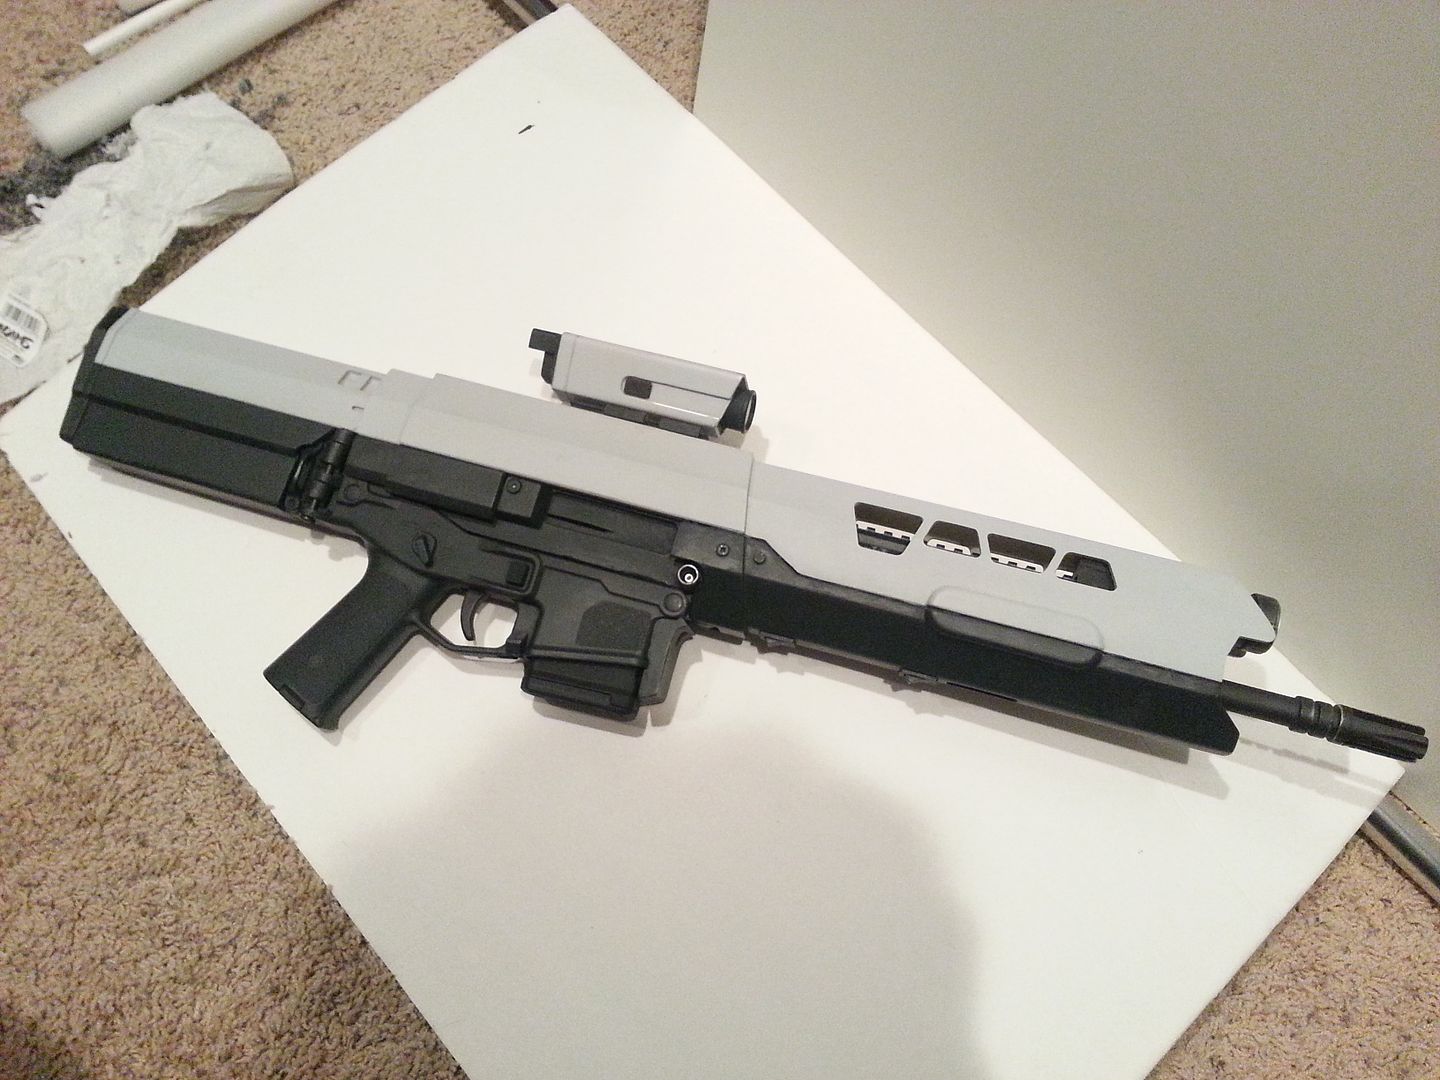
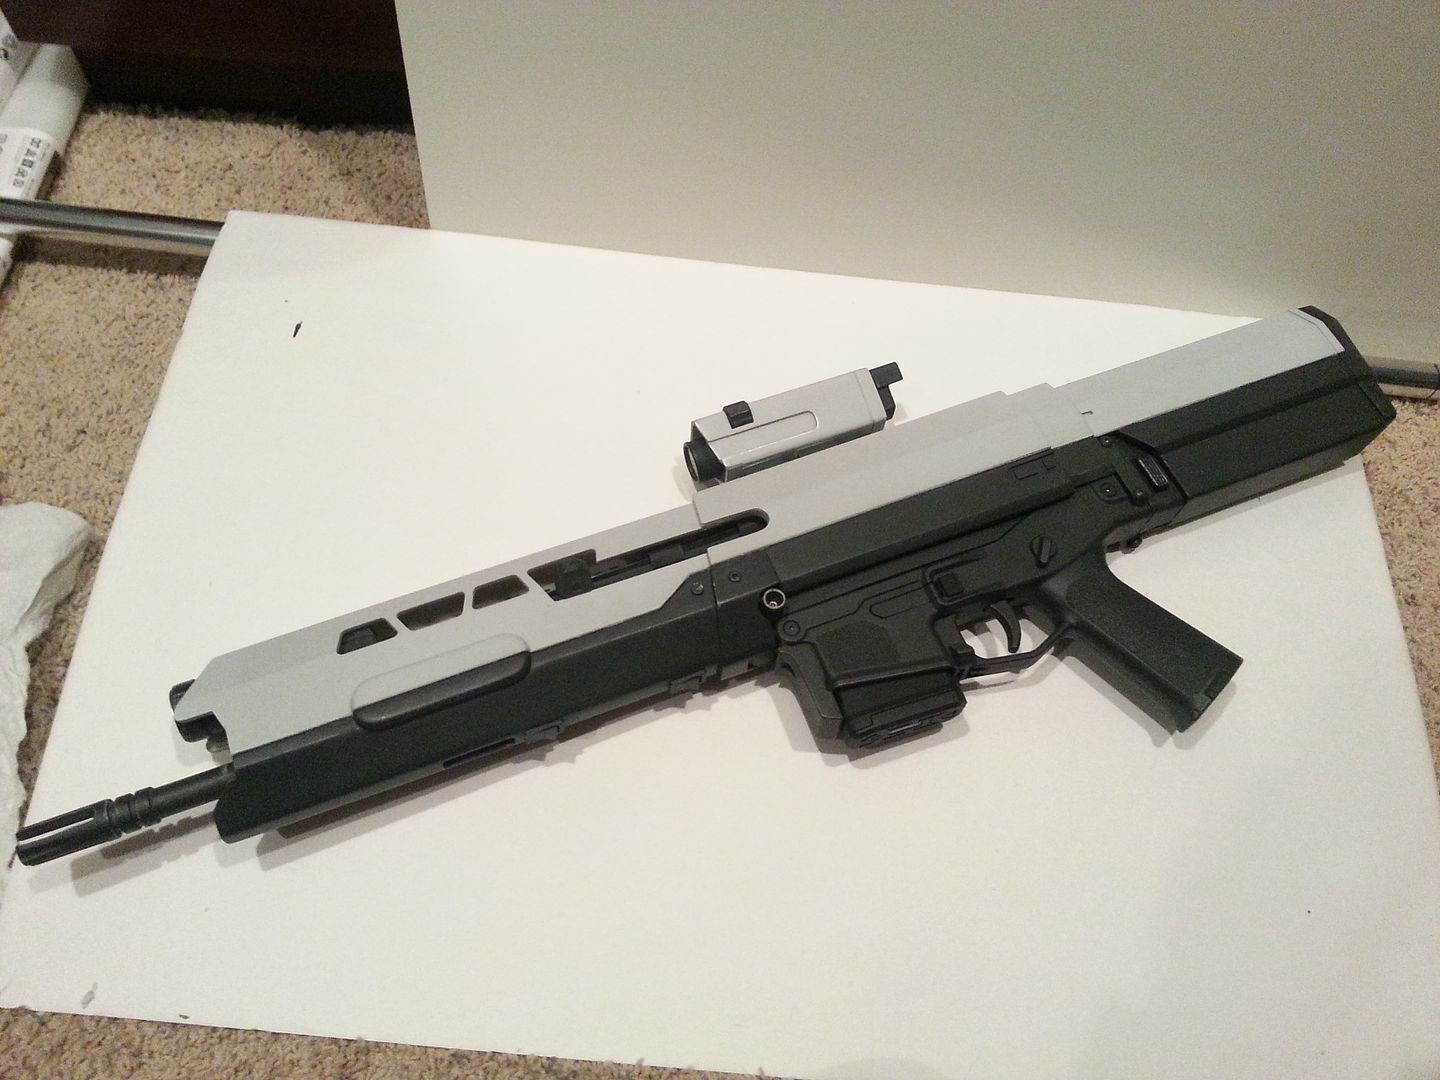
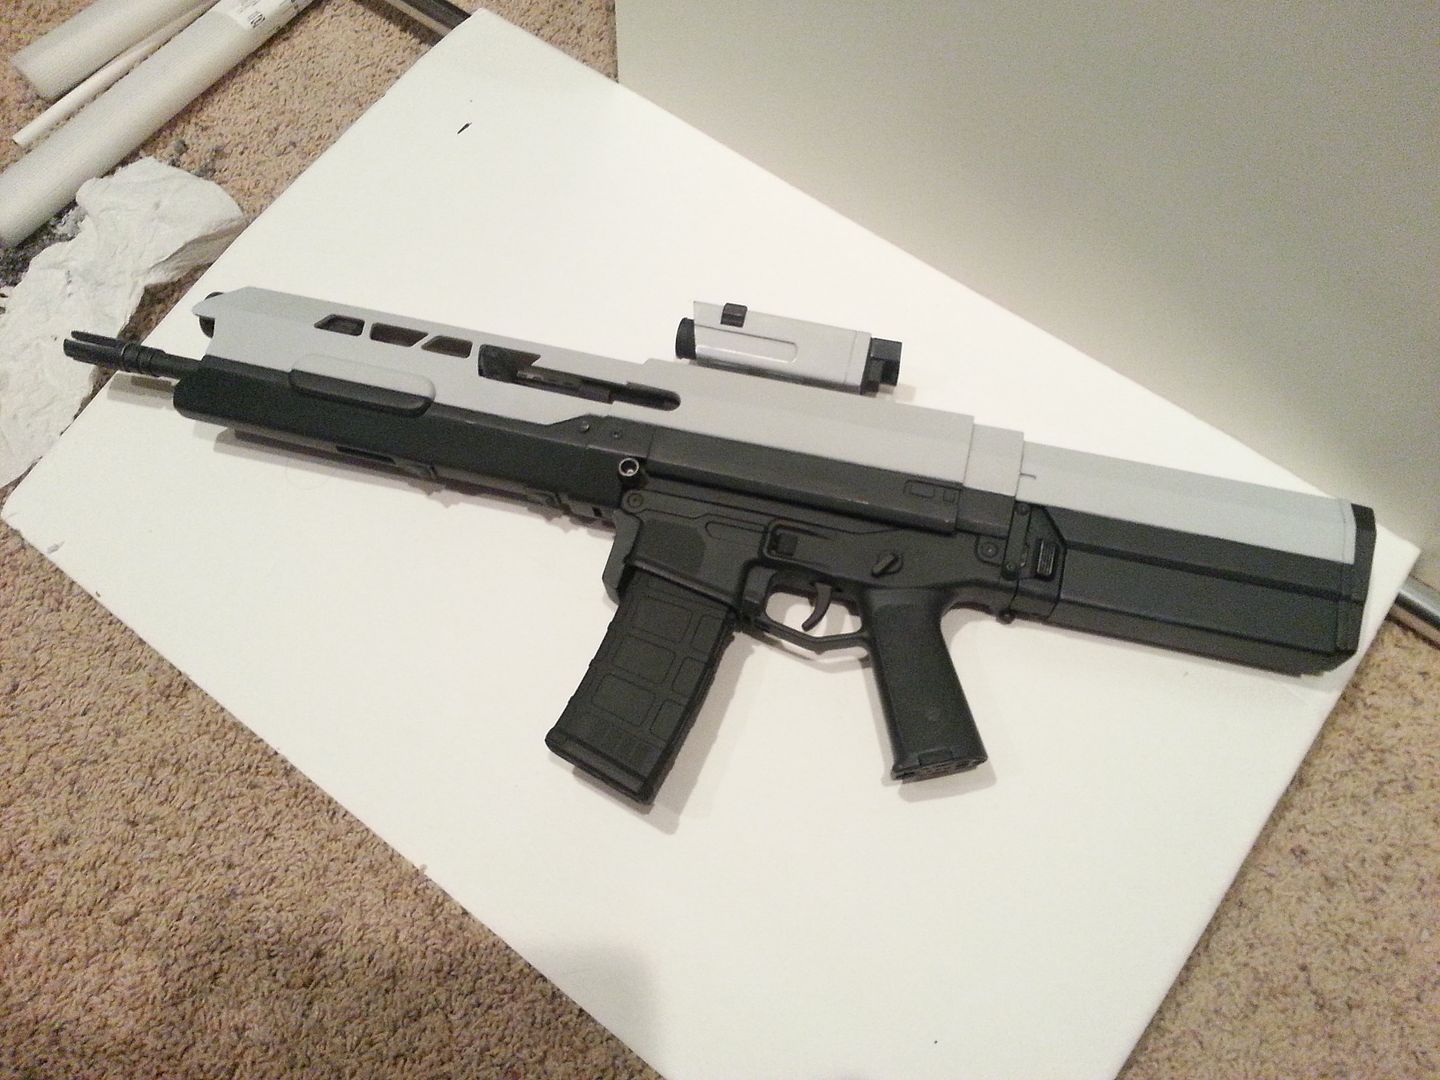
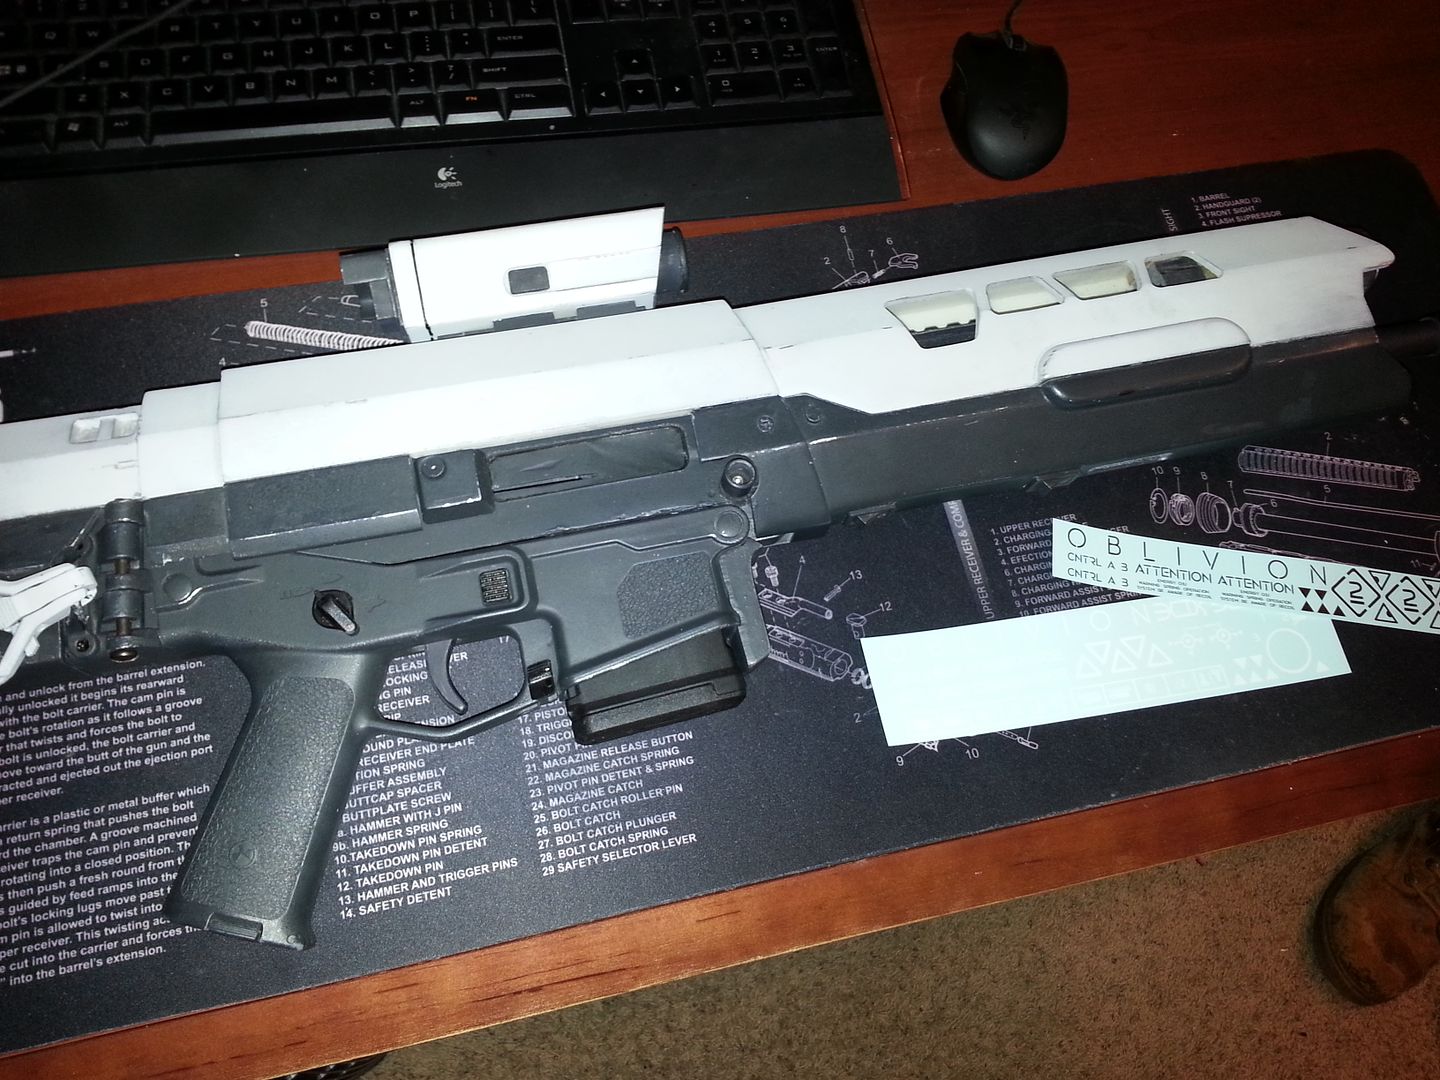
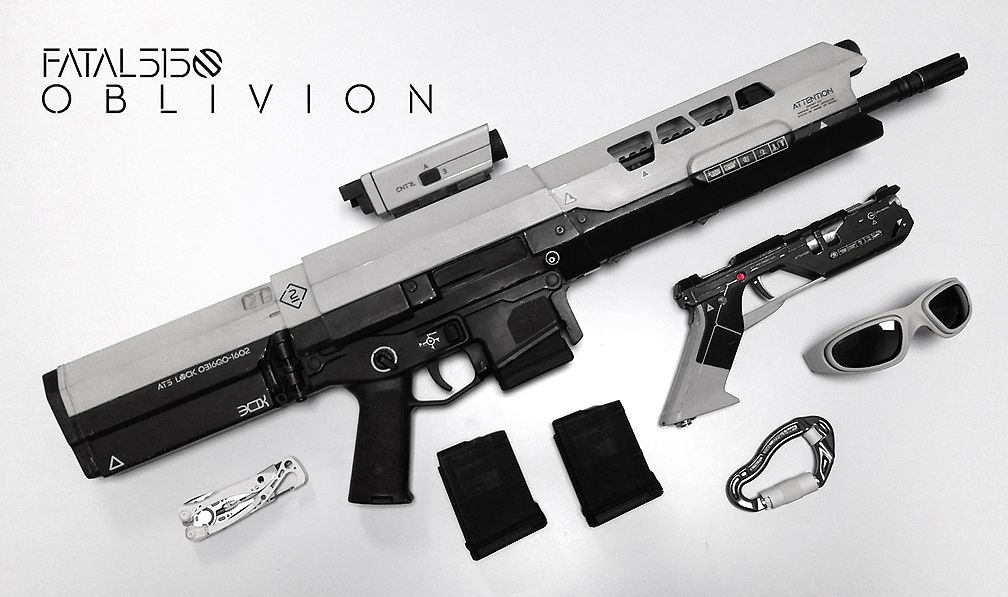
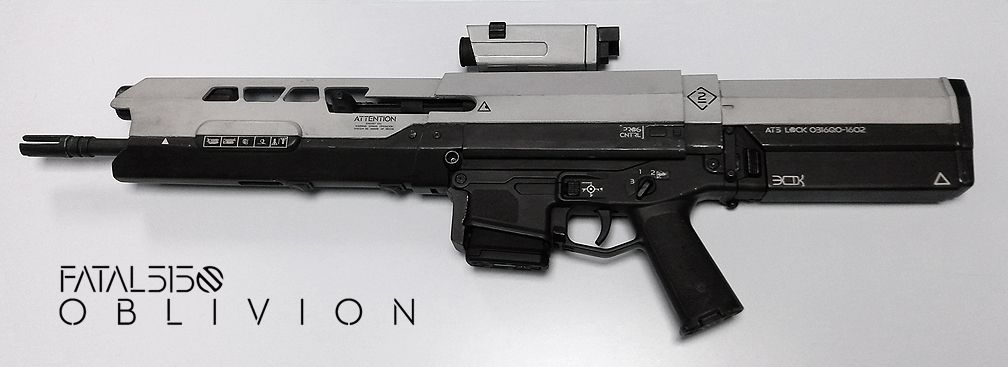
I'll start off with my finished rifle along with the pistol and some other Oblivion accessories:
Because of my persistent nature and my ability to offer decals for the rifle I was fortunate enough to talk Mal into selling me his prototype model so I could develop the decals prior to everyone receiving their kits. BTW, it sounds like some kits have started to ship, or at least will be shipping soon!
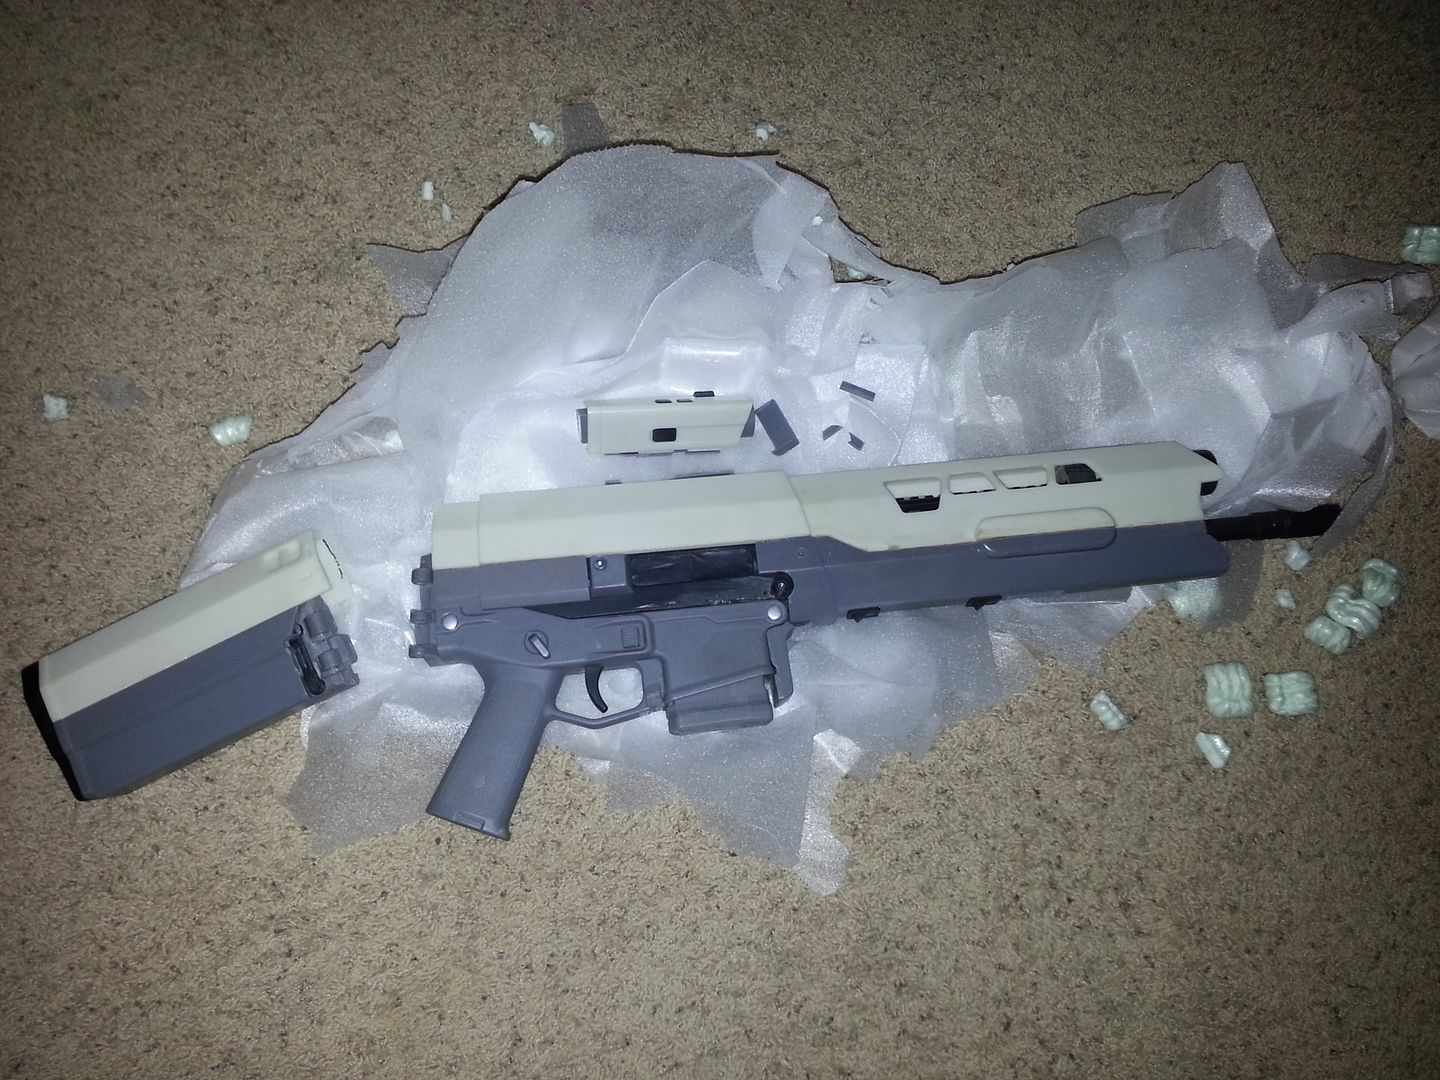
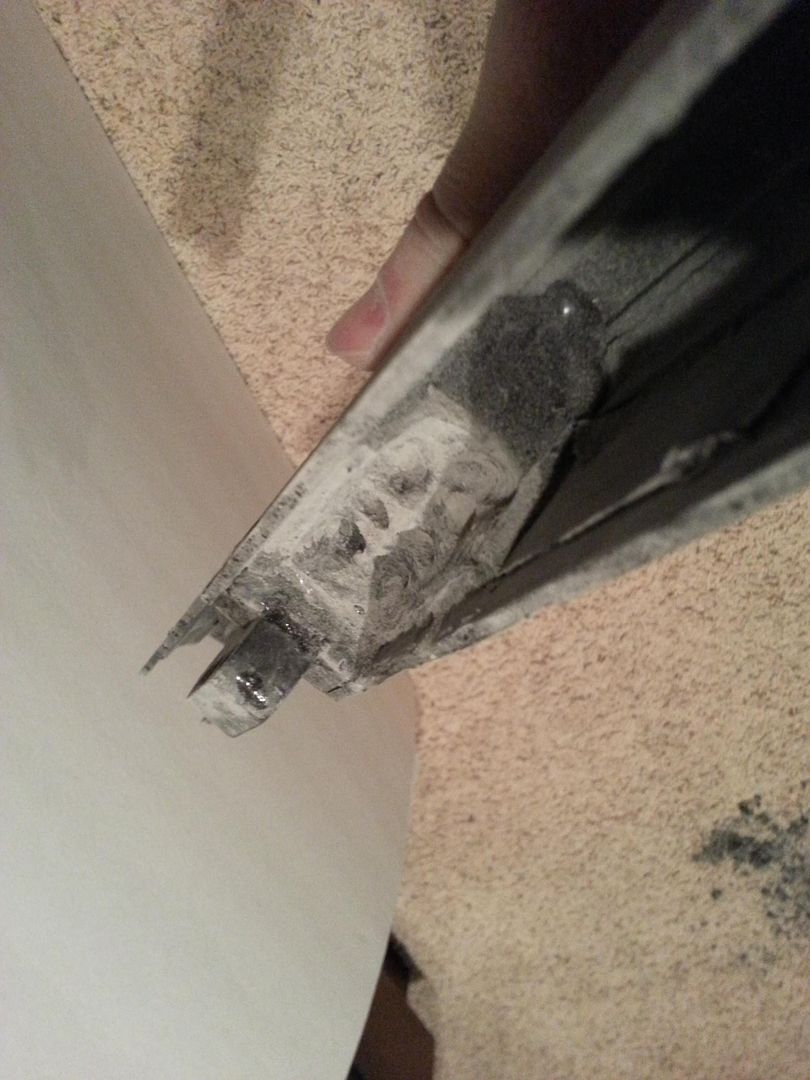
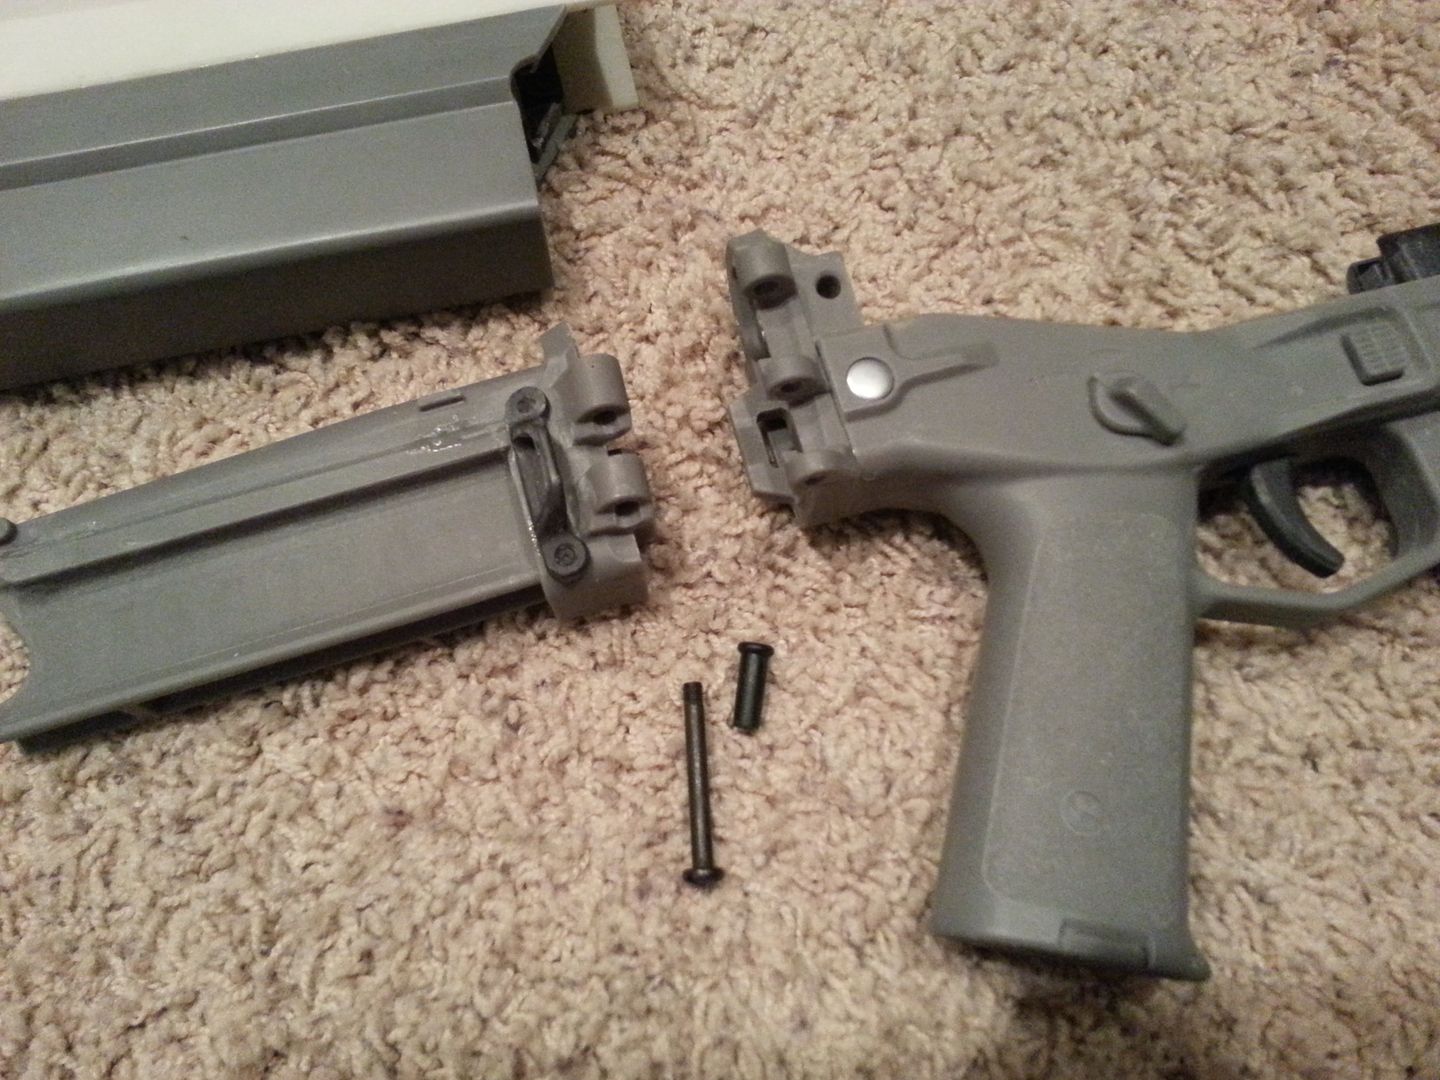
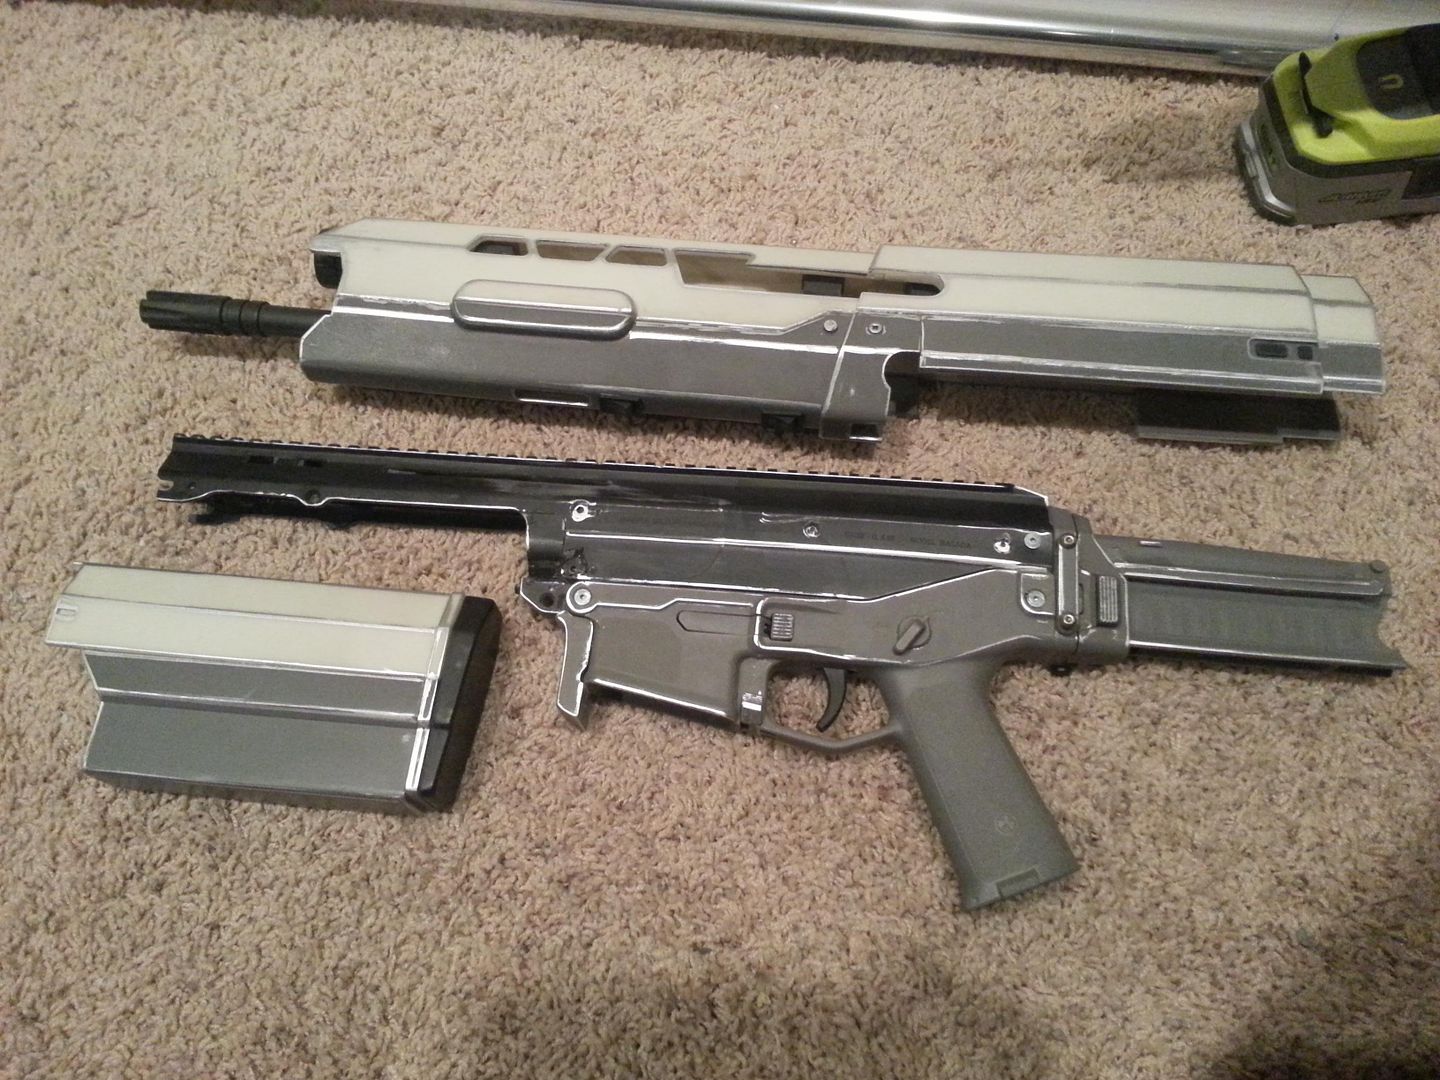
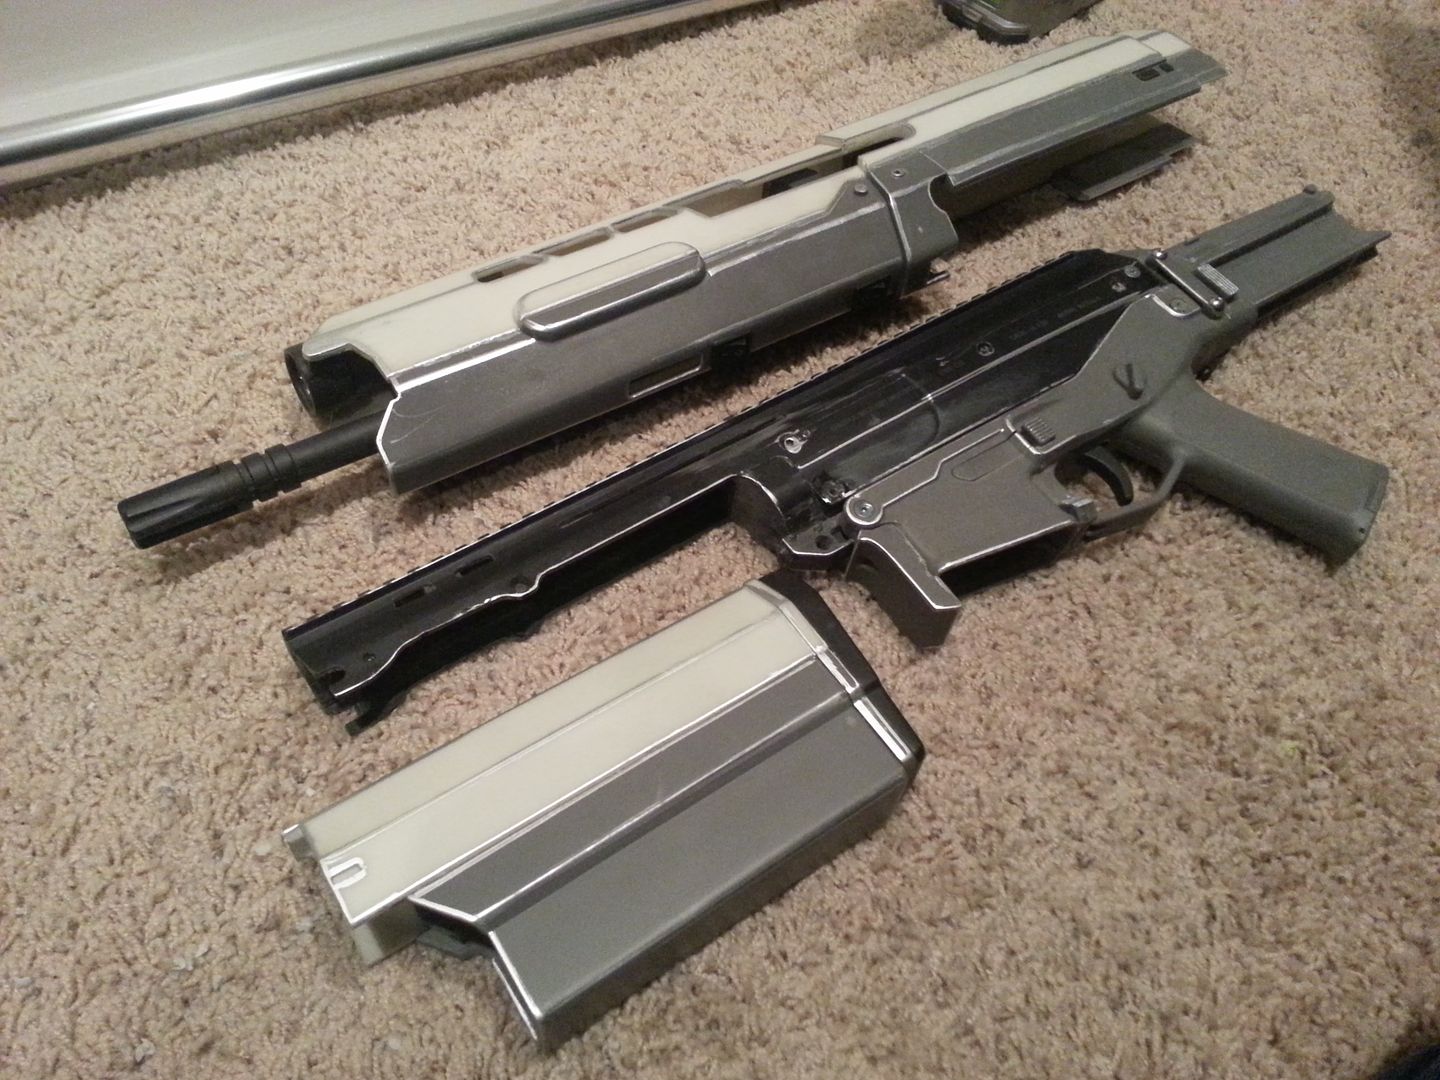
Even though Mal packed the rifle very well, it still arrived in a few pieces due to USPS rough handling of the package, even though it had FRAGILE! written all over it:
I was totally ok with this though, because my plan was to tear it down for painting and incorporating a few mods of my own.
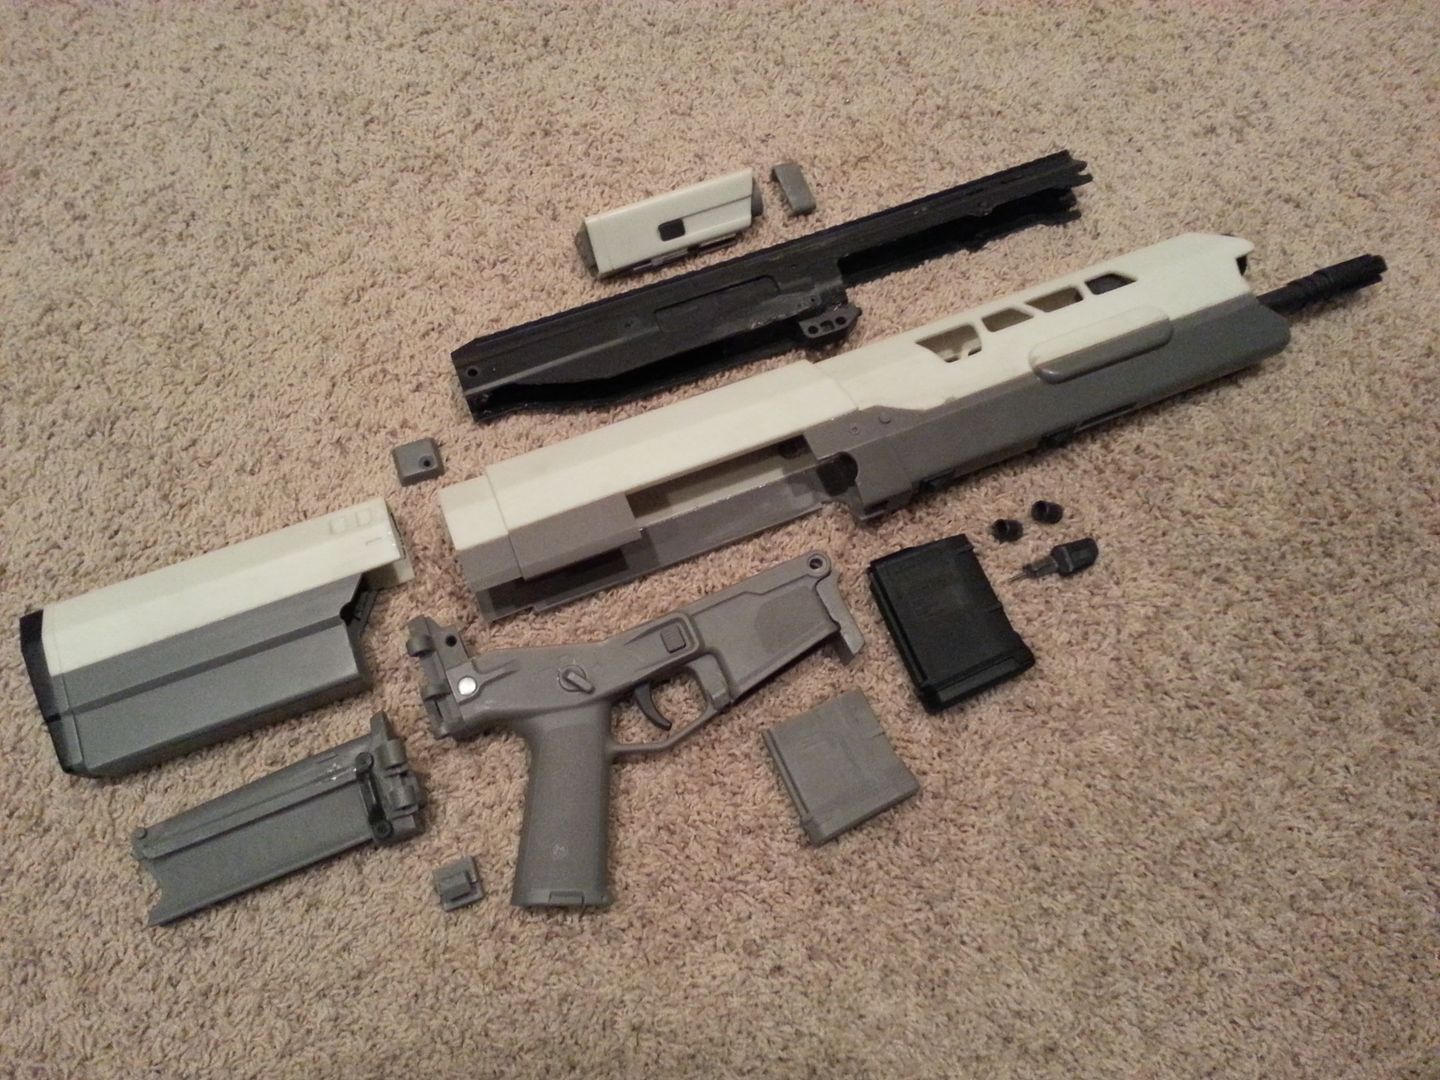
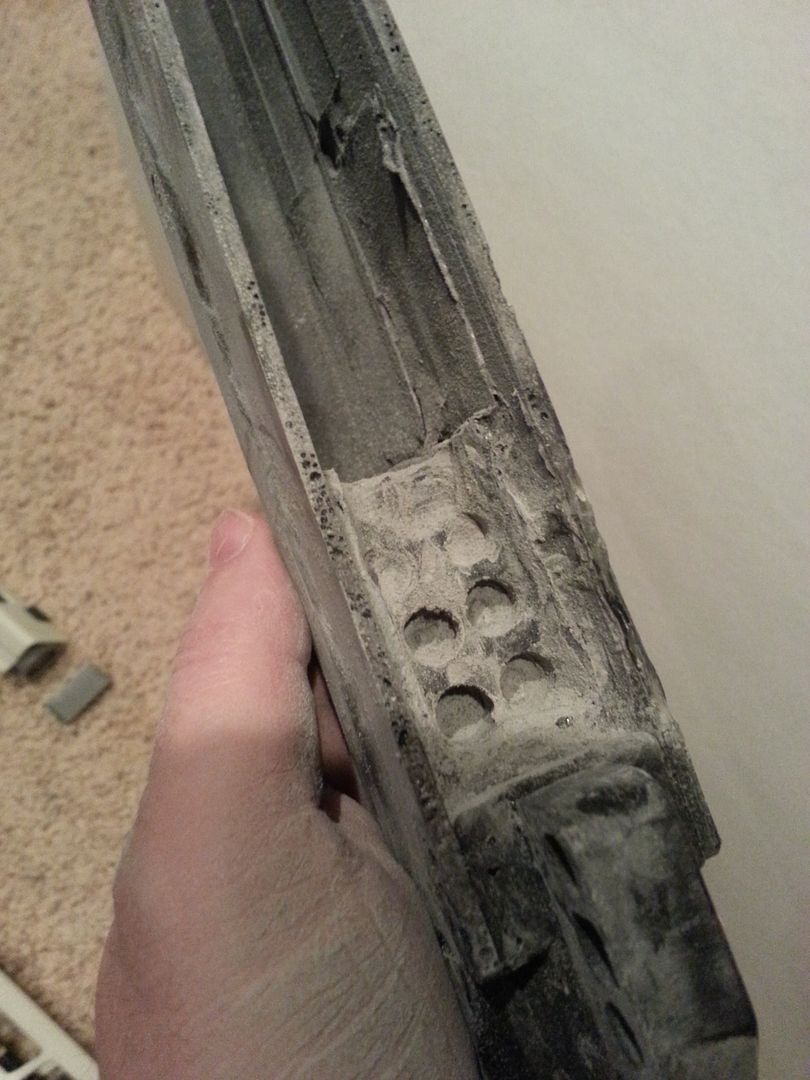
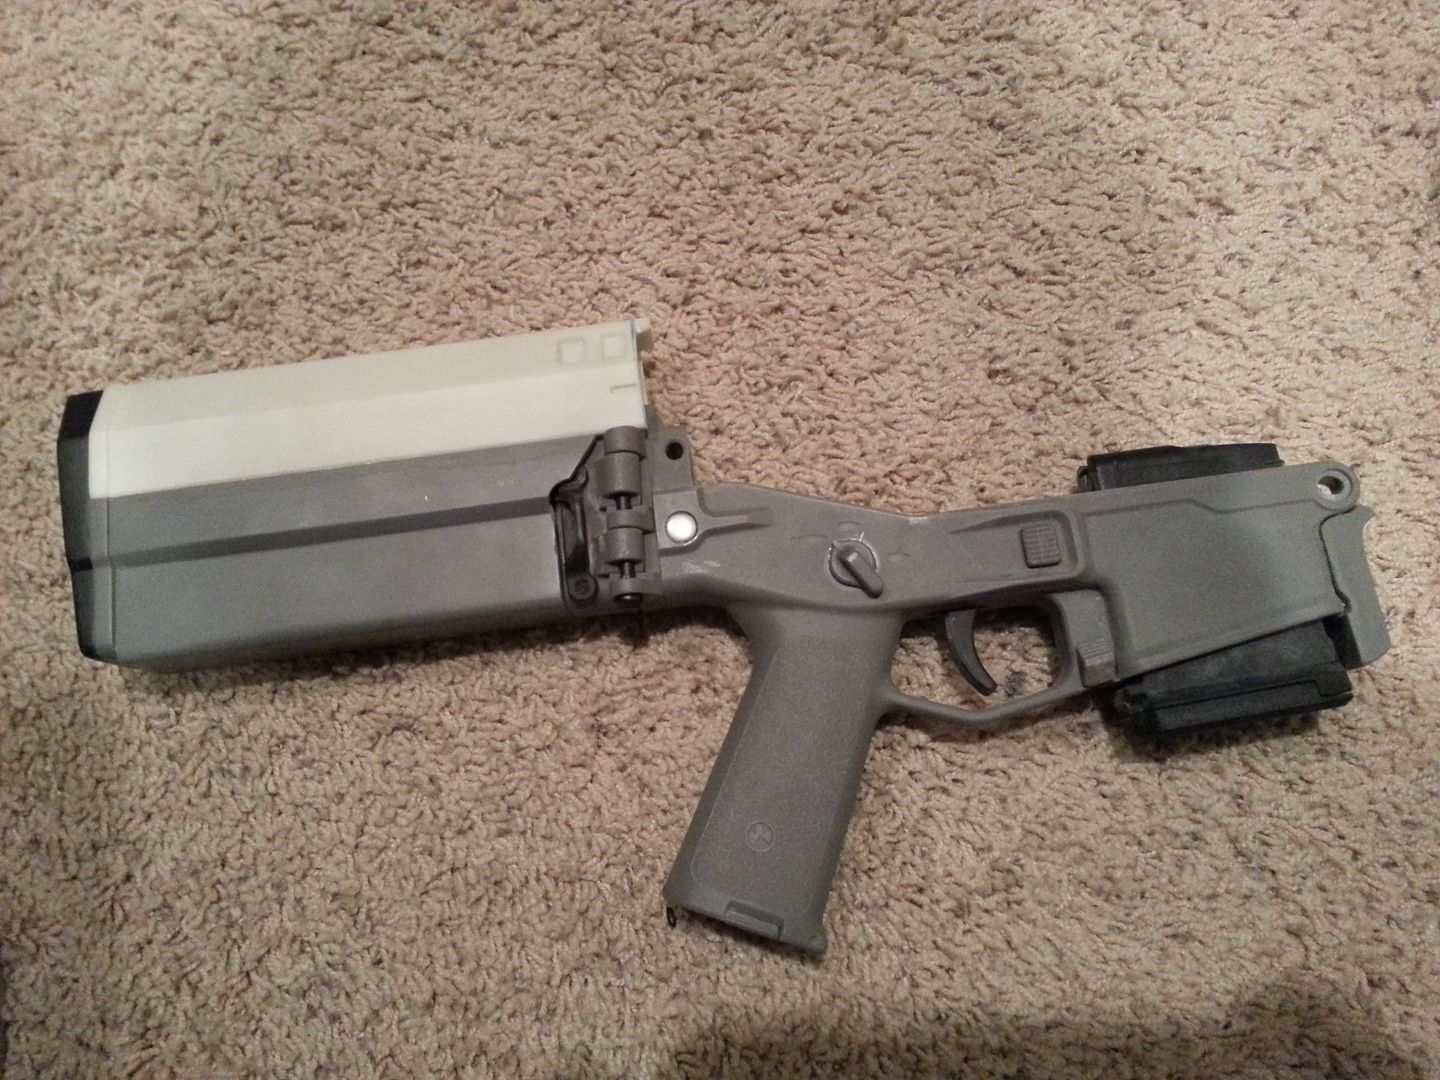
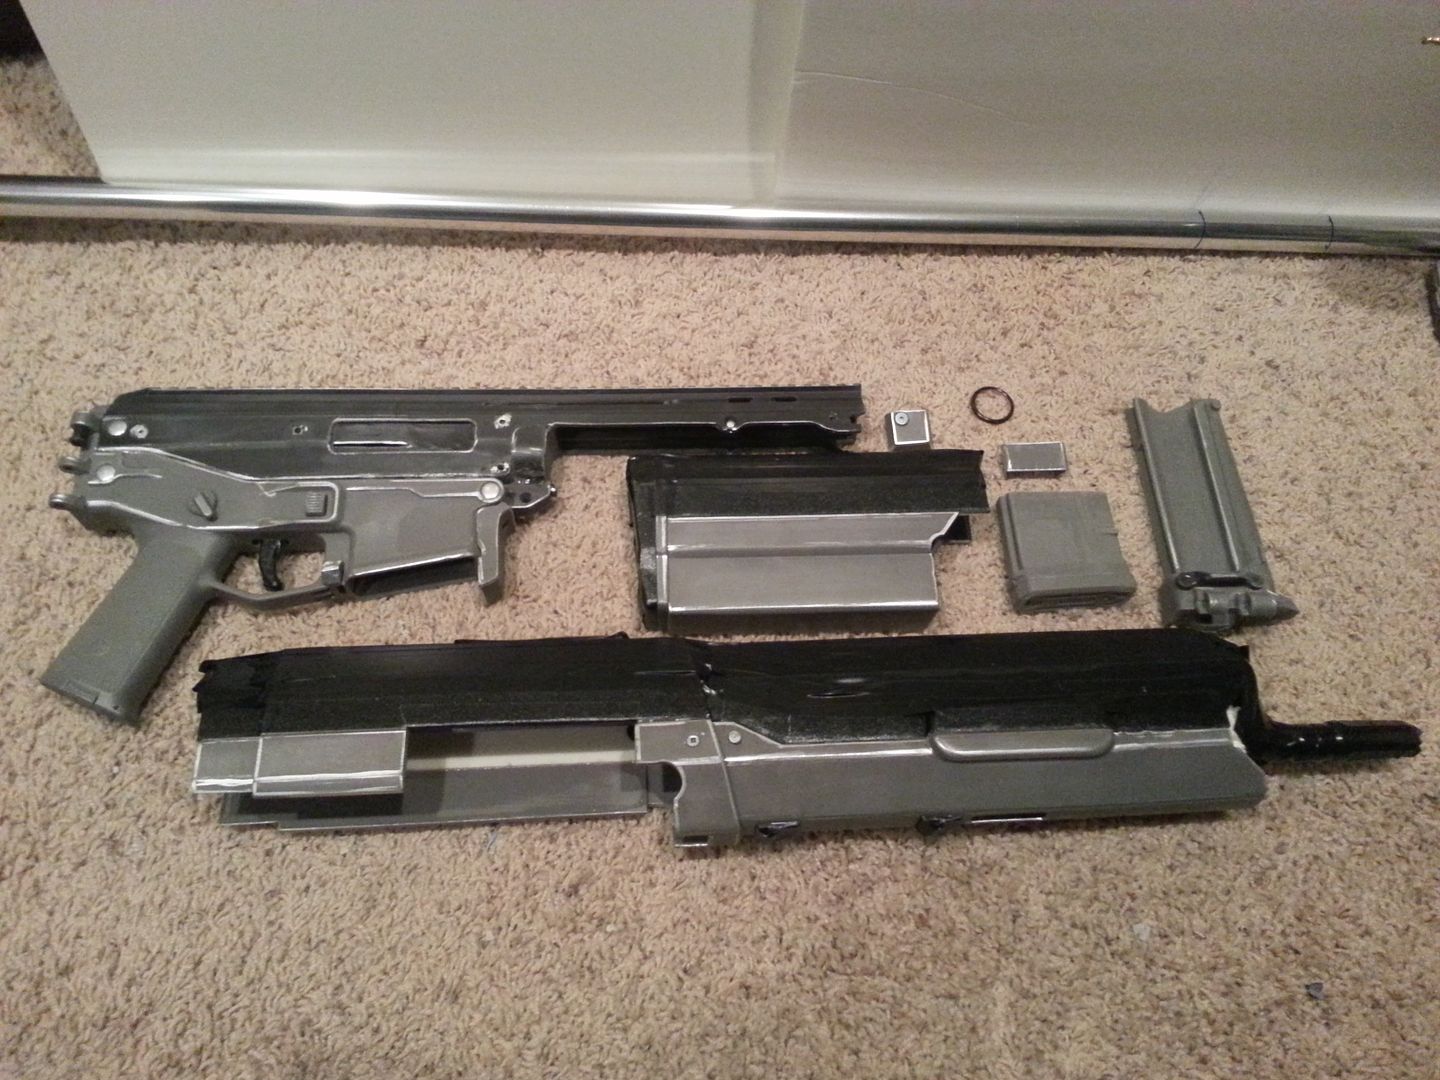
Here it is taken down into a few pieces.
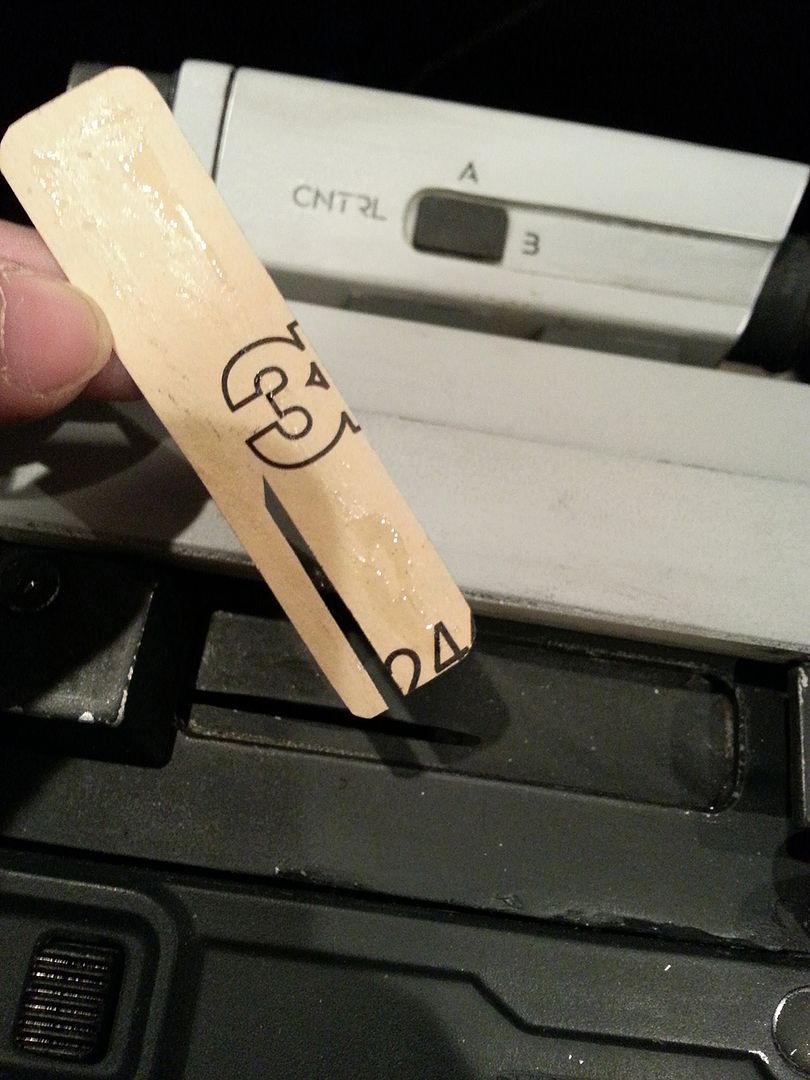
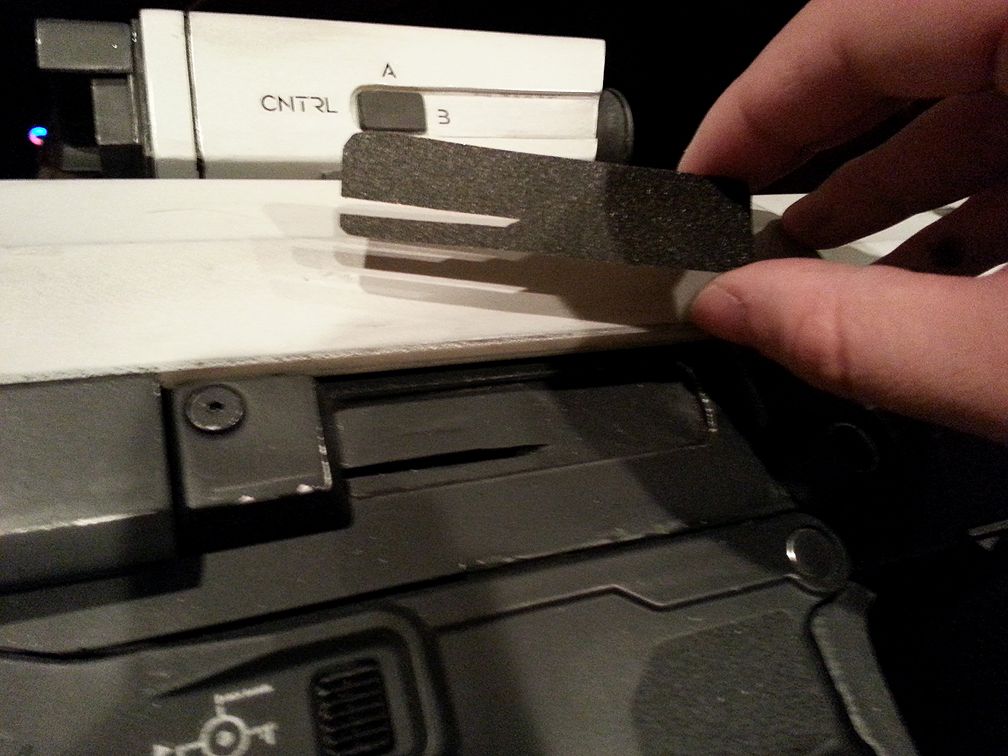
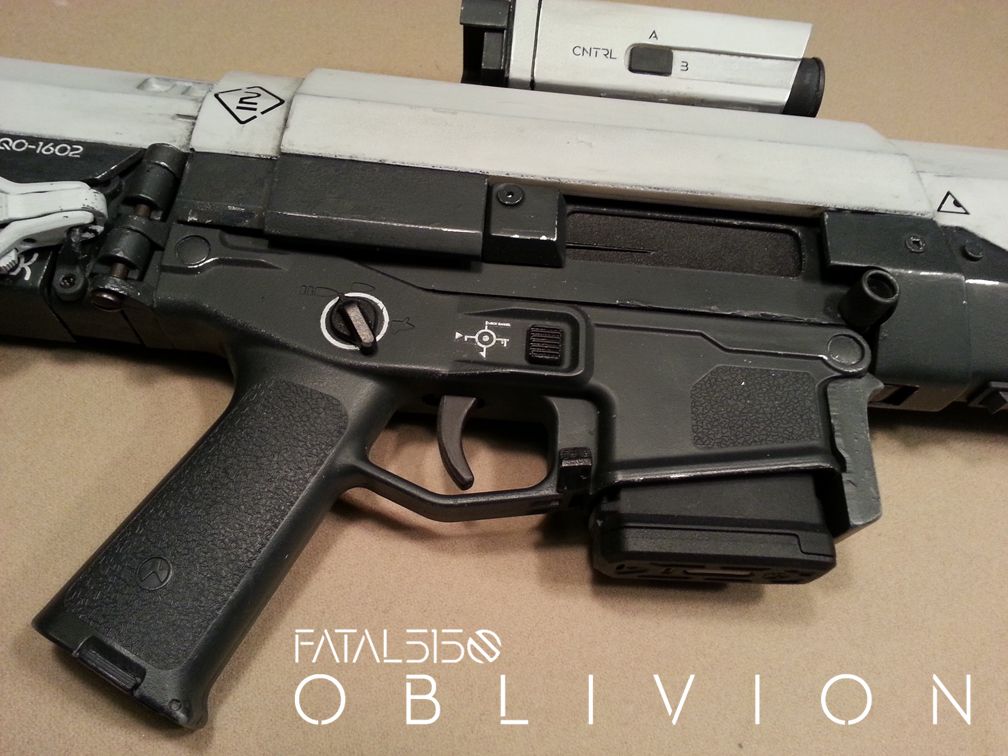
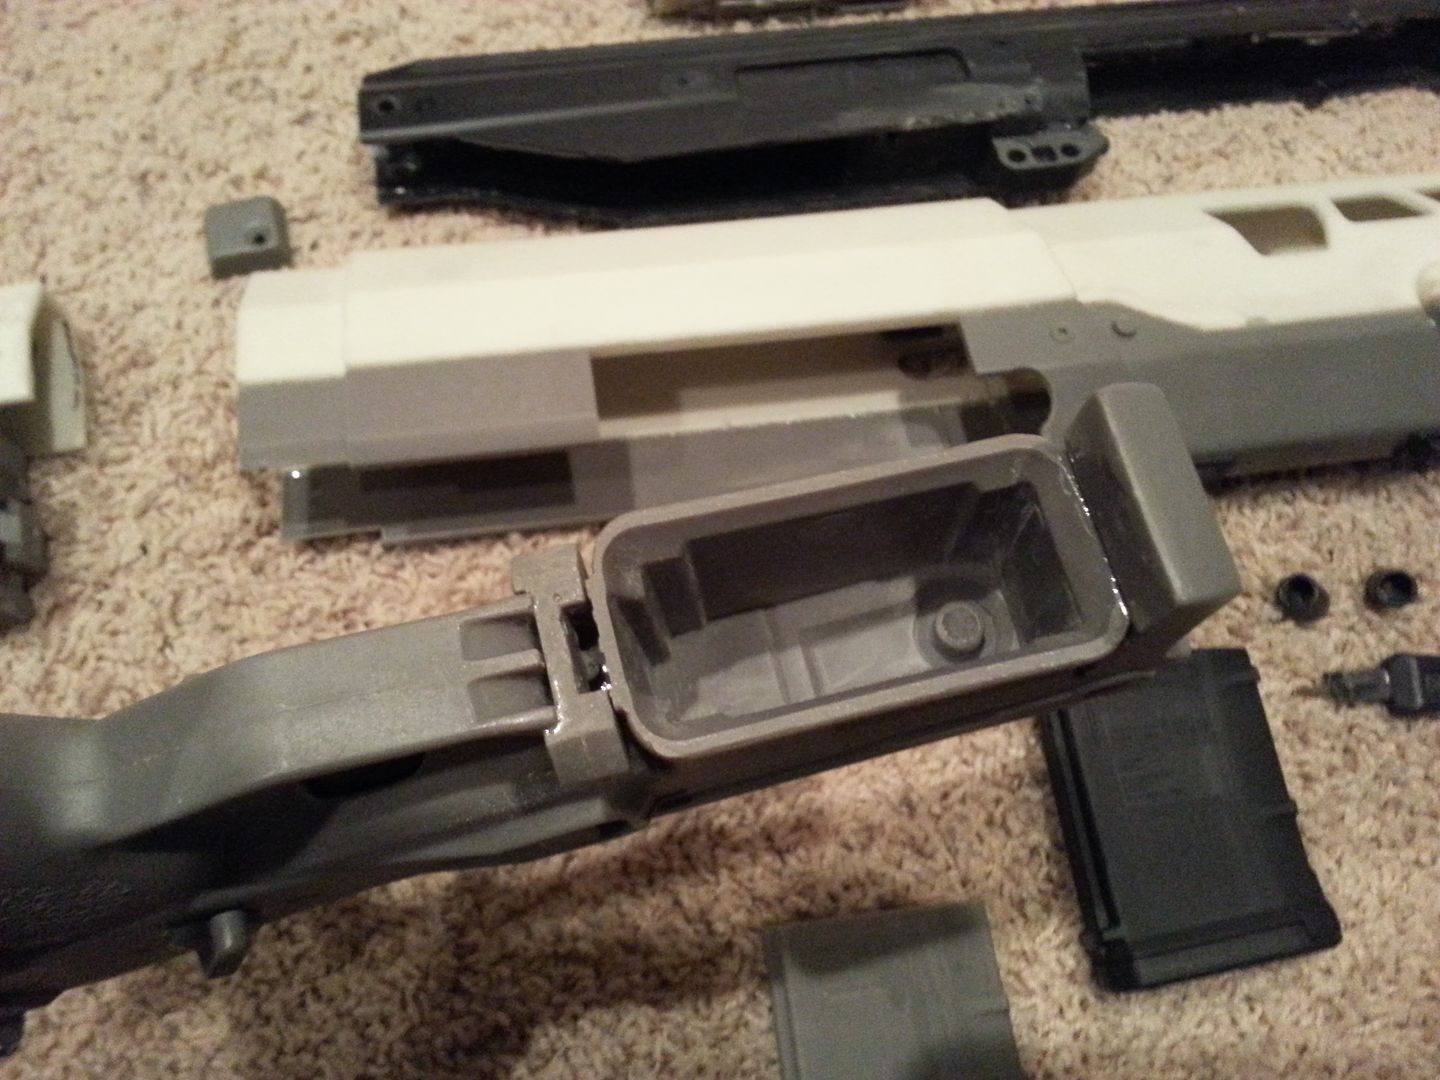
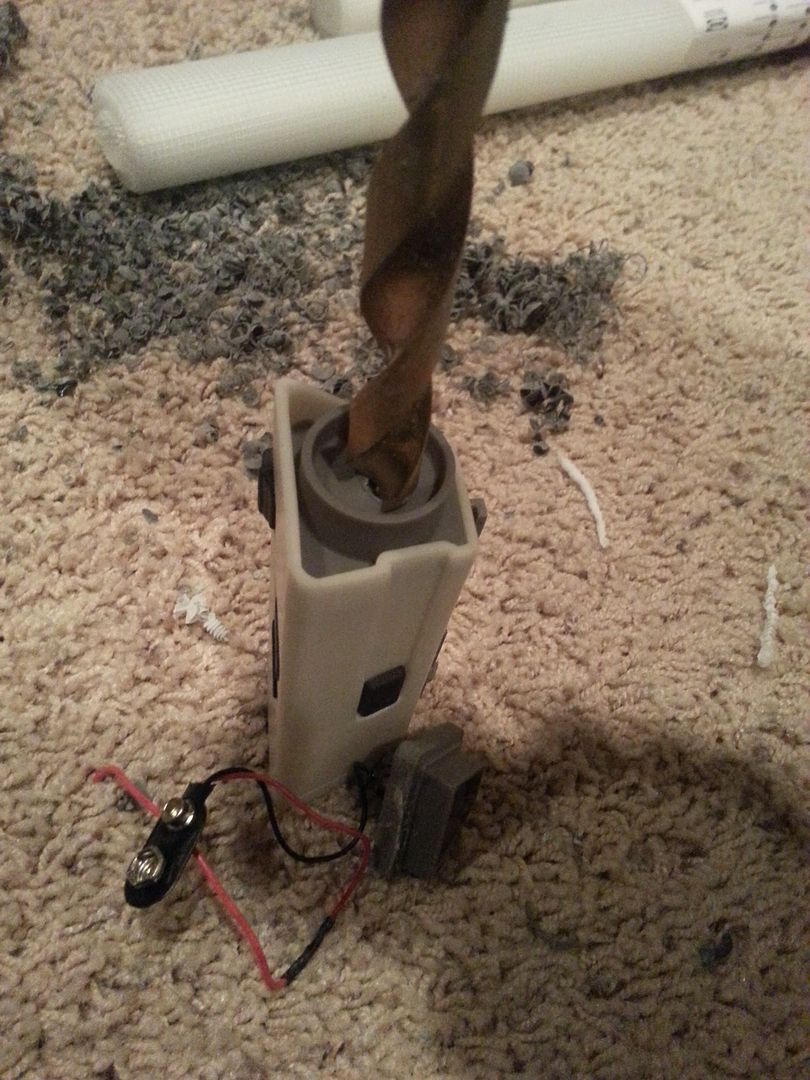
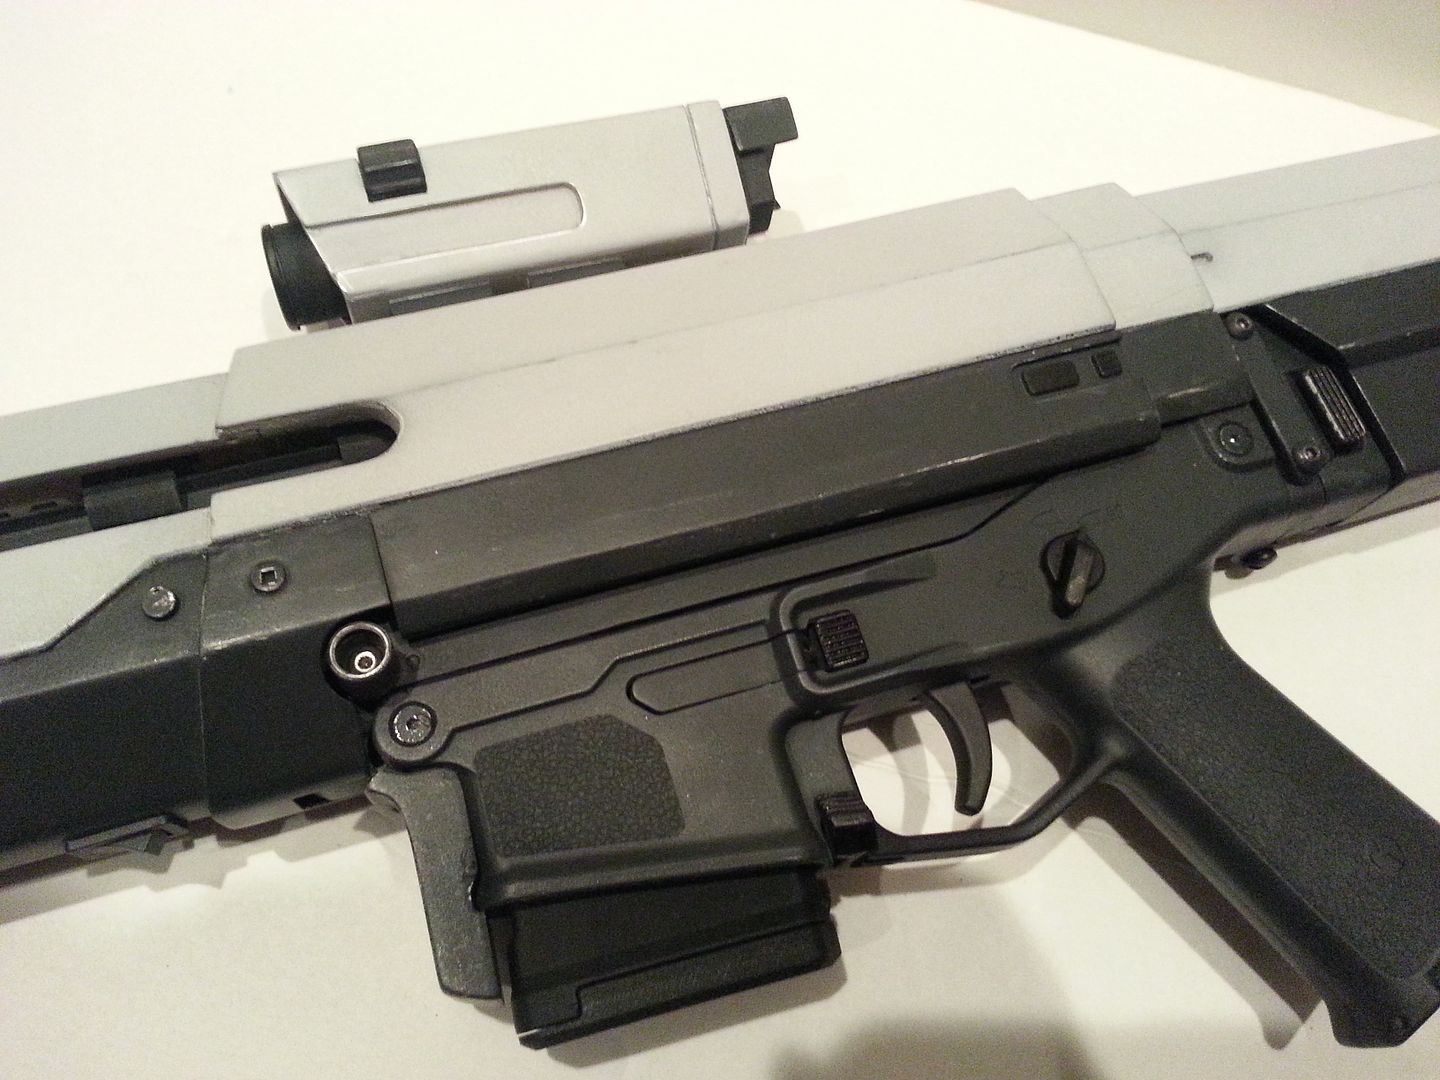
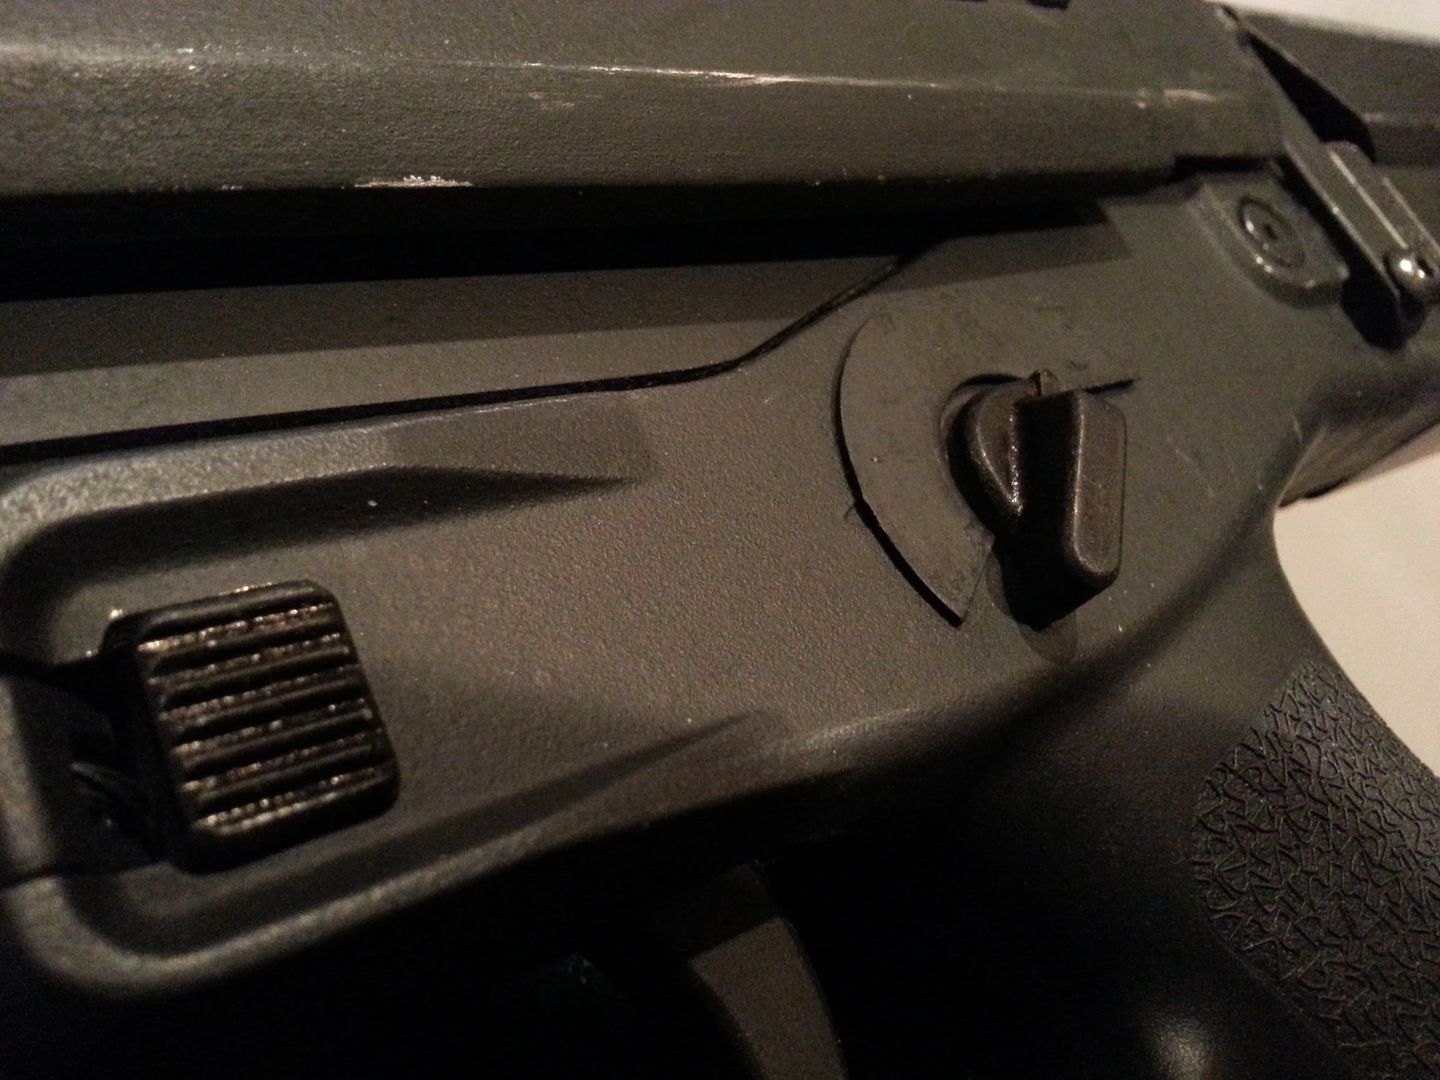
The first thing I wanted to do was clear out the mag well in the lower receiver so I could use real Magpul mags
This required some drilling and dremel work
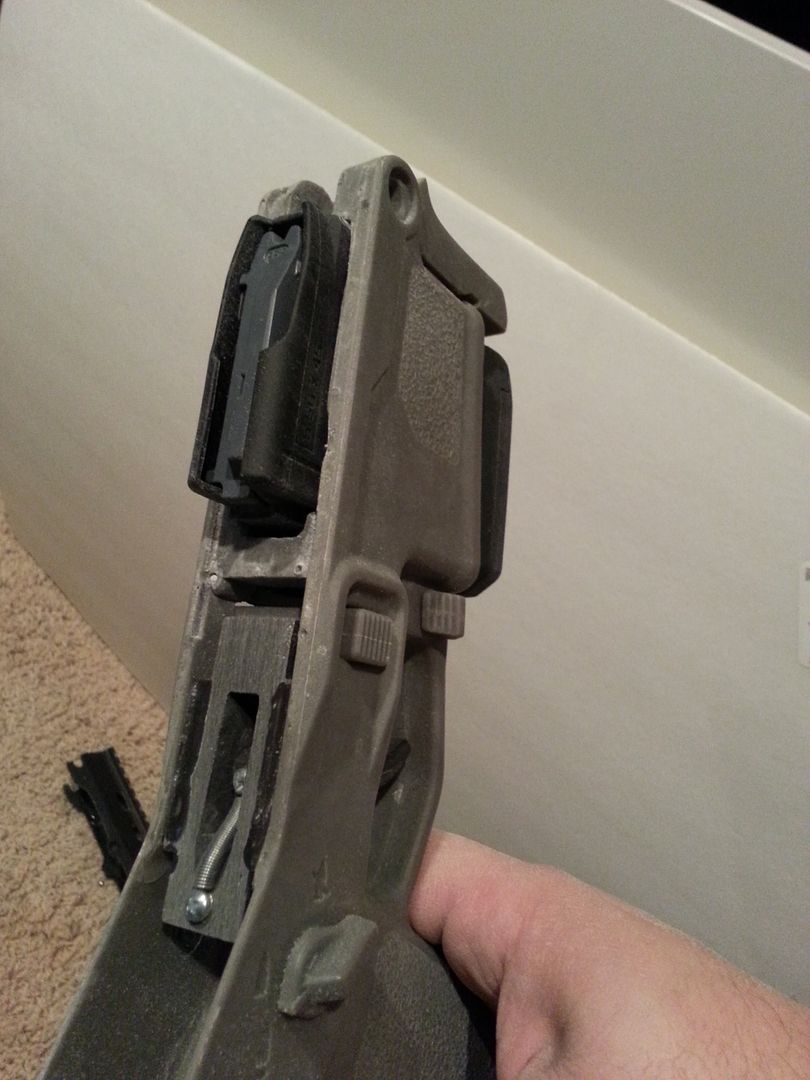
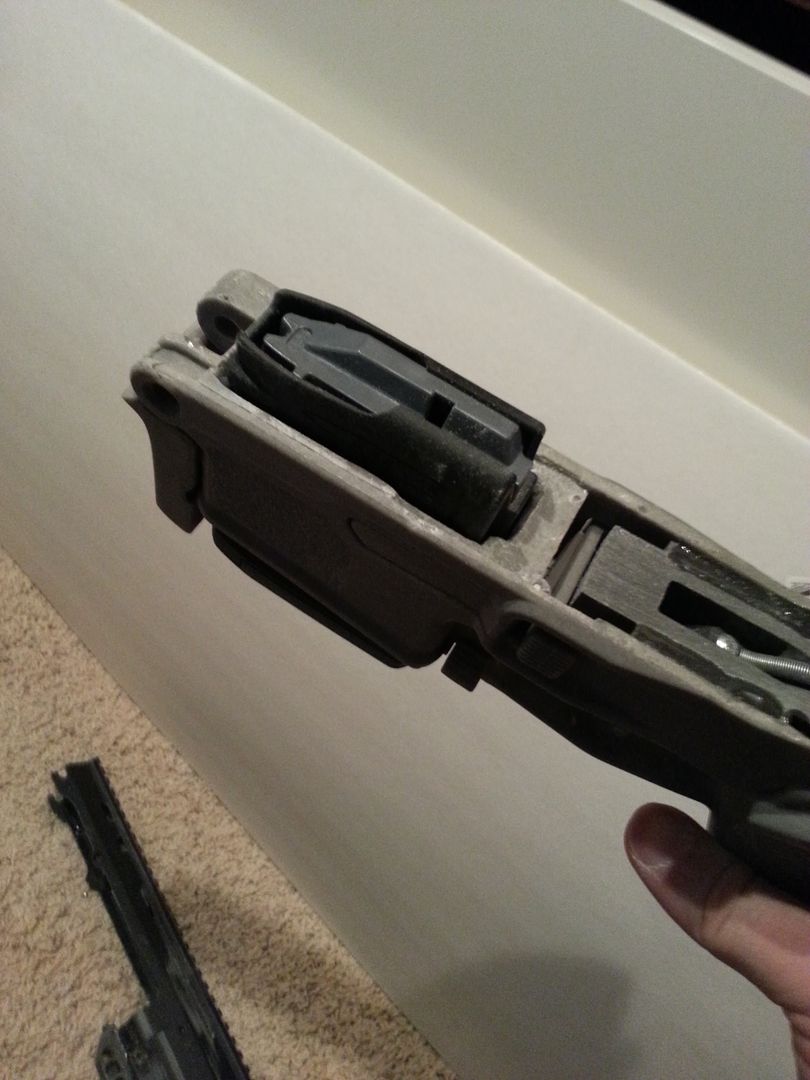
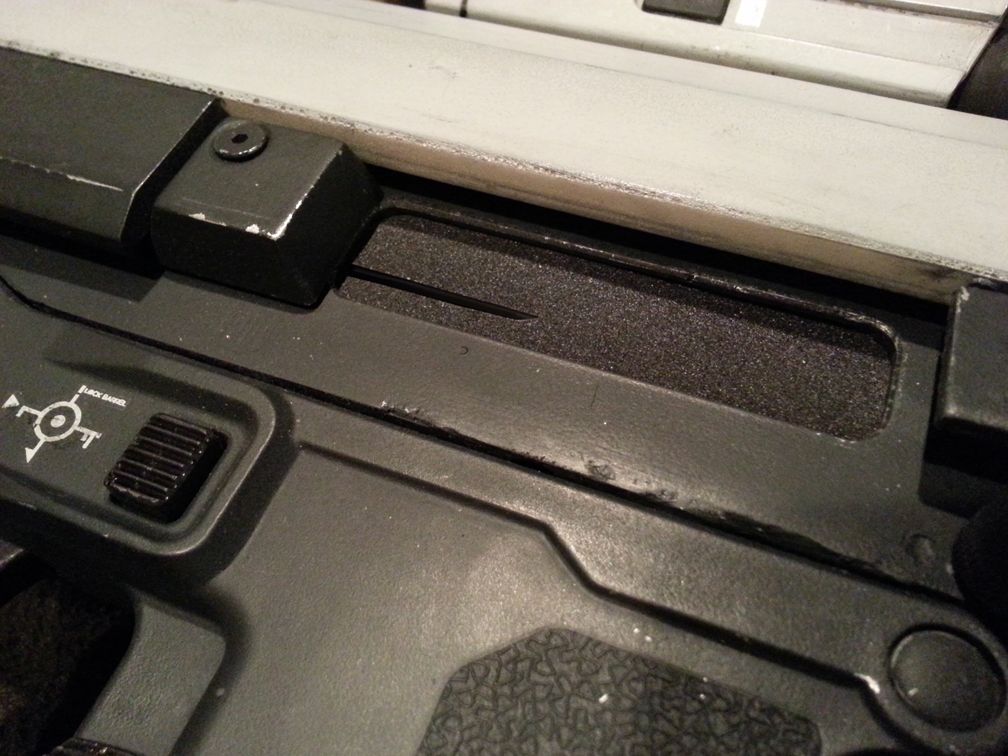
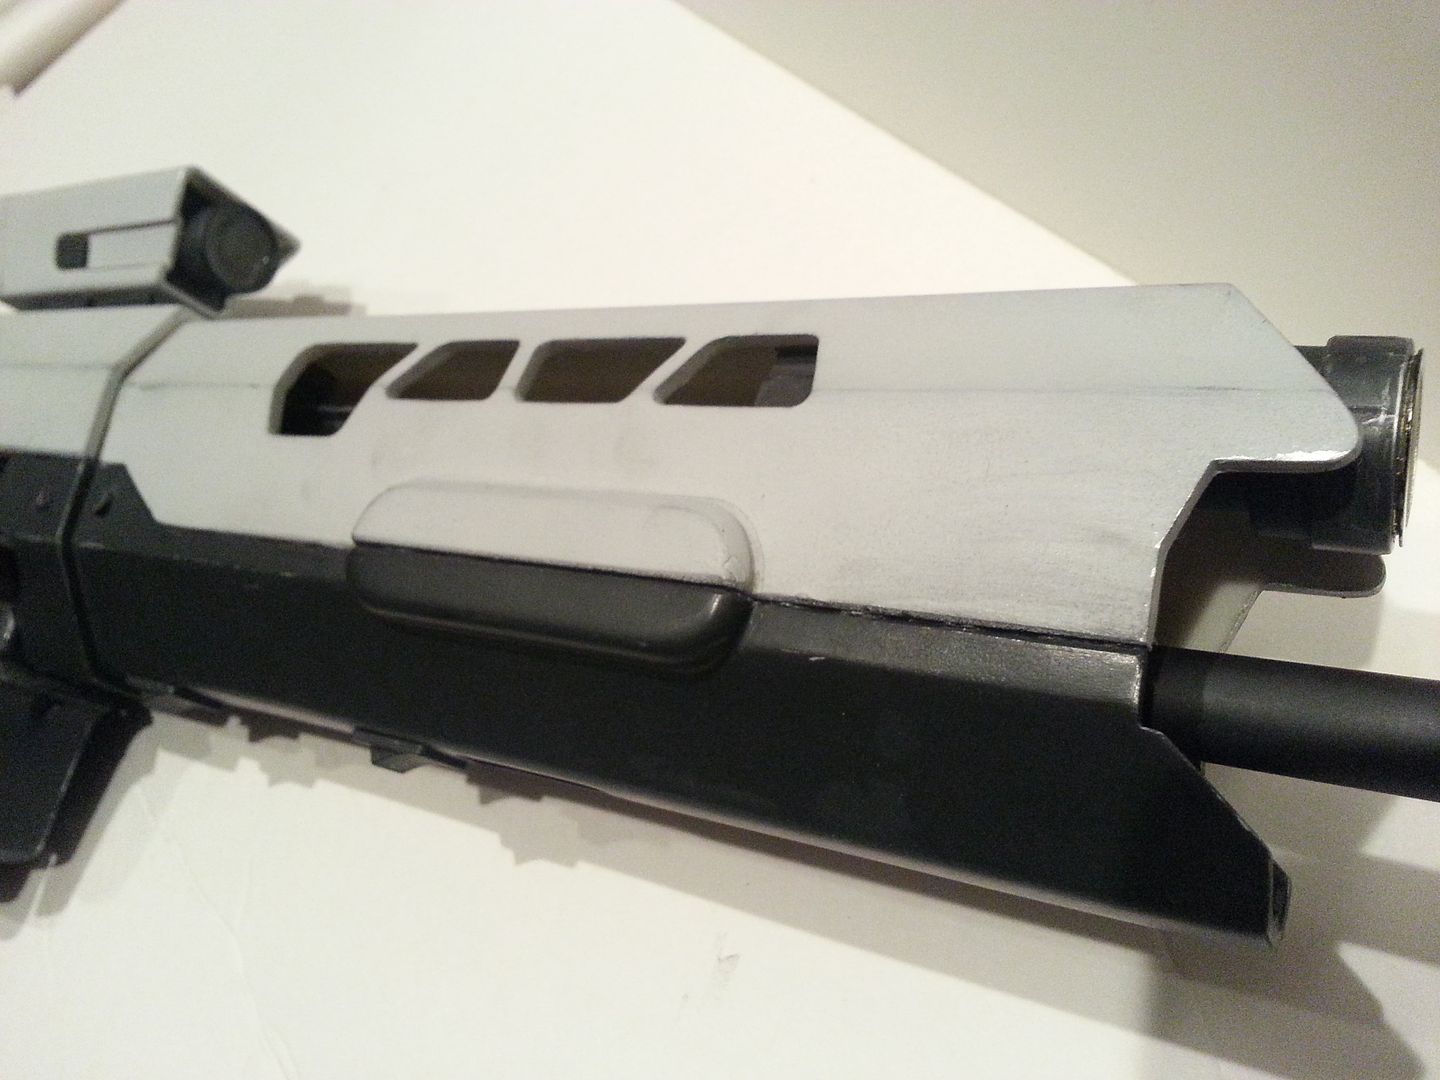
I also needed to clear out the upper receiver by making enough room for the top of the magazine
Perfect fit!
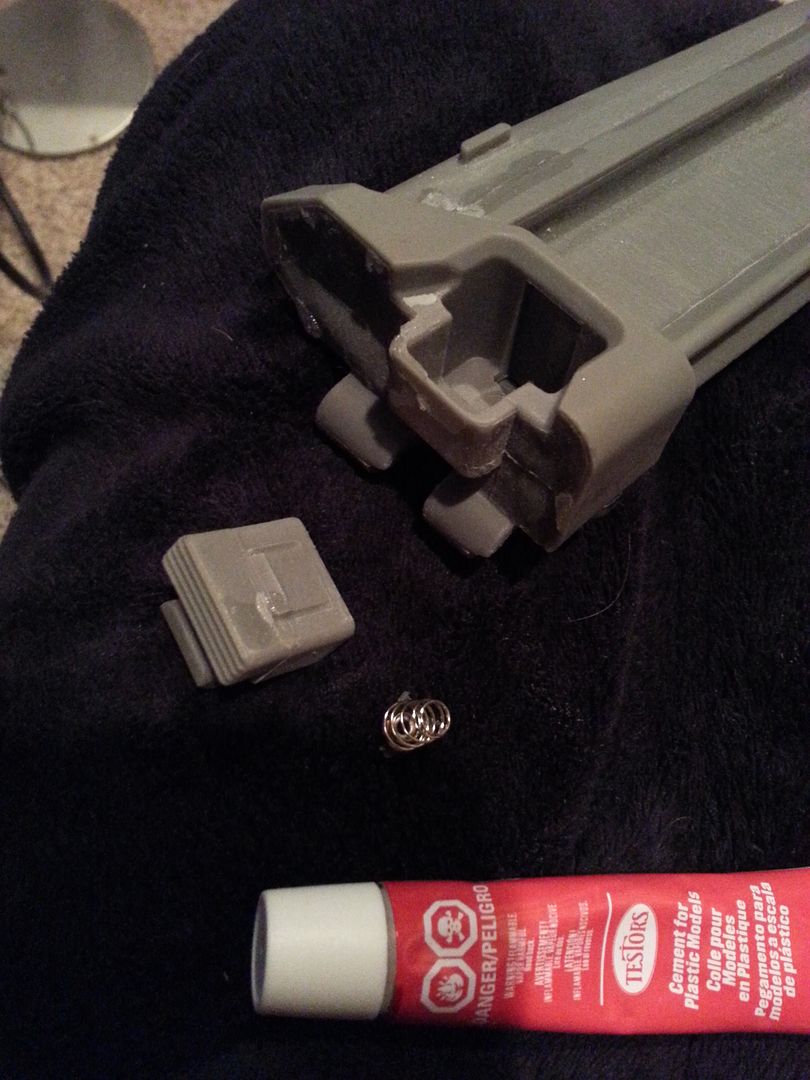
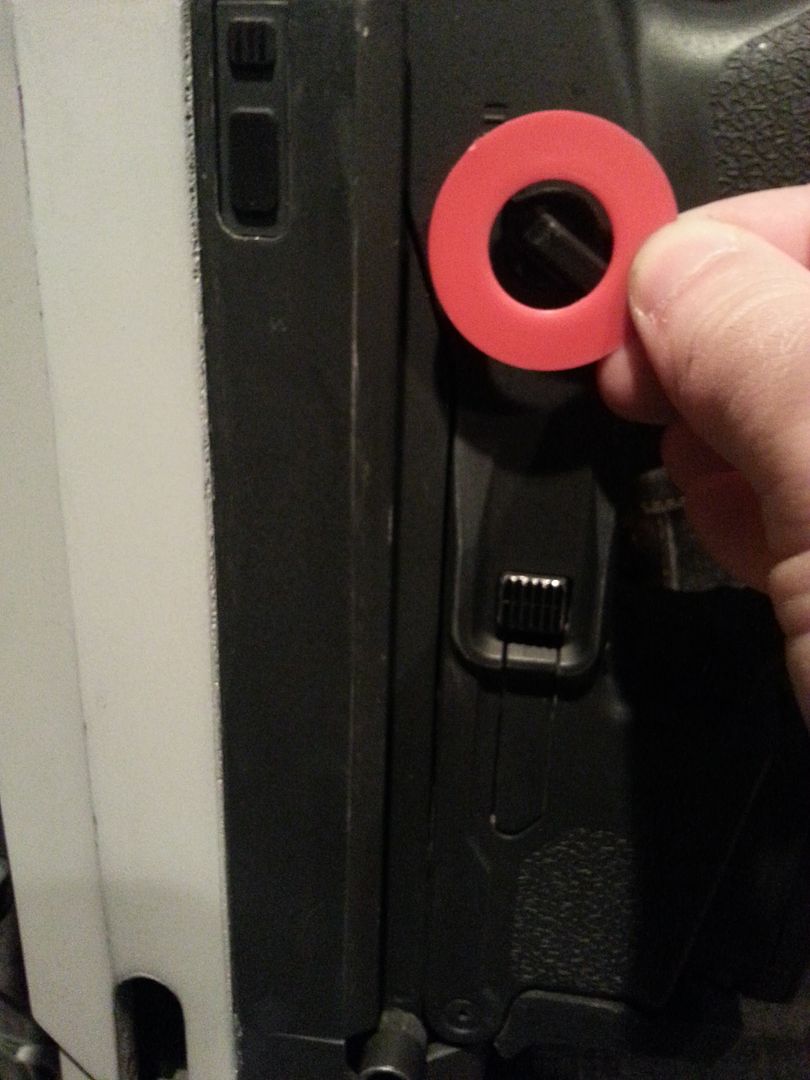
Another thing I really wanted was a functioning folding stock. I think wondersquid had stated that due to the design this wasn't really possible, but I didn't let that stop me from trying!
In order for this to work I needed a functioning stock release button. The prototype didn't have spring retention for the button, (I'm not sure if the kits will come with a spring) so I used one from an old battery holder.
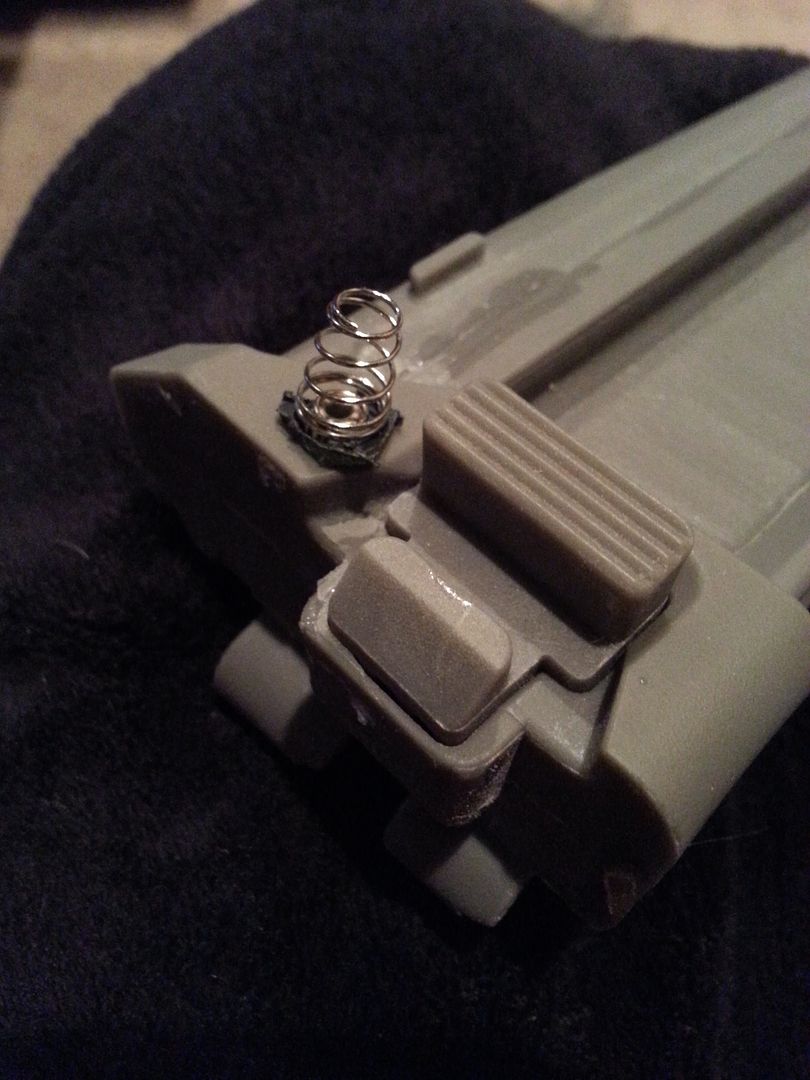
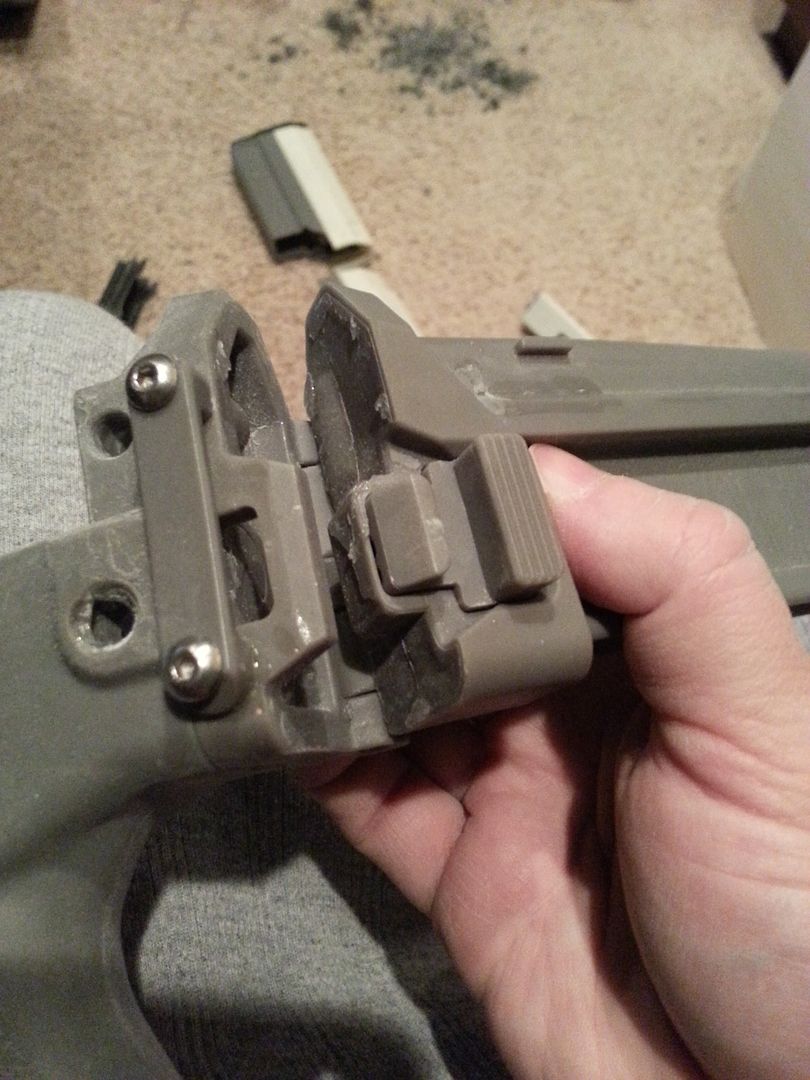
This would allow the button to snap into place when the stock was in it's fully extended position
The other thing I needed to do was trim down part of the upper receiver, so I marked it off
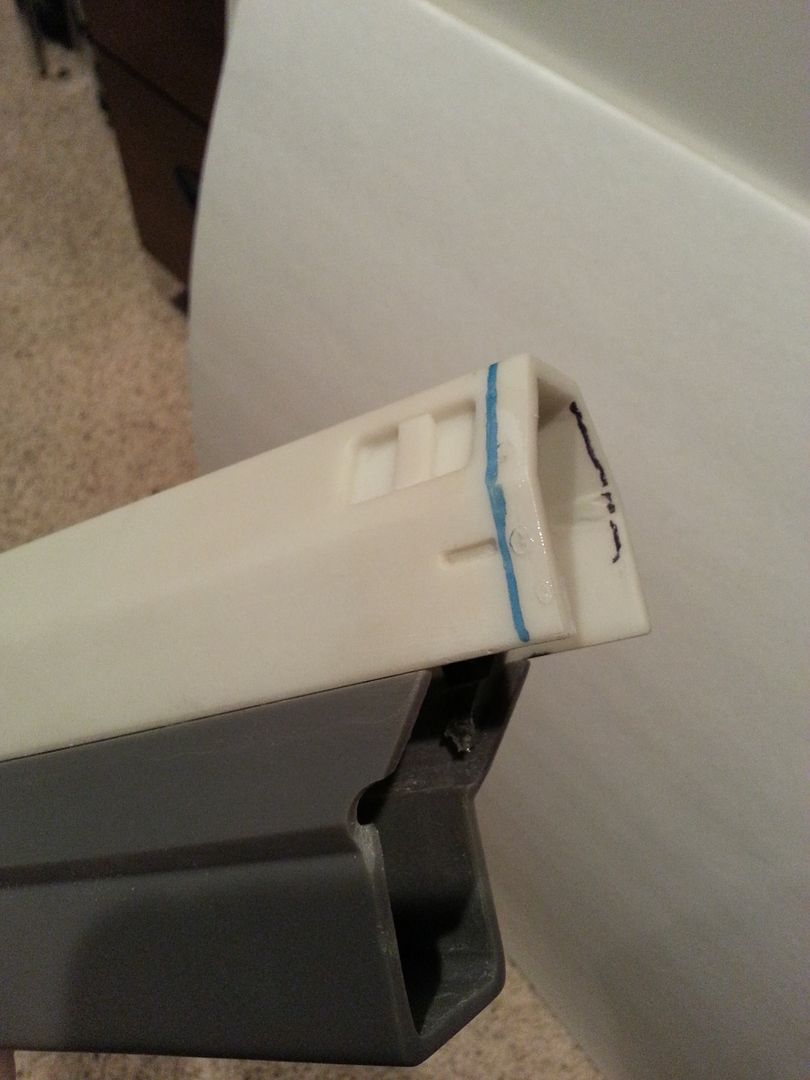
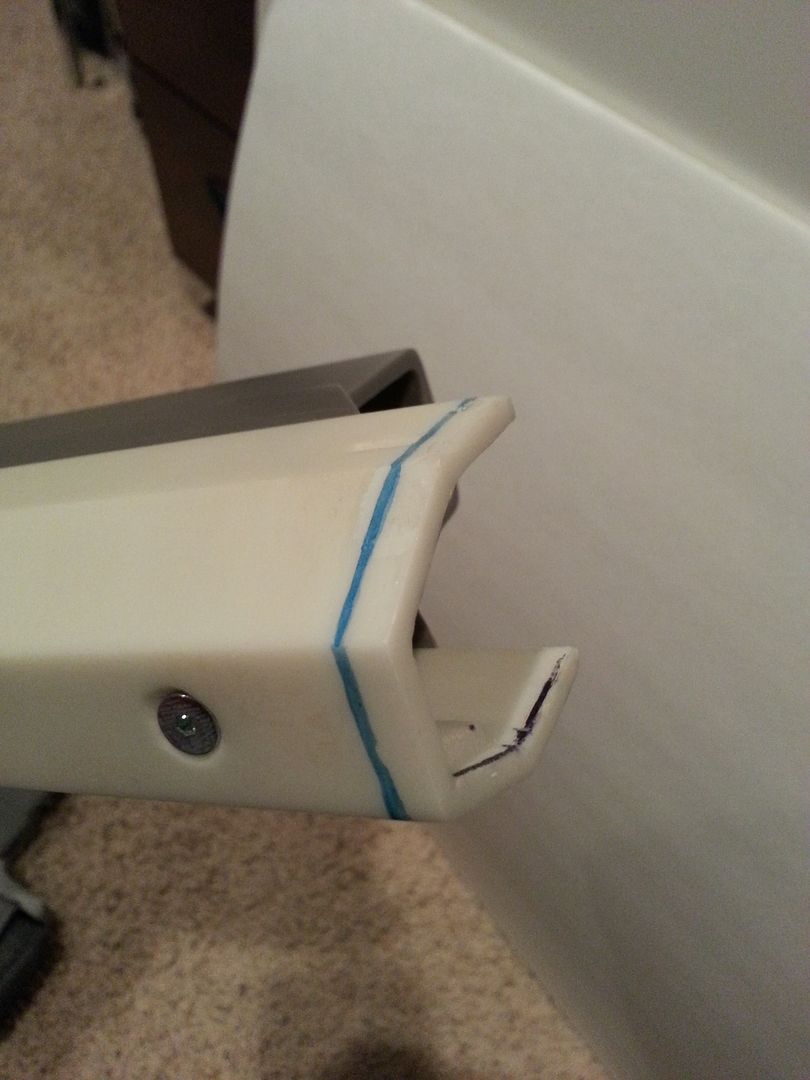
I ended up only needing to cut the side walls and left the top portion
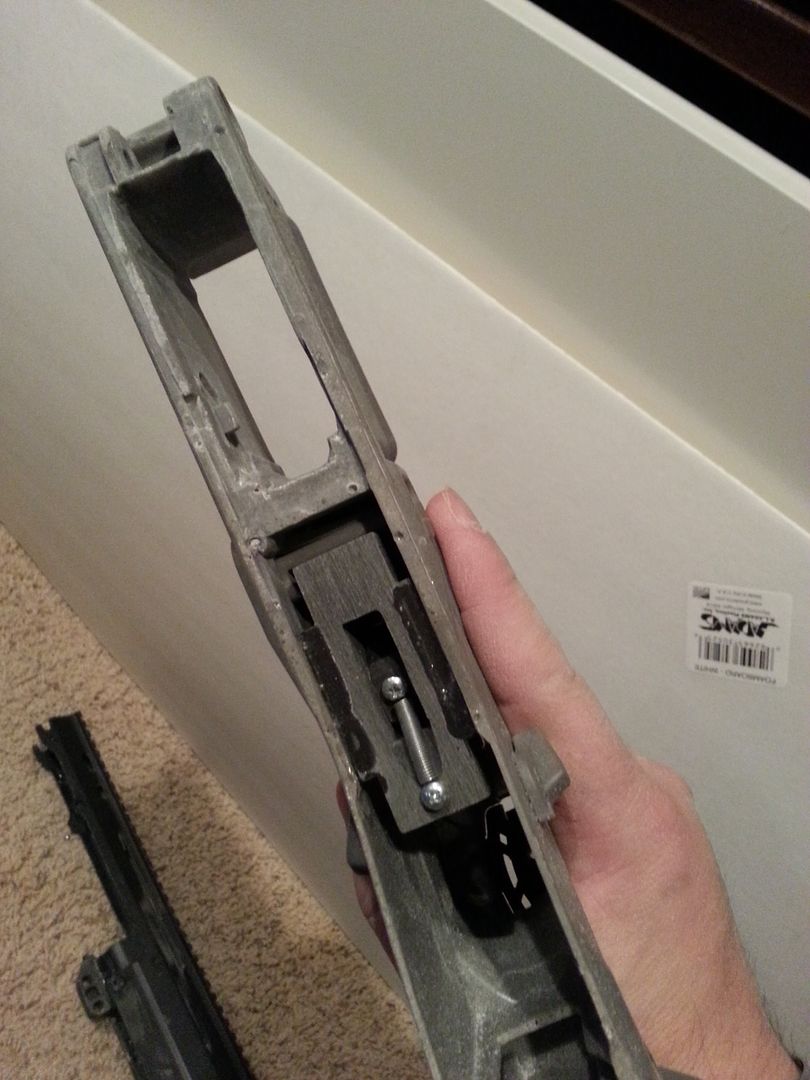
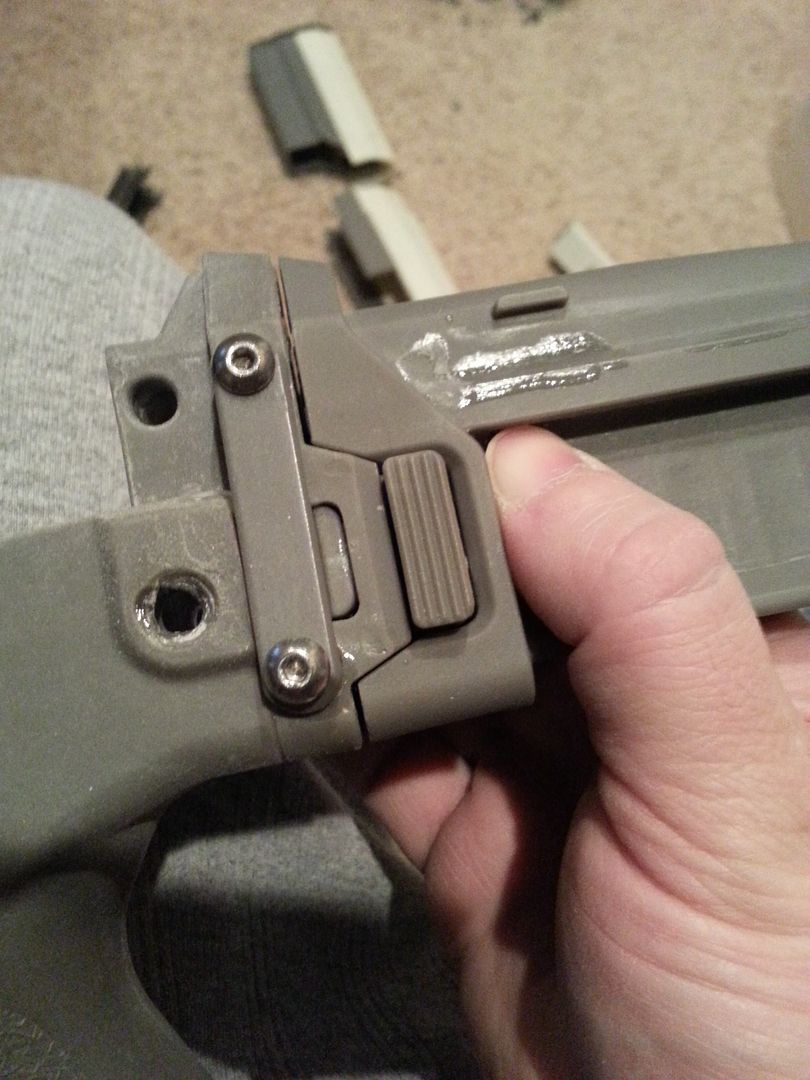
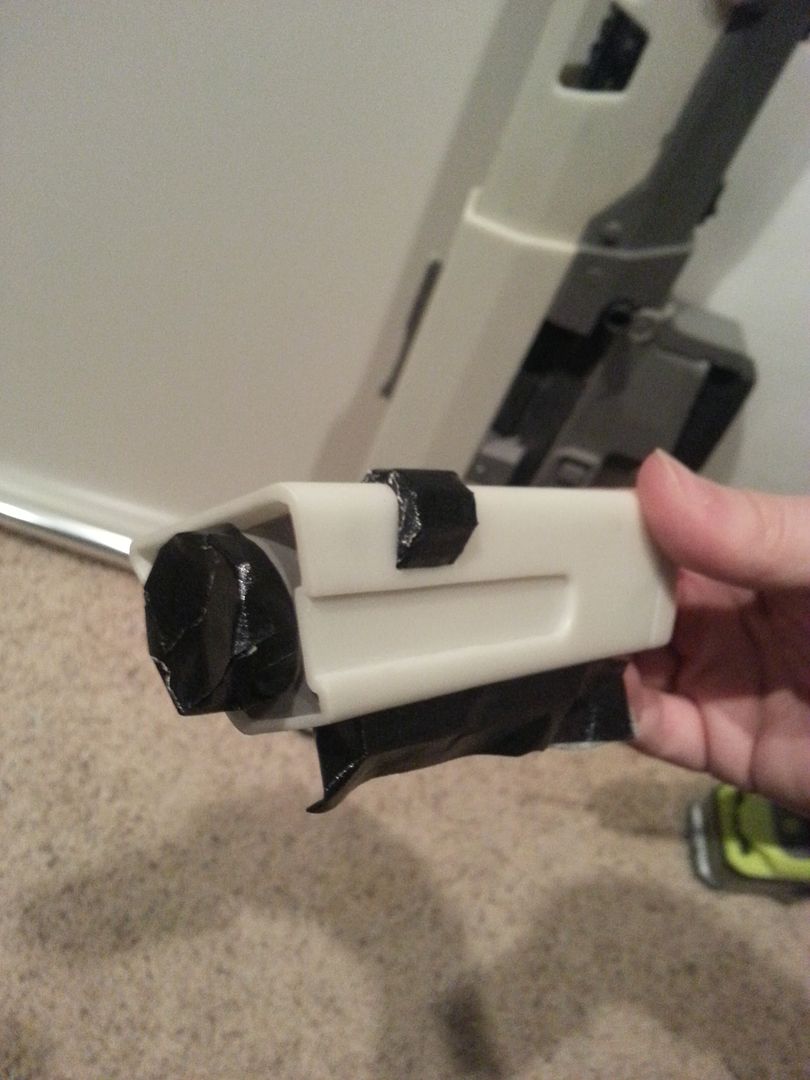
The prototype was also missing the hinge bolt. Fortunately I had some extra parts around that did the trick!
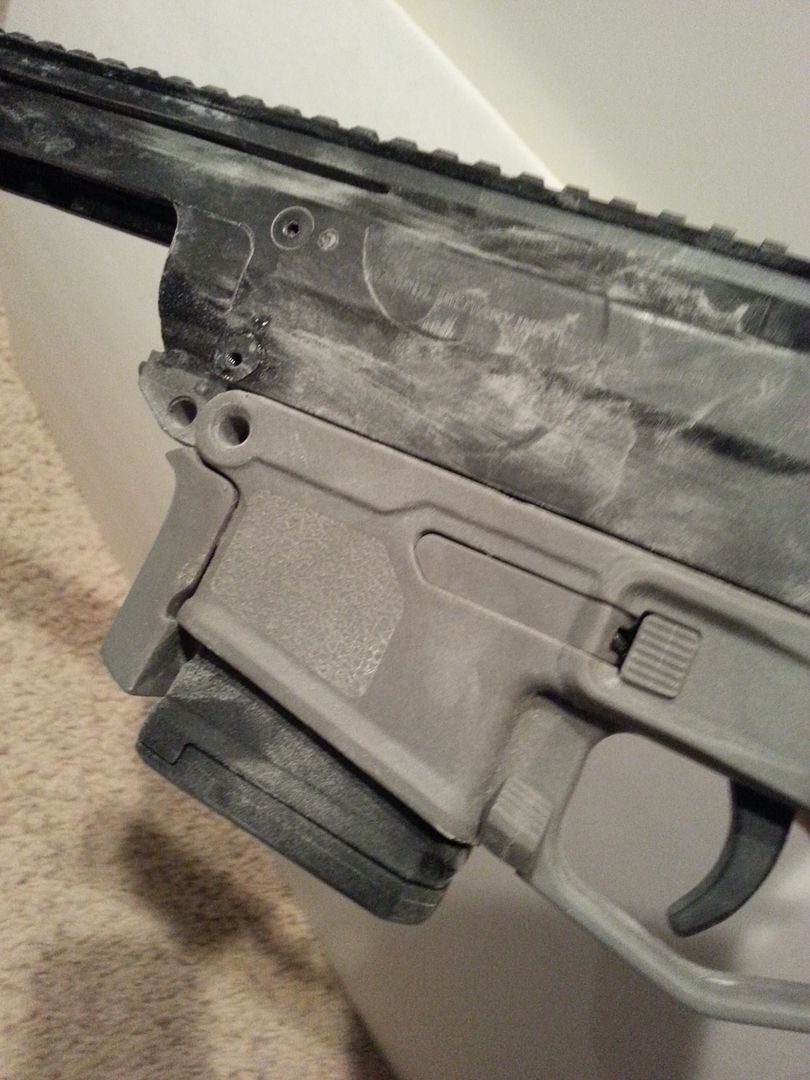
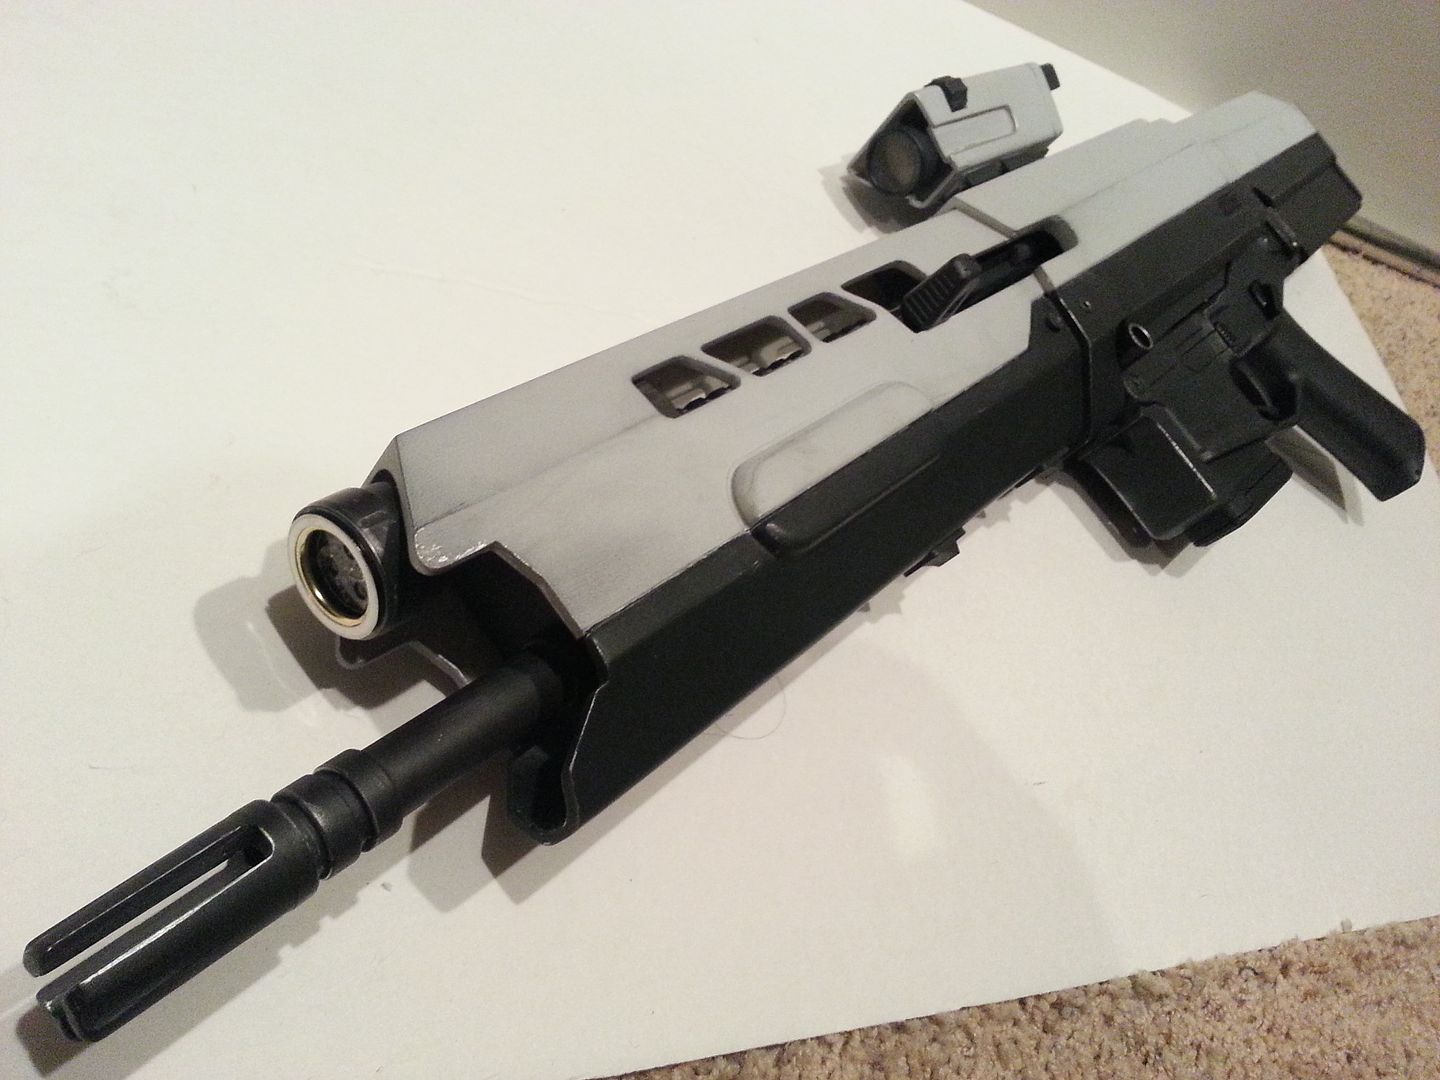
Full lower receiver with buttstock attached
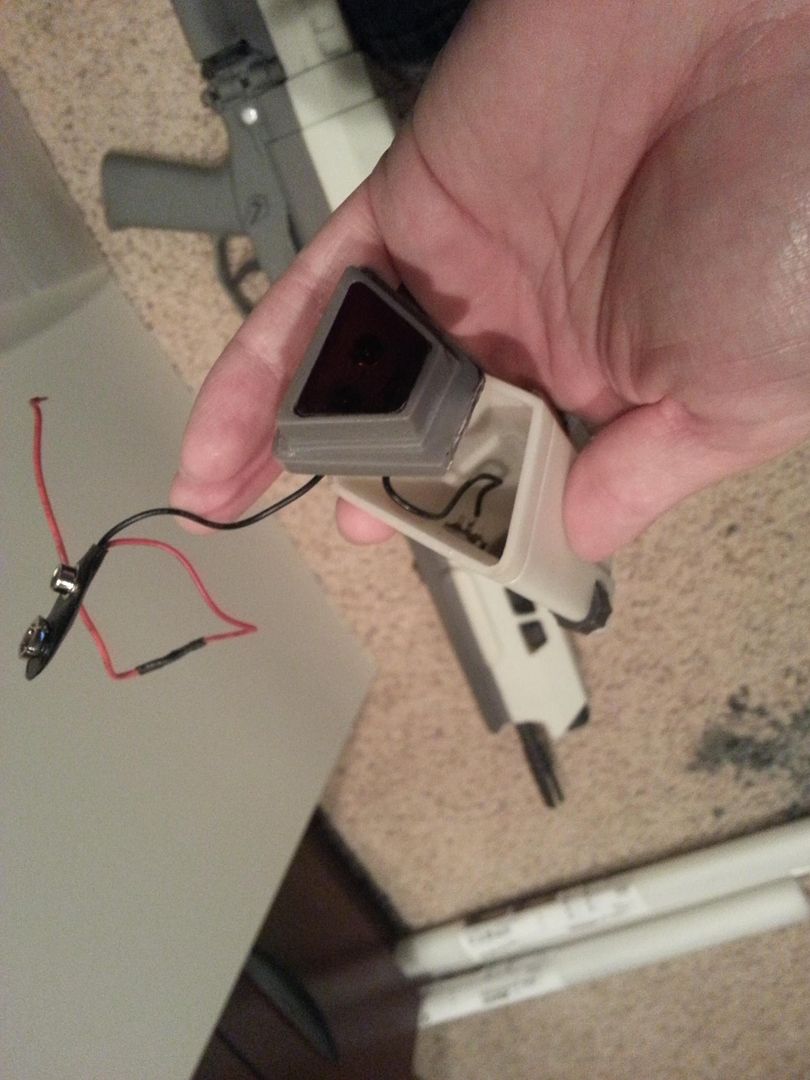
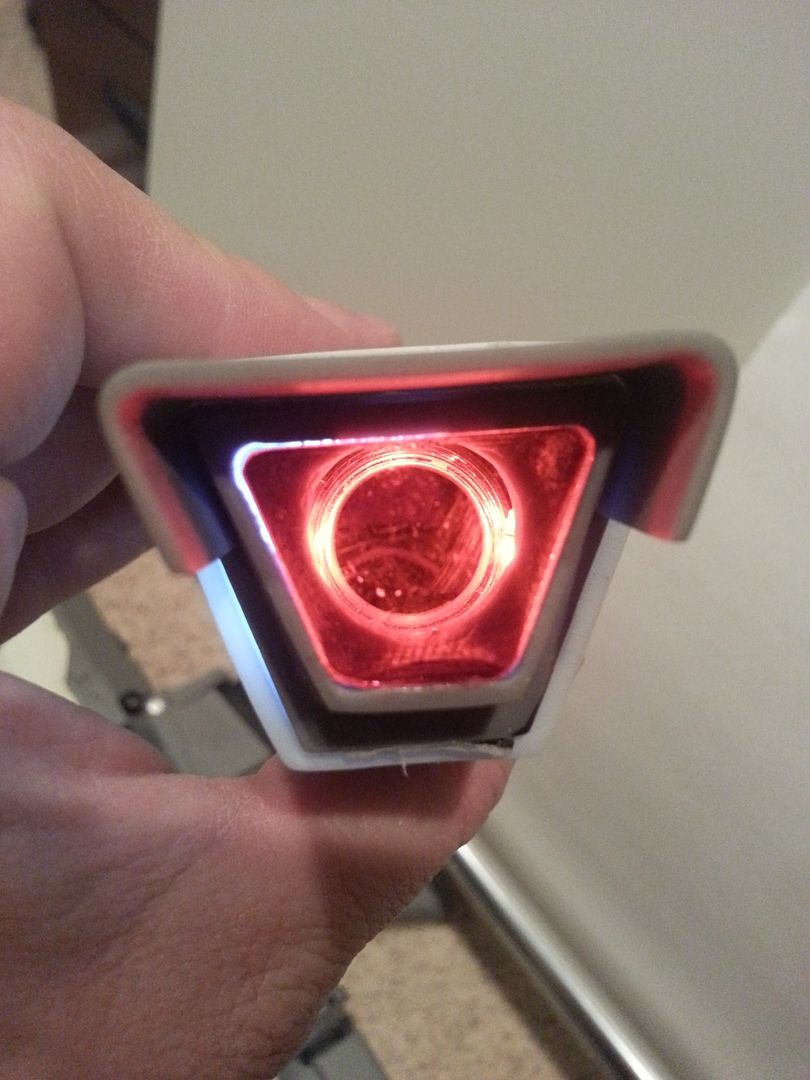
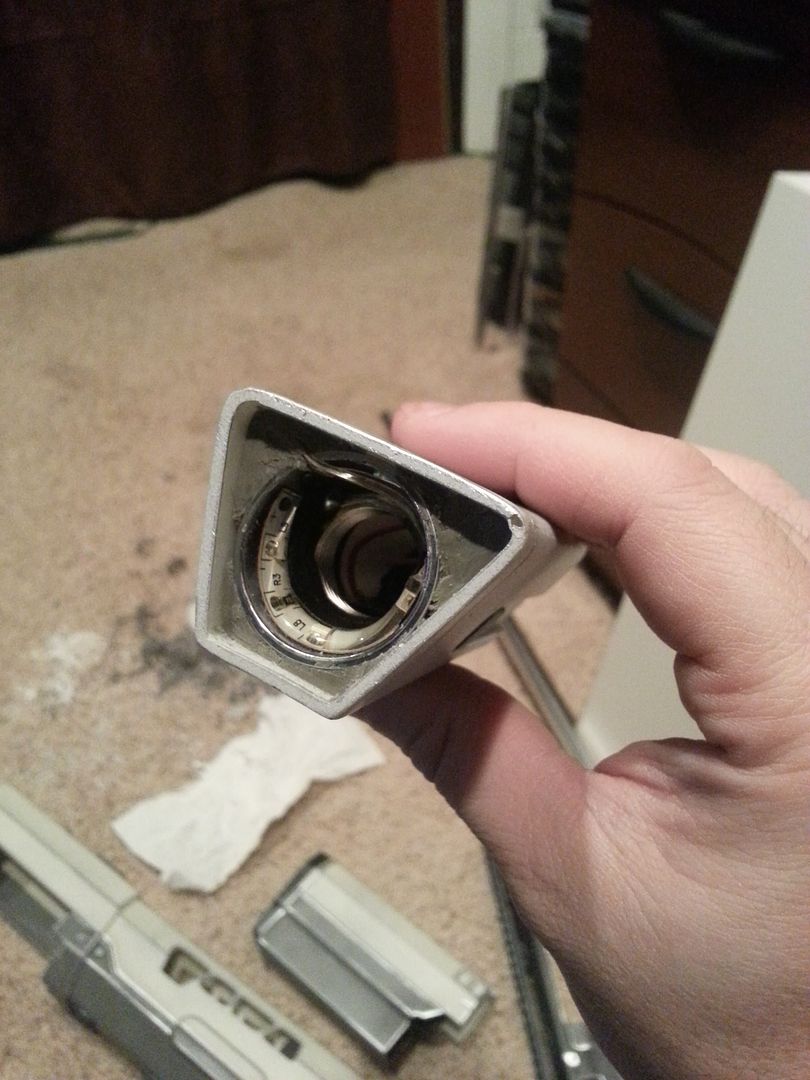
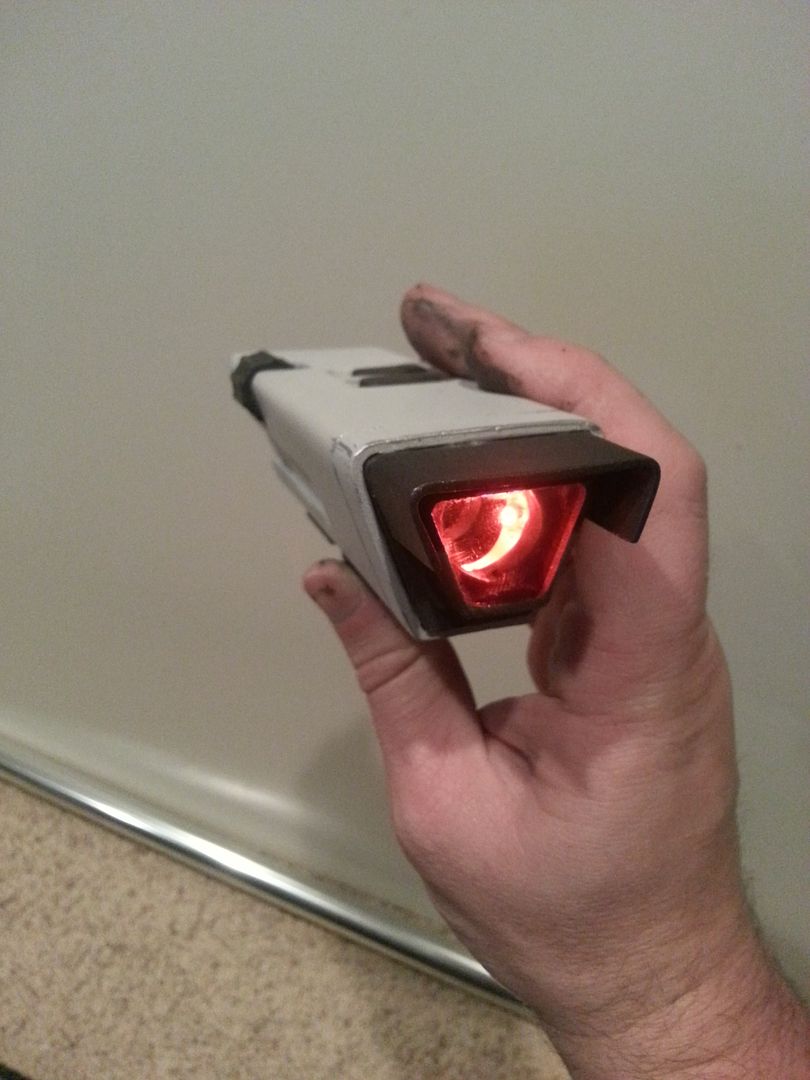
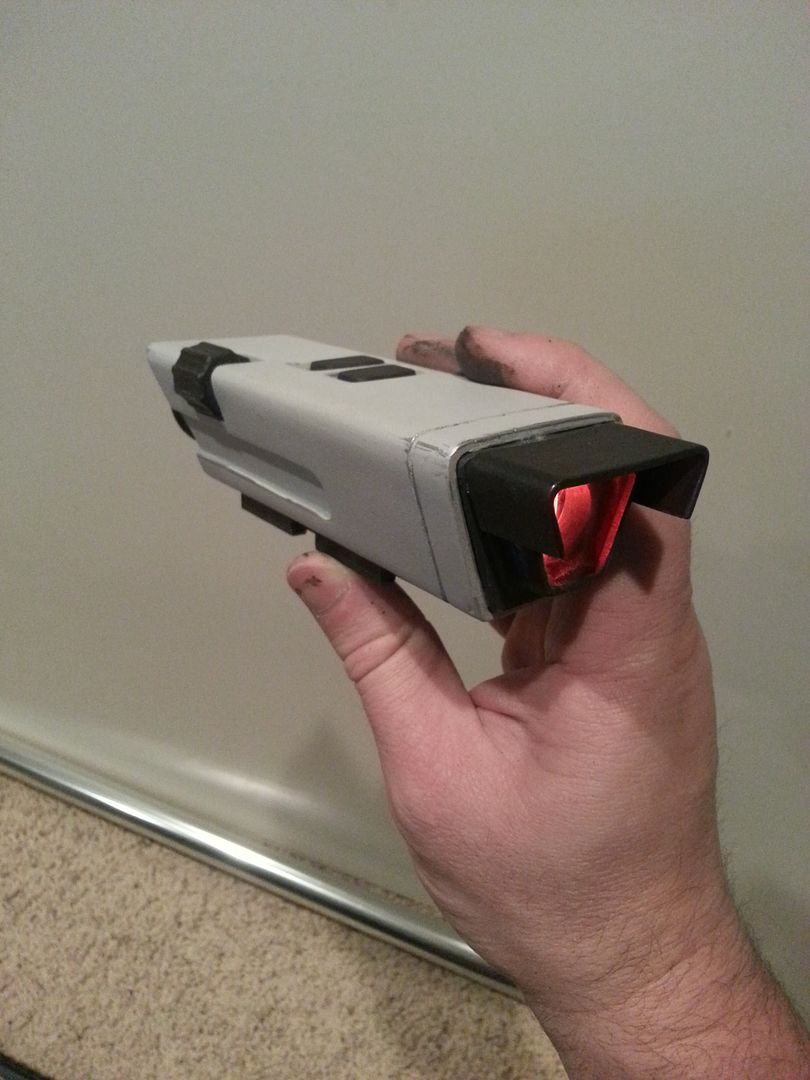
The scope was another thing I wanted to upgrade. Mal already had some really cool LEDs in it behind some red translucent acrylic that gave a great effect, but I wanted to be able to see through the scope and have it illuminate.
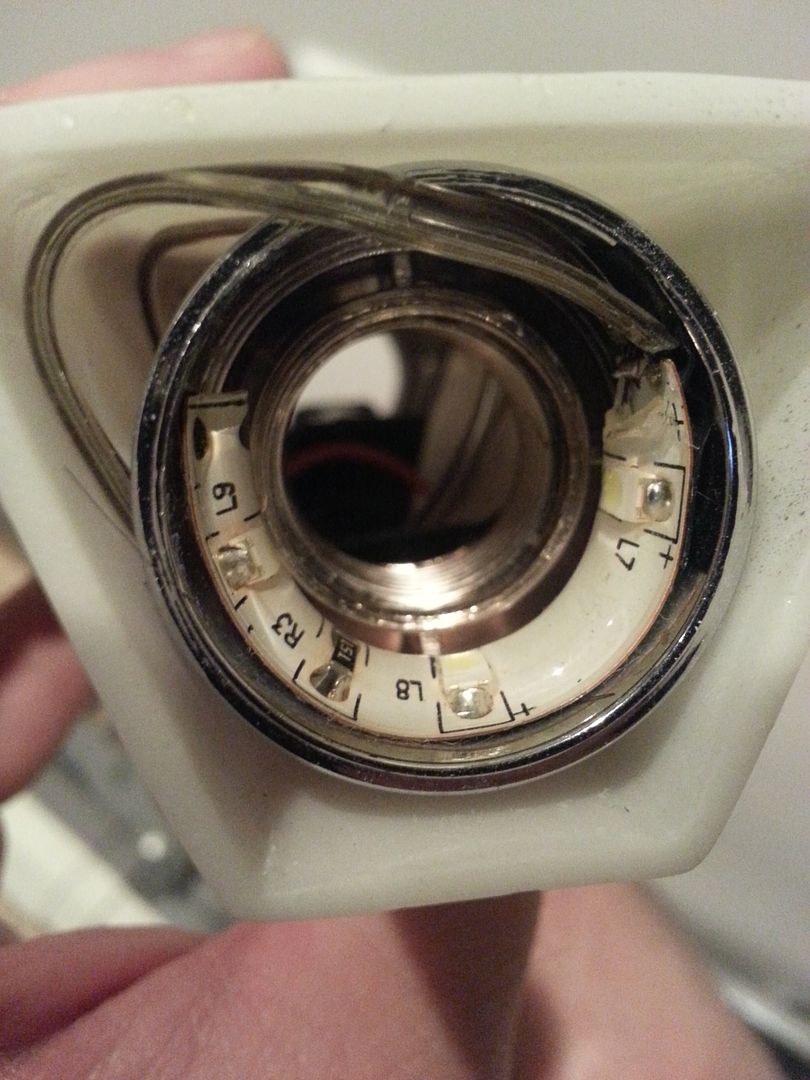
So I started dissecting it
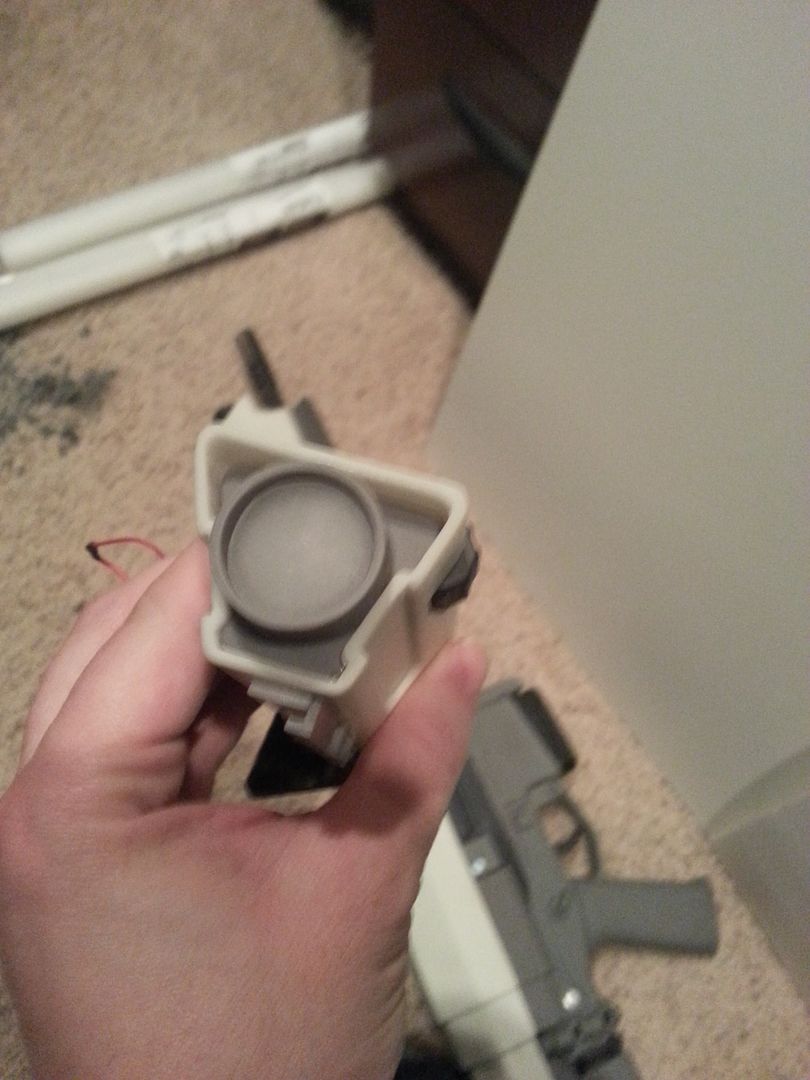
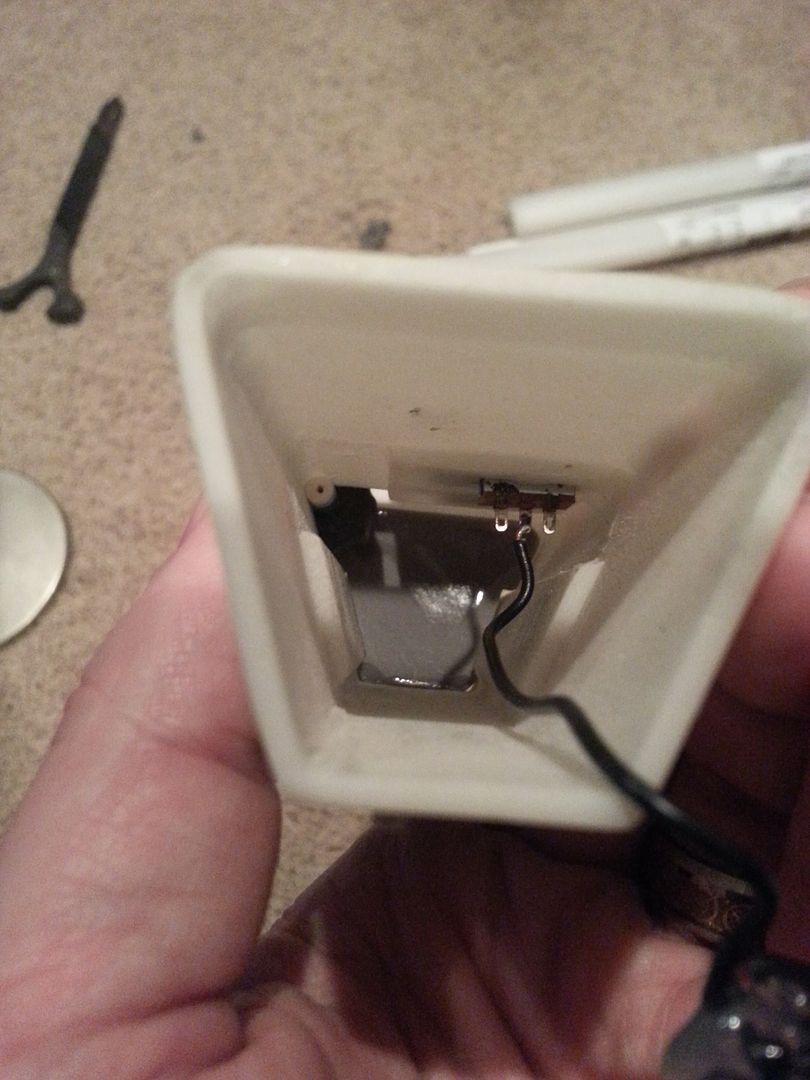
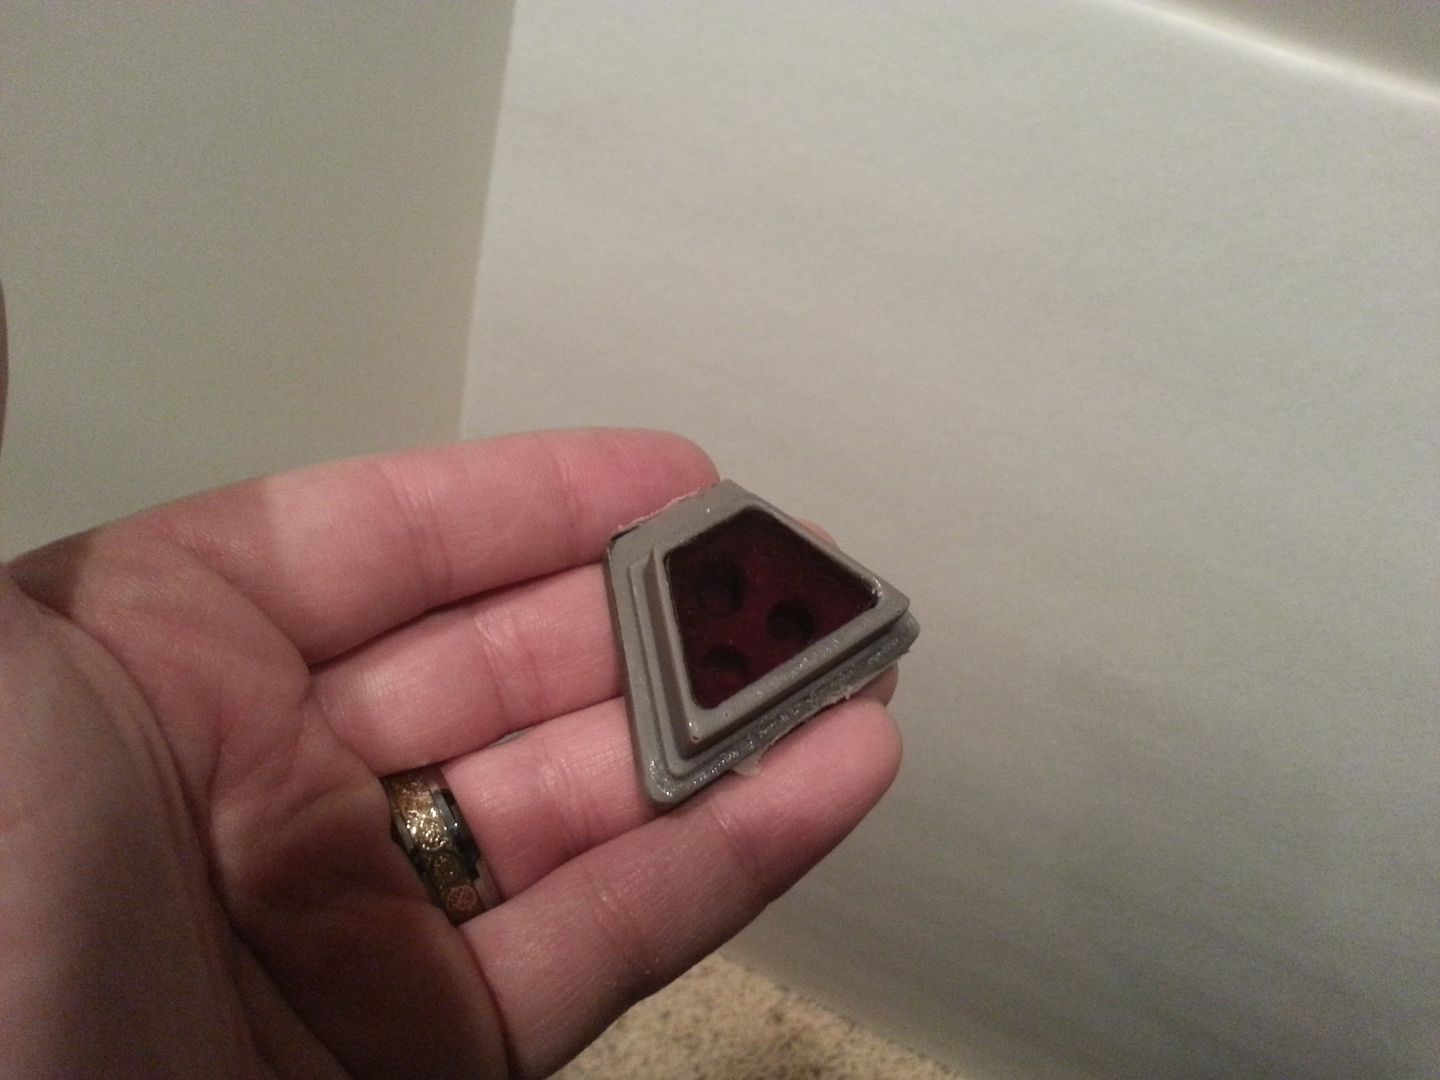
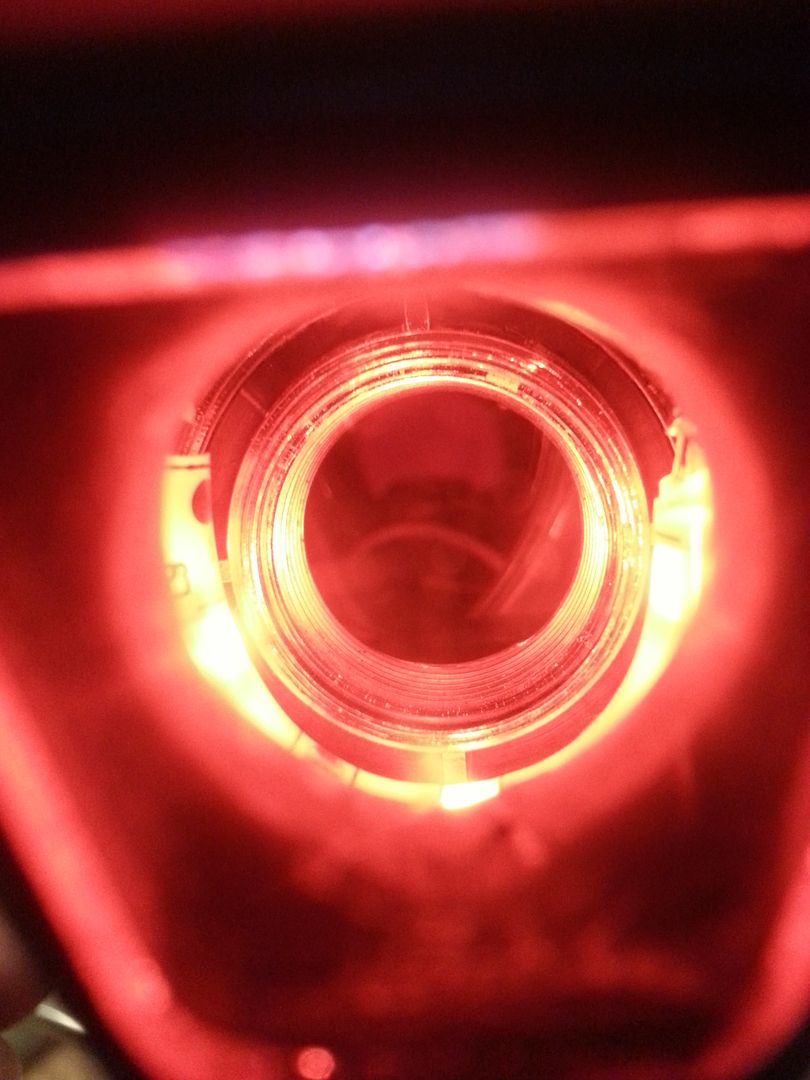
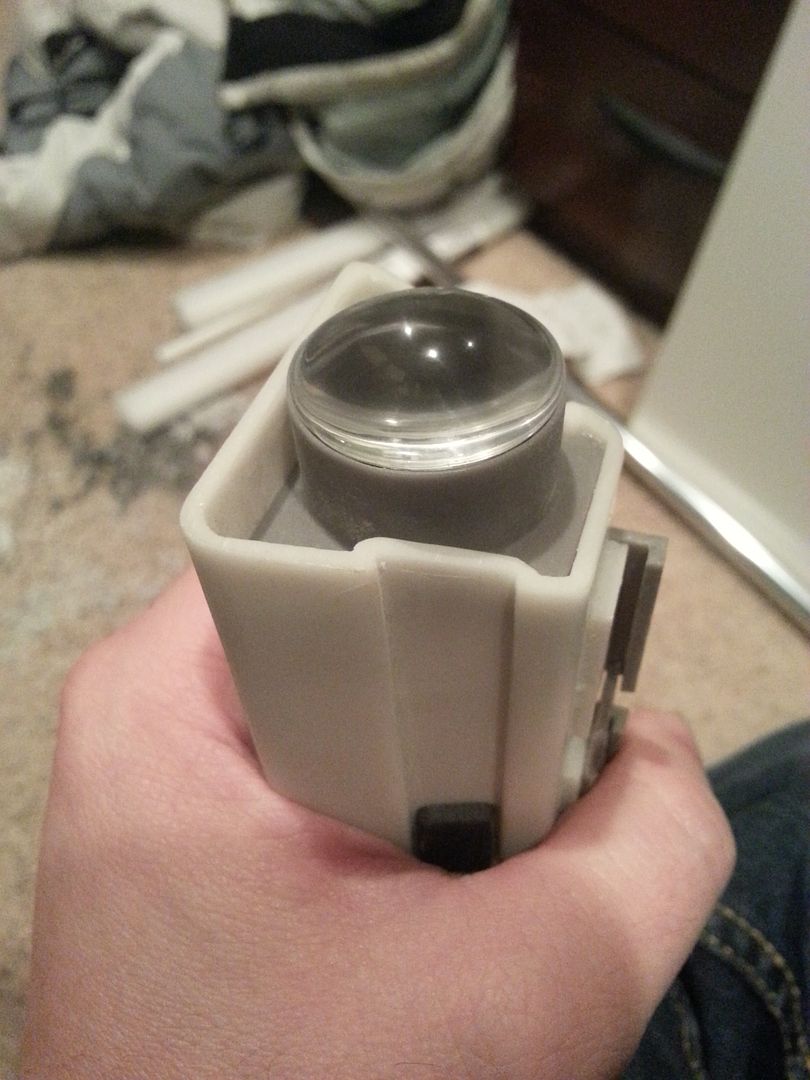
First I drilled out the front of the scope
Here is the existing reticle

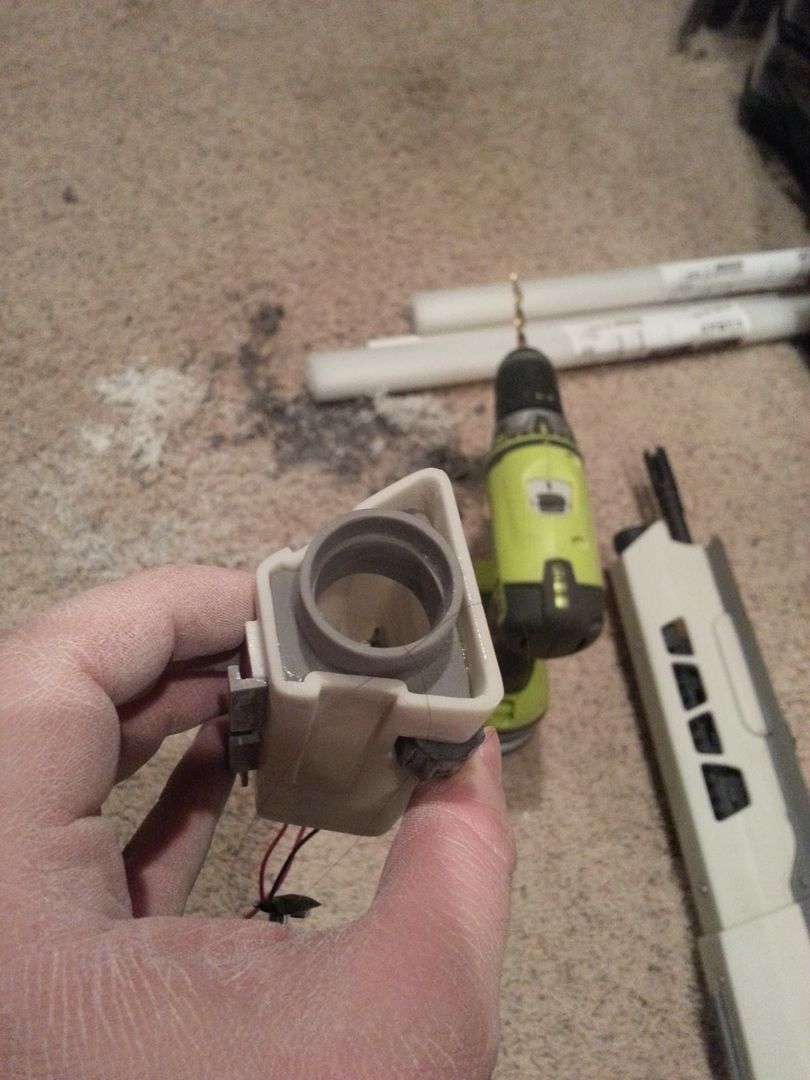
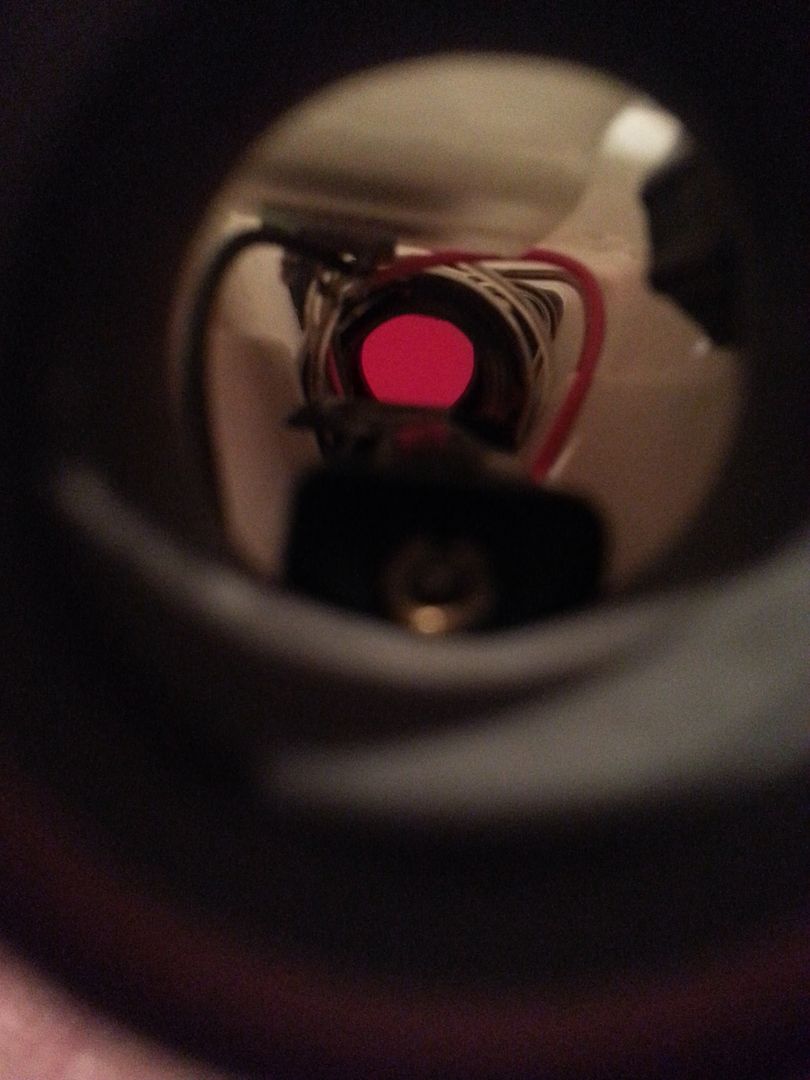
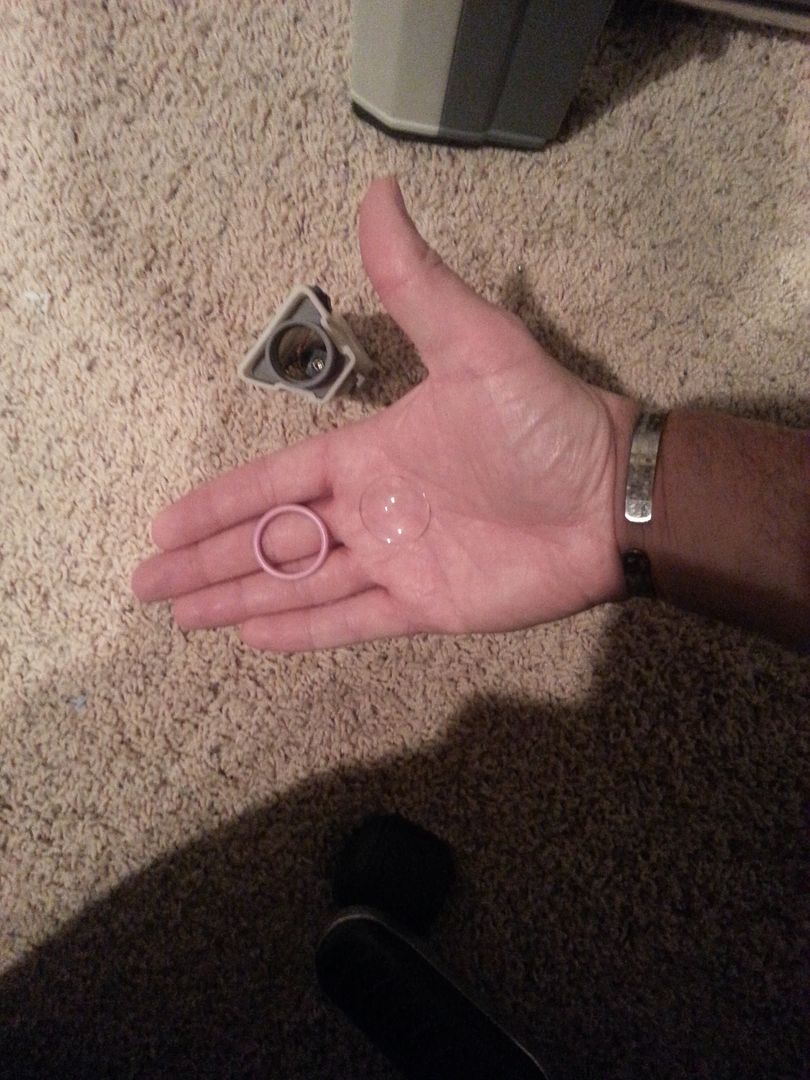
And the new parts for install

I used a small SMD strip and a 12v A27 battery in a holder since it has a very low profile and is easy to change out if needed. I also added a chrome piece of faucet housing to mount the SMD strip to and a metal ring to hold the new glass lens for the front. I was also going to line the inside with foil to block the light and for added reflectivity on the interior but I ended up not needing it.
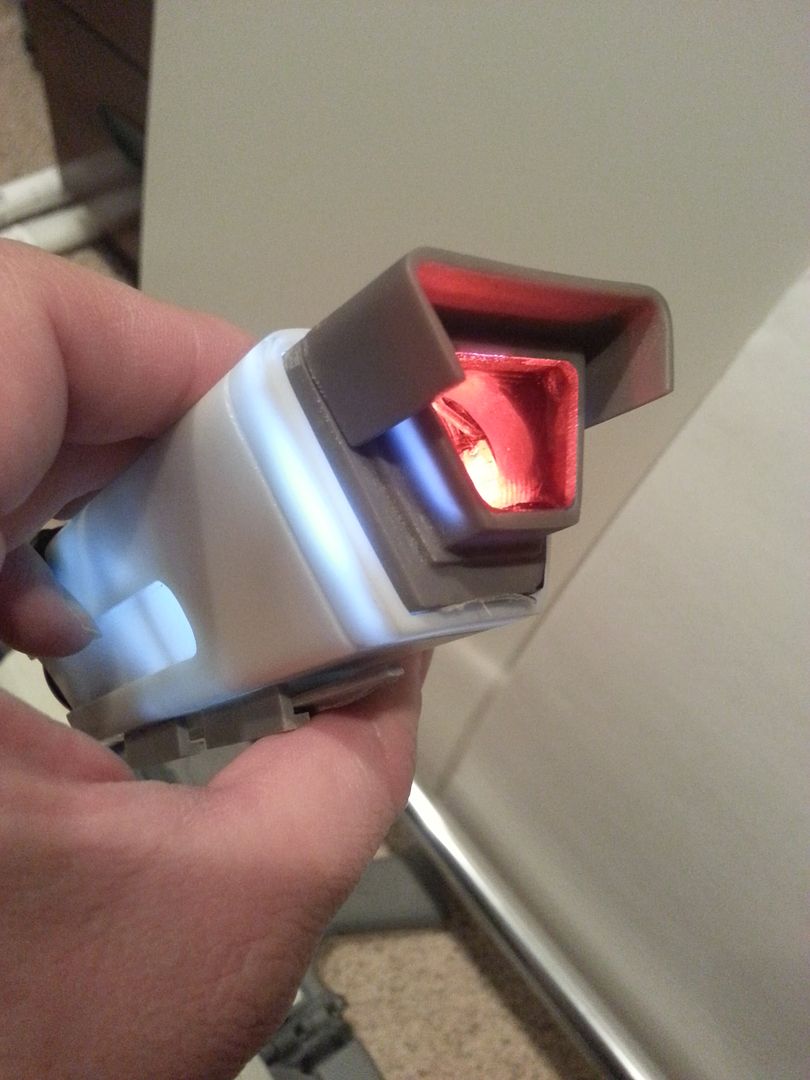
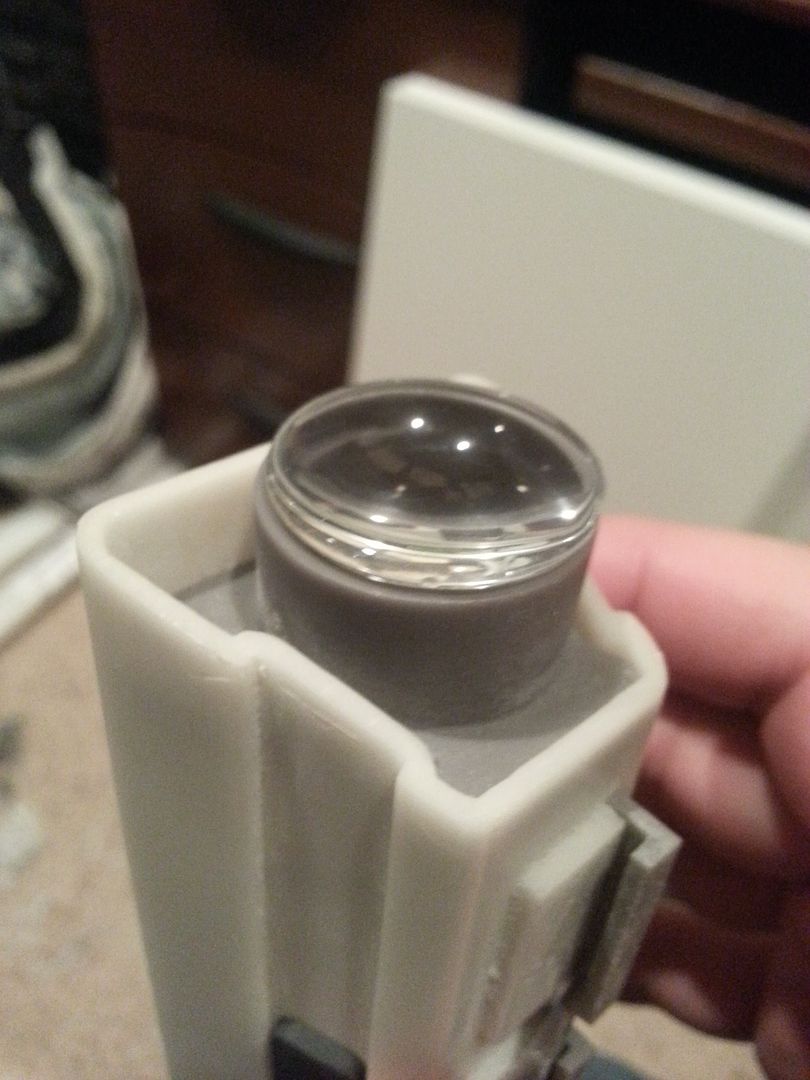
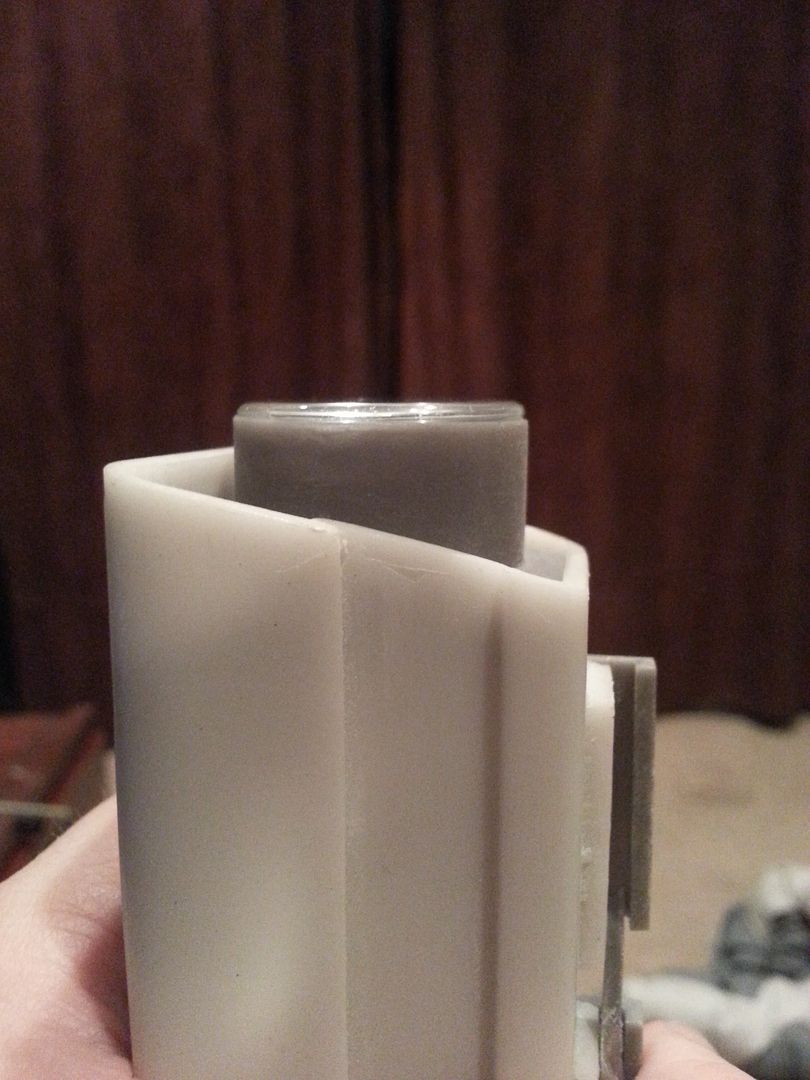
Here it is after initial fitment
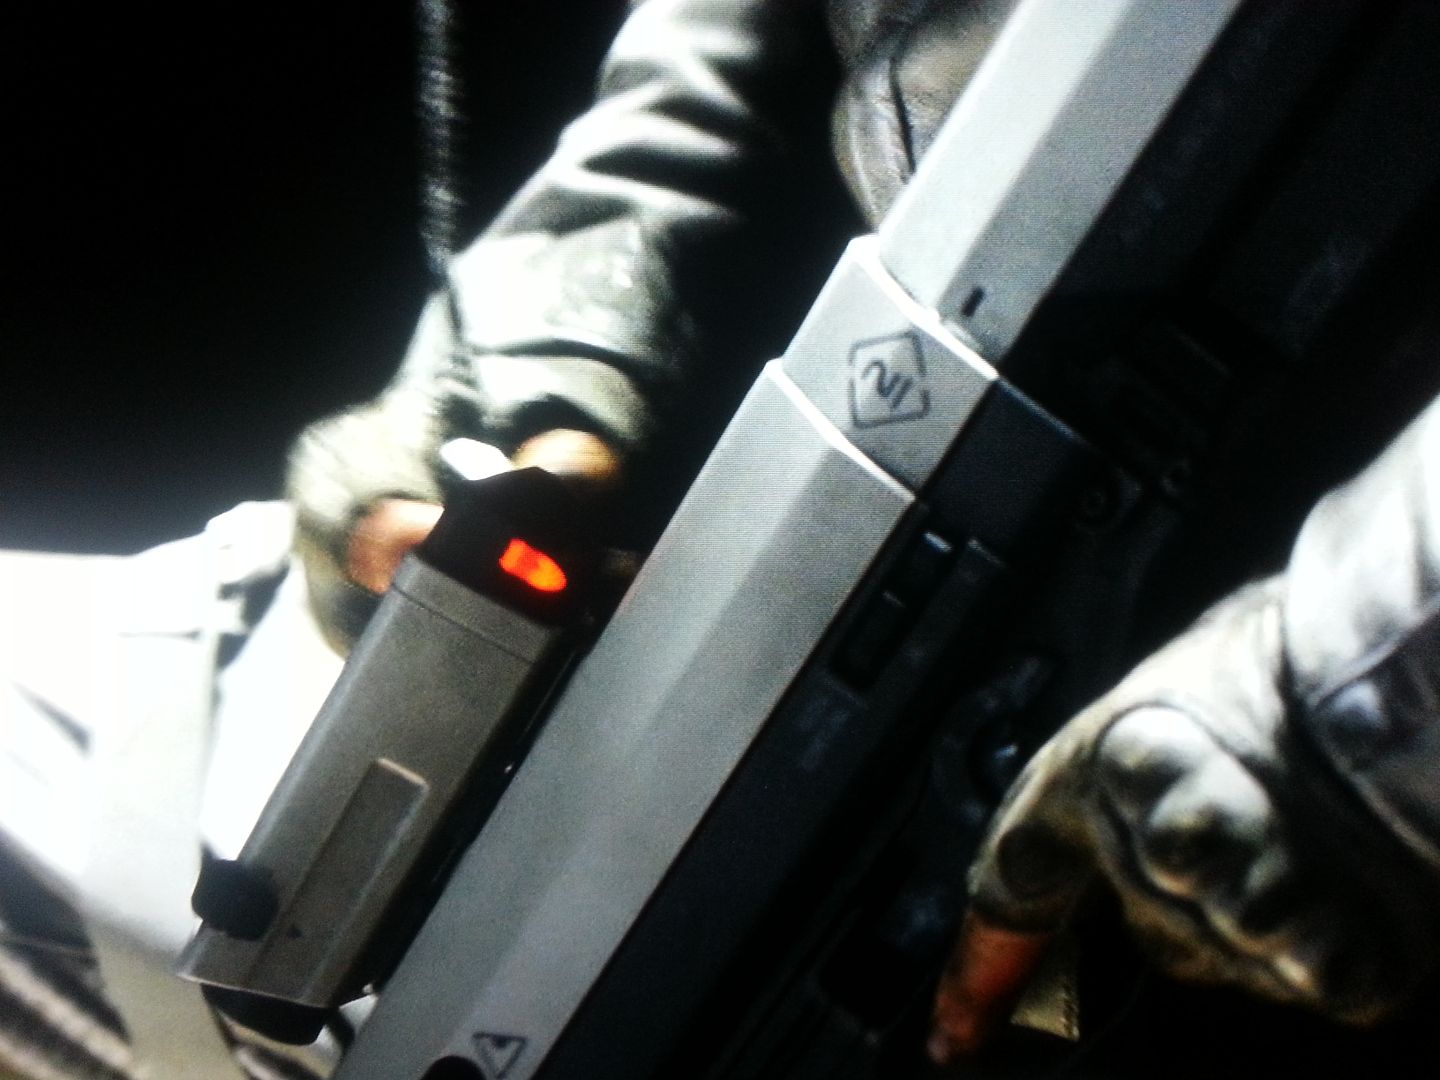
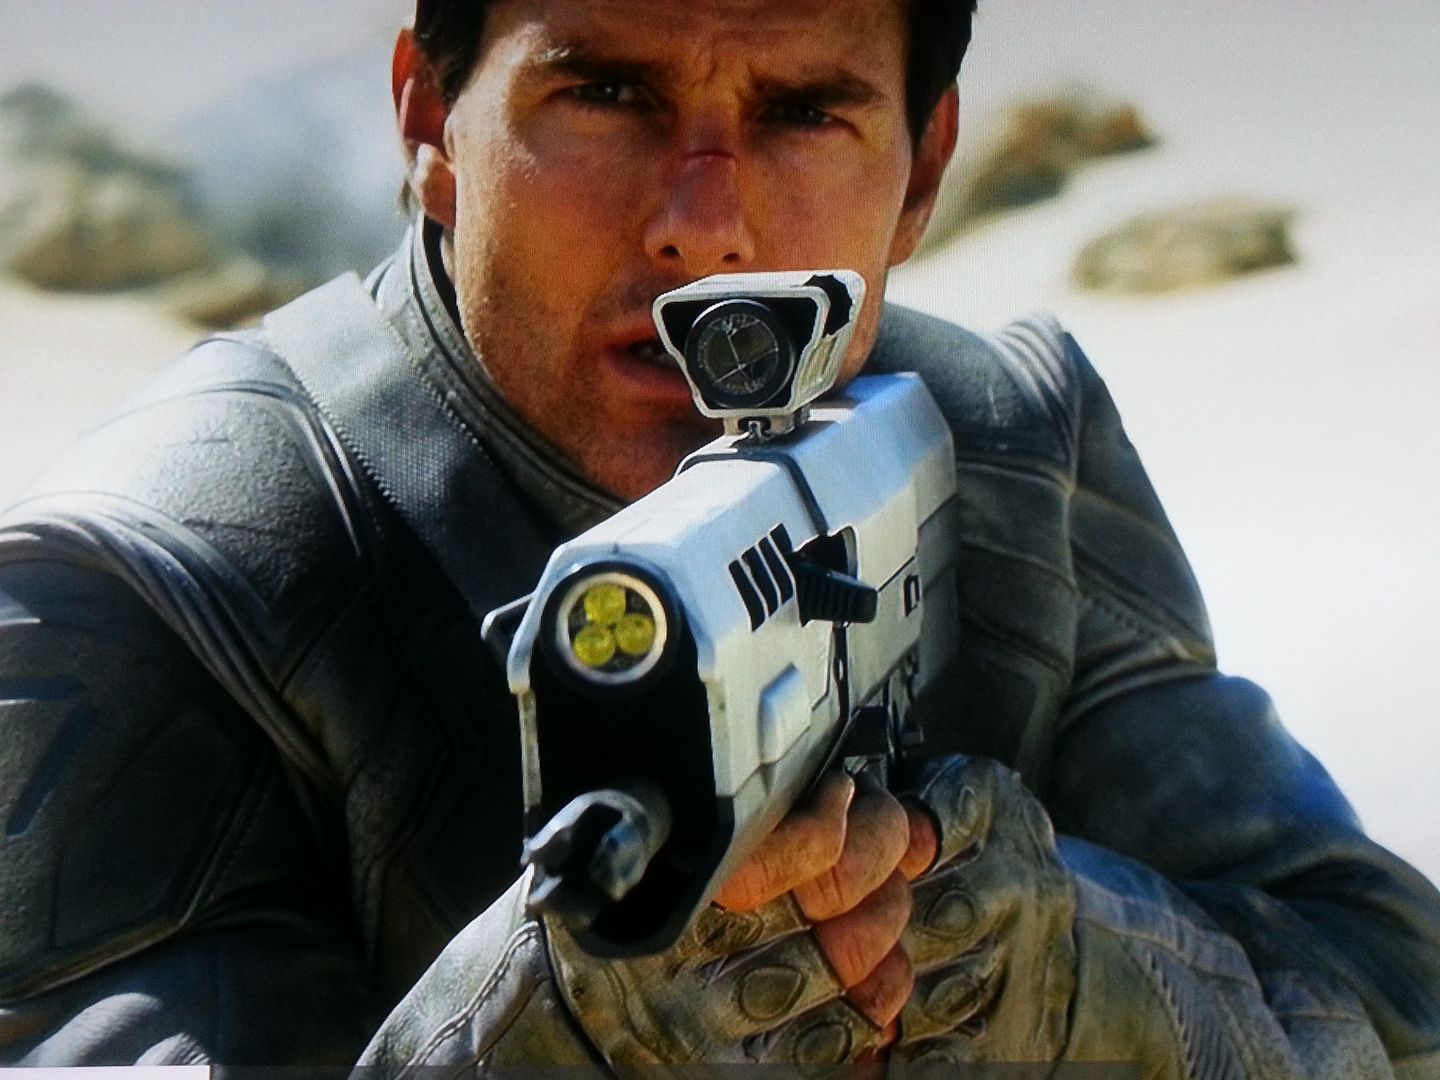
Screen caps for reference:
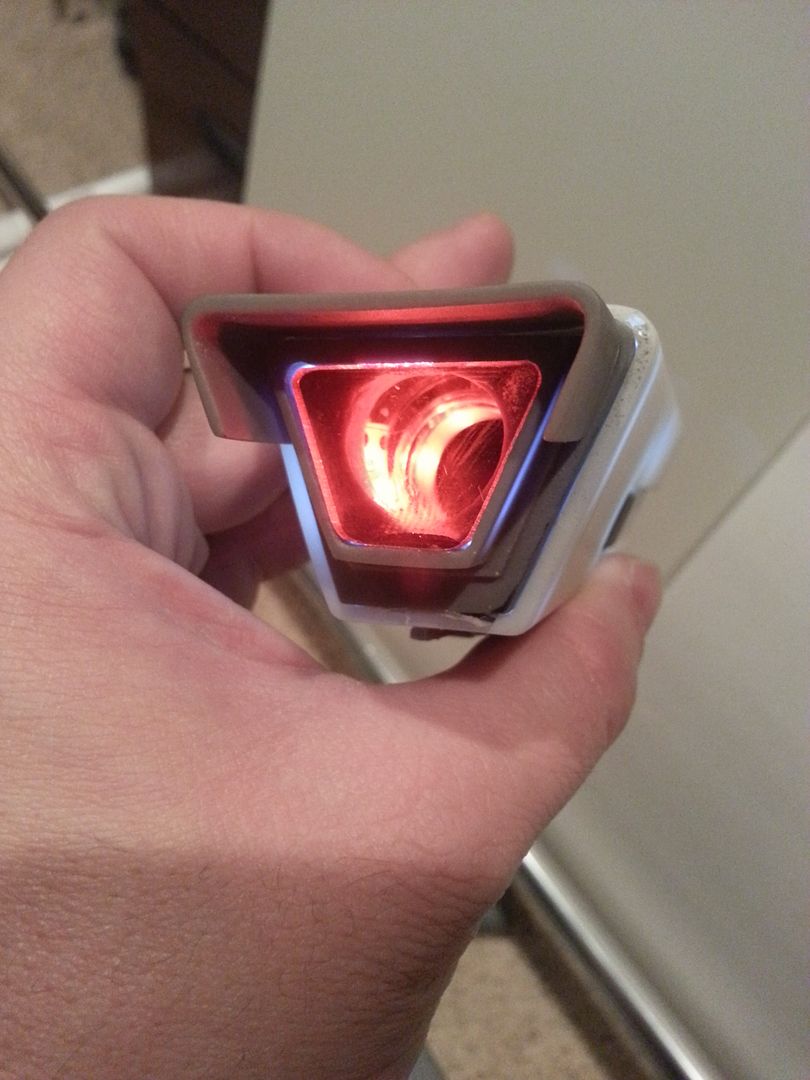
I could technically see through it, but not very well

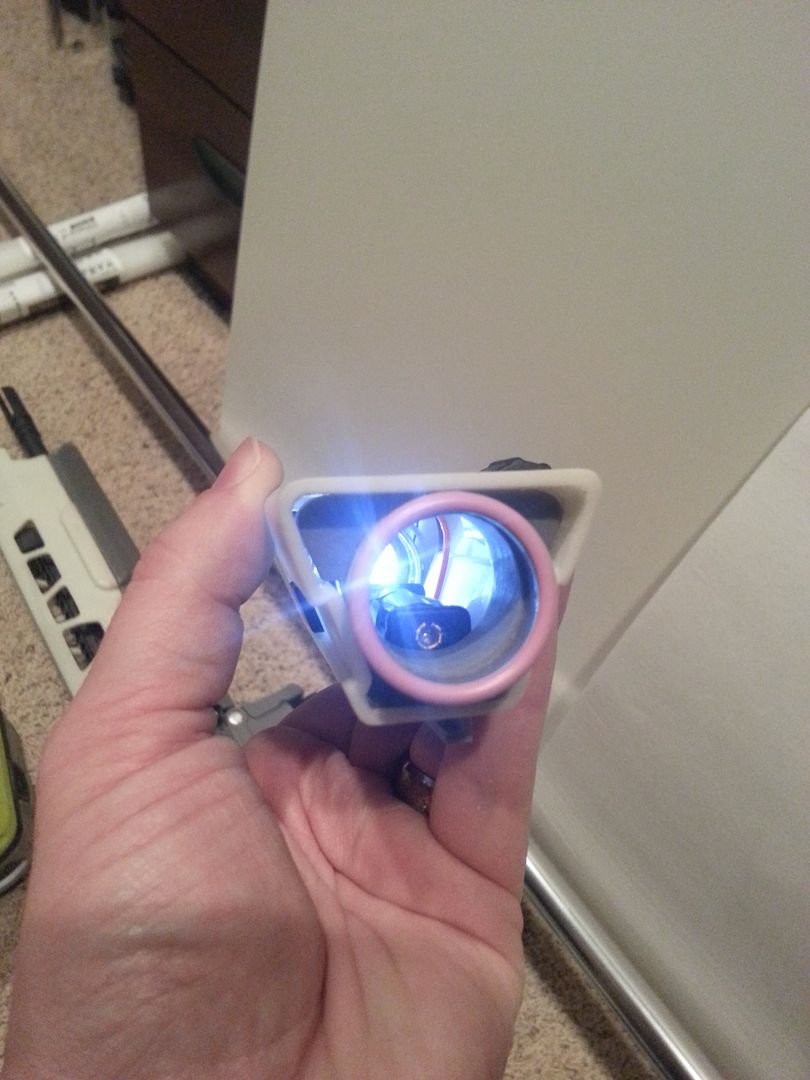
Here is the round glass bezel and metal ring I used for the front. (I picked up the glass from Hobby Lobby in the jewelry making section if anyone wants to create something similar)
The glass didn't quite fit since it was the same size as the opening
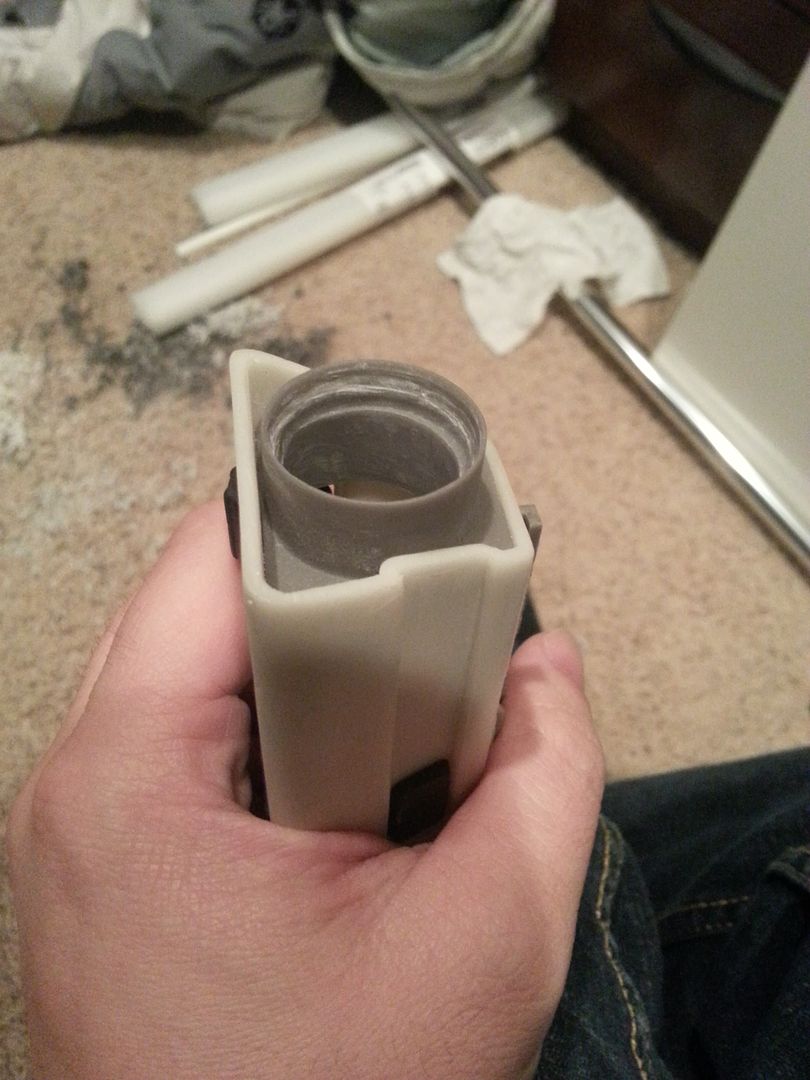
So I shaved the edges down with a dremel and xacto knife until it fit
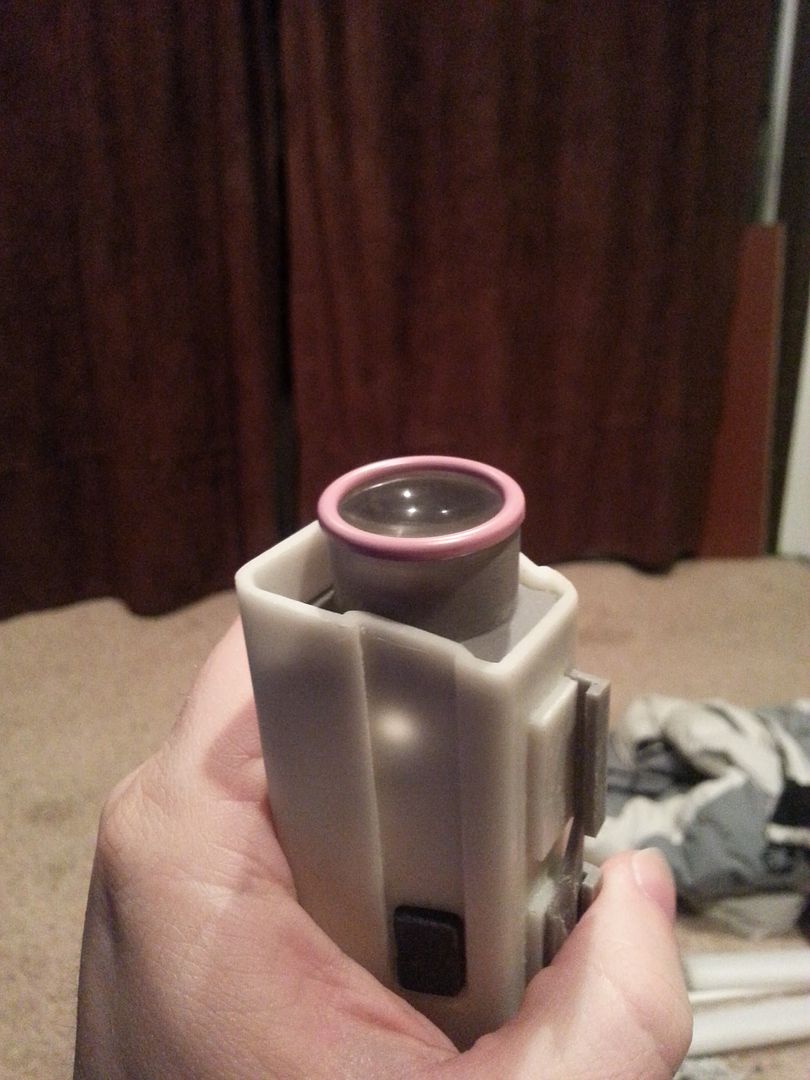
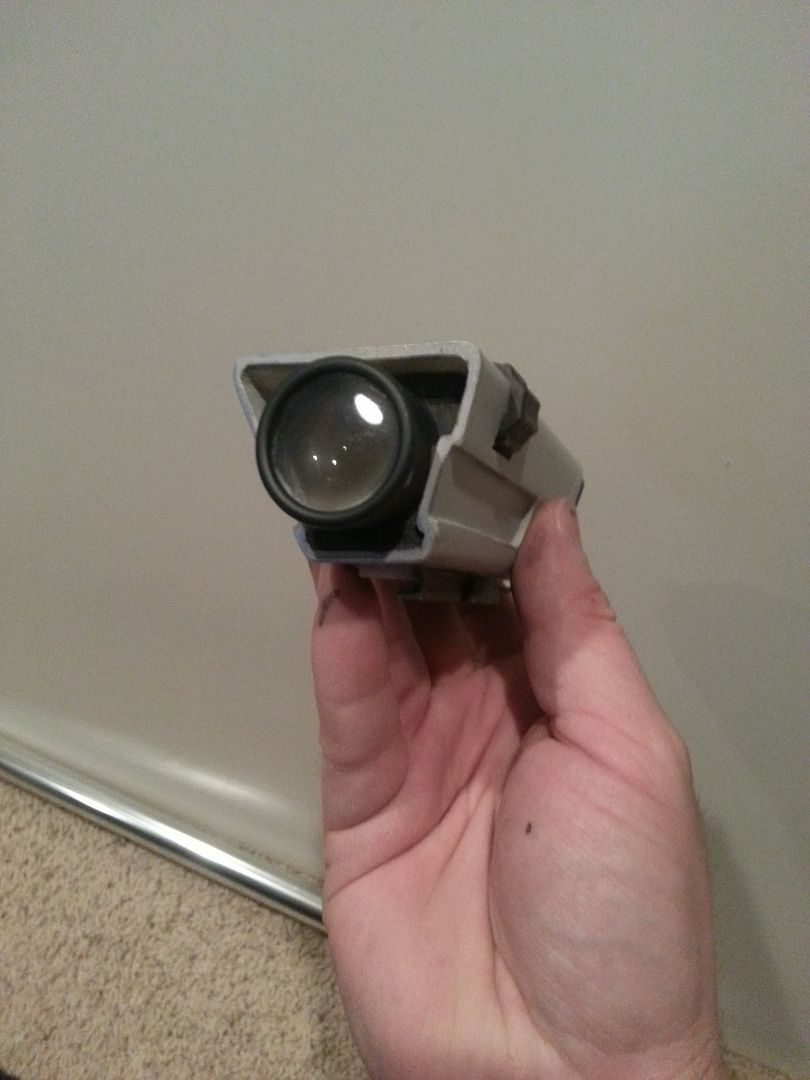
With metal ring
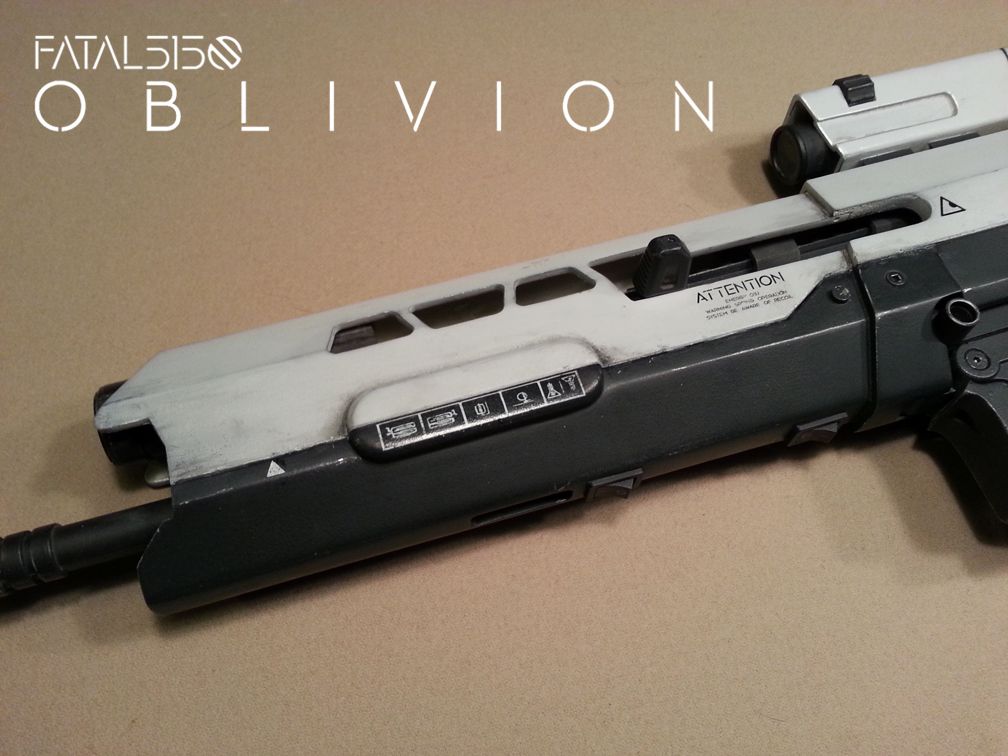
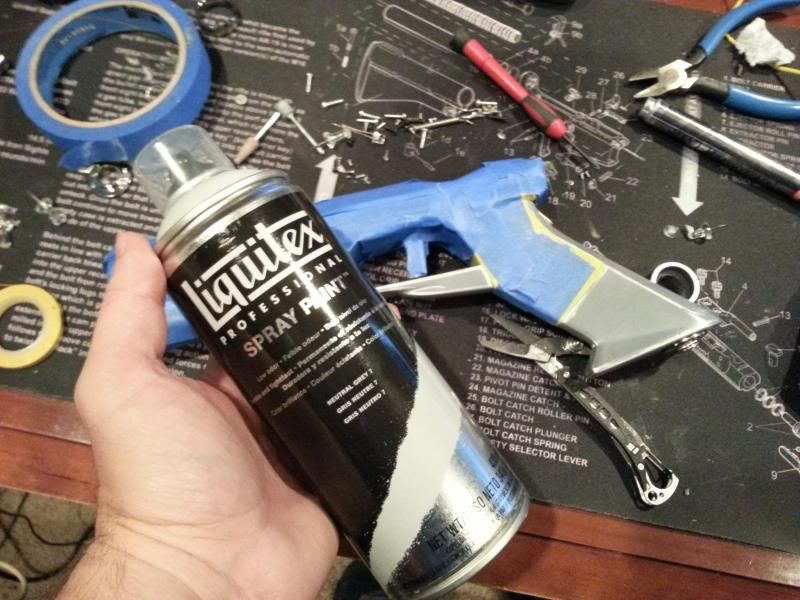
Now I was ready for paint! So I started masking stuff off
Like the pistol, I wanted to show some weathering. I used my silver pen technique to show bare metal underneath in the areas where the paint would scratch off

Top portions masked off
At this stage, I also filled the scope with clay around the reticle to block the light out
After some paint and knock down on the scope

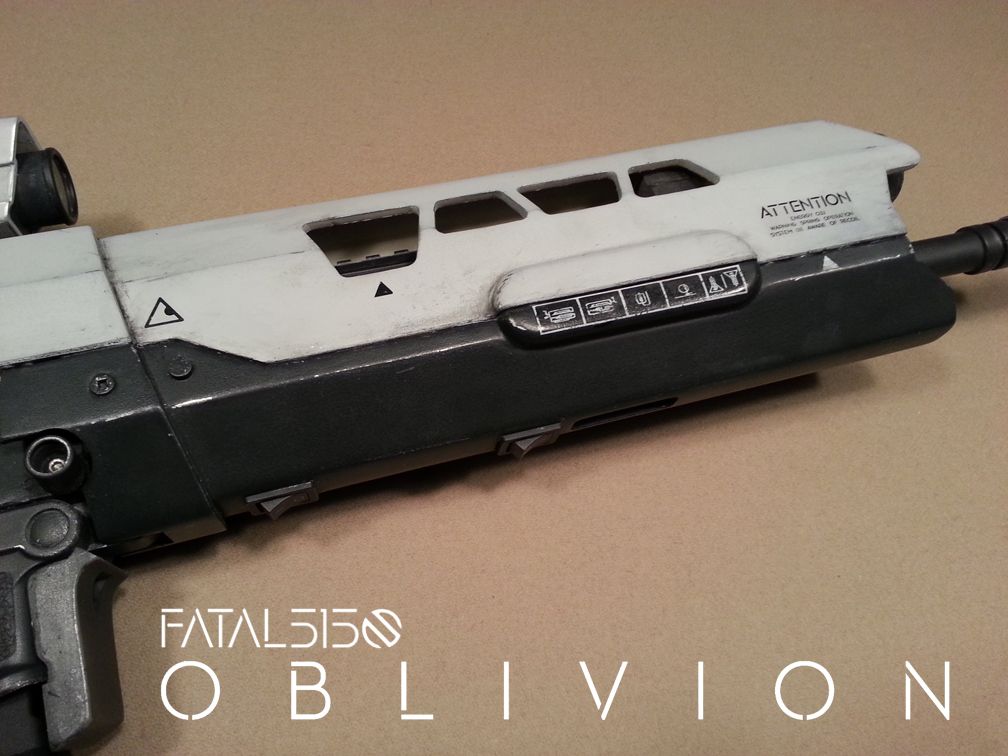
Dark gray freshly painted and masking removed
Light gray also painted and masking removed. I got excited and worked too quickly without letting the dark gray paint fully cure so when I pulled off the tape it took off more paint than I wanted

I went back in and touched up some parts with a paintbrush.
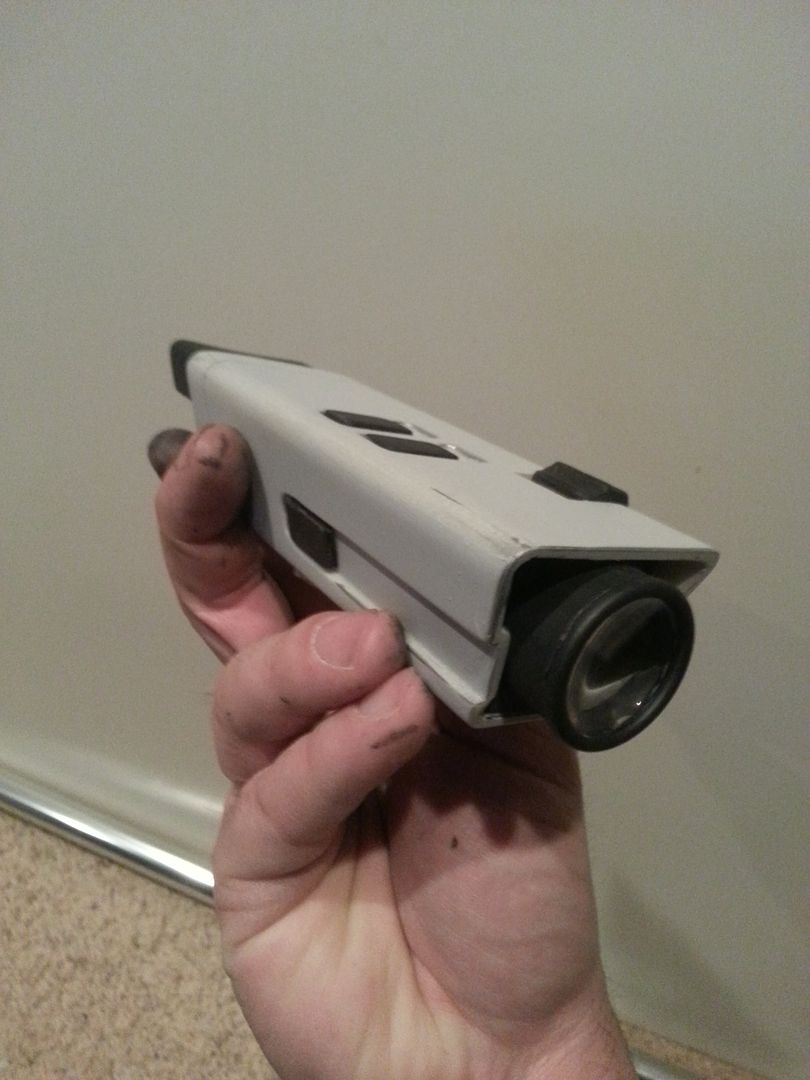
Now the torch needed some kind of bezel to make it look more finished
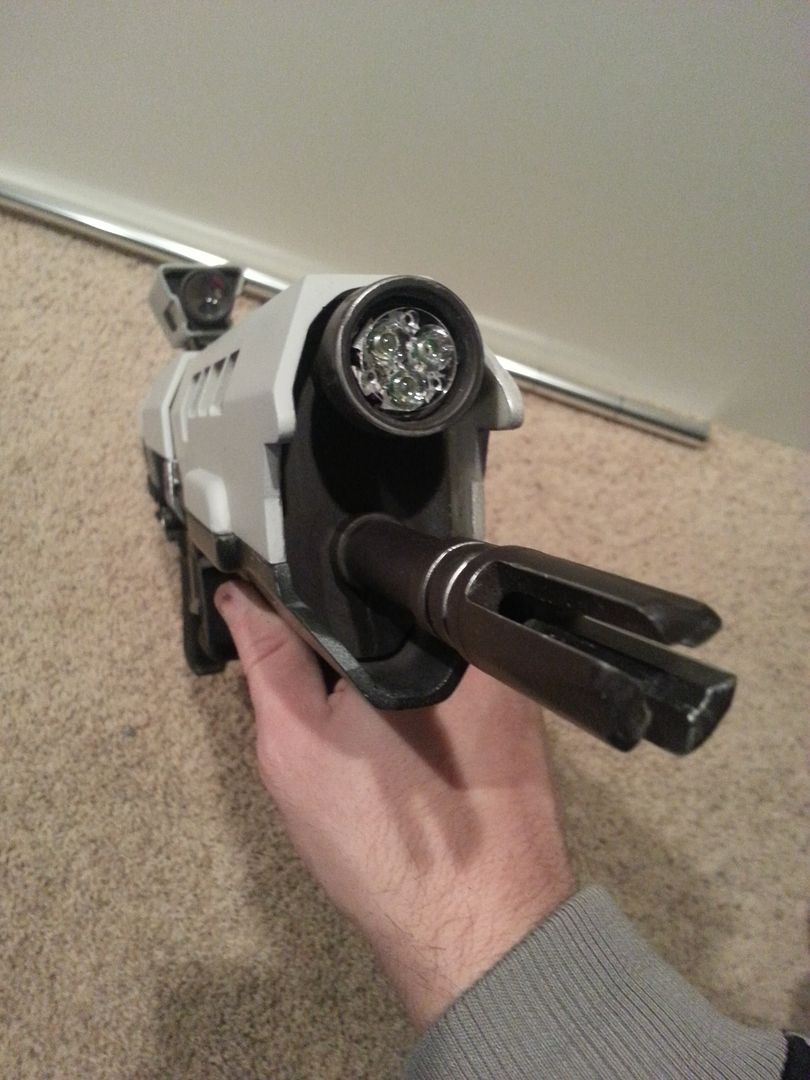
I found some metal rings that I thought worked well

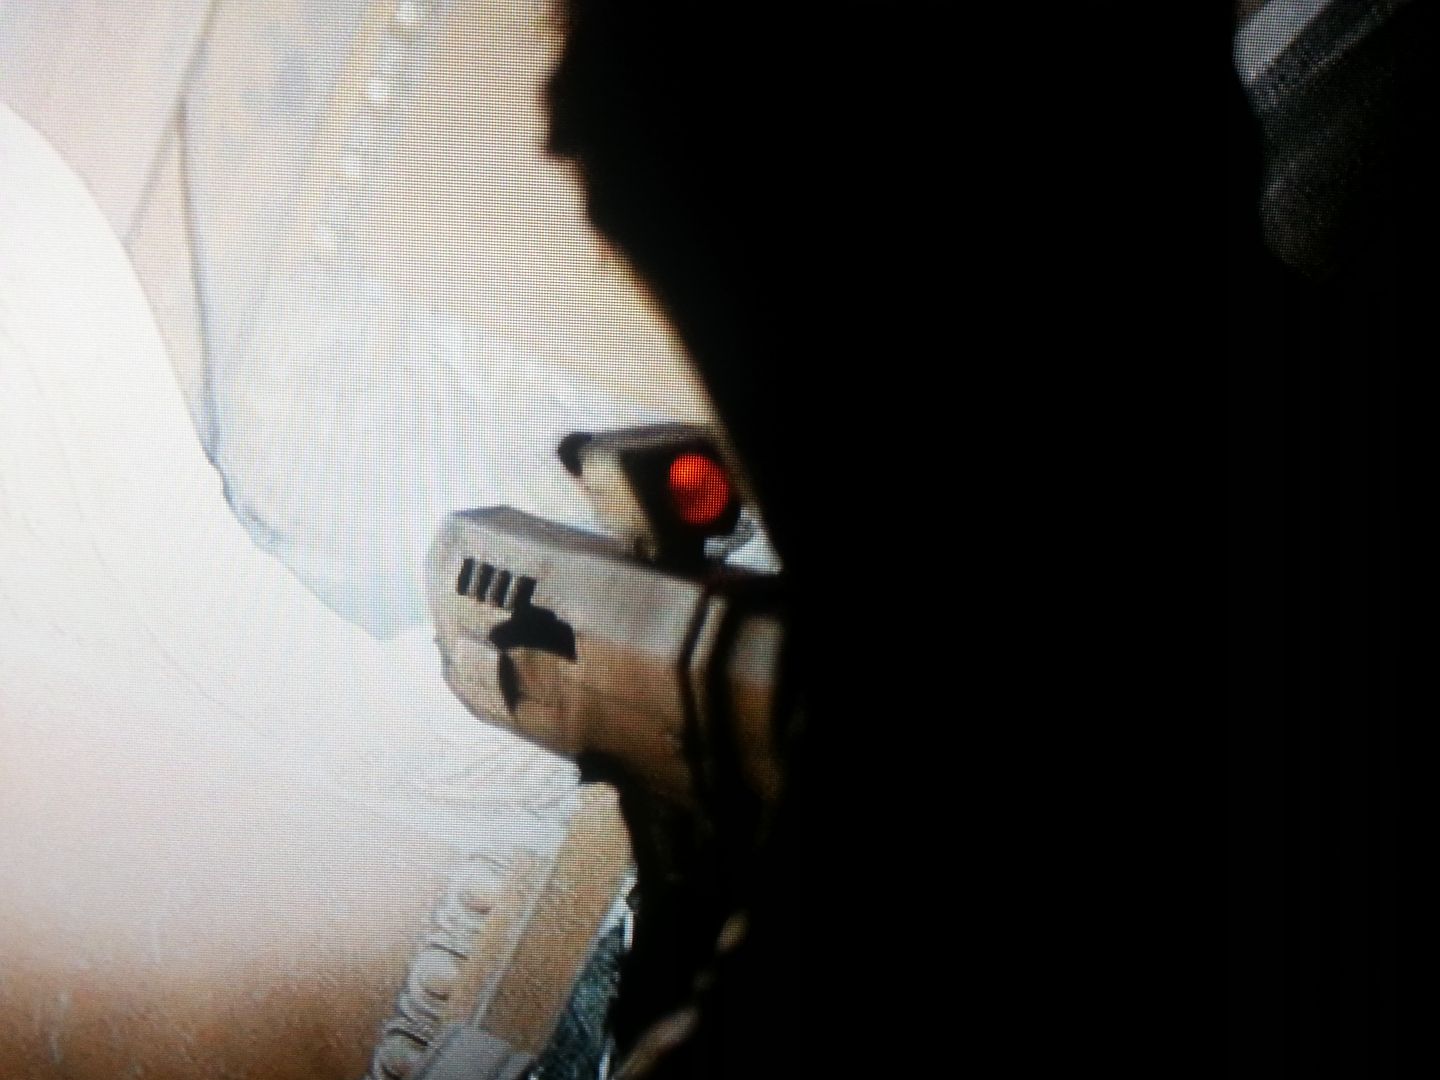
Here is a screen cap for reference:
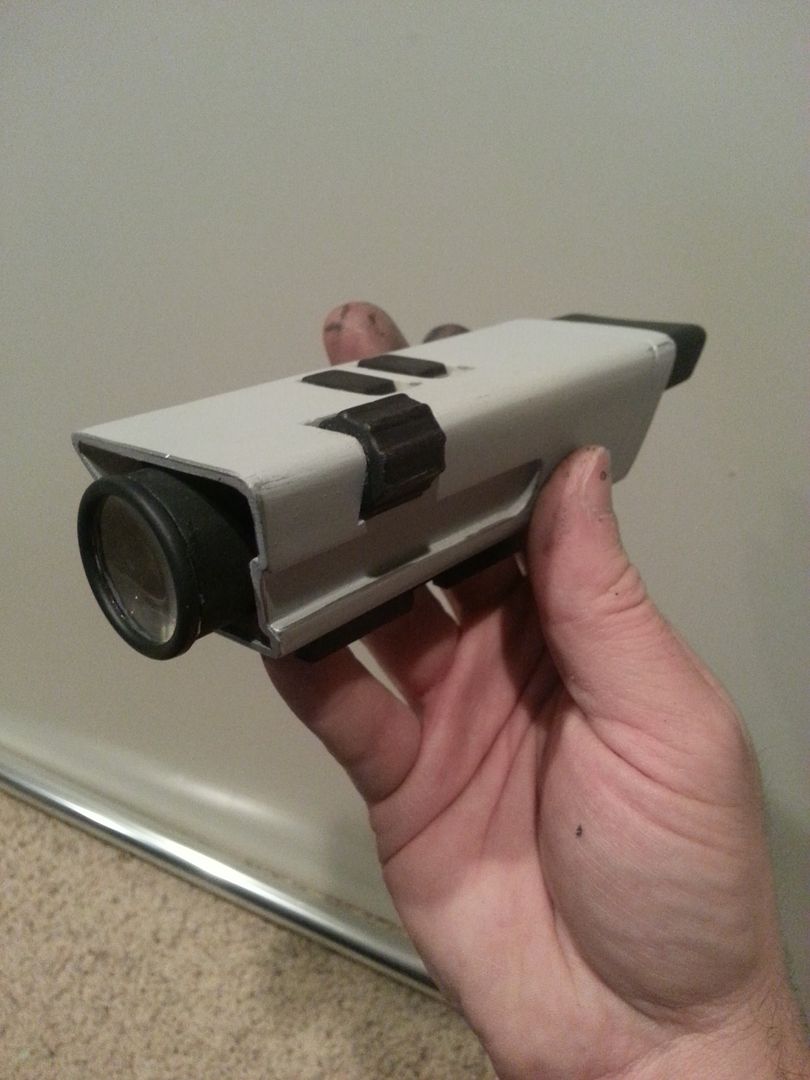
Both sides painted up
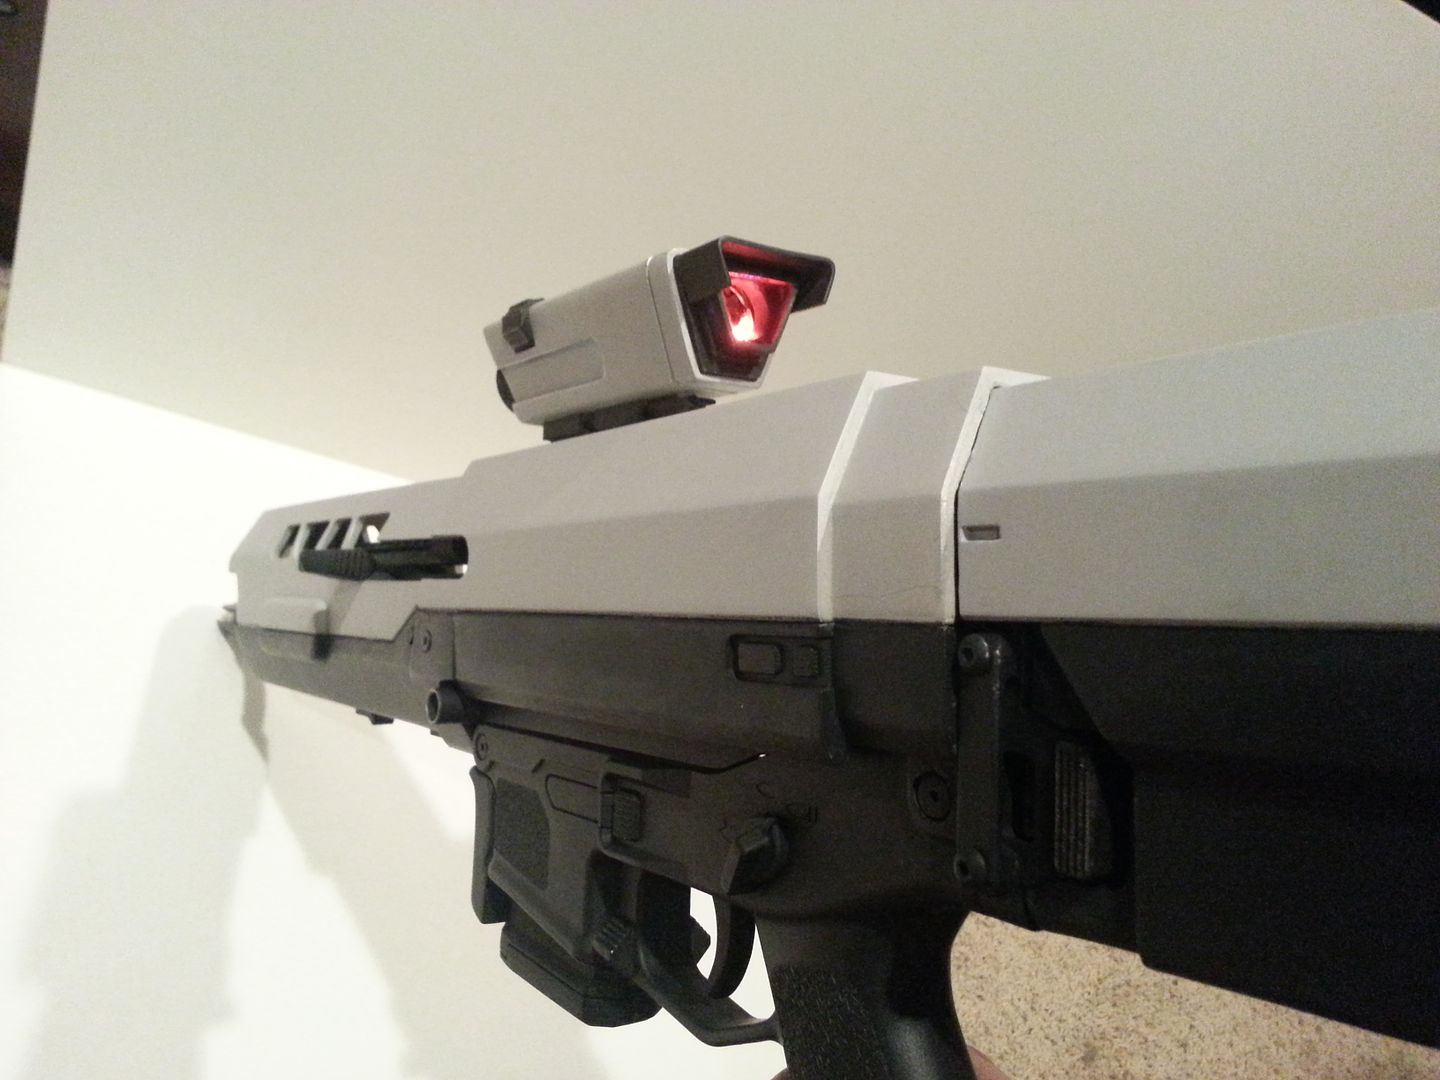
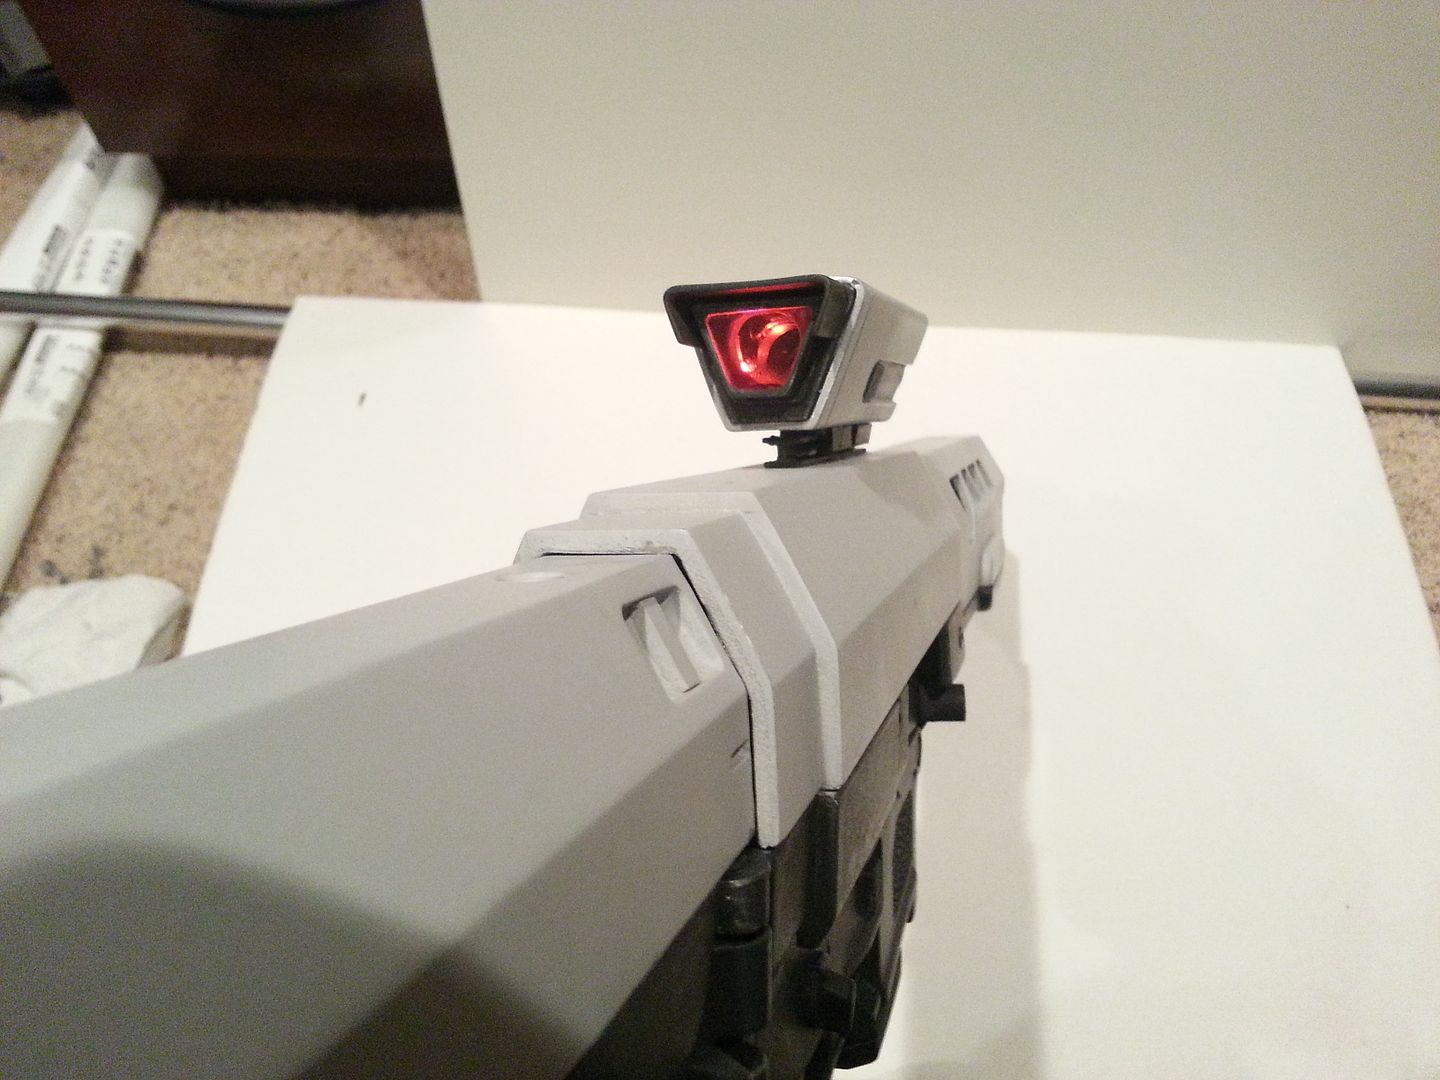
Illuminated scope
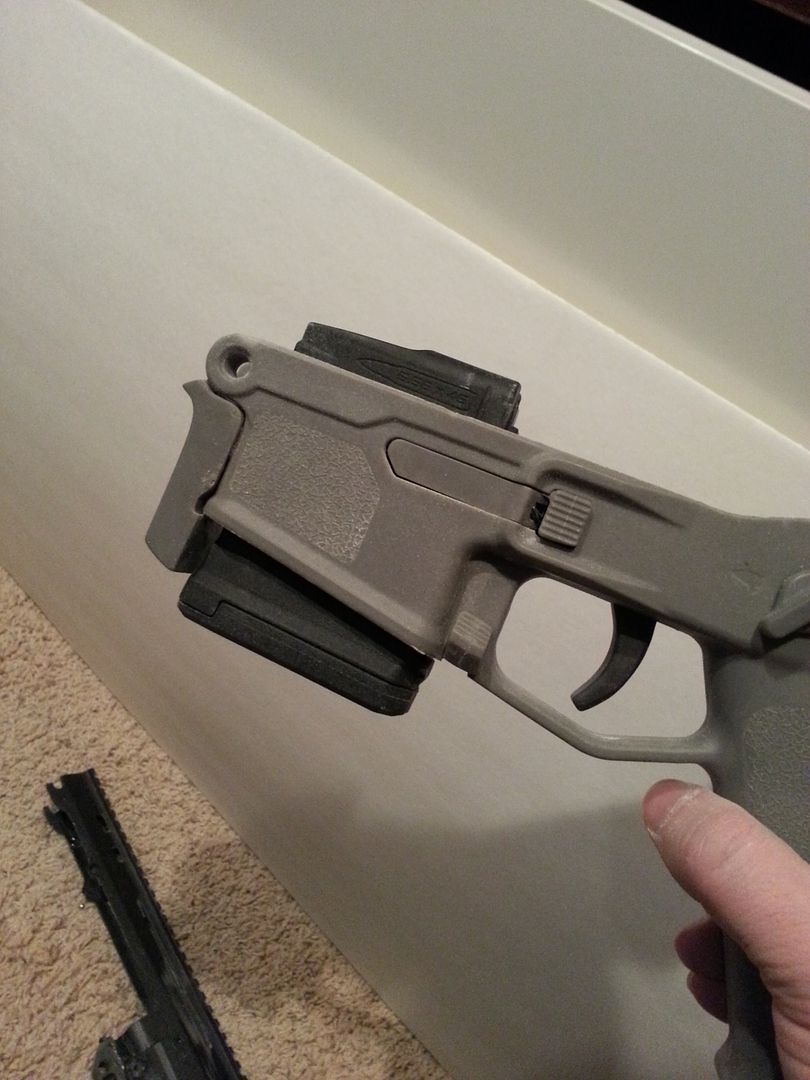
I also threw in a full 30rnd magpul mag just to see what it would look like
My weathering tools!
After working it a bit

As you can see, I went pretty subtle, but I really like how oysteinhole's turned out, so I think I'll keep going on it.
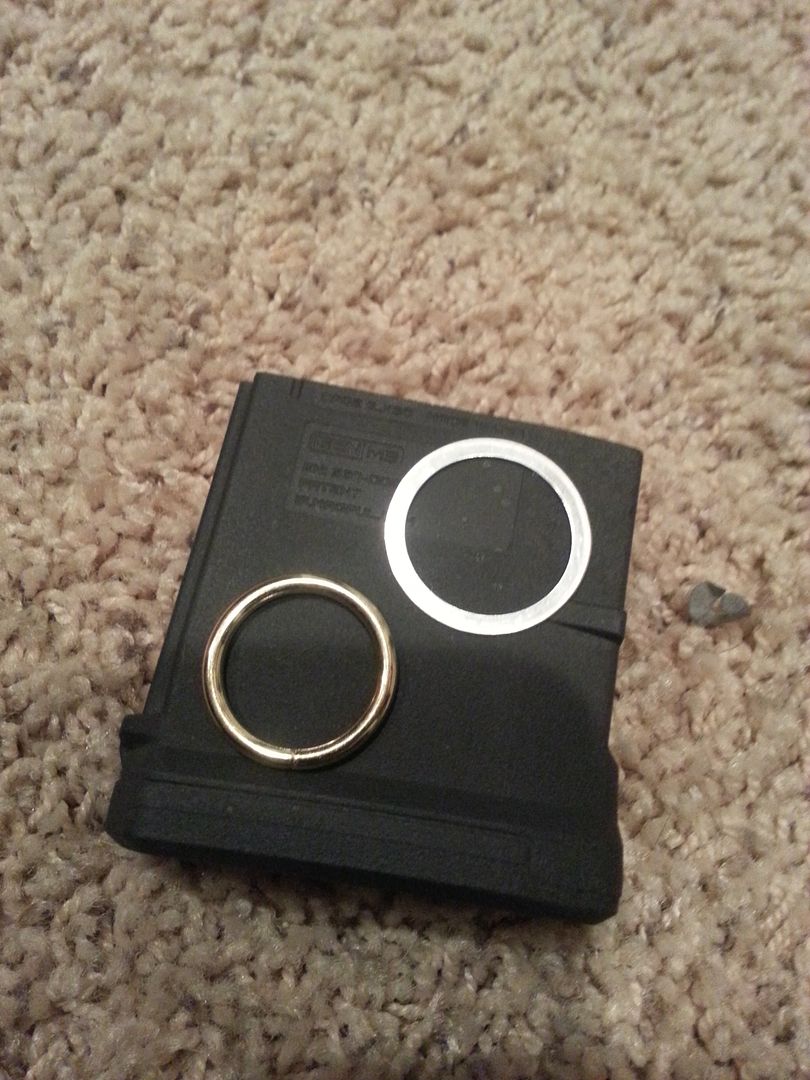
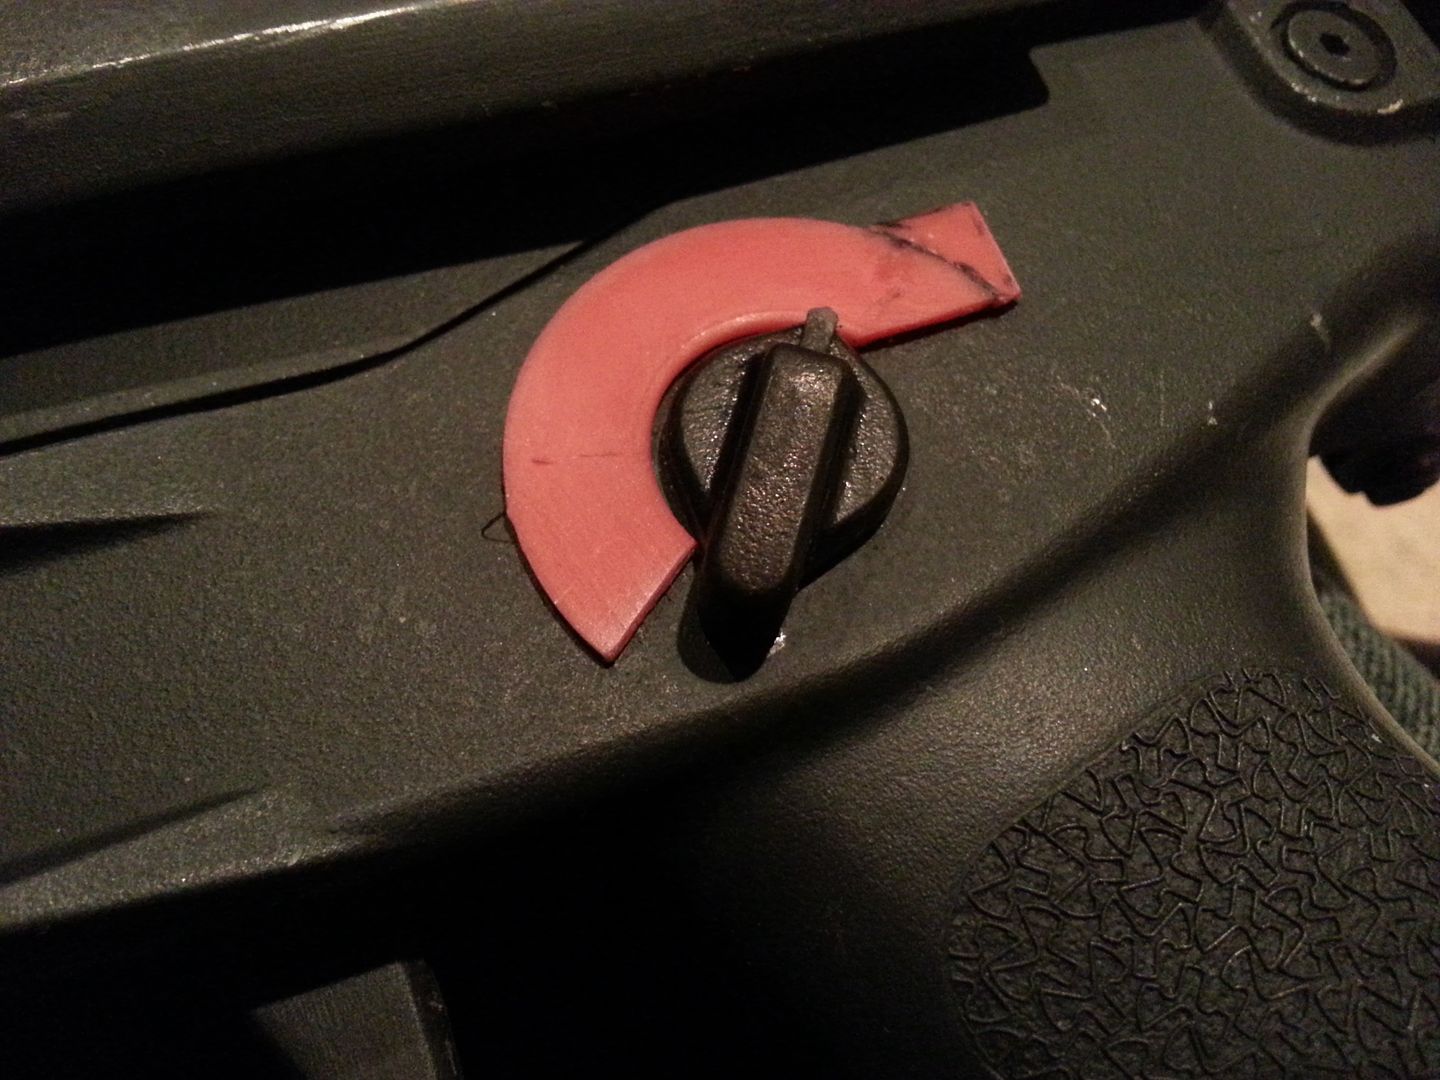
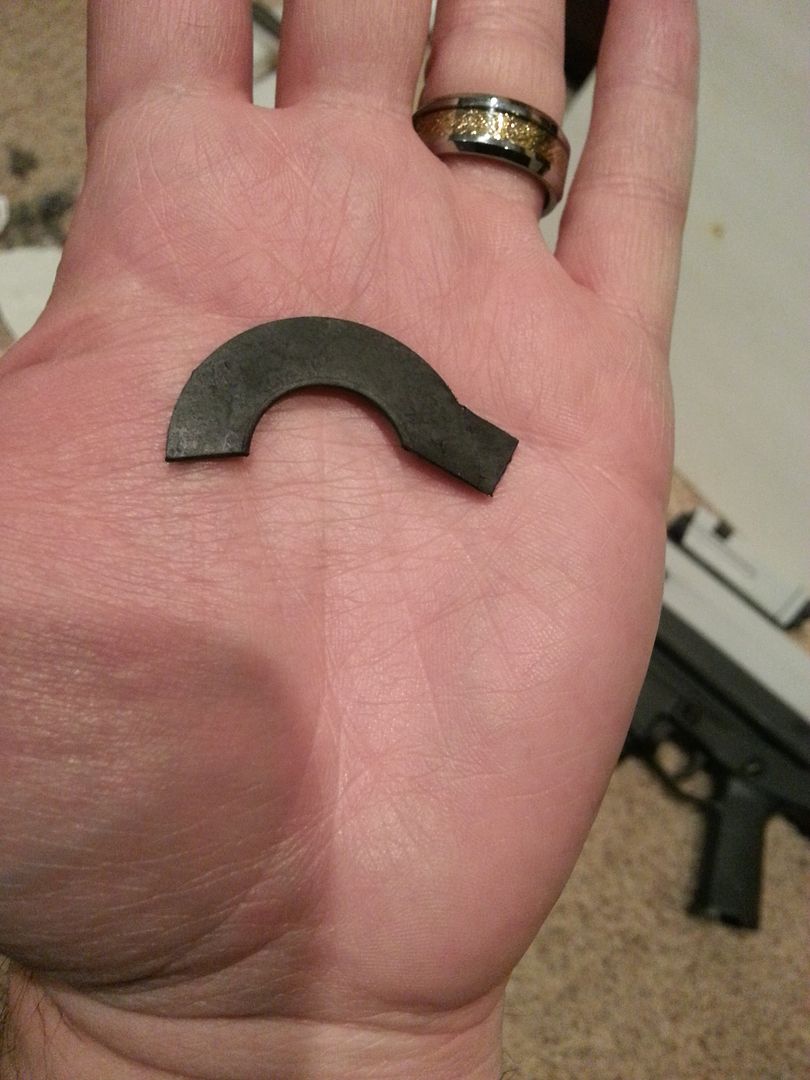
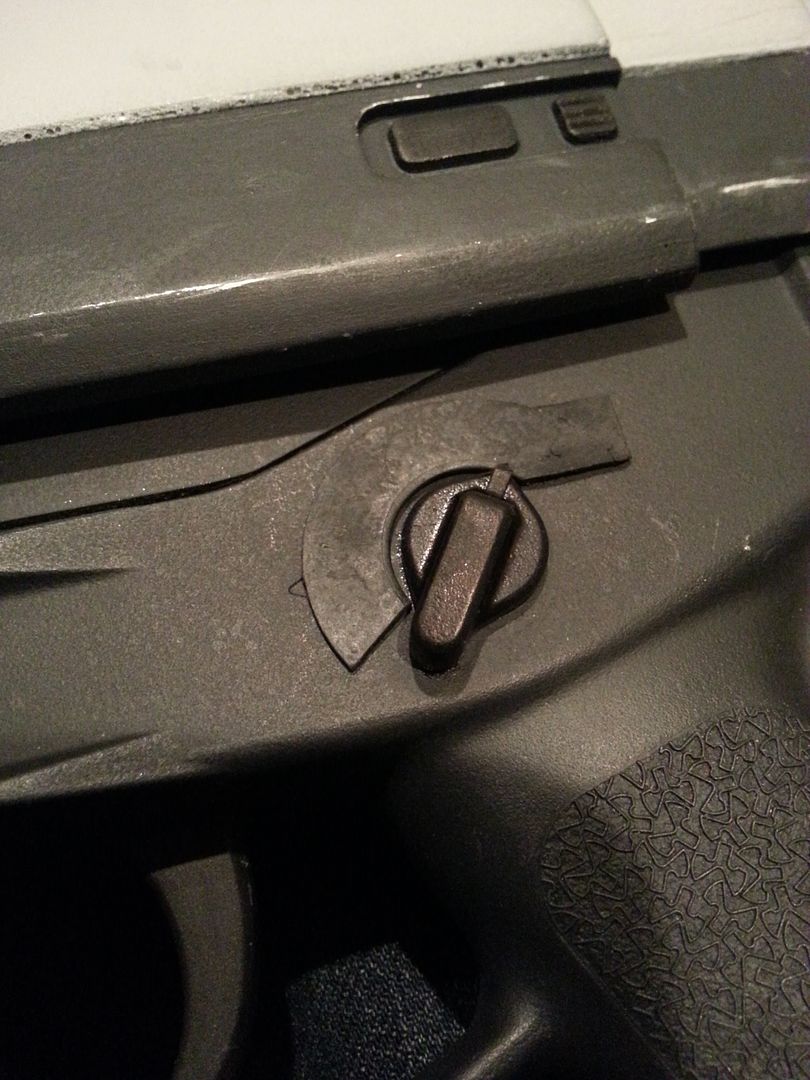
I also noticed this extra circular piece above the fire selector from the Oblivion poster. So I made one from a plastic ring I found that just so happened to be the perfect size
I cut and glued it to shape
Then sanded and painted it
Installed
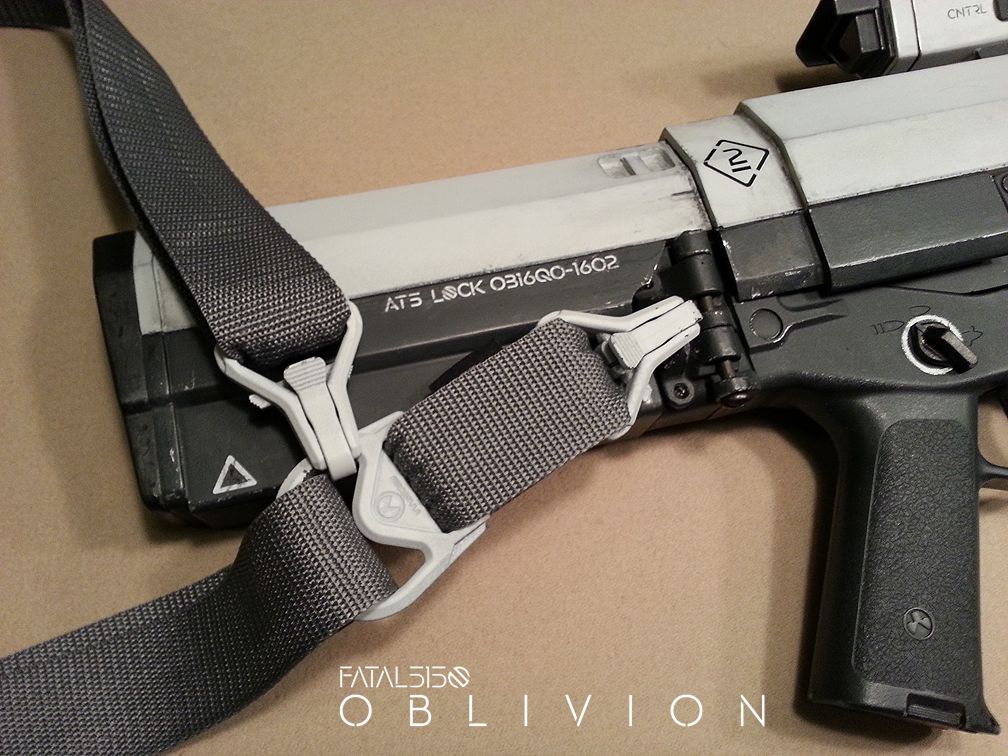
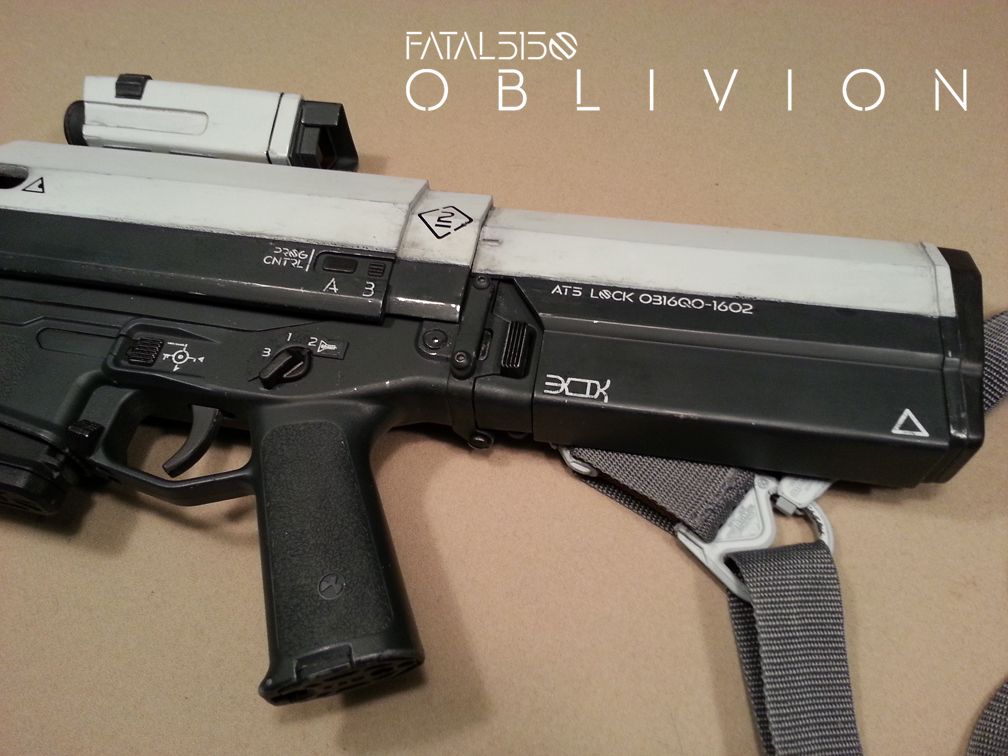
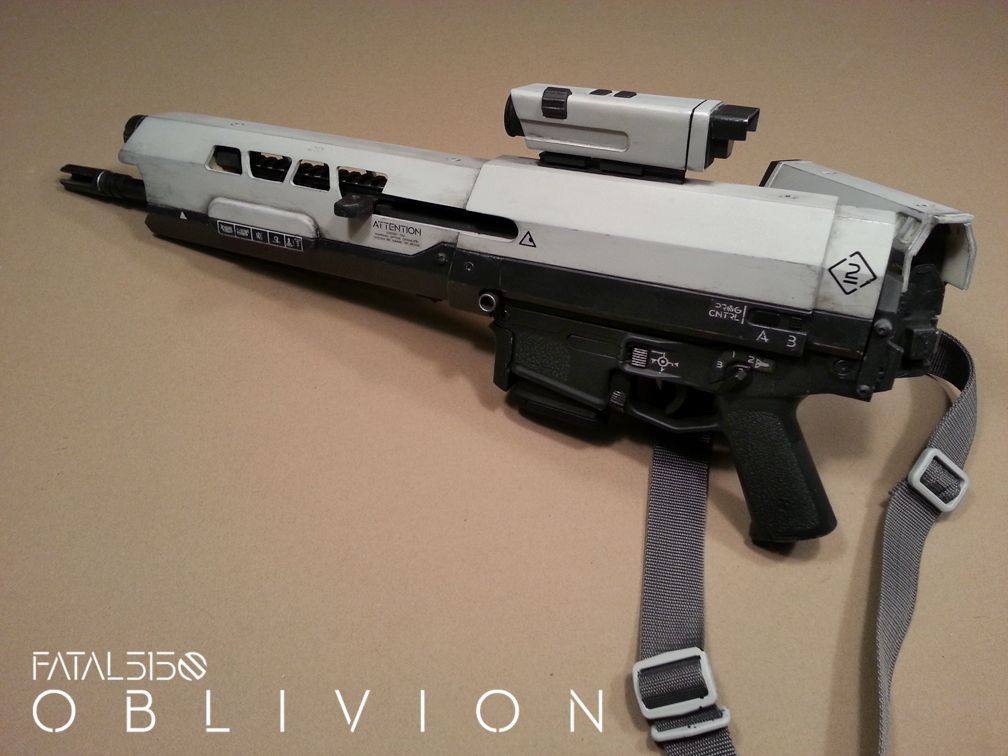
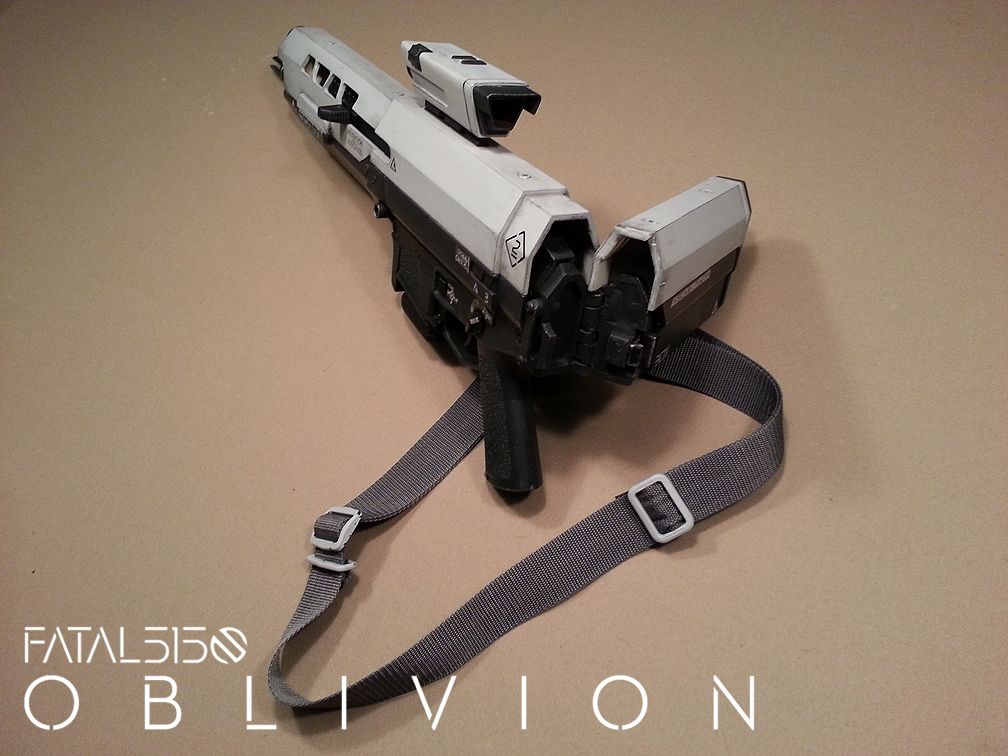
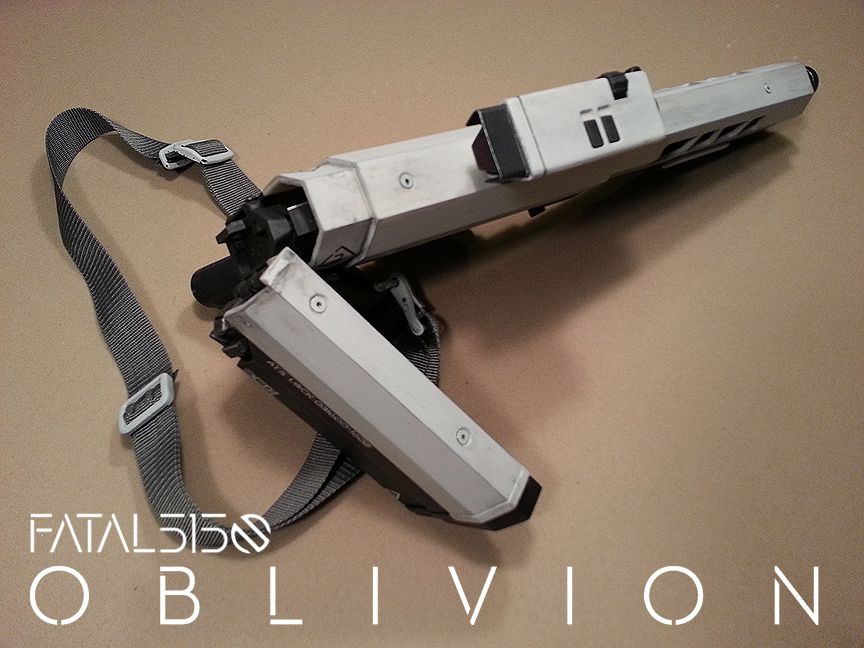
Time to apply decals! (A few sets of pistol and rifle decals are still available in the Junkyard for those interested.)
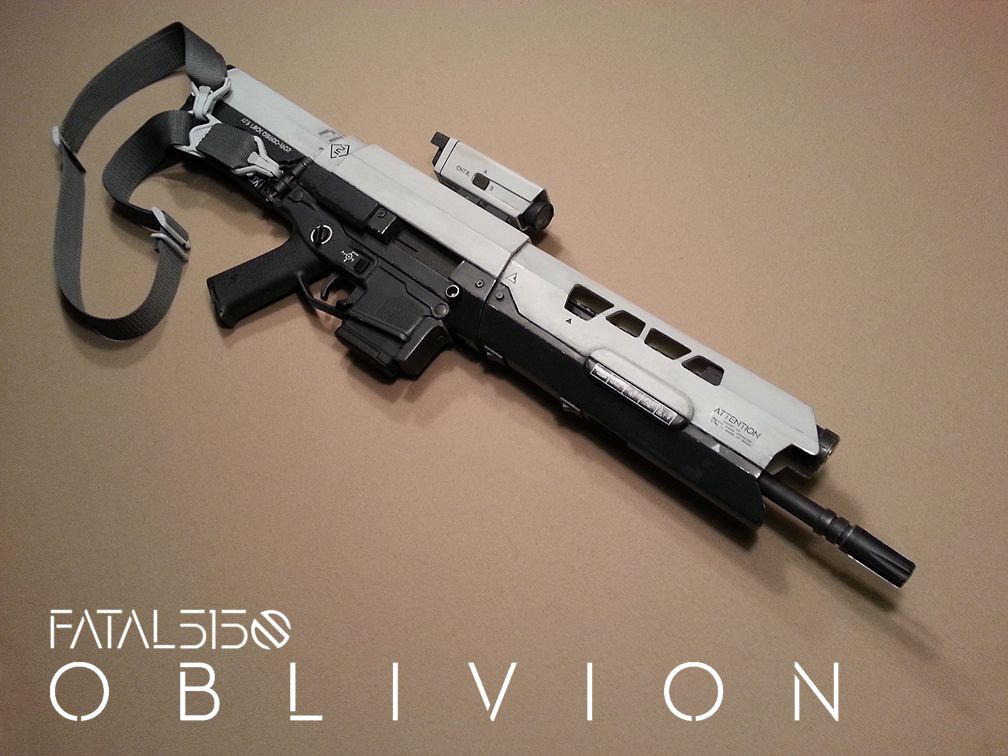
The finished result thus far:
I'll post more pics with the sling and further weathering soon!
Feedback and critiques welcomed and appreciated.
This amazing piece of prop replica magic comes from skilled RPF member wondersquid, who through many trials and tribulations has created what is now the crown jewel of my collection! I believe the run is now closed, but you can see his process here: http://www.therpf.com/f13/oblivion-movie-rifle-taking-final-payments-181871/
I'll start off with my finished rifle along with the pistol and some other Oblivion accessories:
Because of my persistent nature and my ability to offer decals for the rifle I was fortunate enough to talk Mal into selling me his prototype model so I could develop the decals prior to everyone receiving their kits. BTW, it sounds like some kits have started to ship, or at least will be shipping soon!
Even though Mal packed the rifle very well, it still arrived in a few pieces due to USPS rough handling of the package, even though it had FRAGILE! written all over it:
I was totally ok with this though, because my plan was to tear it down for painting and incorporating a few mods of my own.
Here it is taken down into a few pieces.
The first thing I wanted to do was clear out the mag well in the lower receiver so I could use real Magpul mags
This required some drilling and dremel work
I also needed to clear out the upper receiver by making enough room for the top of the magazine
Perfect fit!
Another thing I really wanted was a functioning folding stock. I think wondersquid had stated that due to the design this wasn't really possible, but I didn't let that stop me from trying!
In order for this to work I needed a functioning stock release button. The prototype didn't have spring retention for the button, (I'm not sure if the kits will come with a spring) so I used one from an old battery holder.
This would allow the button to snap into place when the stock was in it's fully extended position
The other thing I needed to do was trim down part of the upper receiver, so I marked it off
I ended up only needing to cut the side walls and left the top portion
The prototype was also missing the hinge bolt. Fortunately I had some extra parts around that did the trick!
Full lower receiver with buttstock attached
The scope was another thing I wanted to upgrade. Mal already had some really cool LEDs in it behind some red translucent acrylic that gave a great effect, but I wanted to be able to see through the scope and have it illuminate.
So I started dissecting it
First I drilled out the front of the scope
Here is the existing reticle
And the new parts for install
I used a small SMD strip and a 12v A27 battery in a holder since it has a very low profile and is easy to change out if needed. I also added a chrome piece of faucet housing to mount the SMD strip to and a metal ring to hold the new glass lens for the front. I was also going to line the inside with foil to block the light and for added reflectivity on the interior but I ended up not needing it.
Here it is after initial fitment
Screen caps for reference:
I could technically see through it, but not very well
Here is the round glass bezel and metal ring I used for the front. (I picked up the glass from Hobby Lobby in the jewelry making section if anyone wants to create something similar)
The glass didn't quite fit since it was the same size as the opening
So I shaved the edges down with a dremel and xacto knife until it fit
With metal ring
Now I was ready for paint! So I started masking stuff off
Like the pistol, I wanted to show some weathering. I used my silver pen technique to show bare metal underneath in the areas where the paint would scratch off
Top portions masked off
At this stage, I also filled the scope with clay around the reticle to block the light out
After some paint and knock down on the scope
Dark gray freshly painted and masking removed
Light gray also painted and masking removed. I got excited and worked too quickly without letting the dark gray paint fully cure so when I pulled off the tape it took off more paint than I wanted
I went back in and touched up some parts with a paintbrush.
Now the torch needed some kind of bezel to make it look more finished
I found some metal rings that I thought worked well
Here is a screen cap for reference:
Both sides painted up
Illuminated scope
I also threw in a full 30rnd magpul mag just to see what it would look like
My weathering tools!
After working it a bit
As you can see, I went pretty subtle, but I really like how oysteinhole's turned out, so I think I'll keep going on it.
I also noticed this extra circular piece above the fire selector from the Oblivion poster. So I made one from a plastic ring I found that just so happened to be the perfect size
I cut and glued it to shape
Then sanded and painted it
Installed
Time to apply decals! (A few sets of pistol and rifle decals are still available in the Junkyard for those interested.)
The finished result thus far:
I'll post more pics with the sling and further weathering soon!
Feedback and critiques welcomed and appreciated.
Last edited: