You are using an out of date browser. It may not display this or other websites correctly.
You should upgrade or use an alternative browser.
You should upgrade or use an alternative browser.
Chewbacca Finished 1/1 costume..Pics relinked from photbucket to imgur!
- Thread starter chefhawk
- Start date


chefhawk
Sr Member
Re: Chewbacca build- Finished 1/1 costume..New pics added today!
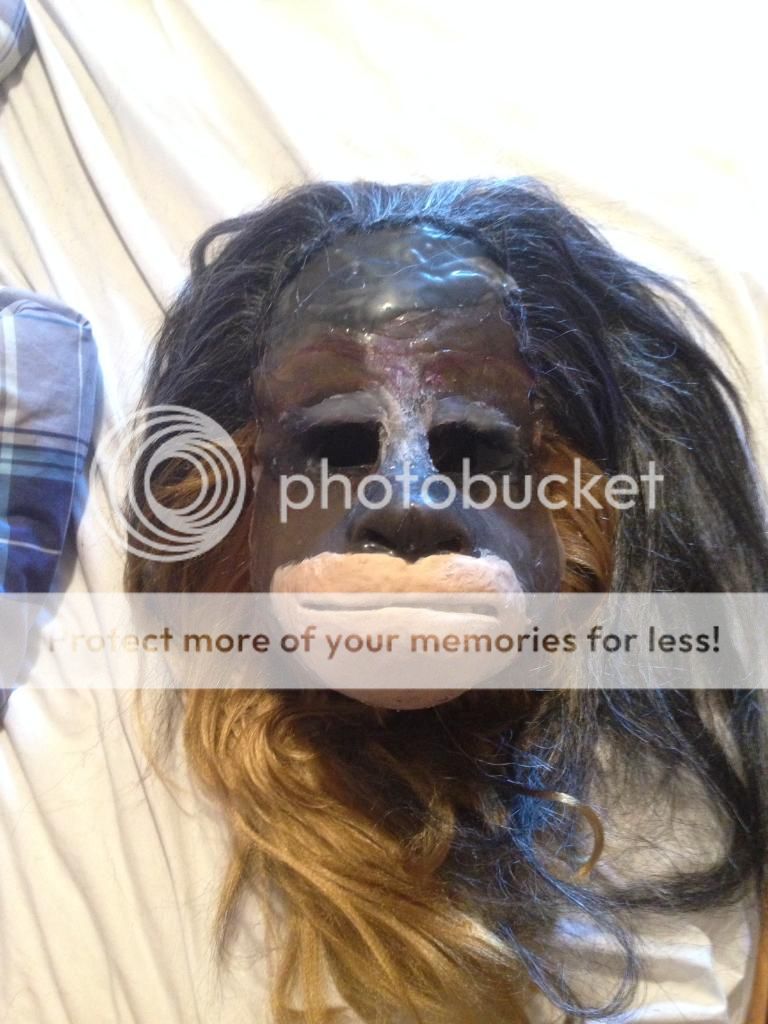
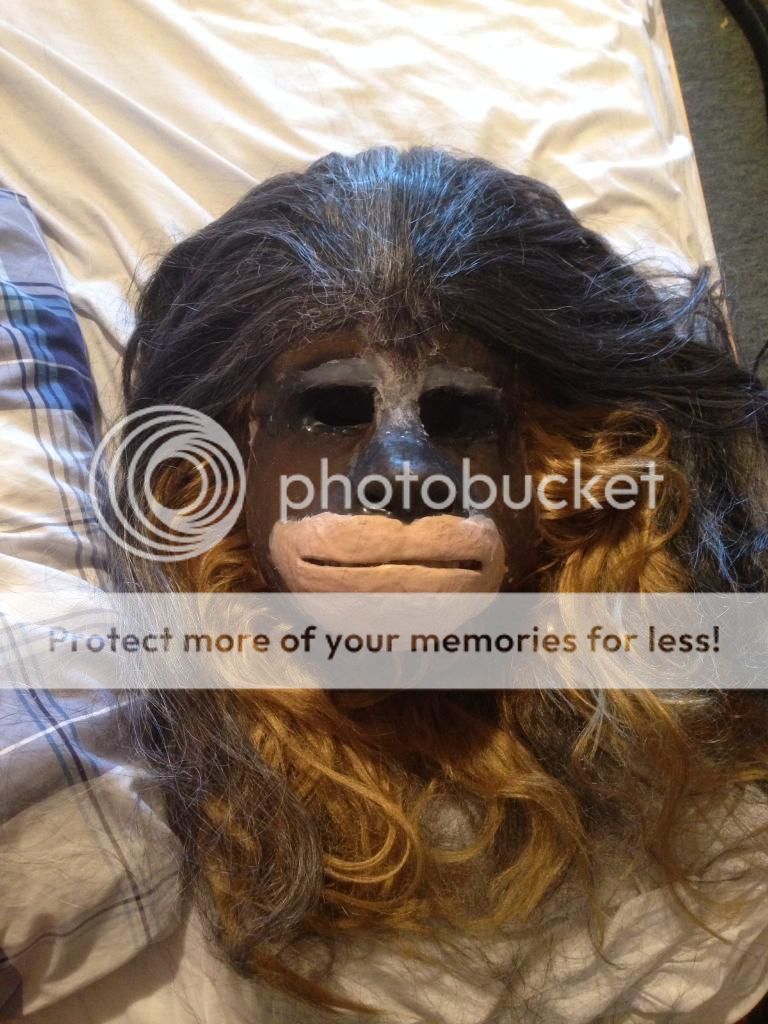
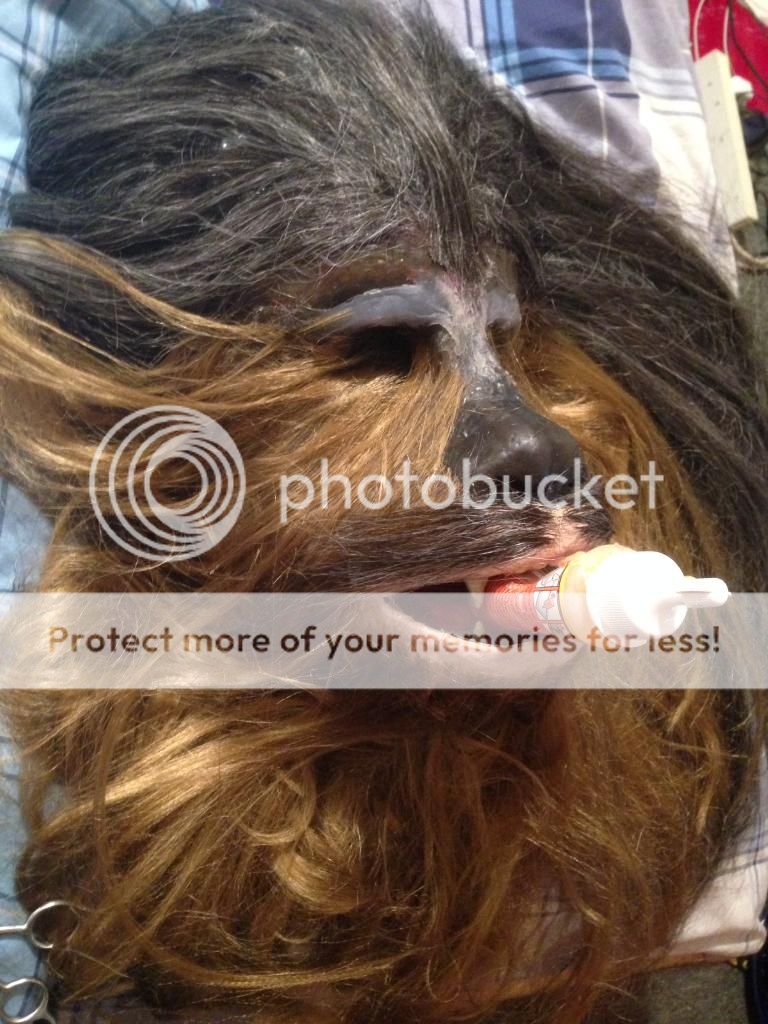
Yes its all Kanekalon hair. Latch hooked on the mesh costume and layer up and punched onto silicone for the mask.
The hair is then thinned out with thinning shears and weathered. Its a long hard process.
cheers
This is very cool. Did you use kanekalon haur.
Yes its all Kanekalon hair. Latch hooked on the mesh costume and layer up and punched onto silicone for the mask.
The hair is then thinned out with thinning shears and weathered. Its a long hard process.
cheers
Parkersandquinn
New Member
Re: Chewbacca build- Finished 1/1 costume..New pics added today!
Absolutely incredible. I Will be following along in your footsteps in the coming year -thanks especially for the workup and info on your wookie/chewie mask, been hunting for a good explanation/breakdown and it's best end result I've seen for sure.
Absolutely incredible. I Will be following along in your footsteps in the coming year -thanks especially for the workup and info on your wookie/chewie mask, been hunting for a good explanation/breakdown and it's best end result I've seen for sure.
cadilovr
Active Member
Re: Chewbacca build- Finished 1/1 costume..New pics added today!
That's cool. This is mine. Latch hooking is a pain. One suggestion. I would hairdry the hair on low setting so it doesn't look like dreadlocks after a couple of troops...lol
http://i800.photobucket.com/albums/yy284/cadilovr/Wookieefront.jpg
[URL=http://s800.photobucket.com/user/cadilovr/media/Wookieefront.jpg.html]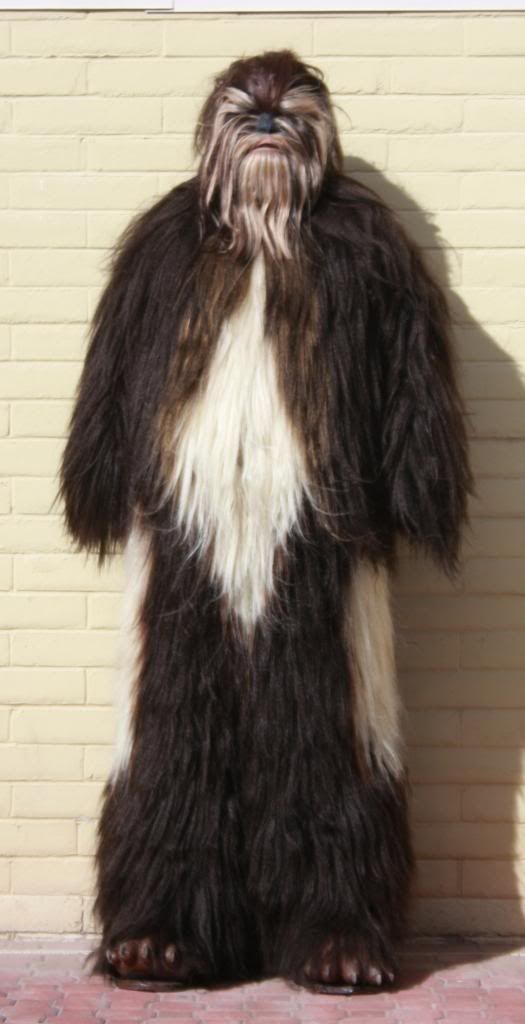
[/URL]
Princess Liz
New Member
Re: Chewbacca build- Finished 1/1 costume..New pics added today!
Very nice!!")
Very nice!!
jamesrgiant
Active Member
Re: Chewbacca build- finally finished the mask.A.N.H
Yours on the left.m Your hair is longer but is shaped slightly better.
Yours on the left.m Your hair is longer but is shaped slightly better.
dwmcguff
New Member
Re: Chewbacca build- Almost there..New pics added today!
Yea, this. If you have any of this info to share for those of us interested, I'd love to try and follow in your footsteps. Great, great work.
Please provide links to where you purchased all of your materials I would love to do this.
Yea, this. If you have any of this info to share for those of us interested, I'd love to try and follow in your footsteps. Great, great work.
chefhawk
Sr Member
Re: Chewbacca build- Finished 1/1 costume..New pics added today!
Ok ...heres the build thread from the beginning ...WARNING. its a long one.
- - - Updated - - -
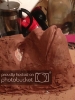
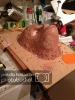
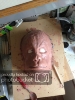
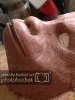
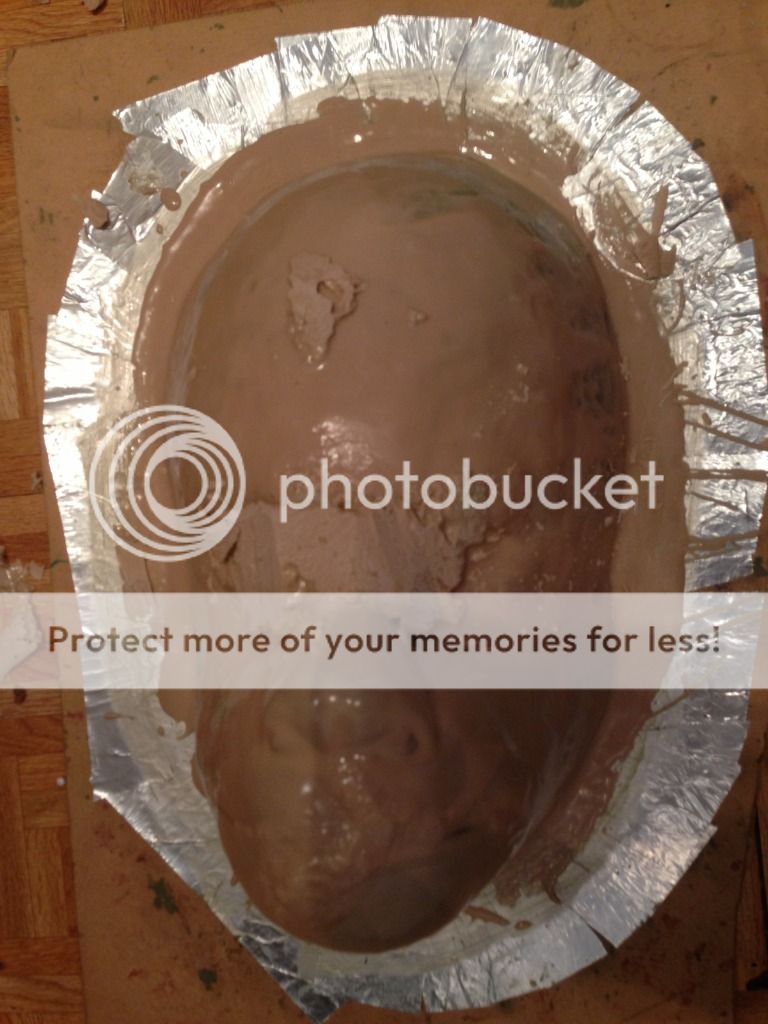
Hi guys, i think i'm about ready to cast my sculpt.
The first attempt at lifecasting my face was a bit of rooster up as it was deformed, but it was a learning curve.
So with the mistakes behind me and my sixteen year old son, we attempted it for a second time.
This time it worked - not perfect but good enough to sculpt over.
Here are the pics...


The one on the left is the one that came out ok

cheers
- - - Updated - - -
I then project an image of chewie on to styrene and compared that to a stormtrooper helmet for scale


it was then i ordered some chauvant nsp clay.
Unfortunately they sent the hard... but after trying the medium afterwards i prefer the hard clay.
I built up around my face cast using gaffer tape and tin foil to save on clay.

and heated/warmed the clay in a slow cooker that i bought for the build.

Ok ...heres the build thread from the beginning ...WARNING. its a long one.
- - - Updated - - -
Hi guys, i think i'm about ready to cast my sculpt.
The first attempt at lifecasting my face was a bit of rooster up as it was deformed, but it was a learning curve.
So with the mistakes behind me and my sixteen year old son, we attempted it for a second time.
This time it worked - not perfect but good enough to sculpt over.
Here are the pics...
The one on the left is the one that came out ok
cheers
- - - Updated - - -
I then project an image of chewie on to styrene and compared that to a stormtrooper helmet for scale
it was then i ordered some chauvant nsp clay.
Unfortunately they sent the hard... but after trying the medium afterwards i prefer the hard clay.
I built up around my face cast using gaffer tape and tin foil to save on clay.
and heated/warmed the clay in a slow cooker that i bought for the build.
chefhawk
Sr Member
Re: Chewbacca build- Almost there..New pics added today!
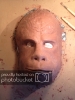
So it was a case of sculpting with the clay that needs warming as you use.
Basic sizes and shapes..


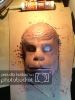
then I went in a direction without referencing properly.


then i studied more pics, edit some videos for referencing


I then comped it in photoshop with a reference pic overlay at 27 percent


- - - Updated - - -
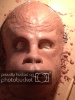
I then adjusted a few bits including the angle of the forehead.
The nose has been redone at least ten times!
heres some vids..
..and after some alterations
- - - Updated - - -
...more to come
So it was a case of sculpting with the clay that needs warming as you use.
Basic sizes and shapes..
then I went in a direction without referencing properly.
then i studied more pics, edit some videos for referencing
I then comped it in photoshop with a reference pic overlay at 27 percent
- - - Updated - - -
I then adjusted a few bits including the angle of the forehead.
The nose has been redone at least ten times!
heres some vids..
..and after some alterations
- - - Updated - - -
...more to come
Attachments
-
 null_zps3f53a667.jpg316.3 KB · Views: 72
 -
 null_zps3f53a667.jpg316.3 KB · Views: 62
 -
 null_zps3f53a667.jpg316.3 KB · Views: 65
 -
 null_zps9b2c459d.jpg405.9 KB · Views: 60
 -
 null_zps9b2c459d.jpg405.9 KB · Views: 63
 -
 null_zps9b2c459d.jpg405.9 KB · Views: 62
 -
 null_zps53b7bff8.jpg398.4 KB · Views: 57
 -
 null_zps53b7bff8.jpg398.4 KB · Views: 56
 -
 null_zps53b7bff8.jpg398.4 KB · Views: 55
 -
 null_zps3f53a667.jpg316.3 KB · Views: 69
 -
 null_zpse6a6e193.jpg346.6 KB · Views: 68
 -
 null_zps9b2c459d.jpg405.9 KB · Views: 58
 -
 null_zpse6a6e193.jpg346.6 KB · Views: 67
 -
 null_zpse6a6e193.jpg346.6 KB · Views: 72
 -
 null_zps53b7bff8.jpg398.4 KB · Views: 60
 -
 null_zps2a097c6d.jpg395.6 KB · Views: 70
 -
 null_zps2a097c6d.jpg395.6 KB · Views: 68
 -
 null_zpse6a6e193.jpg346.6 KB · Views: 68
 -
 null_zps2a097c6d.jpg395.6 KB · Views: 69
 -
 null_zps2a097c6d.jpg395.6 KB · Views: 67
 -
 null_zpse69dda46.jpg307.3 KB · Views: 55
 -
 null_zpse69dda46.jpg307.3 KB · Views: 48
 -
 null_zpse69dda46.jpg307.3 KB · Views: 51
 -
 null_zpse69dda46.jpg307.3 KB · Views: 54
 -
 62354a94-5b8d-425f-9329-806c97b807a8_zps6440e78a.jpg257.3 KB · Views: 64
 -
 62354a94-5b8d-425f-9329-806c97b807a8_zps6440e78a.jpg257.3 KB · Views: 51
 -
 62354a94-5b8d-425f-9329-806c97b807a8_zps6440e78a.jpg257.3 KB · Views: 54
 -
 62354a94-5b8d-425f-9329-806c97b807a8_zps6440e78a.jpg257.3 KB · Views: 53
 -
 overlaywithoriginalpieceat34percentopacityontop_zp%20%20sedd054fb.jpg14 KB · Views: 50
 -
 overlaywithoriginalpieceat34percentopacityontop_zp%20%20sedd054fb.jpg14 KB · Views: 51
 -
 overlaywithoriginalpieceat34percentopacityontop_zp%20%20sedd054fb.jpg14 KB · Views: 53
 -
 overlaywithoriginalpieceat34percentopacityontop_zp%20%20sedd054fb.jpg14 KB · Views: 52
 -
 null_zps081f1554.jpg318.7 KB · Views: 55
 -
 null_zps081f1554.jpg318.7 KB · Views: 55
 -
 null_zps081f1554.jpg318.7 KB · Views: 59
 -
 null_zps081f1554.jpg318.7 KB · Views: 50
Last edited by a moderator:
chefhawk
Sr Member
Re: Chewbacca build- Finished 1/1 costume..New pics added today!
So after finishing the sculpt stage, it was time to prep it for casting.
I added a layer of foil tape around the mold to help release.
I filled in the nose holes with clay, then cut a piece of black cable for the mouth and filled in that void.
Then i waxed with carnuba as a release.

Then I made a Gelcoat out of the fiberglass resin and bondo/p38 1 part or each and then followed the instructions and added each hardener as prescribed.

Then with a cheap poundshop paintbrush that will be sacrificed after use! i painted a coat on..

I made the mistake of using the last bits that were nearly set and added them to the eye sockets. Realising that would make it harder to fiberglass over. I trimmed it off but made a small hole in the gelcoat near the nose area. So when adding a second gelcoat a little leaked into that area!
second coat of gelcoat

I trimmed around the edges of the gelcoat whilst it was nearly set (jelly stage) to make a neater edge later on.
Then i did three layers of fiberglass. Yep not the best, but ive never done fiberglassing before.

Then left it to cure for a couple of days.....
took about four hours to dig out the headcast and clay. I had a couple of weak areas inside at the top that i filled with p40 and sanded after drying.
I also sanded the area that had leaked in causing a raised area by the nose.

Tried it on for size and fit!

Next stage add a quarter inch of chavant nsp clay on the inside and then fiberglassing over that.
Im going to warm the clay till its liquid and do the brush or pour method? not sure which is the best?
Also im worried about the inner shell sticking to the clay.
cheers
- - - Updated - - -
so the stages for my build are...
1) lifecast my face only
2) use life cast on a board/wood to sculpt chewie onto..leaving my eye sockets untouched and free from any clay
3) prep the sculpt of chewbacca for moulding (partially filling in the nostrils,filling the gap in the mouth area, making sure theres no undercuts, use some wax as a release agent)
4) paint on two layers of gelcoat - waiting 20 mins before layers
5)layer up with fiberglass and resin paying attention to making a strong edge for drilling later
6)leave for two days to cure
7)remove the sculpt/clay and lifecast from fiberglass shell - took about 4 hours
Cool check fiberglass shell for any weak spots and repair
9) lay in/spread clay the thickness i want the silicone to be.
10)wax inside of the fiberglass shell about 5 times (wax on - wax off)
11) spray on two coats of pva fiberglass release
...tbc
- - - Updated - - -
..I wasnt happy with the clay at the sides, so i added more.
Then it was a case of waxing coats or release (Honey plus wax - hi temp)
It took about twenty/thirty mins between each waxing. You can tell its ready when its set hard.

Today ive done two coats of PVA release..that take about 40 mins to an hour to set between coats.

I haven't got a spray compressor , so i painted it on.
here it is after one coat

then after two..
- - - Updated - - -

last coat before gellcoating and fiberglassing.
I will do a couple of thin gellcoats and then two layers of mat with the second layer that will be close to my skin in fiberglass tissue, then a gellcoat on top.
heres what i will be using

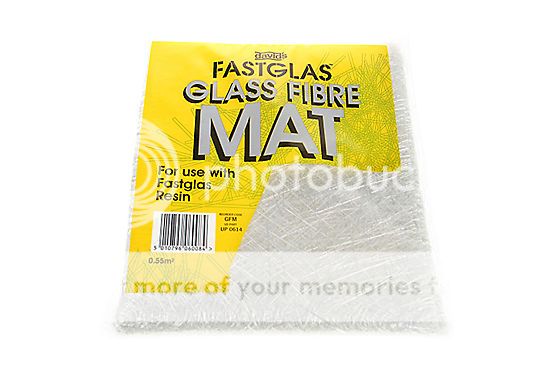
- - - Updated - - -
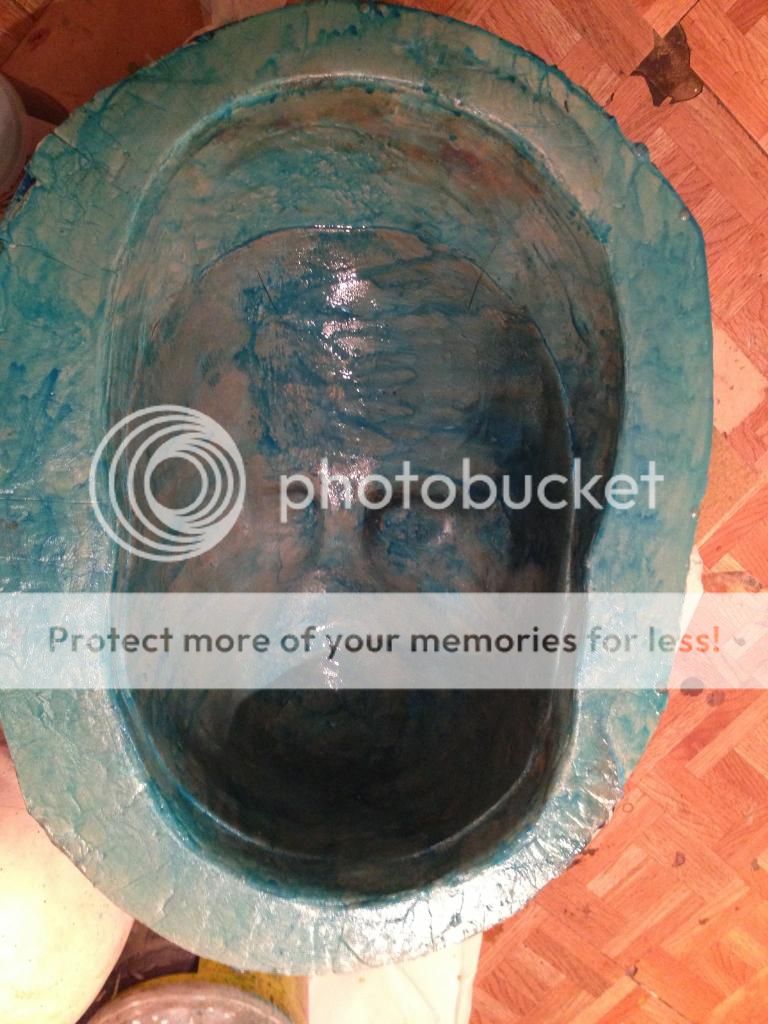
So after the wax and pva have dried, it was time to cut the fiberglass to size and arrange it accordingly

I didnt go with a gelcoat as planned, i went straight into laying up the fiberglass matting

always where protection, these fumes are a killer

Then i did a gellcoat which is made of 1 part resin to 1 part bond/bodyfiller and with the corresponding setting agents for each

then i finished with three layers of tissue.

PostPosted: Sat Aug 31, 2013 9:03 pm Post subject: Reply with quote Edit/Delete this post
So after the wax and pva have dried, it was time to cut the fiberglass to size and arrange it accordingly
I didnt go with a gelcoat as planned, i went straight into laying up the fiberglass matting
always where protection, these fumes are a killer
Then i did a gellcoat which is made of 1 part resin to 1 part bond/bodyfiller and with the corresponding setting agents for each
then i finished with three layers of tissue.
Dont forget this is not a victimless crime!...many bothan spies died (cheap paintbrushes and rollers)

next step...leave for 24 hours and then drill holes in outer flange for nuts/washers and bolts.
cheers
So after finishing the sculpt stage, it was time to prep it for casting.
I added a layer of foil tape around the mold to help release.
I filled in the nose holes with clay, then cut a piece of black cable for the mouth and filled in that void.
Then i waxed with carnuba as a release.
Then I made a Gelcoat out of the fiberglass resin and bondo/p38 1 part or each and then followed the instructions and added each hardener as prescribed.
Then with a cheap poundshop paintbrush that will be sacrificed after use! i painted a coat on..
I made the mistake of using the last bits that were nearly set and added them to the eye sockets. Realising that would make it harder to fiberglass over. I trimmed it off but made a small hole in the gelcoat near the nose area. So when adding a second gelcoat a little leaked into that area!
second coat of gelcoat
I trimmed around the edges of the gelcoat whilst it was nearly set (jelly stage) to make a neater edge later on.
Then i did three layers of fiberglass. Yep not the best, but ive never done fiberglassing before.
Then left it to cure for a couple of days.....
took about four hours to dig out the headcast and clay. I had a couple of weak areas inside at the top that i filled with p40 and sanded after drying.
I also sanded the area that had leaked in causing a raised area by the nose.
Tried it on for size and fit!
Next stage add a quarter inch of chavant nsp clay on the inside and then fiberglassing over that.
Im going to warm the clay till its liquid and do the brush or pour method? not sure which is the best?
Also im worried about the inner shell sticking to the clay.
cheers
- - - Updated - - -
so the stages for my build are...
1) lifecast my face only
2) use life cast on a board/wood to sculpt chewie onto..leaving my eye sockets untouched and free from any clay
3) prep the sculpt of chewbacca for moulding (partially filling in the nostrils,filling the gap in the mouth area, making sure theres no undercuts, use some wax as a release agent)
4) paint on two layers of gelcoat - waiting 20 mins before layers
5)layer up with fiberglass and resin paying attention to making a strong edge for drilling later
6)leave for two days to cure
7)remove the sculpt/clay and lifecast from fiberglass shell - took about 4 hours
Cool check fiberglass shell for any weak spots and repair
9) lay in/spread clay the thickness i want the silicone to be.
10)wax inside of the fiberglass shell about 5 times (wax on - wax off)
11) spray on two coats of pva fiberglass release
...tbc
- - - Updated - - -
..I wasnt happy with the clay at the sides, so i added more.
Then it was a case of waxing coats or release (Honey plus wax - hi temp)
It took about twenty/thirty mins between each waxing. You can tell its ready when its set hard.
Today ive done two coats of PVA release..that take about 40 mins to an hour to set between coats.
I haven't got a spray compressor , so i painted it on.
here it is after one coat
then after two..
- - - Updated - - -
last coat before gellcoating and fiberglassing.
I will do a couple of thin gellcoats and then two layers of mat with the second layer that will be close to my skin in fiberglass tissue, then a gellcoat on top.
heres what i will be using
- - - Updated - - -
So after the wax and pva have dried, it was time to cut the fiberglass to size and arrange it accordingly
I didnt go with a gelcoat as planned, i went straight into laying up the fiberglass matting
always where protection, these fumes are a killer
Then i did a gellcoat which is made of 1 part resin to 1 part bond/bodyfiller and with the corresponding setting agents for each
then i finished with three layers of tissue.
PostPosted: Sat Aug 31, 2013 9:03 pm Post subject: Reply with quote Edit/Delete this post
So after the wax and pva have dried, it was time to cut the fiberglass to size and arrange it accordingly
I didnt go with a gelcoat as planned, i went straight into laying up the fiberglass matting
always where protection, these fumes are a killer
Then i did a gellcoat which is made of 1 part resin to 1 part bond/bodyfiller and with the corresponding setting agents for each
then i finished with three layers of tissue.
Dont forget this is not a victimless crime!...many bothan spies died (cheap paintbrushes and rollers)
next step...leave for 24 hours and then drill holes in outer flange for nuts/washers and bolts.
cheers
chefhawk
Sr Member
Re: Chewbacca build- Finished 1/1 costume..New pics added today!
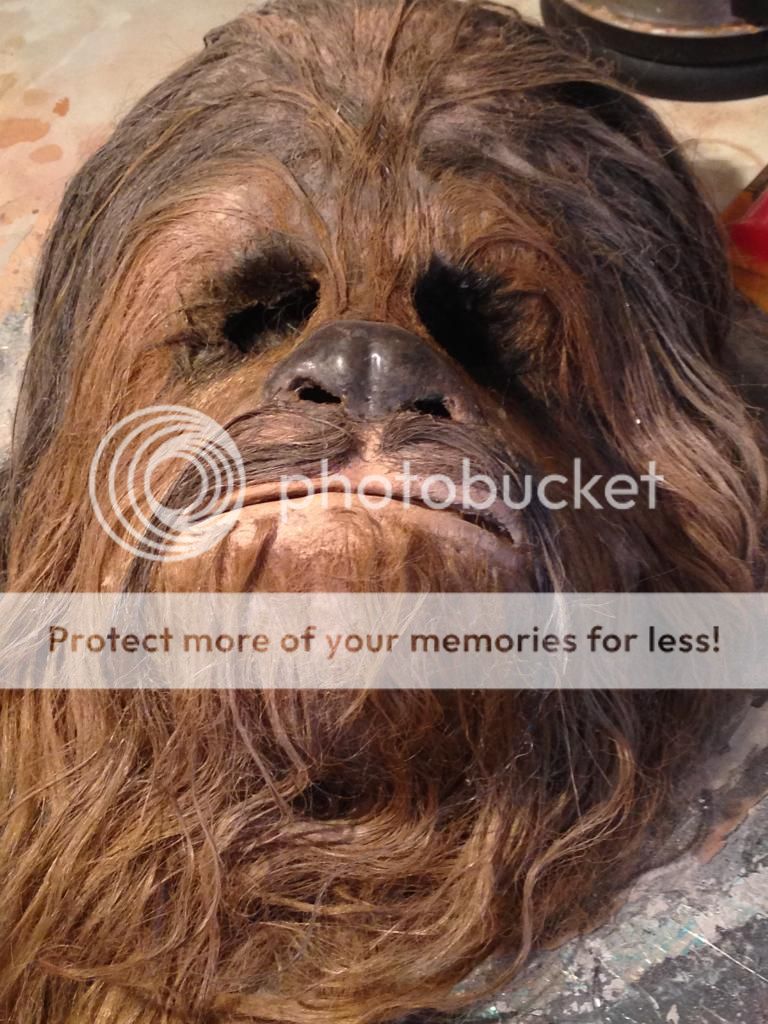
Just a little update, Ive finished the second mask. Its got a new pallette inside the mouth and new tongue. The underskull was changed to improve the look. New teeth were sculpted and a better mech for the mouth for more movement.
Here are some pictures ..


Also on the BBC for a moment from an event in london
http://www.bbc.co.uk/news/entertainment-arts-28297317
Just a little update, Ive finished the second mask. Its got a new pallette inside the mouth and new tongue. The underskull was changed to improve the look. New teeth were sculpted and a better mech for the mouth for more movement.
Here are some pictures ..
Also on the BBC for a moment from an event in london
http://www.bbc.co.uk/news/entertainment-arts-28297317


Similar threads
- Replies
- 11
- Views
- 1,174
- Replies
- 2
- Views
- 860
- Replies
- 4
- Views
- 561