welshwarrior123
Well-Known Member
Whats up guys,
So aside me painting star wars helmets and Boba fett stuff, im doing a model making degree that low and be-hold needs us to make a few models. So we have been given a brief of building a vehicle or architectural building from scratch, naturally I turned to star wars. And even though there are 100's of X wing threads on here, I had to choose it.
So we had a week to put together a presentation and create some 1:1 scale drawings to which we would either get the go ahead for our project or have to chose something else. So I spent 3 days reading up on the hero and pyro X-wing models which clearly was not enough time, and from what i found it would be nigh on impossible to create a true accurate X wing in the time I have (8 weeks), so I turned to the finemolds 1/48 model. I know its not accurate, but to me it looks like an x wing and thats good enough.
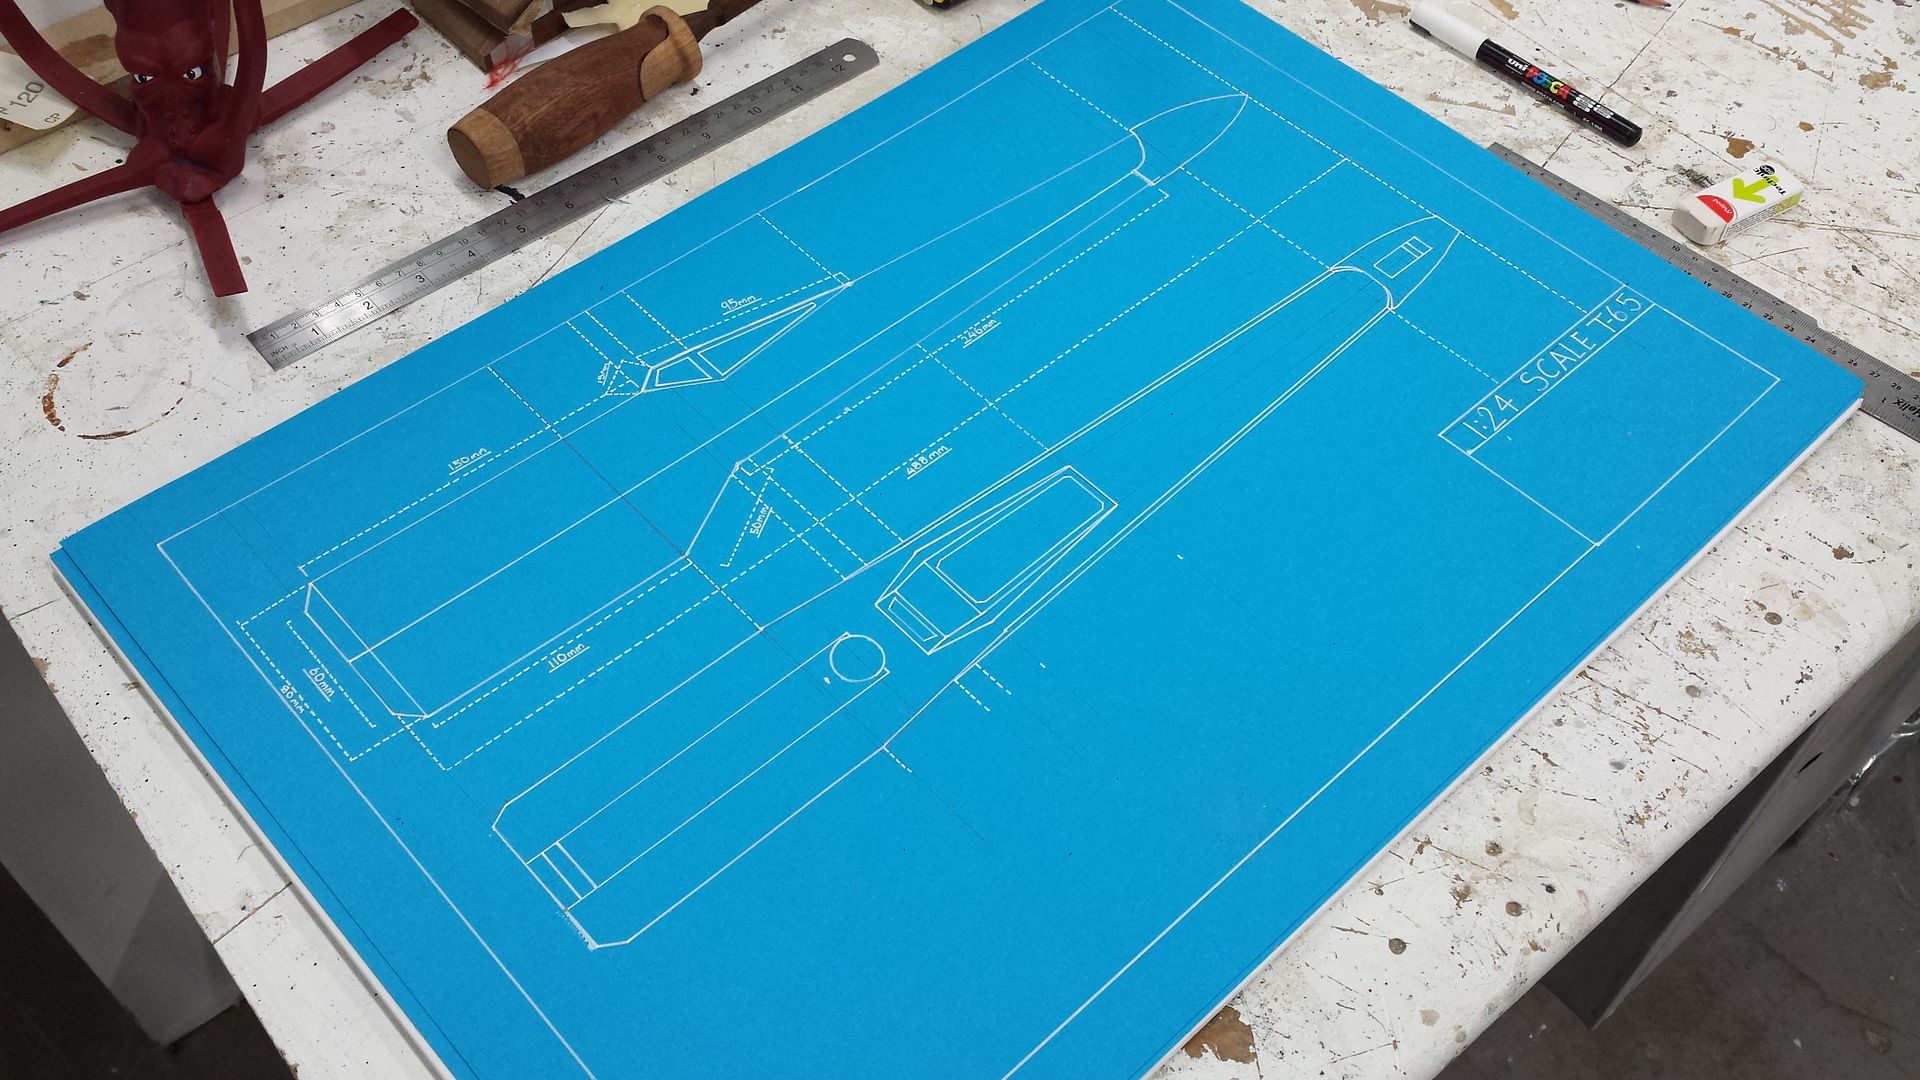
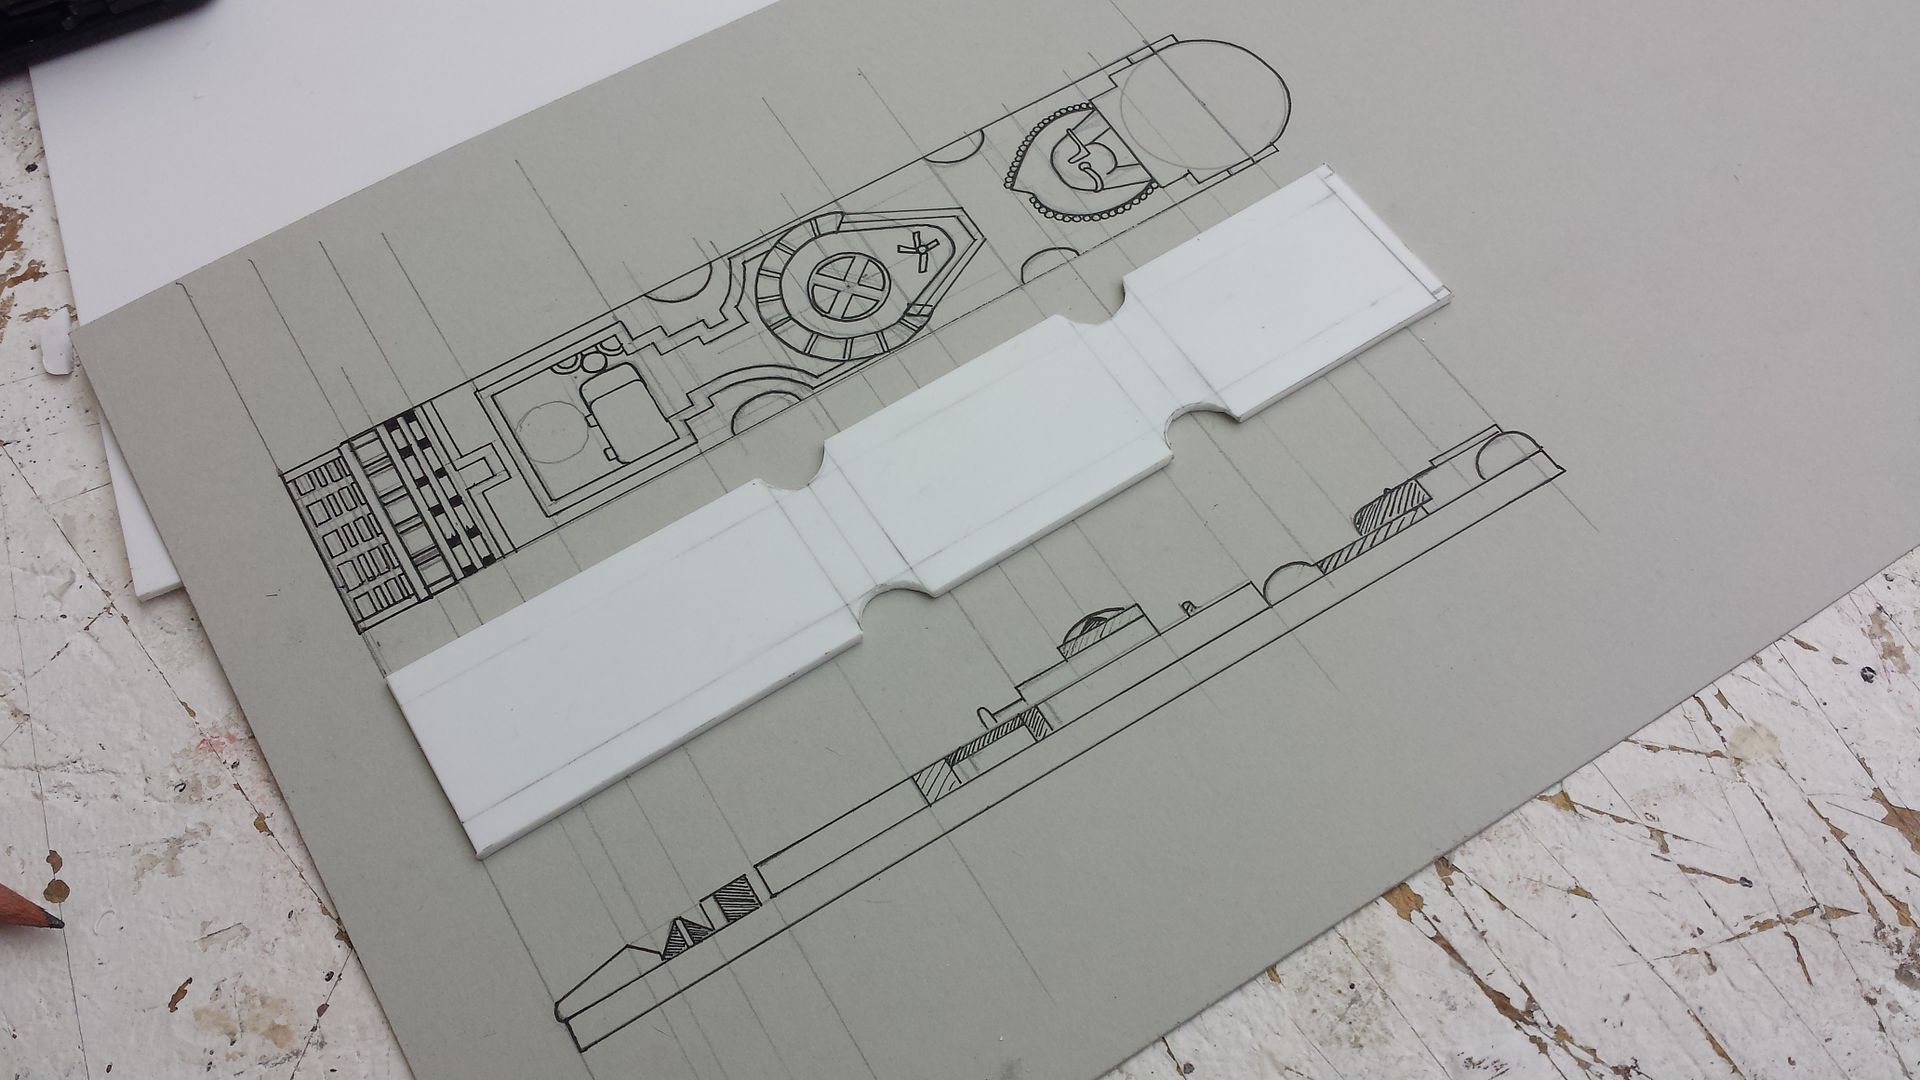
So I drew up some 1/24 scale blue prints but doubling every measurement on the FM kit, and also knocked up a very rough maquette just for a realisation of size,
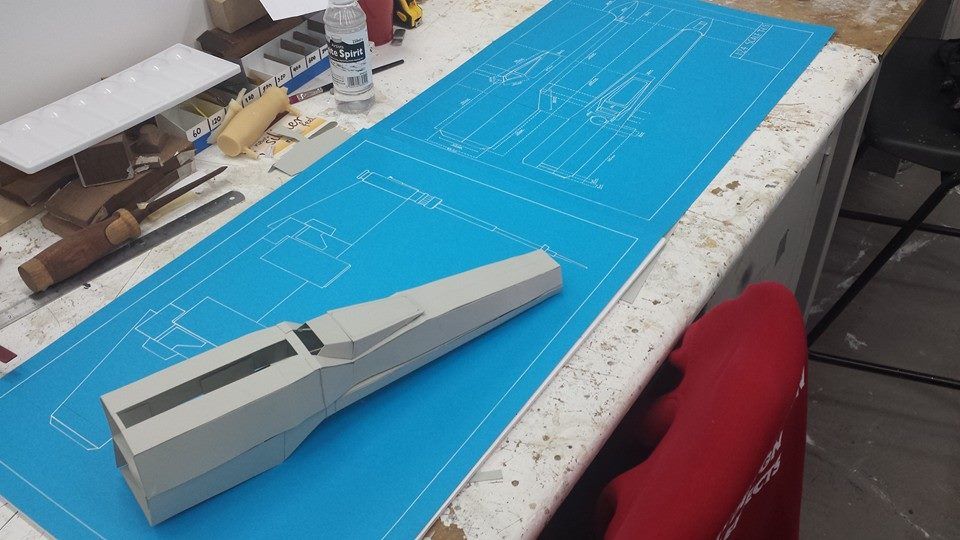
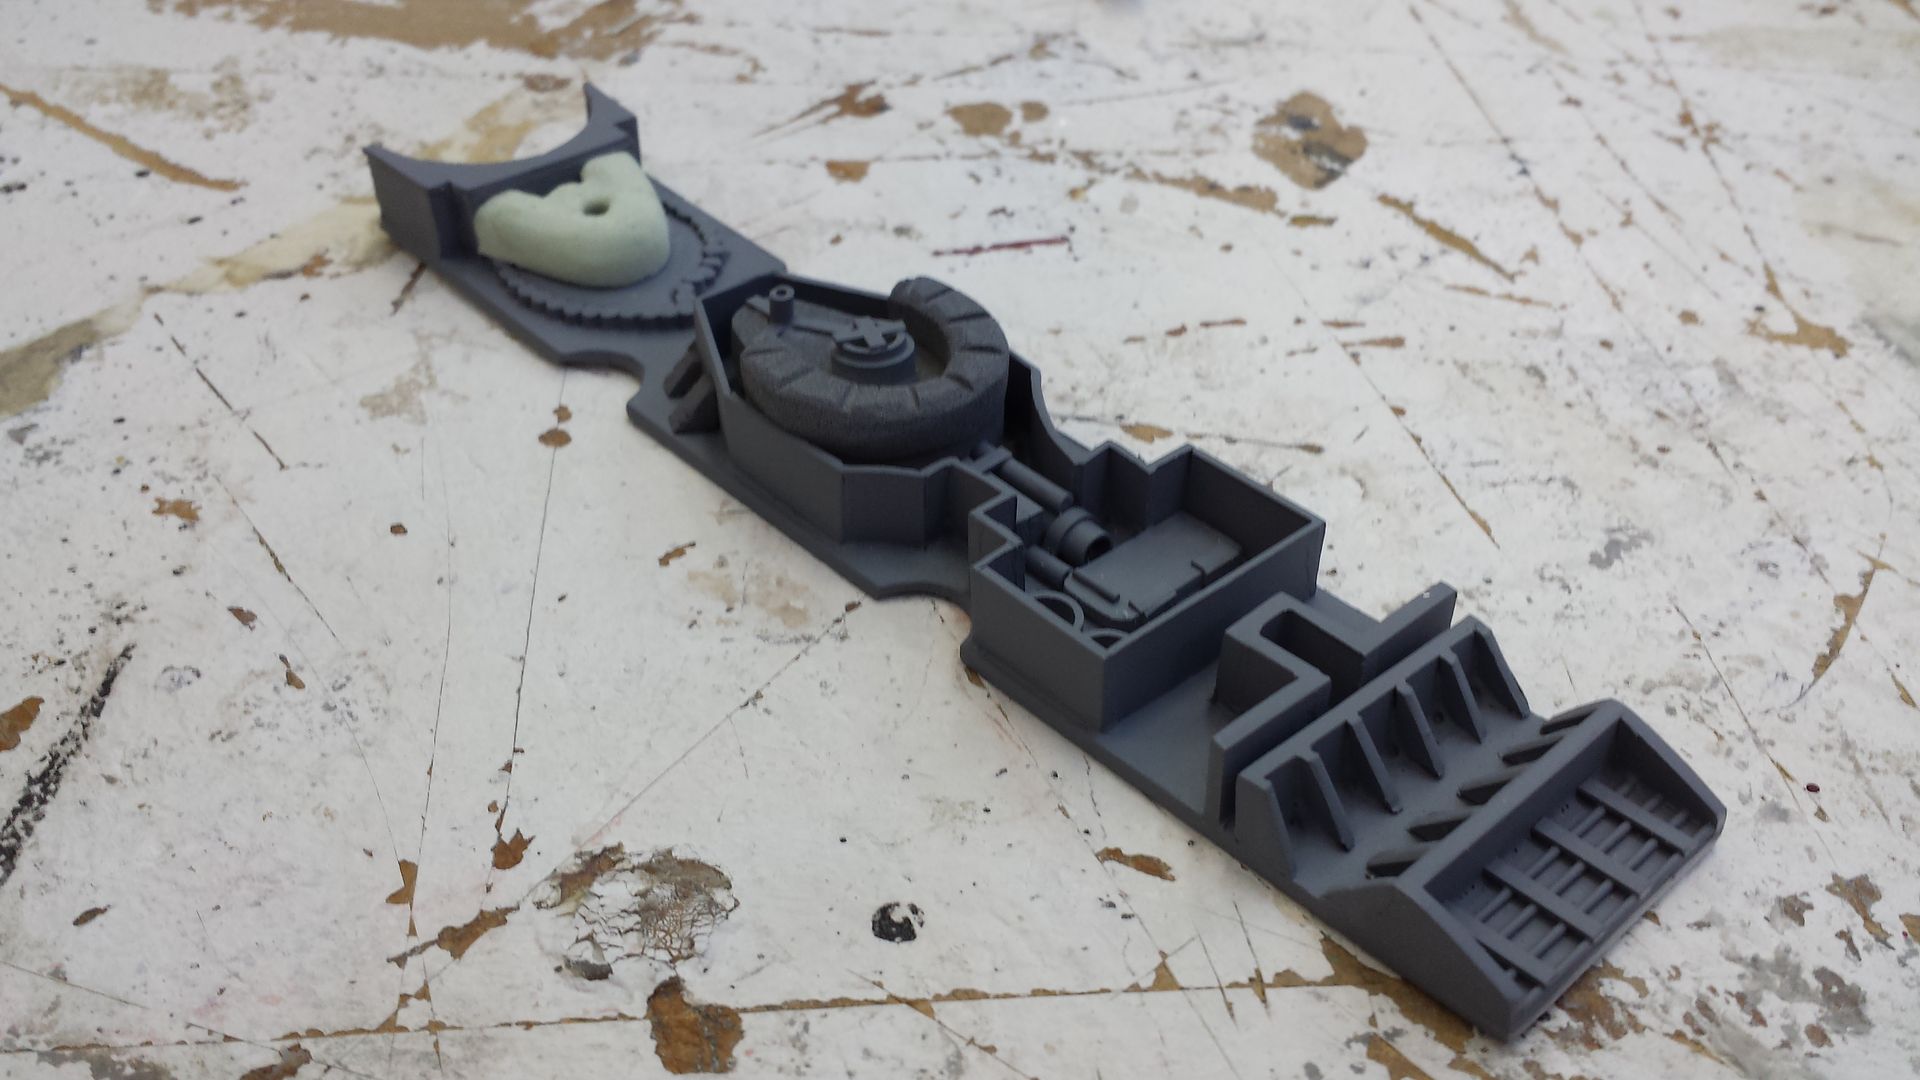
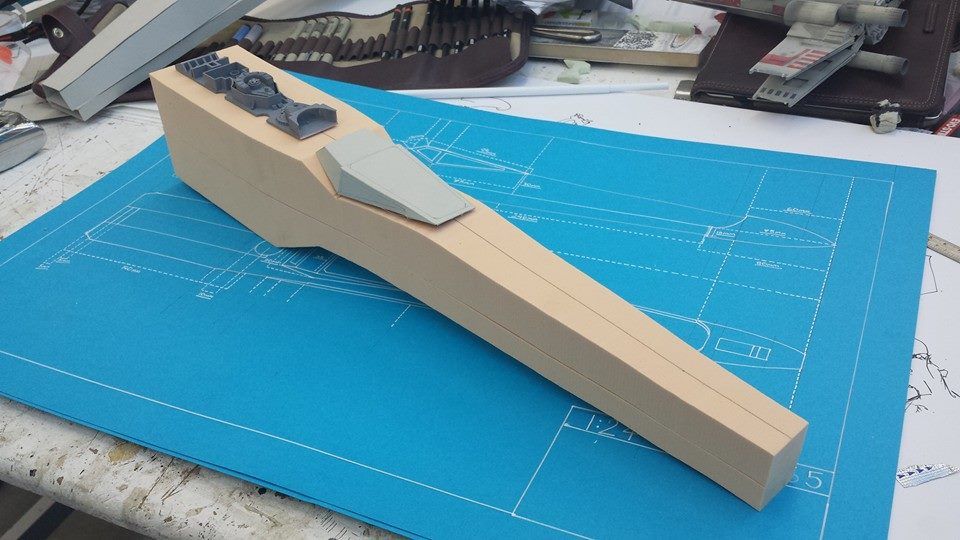
With that done and a meeting with my tutor, I got the go ahead to build her. So I decided to start with droid strip. Now this isnt accurate, and I will be redrawing it on Rhino and 3D printing a better one. But this is my place holder for now, was also a good exercise in building small details in styrene.
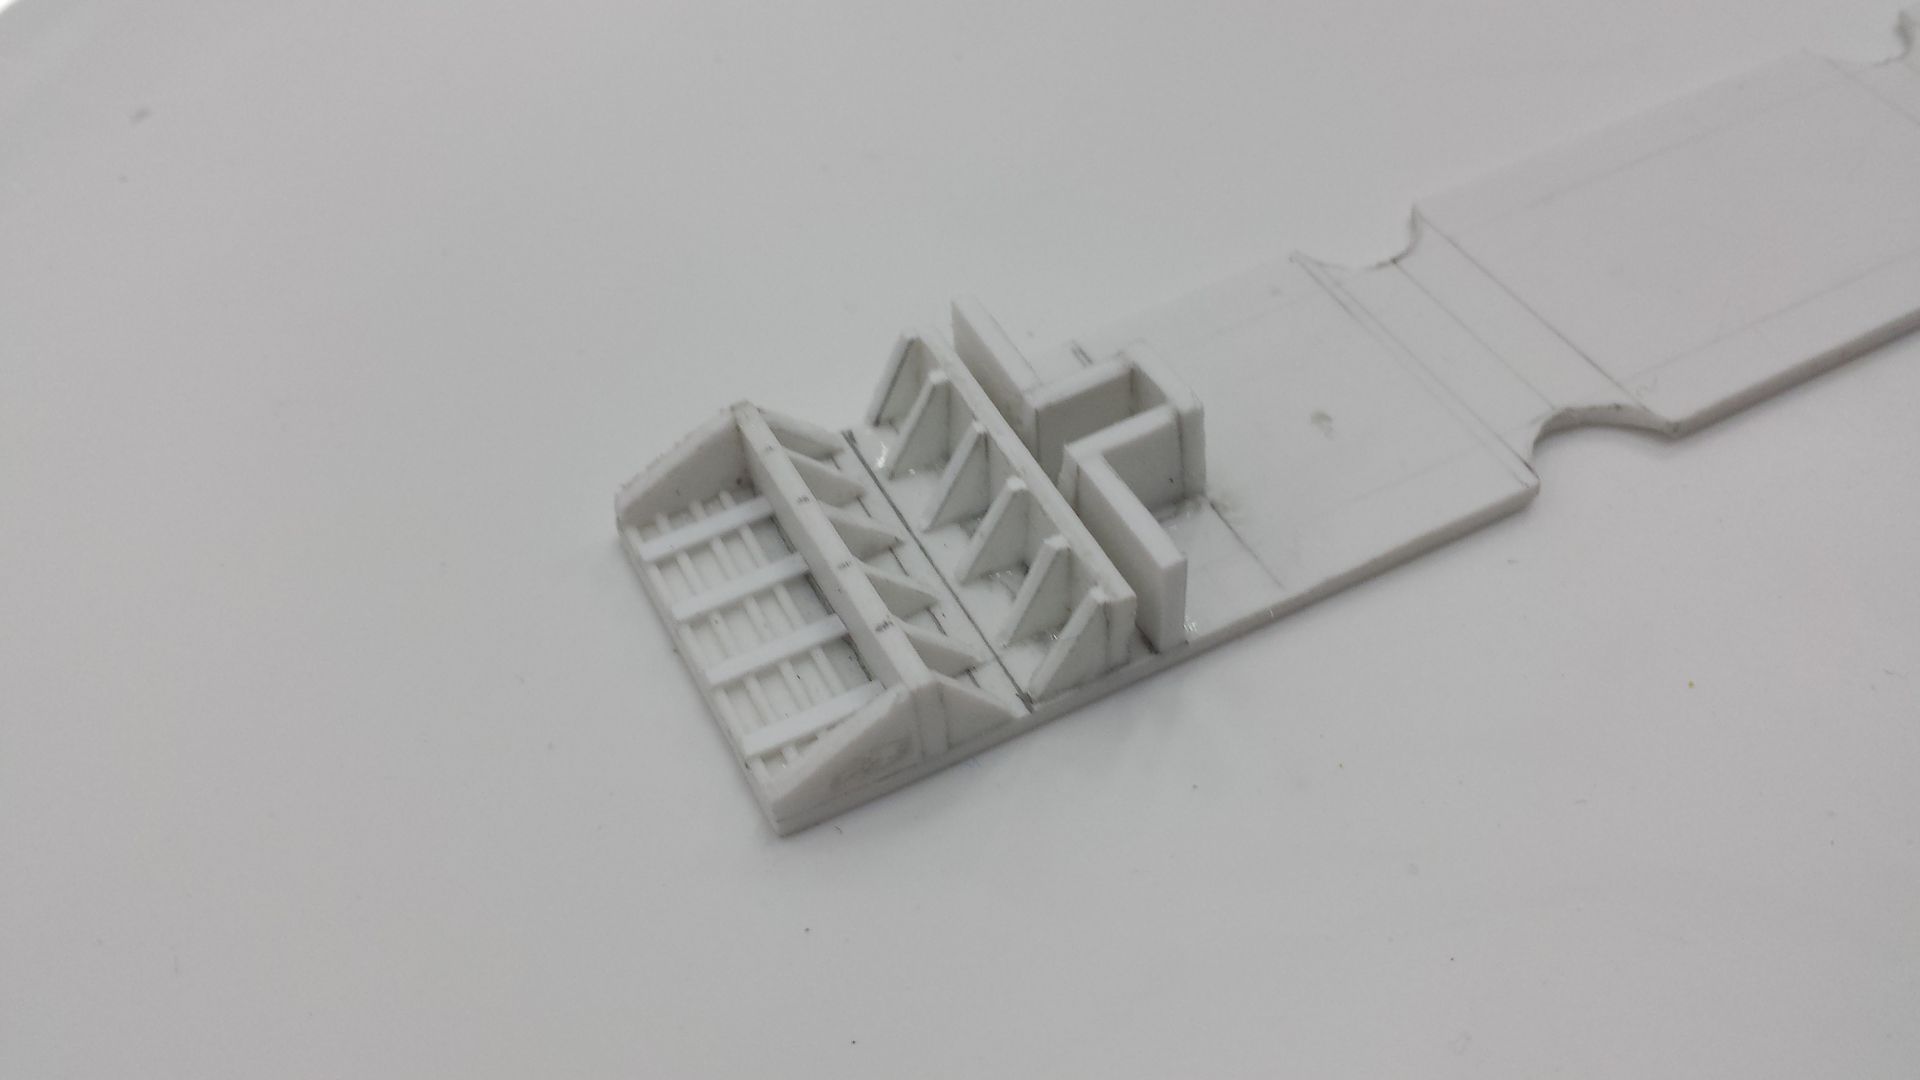
With the droid strip I went to big at the start and had to squeeze everything in. So I will be redoing it, im pleased with how it came out and it will make a good piece to build around until I print my better version. So with that done, I ordered some polyurethane tooling foam to start work on the fuselage.
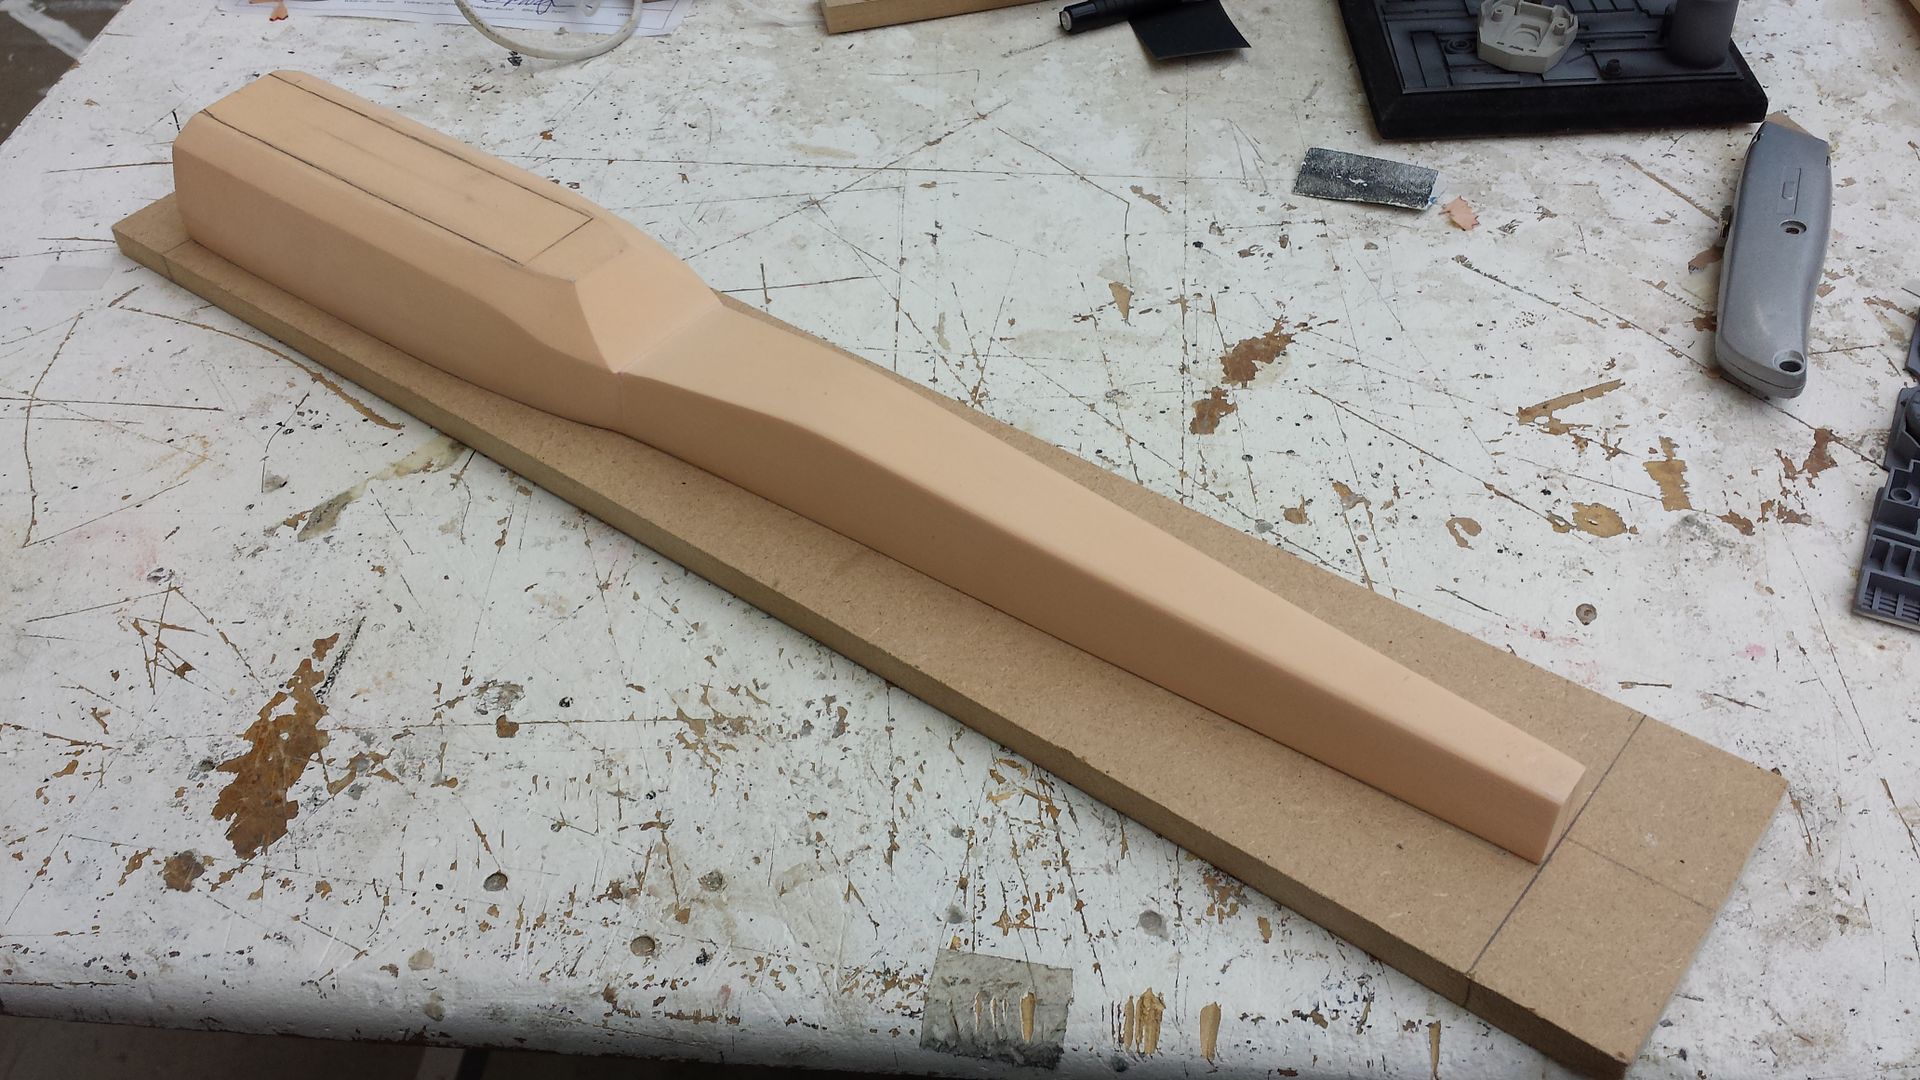
So using the blueprints I marked out my lines, both profile and top down, and ran it through the bandsaw, which left me with a rough X-wing shape;
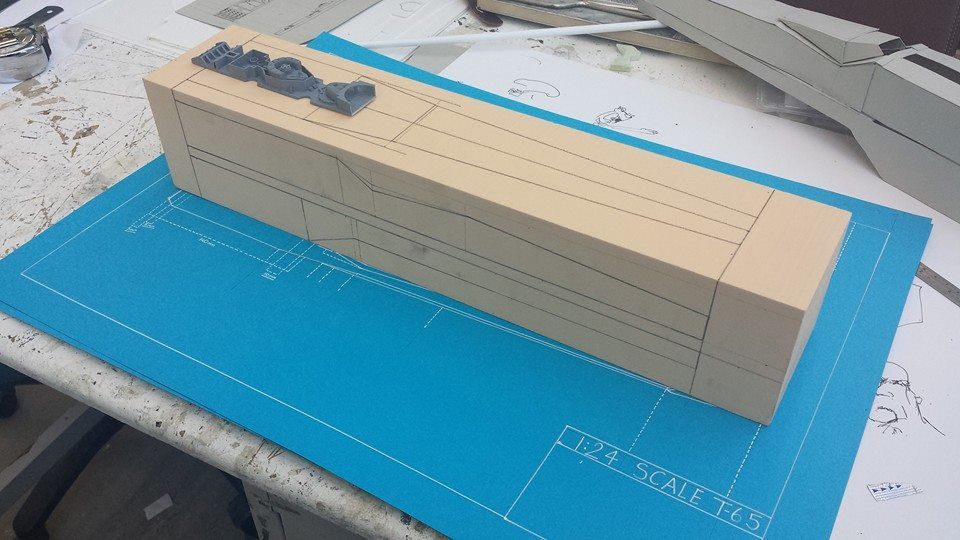
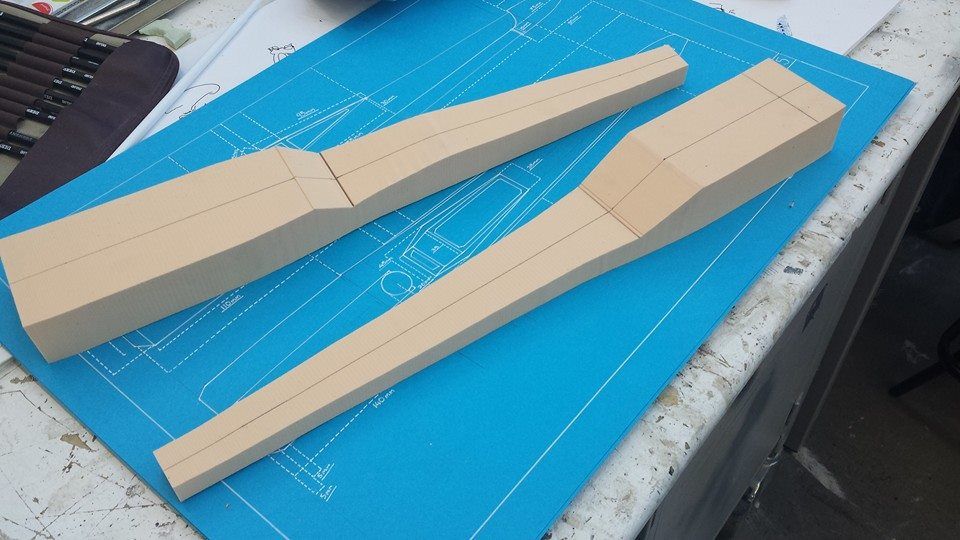
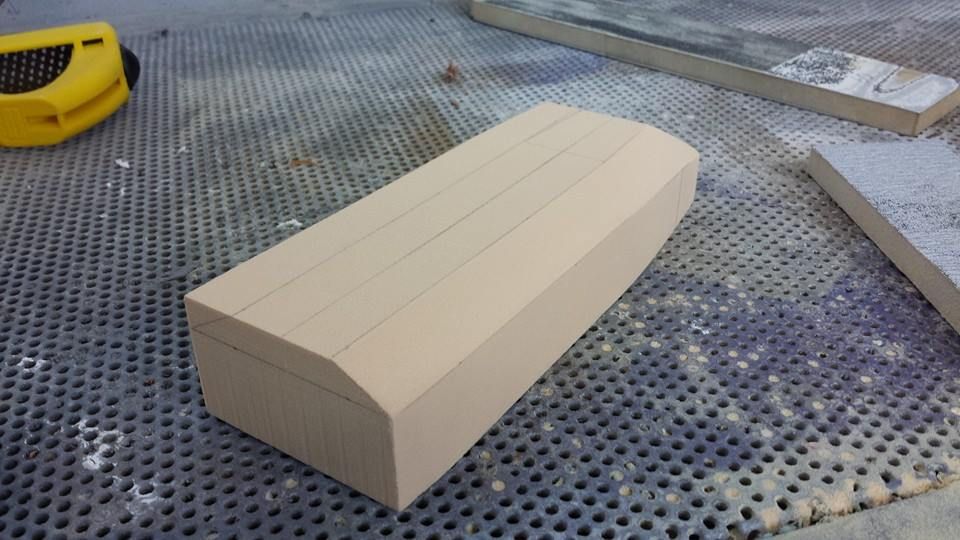
Then i spent the best part of 2 days drawing out all the bevels and angles and sanding them out with a sanding block. I first cut the fuselage in two, and once shaped, re joined them using pins and a bit or fast cast resin.
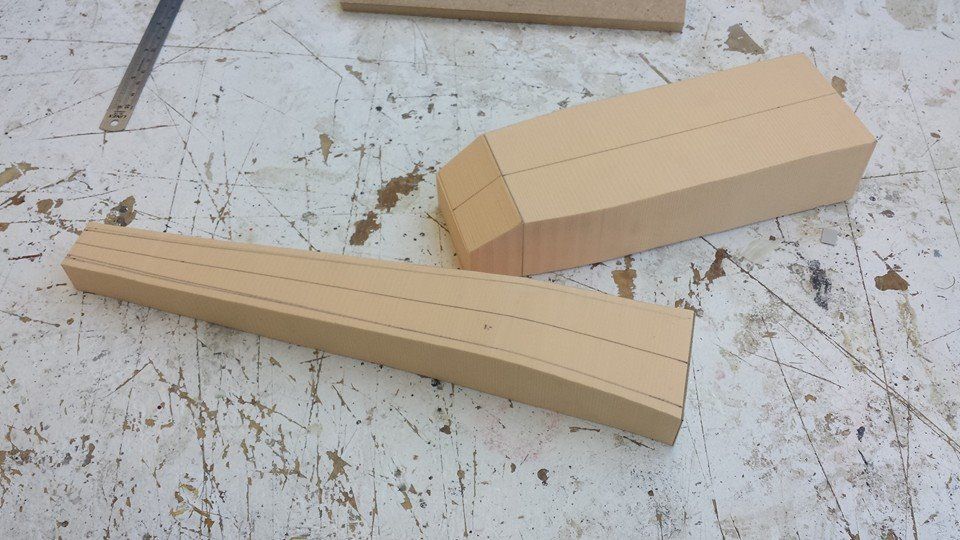
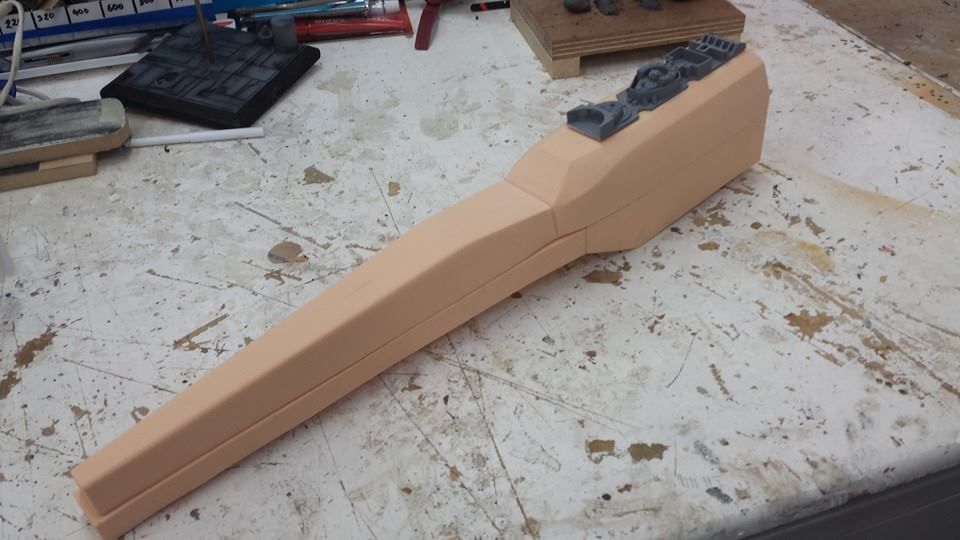
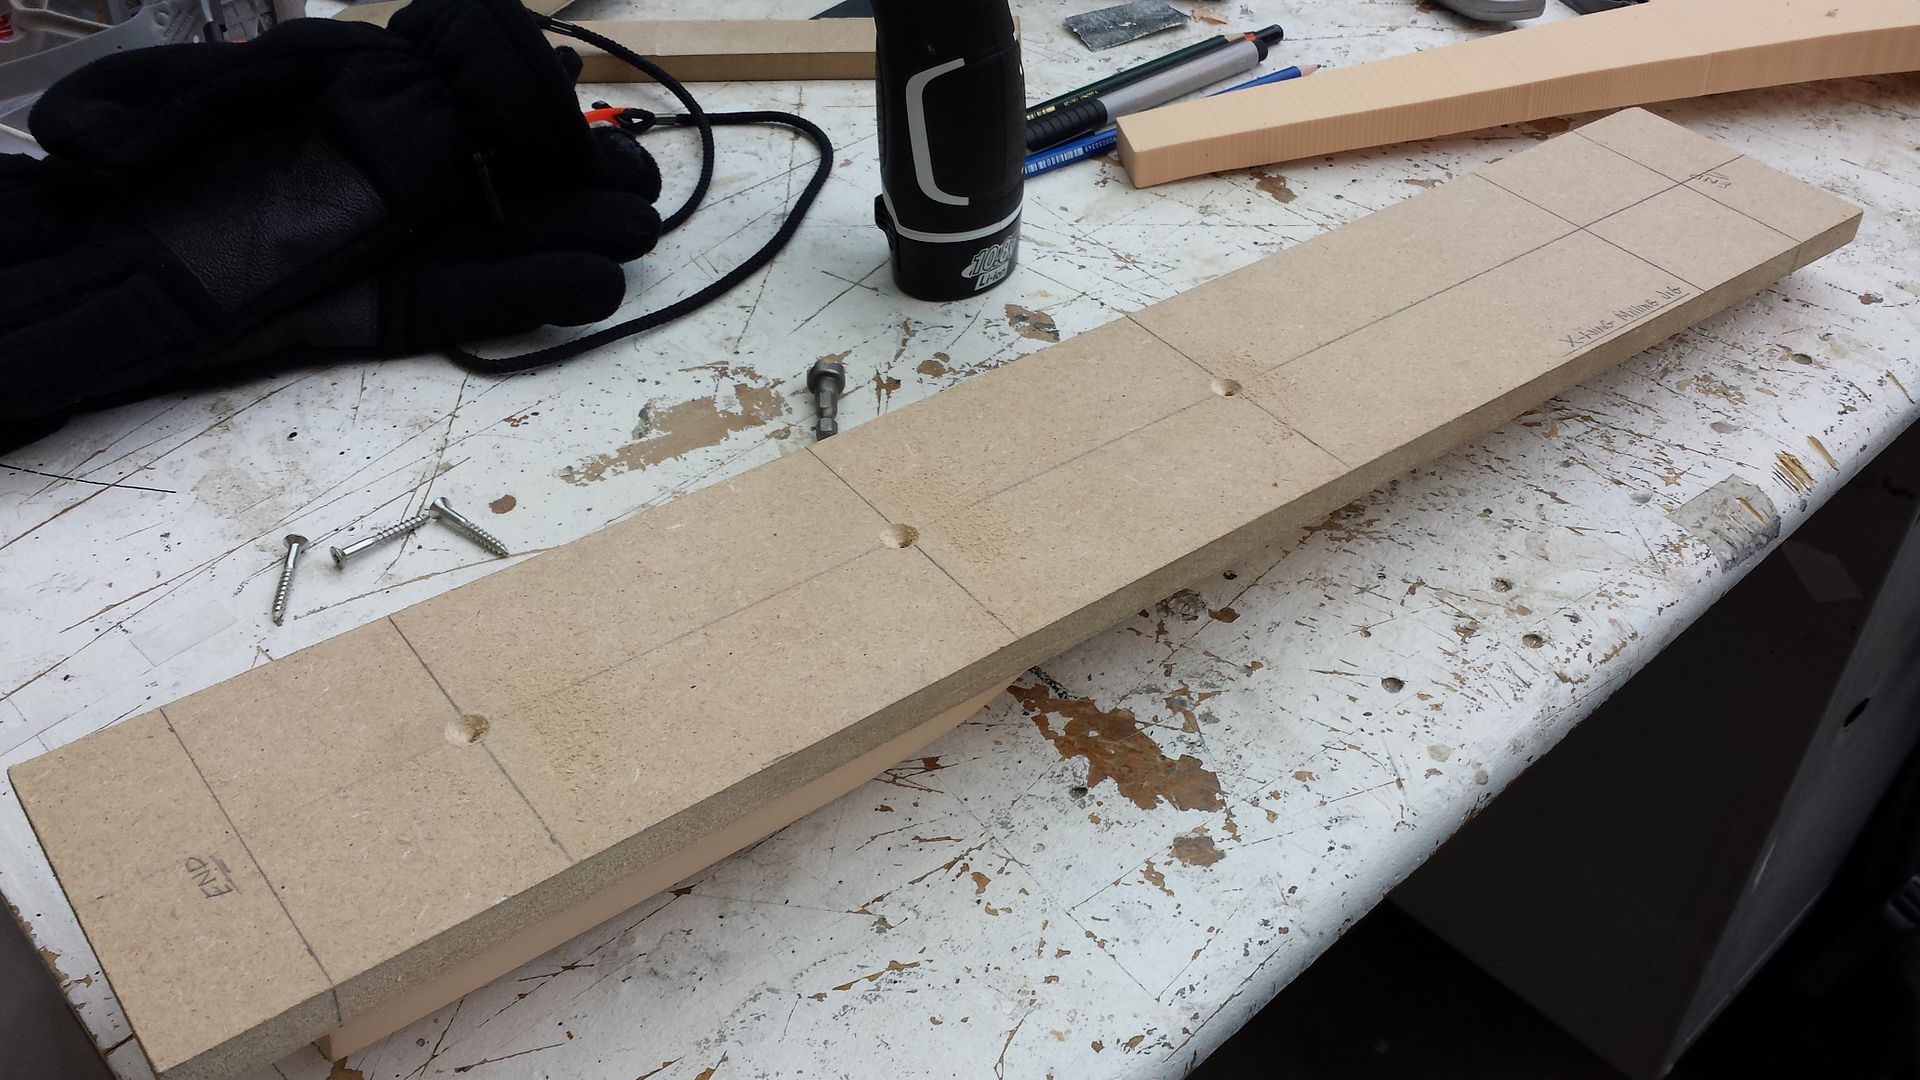
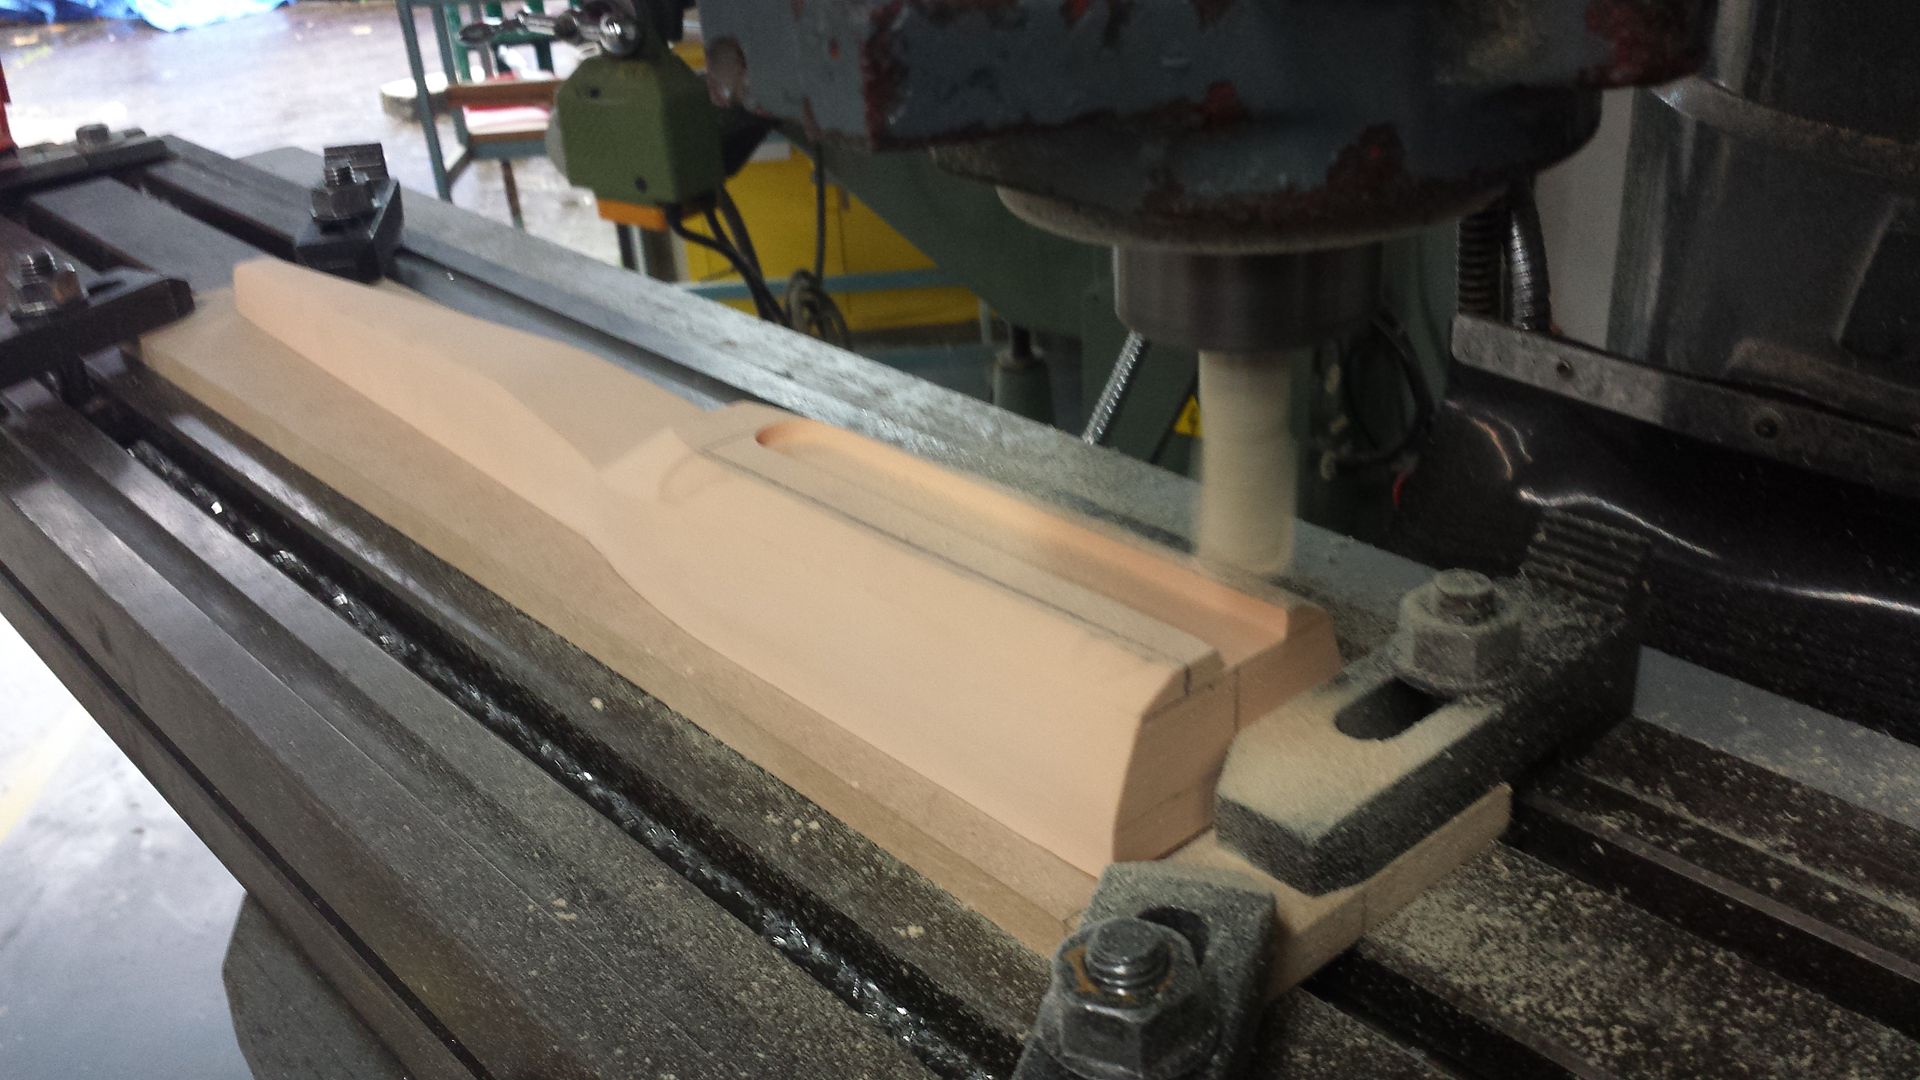
From those pictures, I also slimmed down the front more so as the bottom section creates a little overlap. I then had to cut out the droid strip section, which would need to be CNC'd. I should have done this before cutting, so I had to create a jig to be able to clamp it onto the milling bench.
A couple of screws and some MDF...
I then stuck it on the mill and started to mill out the strip;
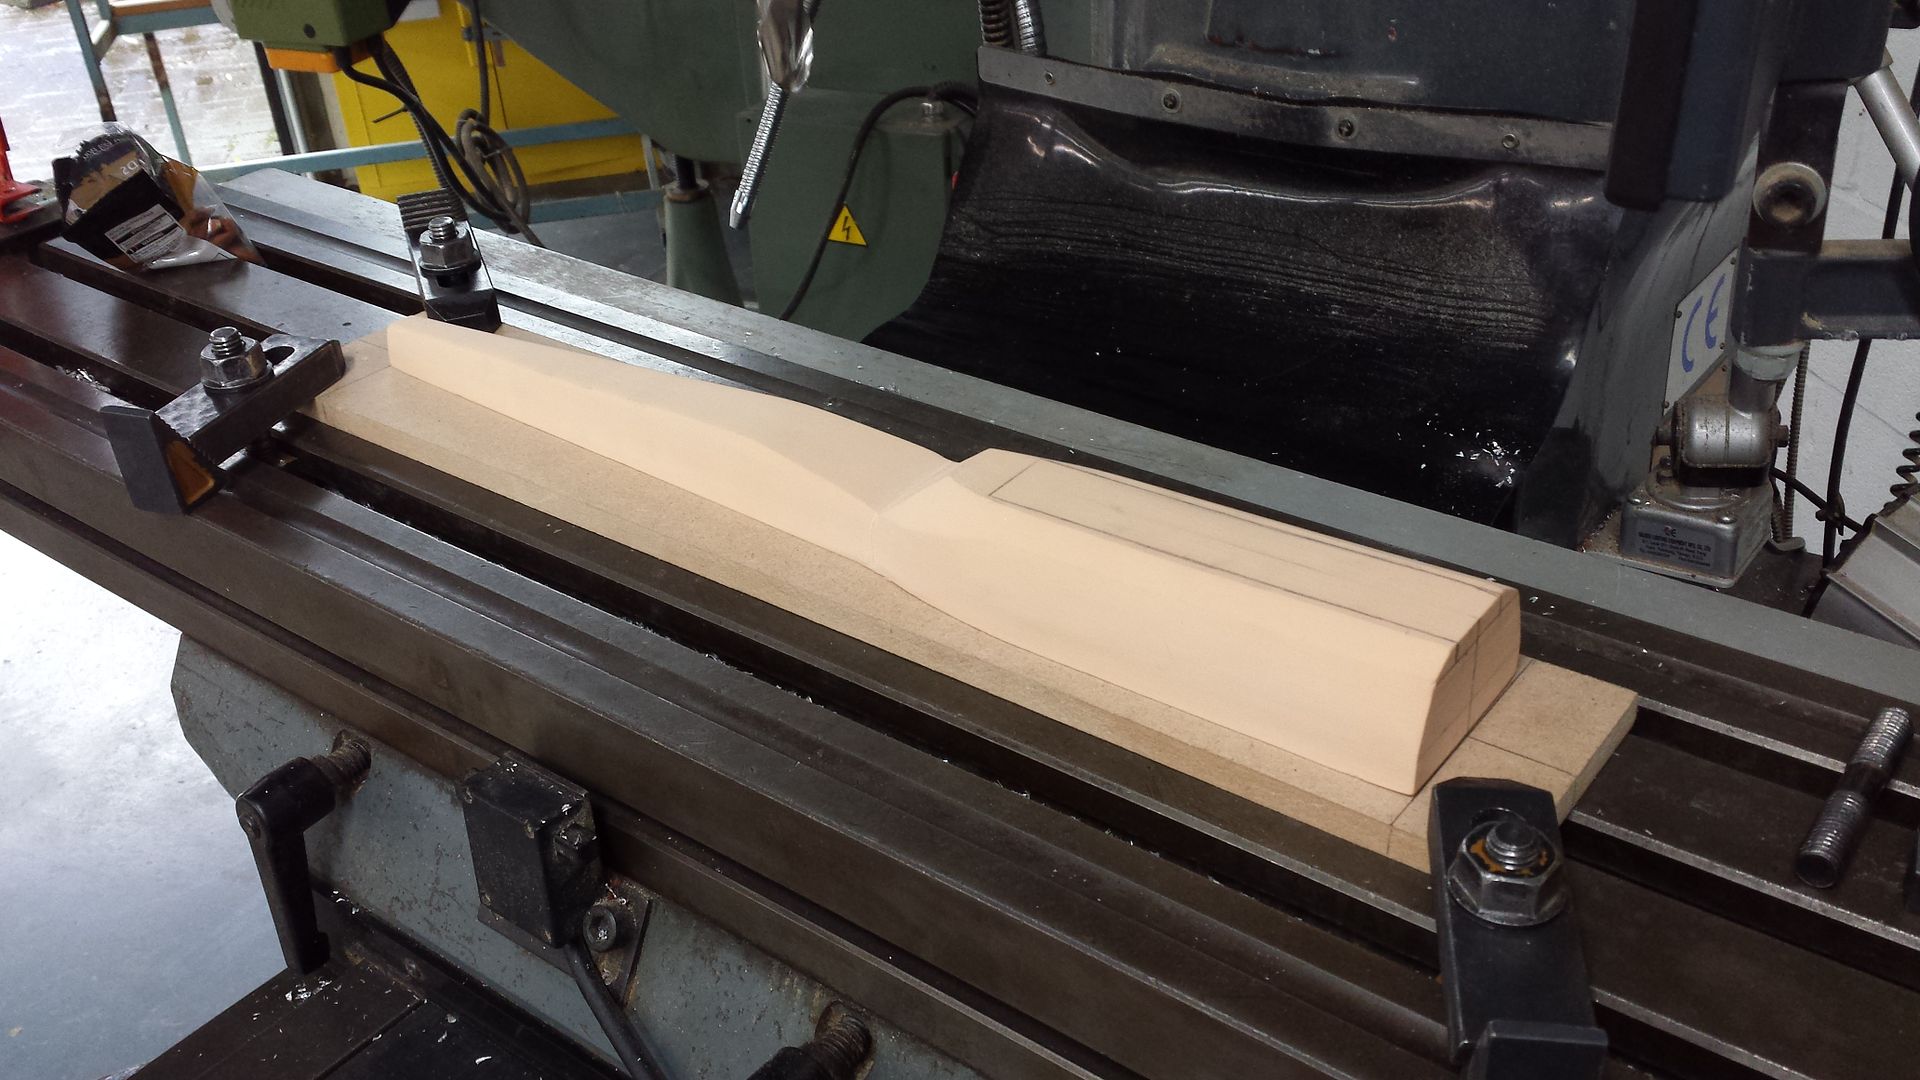
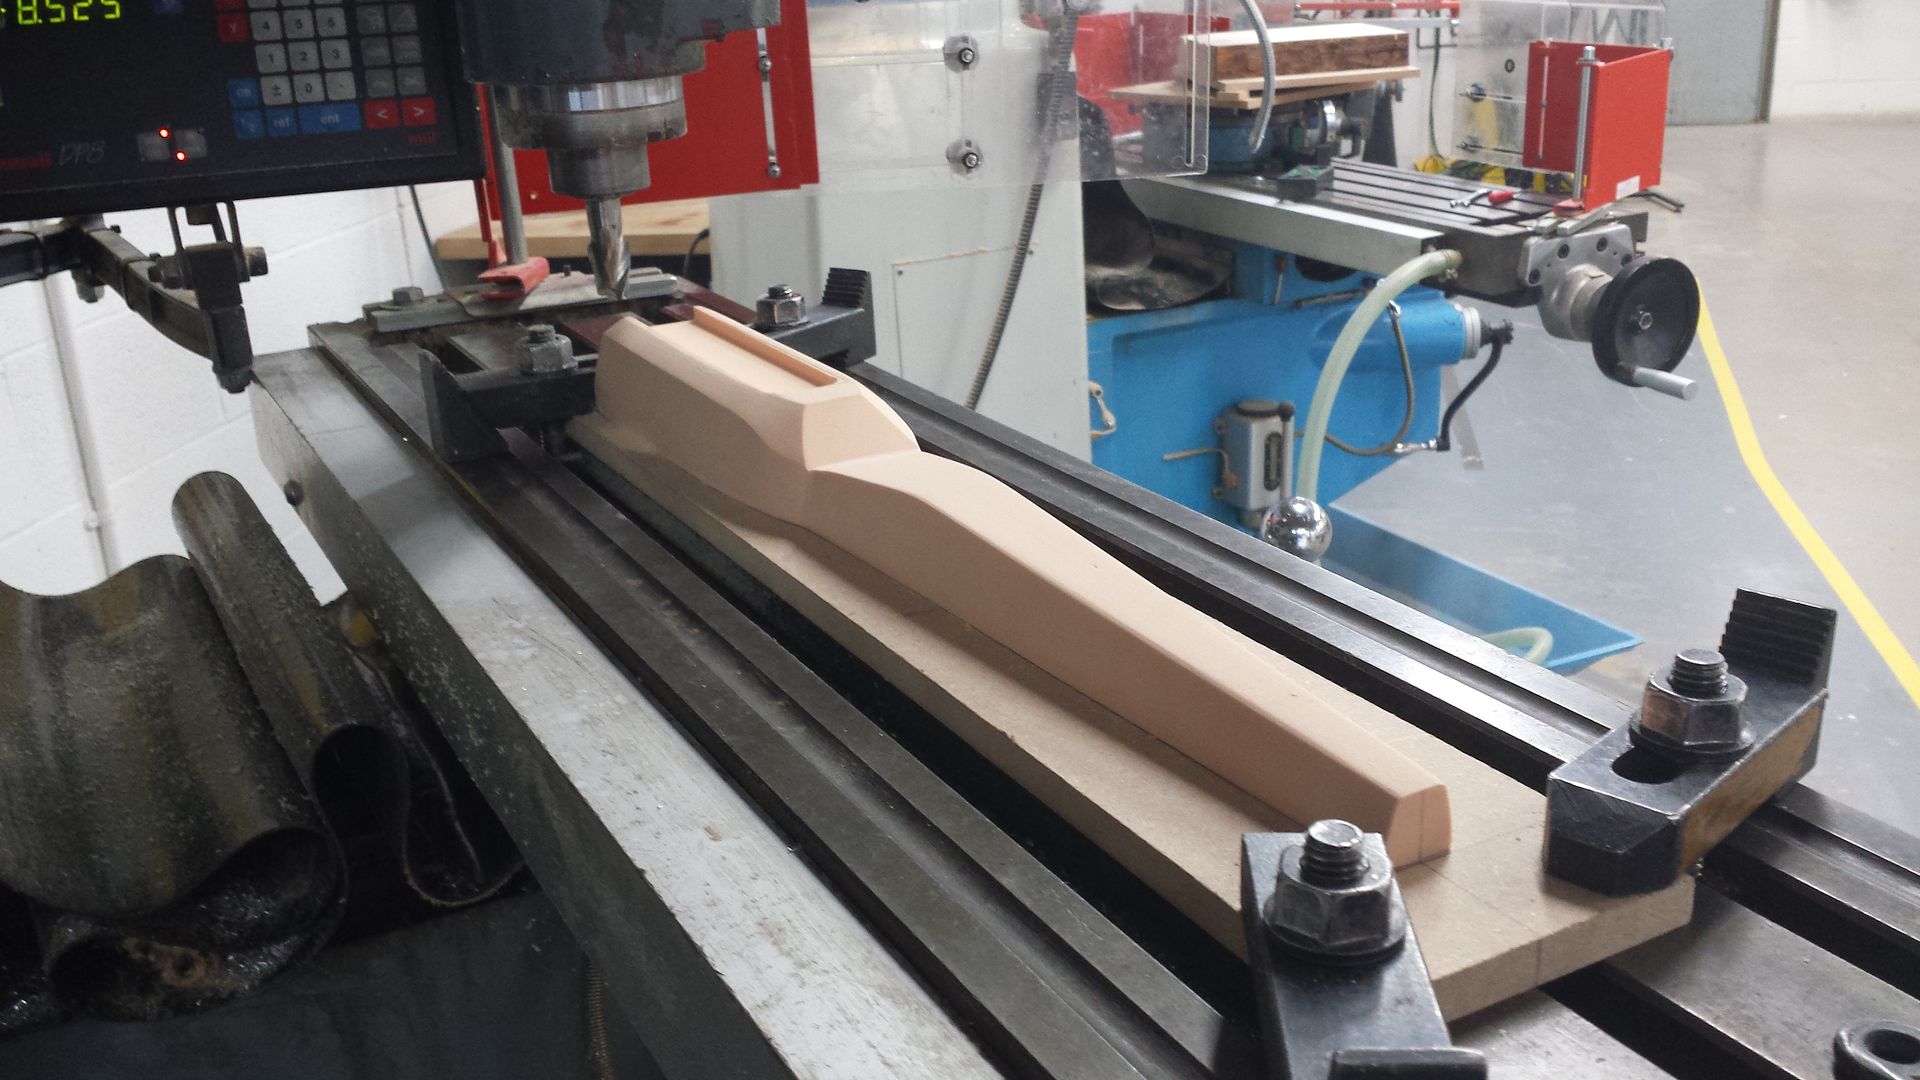
...and then i was kicked out of our workshop for closing hours. So she's still clamped to the bed at this moment till the morning. I just need to straighten up the edge detail, then I can build a riser and get some vac pulls of the top half. Hoping to have a shell of both fuselage pieces and the canopy by the weekend.
Im pretty pleased with how its going, It not 100% accurate or to scale so that why ive put it in here, but as long as it looks like an X wing at the end of it I will be happy. Any pointers or tips any of you model veterans have I would be very grateful to here. Should have regular updates on this being that its my only Uni project, hopefully some vac pulls tomorrow.
Welsh
So aside me painting star wars helmets and Boba fett stuff, im doing a model making degree that low and be-hold needs us to make a few models. So we have been given a brief of building a vehicle or architectural building from scratch, naturally I turned to star wars. And even though there are 100's of X wing threads on here, I had to choose it.
So we had a week to put together a presentation and create some 1:1 scale drawings to which we would either get the go ahead for our project or have to chose something else. So I spent 3 days reading up on the hero and pyro X-wing models which clearly was not enough time, and from what i found it would be nigh on impossible to create a true accurate X wing in the time I have (8 weeks), so I turned to the finemolds 1/48 model. I know its not accurate, but to me it looks like an x wing and thats good enough.
So I drew up some 1/24 scale blue prints but doubling every measurement on the FM kit, and also knocked up a very rough maquette just for a realisation of size,


With that done and a meeting with my tutor, I got the go ahead to build her. So I decided to start with droid strip. Now this isnt accurate, and I will be redrawing it on Rhino and 3D printing a better one. But this is my place holder for now, was also a good exercise in building small details in styrene.


With the droid strip I went to big at the start and had to squeeze everything in. So I will be redoing it, im pleased with how it came out and it will make a good piece to build around until I print my better version. So with that done, I ordered some polyurethane tooling foam to start work on the fuselage.
So using the blueprints I marked out my lines, both profile and top down, and ran it through the bandsaw, which left me with a rough X-wing shape;


Then i spent the best part of 2 days drawing out all the bevels and angles and sanding them out with a sanding block. I first cut the fuselage in two, and once shaped, re joined them using pins and a bit or fast cast resin.


From those pictures, I also slimmed down the front more so as the bottom section creates a little overlap. I then had to cut out the droid strip section, which would need to be CNC'd. I should have done this before cutting, so I had to create a jig to be able to clamp it onto the milling bench.
A couple of screws and some MDF...


I then stuck it on the mill and started to mill out the strip;


...and then i was kicked out of our workshop for closing hours. So she's still clamped to the bed at this moment till the morning. I just need to straighten up the edge detail, then I can build a riser and get some vac pulls of the top half. Hoping to have a shell of both fuselage pieces and the canopy by the weekend.
Im pretty pleased with how its going, It not 100% accurate or to scale so that why ive put it in here, but as long as it looks like an X wing at the end of it I will be happy. Any pointers or tips any of you model veterans have I would be very grateful to here. Should have regular updates on this being that its my only Uni project, hopefully some vac pulls tomorrow.
Welsh


